

Step by step: Adding flash to daylight
Saturday 31 August 2024, 16:32 by Elja Trum | 3,773 views | 2 commentsThis article was translated from Dutch with the help of AI. Read the original.
Natural light can be beautiful, but unfortunately it is not always like that. Adding flash to your photo can help. This way, you can still get beautiful light. But how do you do it? I will show you step by step.
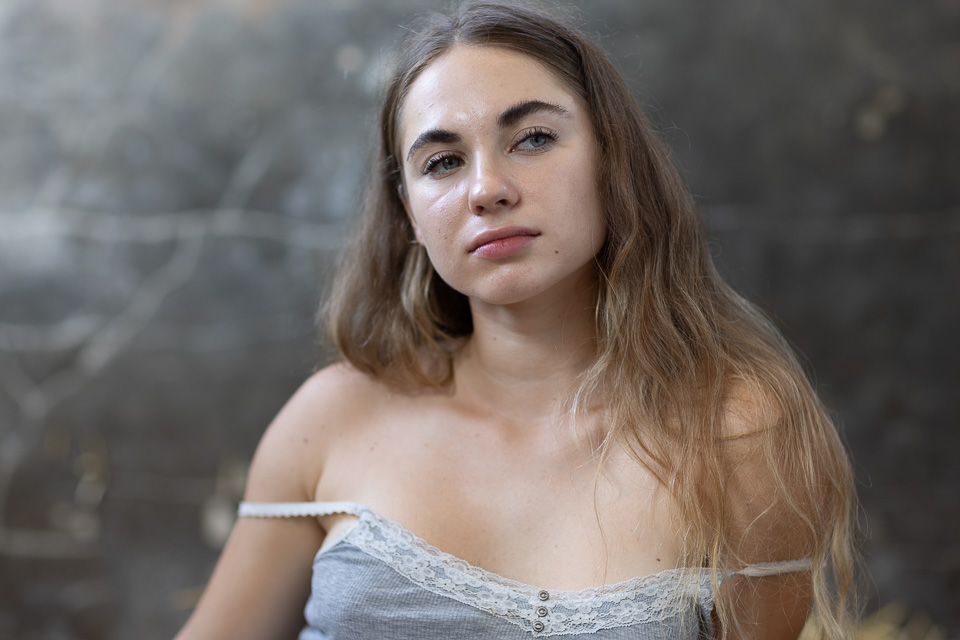
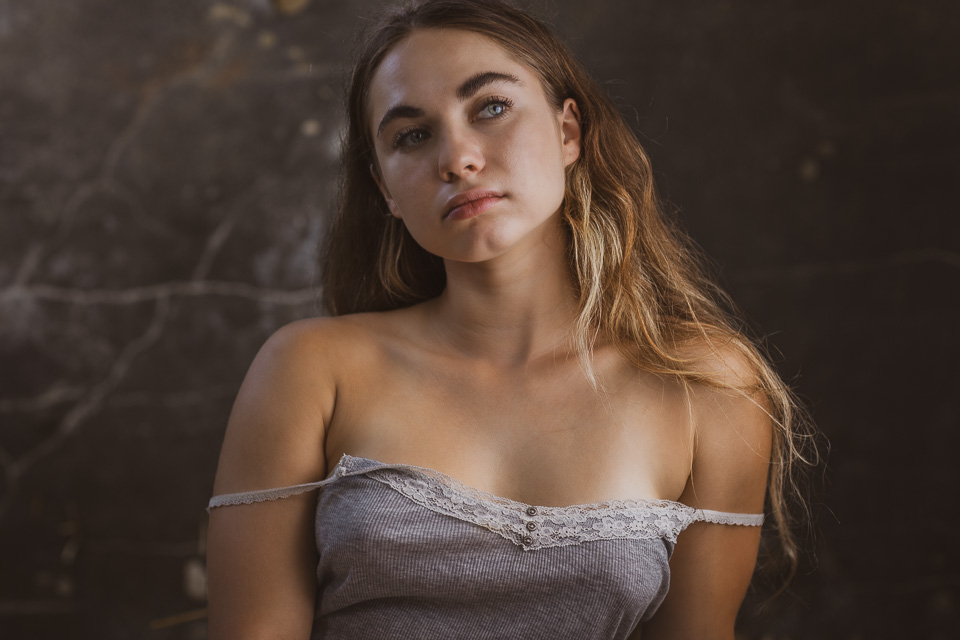
Last Wednesday, I was taking photographs at a beautiful old farm. I wanted to take a simple portrait in front of a lovely weathered wall. The available light just was not very nice.
Light often looks better when you give it some direction. Straight from the front is generally not very good, but from the side or behind can work very well.
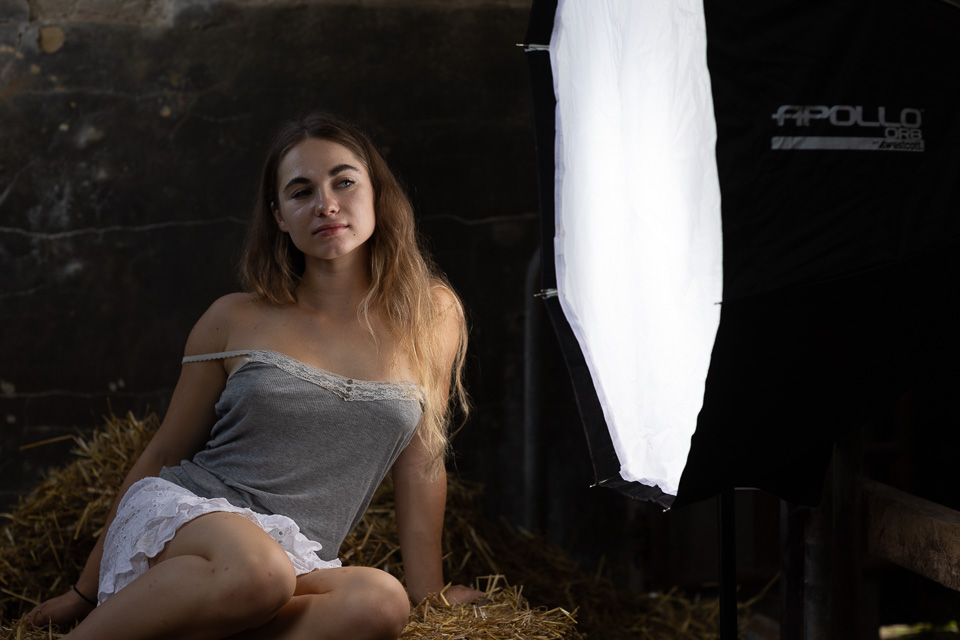
For this photo, I chose to place a flashgun with a softbox directly beside the model. However, if you only add a flash and nothing else, the photo does not get much better.
Step 1: Underexposing the ambient light
I wanted the flash light to be visible without overexposing the model. And I wanted to create contrast between both sides of the model. One lighter side and one darker side. This creates shadows and therefore adds depth to your photo.
To achieve this, you first work on the shadow side. What should become shadow is still too bright in the first photo with the available light. So the first step is to make the entire photo darker.
You have the most control when you set your camera to M mode. However, you can also use, for example, aperture priority mode combined with underexposure, using minus values.
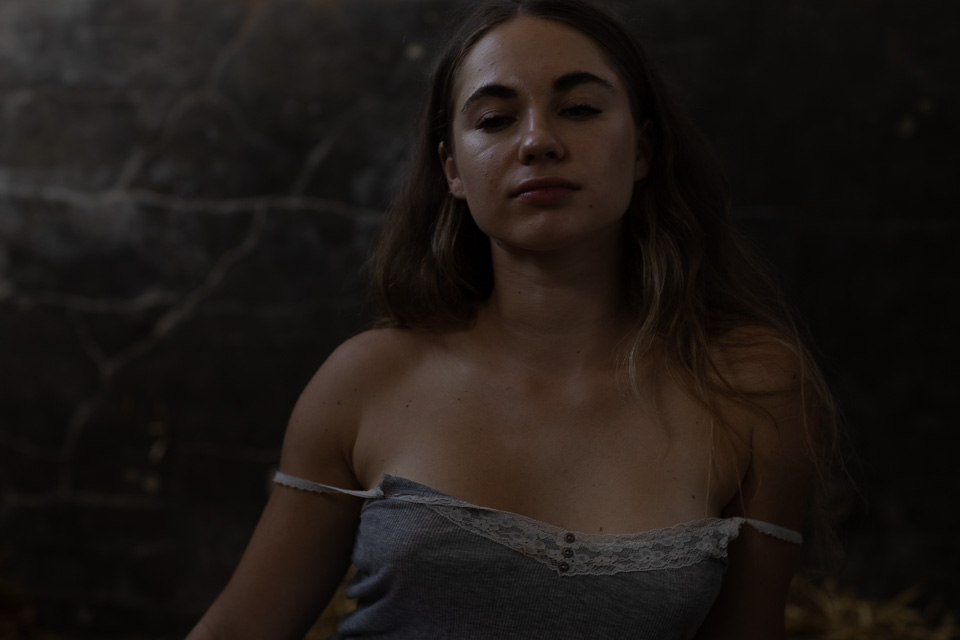
The ISO sensitivity of my camera was already at its lowest setting: 100 ISO. So I had to work with shutter speed and/or aperture.
Making the shutter speed faster lets less light reach the sensor, making the photo darker. The same applies to the aperture. Use a smaller aperture opening, a higher number, and less light will enter.
Going from 1/60th to 1/160th is 4 steps of 1/3 stop. Going from f/2.0 to f/3.2 is 2 steps of 1/3 stop. So in total, I made the ambient light two stops darker. The result is an underexposed photo.
Often, one and a half to two stops is a nice difference for good contrast. If you go much further, you get a studio situation, everything is black unless the flash light reaches it. If you do not go far enough, there is little contrast between your light and dark areas.
Above all, decide based on your own taste how much available light you want to see in your final photo.
Step 2: Adding flash light
The next step is adding the flash light. I wanted soft light, so you want to place as large a surface as possible as close to your model as possible. I usually position the flash so that it is just outside my frame.
Exactly how powerful the flash needs to be depends on many factors. In my view, the simplest way to determine the right brightness is simply to take a photo. Then look at the photo and its corresponding histogram.
You want to avoid blown-out areas, so there should be no high line against the right side of the histogram. But you also want the photo to be correctly exposed, so the right side of your histogram should be filled.
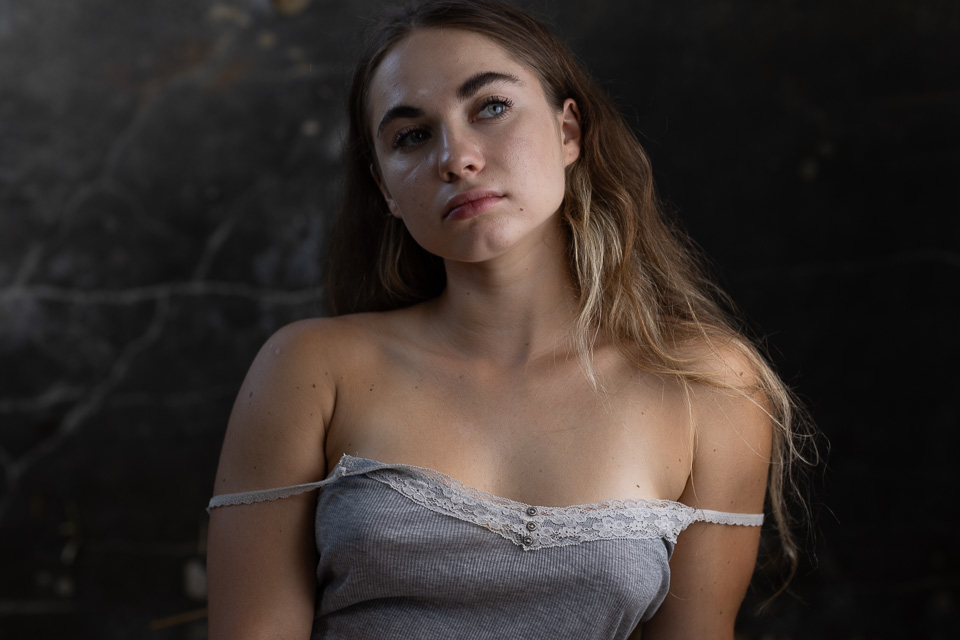
If you use flash more often, you will naturally develop a feel for the situation and your first estimate will often be quite good. Otherwise, just start at around half the power of your flash. For example, at 1/16th power. From there, you can still add or reduce enough light.
Now that your light is set up, you can get on with taking photographs. You only need to adjust your settings again when the ambient light changes. For example, when the sun comes out from behind the clouds.
Step 3: Editing to taste
The final step is editing your photo. In my view, this is an important step in achieving the final result you are looking for. You want the basics to be right, but there is still a lot you can achieve using, for example, Lightroom Classic.
About the author
Elja Trum is the founder of Photofacts and online photography course website Photofacts Academy. He has been writing about photography since 2006. Elja is also the author of (Dutch) books on composition, black-and-white photography, flash photography and portrait photography.
You might also like
-
 Using Daylight for a Natural Effect
by Anniek Snoeijs
-
.jpg "Tip: try photographing from a step ladder!") Tip: try photographing from a step ladder!
Tip: try photographing from a step ladder!by Elvira Smit
-
 Set your camera to daylight saving time
by Nando Harmsen
-
 Using flash outdoors in 3 steps
by Elja Trum
-
 Dealing with deadlines: a simple step-by-step plan
by Elvira Smit
2 comments
-
 guest wrote on Sunday 1 September 2024 at 09:11 | reply
Where did that beautifully weathered wall go ?
Translated from Dutch. -

 Elja Trum
wrote on Sunday 1 September 2024 at 10:22
| reply
Elja Trum
wrote on Sunday 1 September 2024 at 10:22
| reply
I can still see it, but if your screen is set a bit dark perhaps not. Of course, that could still be lightened. Afterwards, or better yet, while taking the photo already.
Translated from Dutch.
Update: I lightened the background in the final photo a little more.
Have your say
Please note: Articles older than a week can only be commented on by signed-in visitors.Would you still like to comment? sign in or create a free account.
Become a better photographer every week
A practical photography tip in your inbox every week.
39,024 photography enthusiasts already receive the tips! More about the weekly mail. Or keep up to date via  Facebook.

Elja Trum
Photofacts; everything to do with photography!
Would you like to take better photos and keep up with what is happening in photography? Photofacts publishes articles that teach you something about photography — from a product announcement to a practical shooting tip or a look at a website. Photofacts covers photography every day and is a hobby project of Elja Trum's that got out of hand. The articles are written by a team of volunteer authors. If you would enjoy writing one or more articles for Photofacts, do get in touch.More about PhotofactsPhotofacts is made possible in part by
