

19 tips about (writing with) light
Wednesday 12 December 2018, 15:10 by Michelle Peeters | 21,418 views | 2 commentsThis article was translated from Dutch with the help of AI. Read the original.
Photography is writing with light. The more you photograph, the better you understand what light does to your subjects, both indoors and outdoors.
The most important thing is learning to recognise 'beautiful' light for the image you may already have in mind.
1. Intensity or brightness of the light
This is an important aspect of light. The morning sun is much less powerful than the sun shining in the middle of the day. The amount of light certainly affects your exposure.
In low light, you have to use a longer exposure (shutter speed) or open your lens further (aperture). And if the light is truly insufficient, you have to increase the light sensitivity (ISO value) to gain brightness.
2. Differences in brightness
Differences in brightness make your subject clearly visible. Even subjects with the same colour suddenly become clearly visible once they are lit. You then see a lit side and a shadow side.
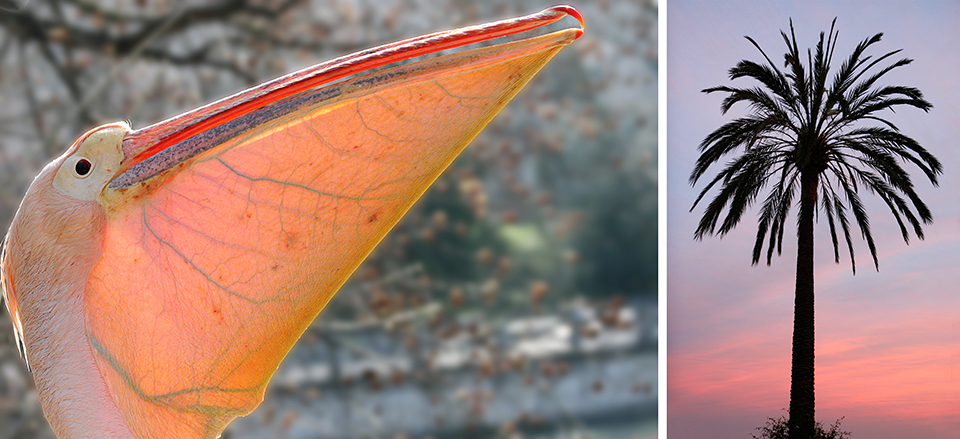
When you take a backlit shot, the shape is surrounded by light. If your subject is slightly transparent, the sun shines through it, which can also create a nice effect. Especially when internal details, such as leaf veins, become visible.
3. Shadows
Wherever there is light, you will also find shadow. For example, you can see the shadow of the subject itself projected onto the ground: the cast shadow.
4. Contrast
Contrast is the difference between the shadow side and the lit side of a subject.
You can reduce this difference in contrast with, for example, a reflector by brightening the shadow side.
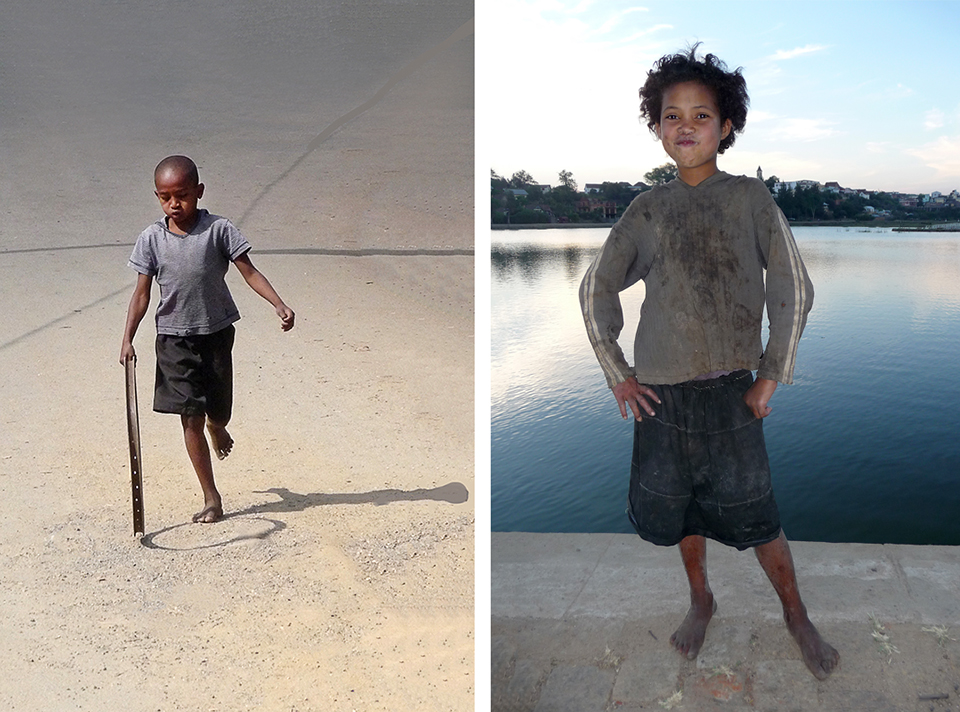
You can also reduce the difference in contrast between the foreground and background with fill flash, a small flash. The camera measures the light from the sky, which is rendered with a correct exposure, but the foreground, the model, turns into a silhouette.
5. Contrast that is too high
Sometimes the contrast becomes too high. This can happen, for example, when shooting in an alley, where the difference between the dark areas, the alley, and the light areas, the sky, becomes too great for your camera to bridge.
But it can also happen when photographing light subjects against dark backgrounds in the shade. Or with a dark object in backlight.
When you take landscape photos early in the morning or late in the evening, the sky is often already quite bright while the foreground is still underexposed, giving you large differences in contrast between the foreground and the sky.
The result is that you have problems with detail: you lose detail in the dark areas, the shadows, and the light areas. You can brighten the shadows in post-processing, but you get noise in return instead of the desired detail.
6. Bridging differences in contrast
Full-frame cameras are generally better able to bridge high contrasts because of their larger sensor and dynamic range, which means you get little noise. Especially when photographing in RAW, there are significant differences in contrast to overcome.
Besides the previously mentioned use of a reflector or fill flash, there are more and different ways to bridge differences in contrast that are too large.
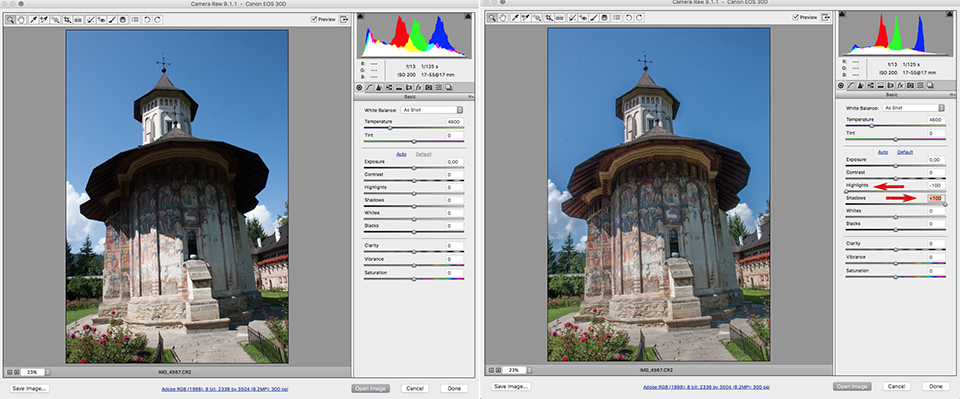
It is best to photograph in RAW and overexpose slightly ('expose to the right'). In post-processing, you can recover the detail in the light areas, provided you have not overexposed too much. This also prevents noise. In this Photofacts article, you can read how exactly to expose to the right.
You can also use HDR and exposure blending, the latter if you do not want to lose the atmosphere, to get high differences in contrast under control. With exposure blending, you manually combine the exposures of two photos by using layers and masks in Photoshop.
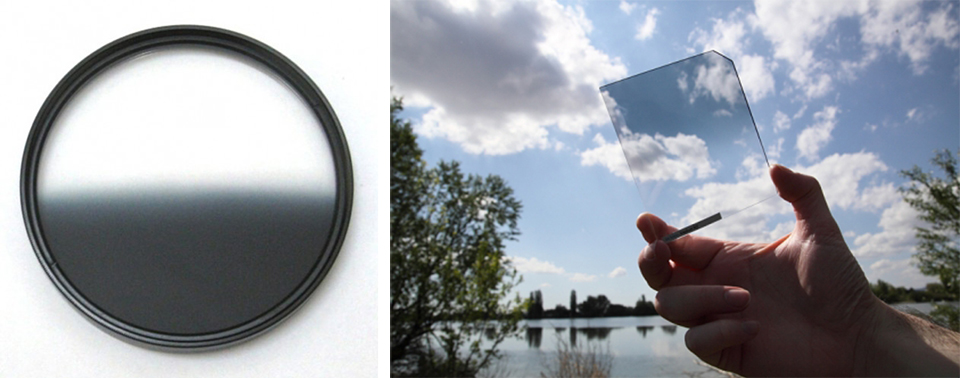
Finally, you can also use graduated neutral density filters to reduce the contrast between the lightest part, such as the sky, and the darkest part, such as a dark foreground, in your photo. Sometimes this contrast is so great that even the best full-frame cameras cannot reproduce the image as you see it with your own eyes.
A graduated neutral density filter, consisting of a light and a dark part, can provide a solution. You place the dark part in front of the sky, reducing the difference in contrast between the two.
7. White reflects, black absorbs
You may have noticed this when comparing the temperature of the bonnet of a white car and a black car, both parked in full sun, with your palm.
The black bonnet reflects very little light, but feels much warmer. White is reflected brightly, the reflected brightness is visible, and works as a reflector. Black absorbs the light, which is then converted into heat.
8. The black and the white cat
Imagine that you have a black cat and a white cat sitting next to each other. The ambient light and the optimum exposure are exactly the same for both cats. But if you now move closer and take a close-up of either the black cat or the white one, your camera gives you a different light reading. This is because the white cat's fur reflects more light than the black cat's.
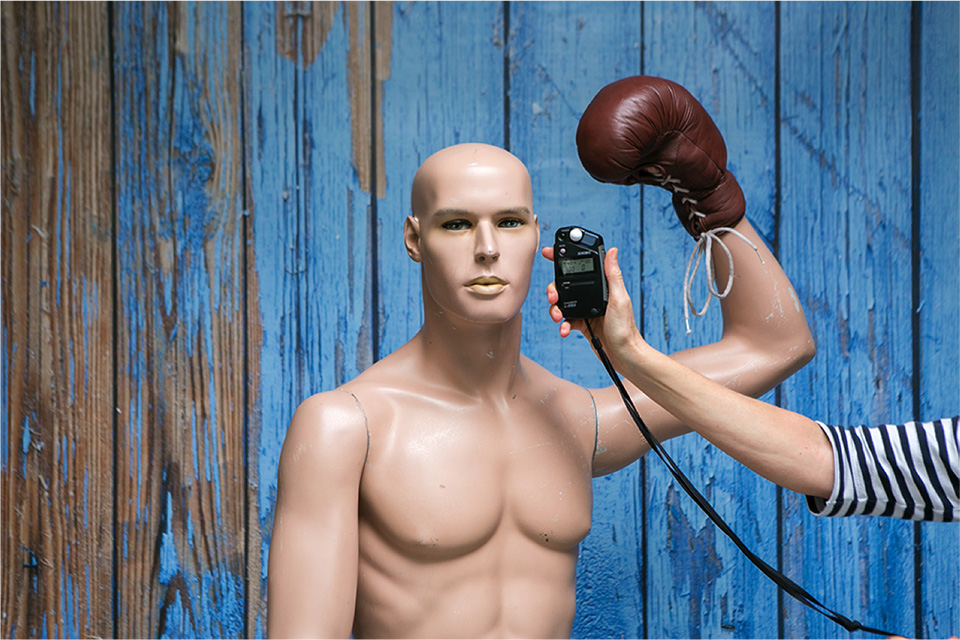
The camera struggles with this because it works with reflected light. And with the black cat, little light is reflected, so the camera also 'sees' little light.
In the studio, an external light meter is therefore often used. It does not measure reflected light, but incident light. This light meter is not affected by a black cat reflecting less light, so it will always produce a correct light reading.
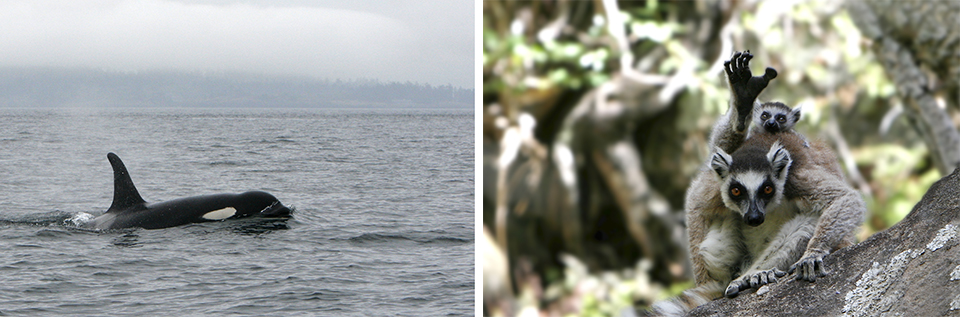
The camera's light meter therefore tends to render uniformly light and dark subjects as average. But why does the camera's light meter get it wrong?
The reason is that the camera expects all the tones in the photographed scene to have an average that corresponds to middle grey, also known as 18 per cent grey.
All the tones in a typical scene average out to middle grey. This is also the basis on which light meters in cameras are built. In many cases, an average works well.
But what if a scene is not average and mainly consists of light tones? Your camera will then underexpose the photo. And when photographing a scene with mainly dark tones, the camera will overexpose.
In this case, the camera's light meter will suggest an exposure that comes close to middle grey. In both cases, the result is that the white or black cat is rendered grey.
So how do you compensate for this? Set the camera to aperture priority mode, A or Av, and overexpose or underexpose, depending on whether you are photographing a dark or light scene. Your camera will compensate by adjusting the shutter speed.
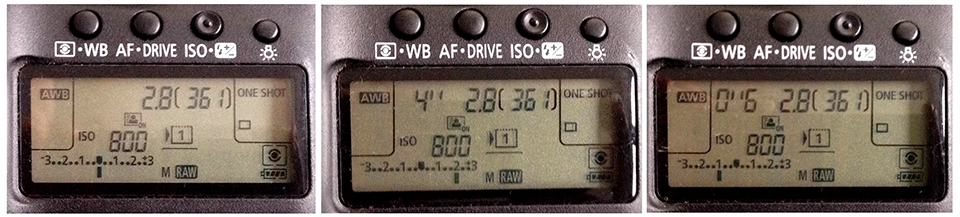
With a scene consisting mainly of light tones: overexpose, so set the EV to the plus position. You then let in more light.
With a scene consisting mainly of dark tones: underexpose, so set the EV to the minus position. You then let in less light.
How much should you compensate? That depends on various factors. A completely white, snow-covered landscape will require quite a lot of compensation, overexposure, perhaps as much as 2 stops. But it is difficult to give a recipe for every scenario.
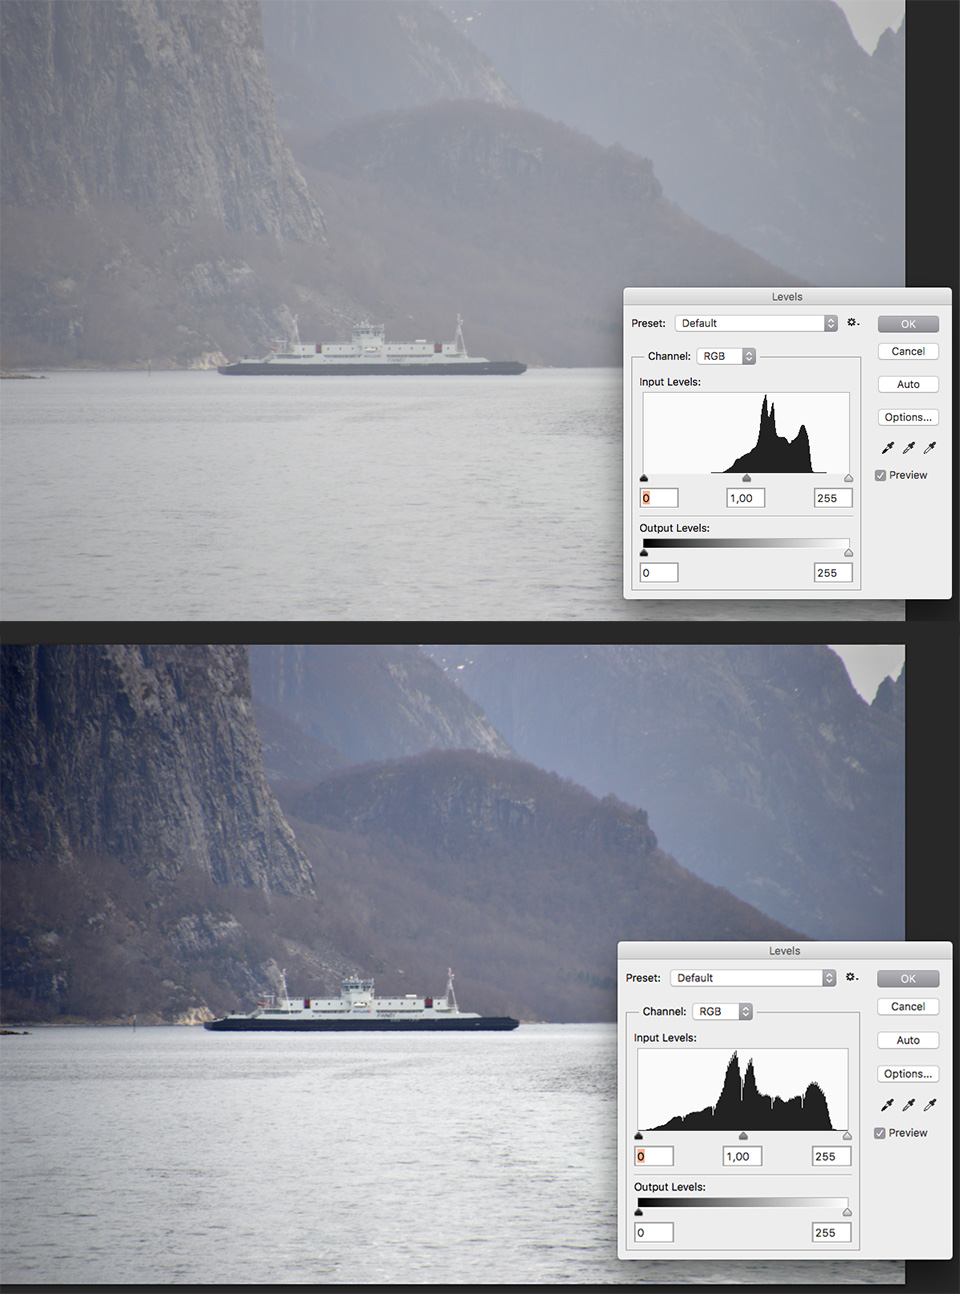
You will therefore have to do it partly by feel, using your histogram as a very useful tool to check whether you are compensating in the right direction and whether you are compensating enough or too much. As long as you compensate in the right direction, you can make any small adjustments still needed in post-processing.
9. White balance
Daylight also changes colour throughout the day. Light can determine the mood and state of mind. It can set the atmosphere, for example at a wedding or during a holiday.
The human eye adapts to these changes in colour temperature and makes everything neutral. Earlier 35mm film was less capable of doing this. The evening sun often looked much yellower in the photo than we had seen it, and a grey, dull sky often appeared rather blue.
But with the arrival of the digital camera, you can now set the white balance. The camera can influence the colours through software, and you get good results, with the colours looking right, when the adjustment is correct. In effect, the camera measures the colour of the light and fixes it.
You can also enter a numerical value in degrees Kelvin. And if you photograph in RAW, you can still adjust the colour temperature in post-processing.
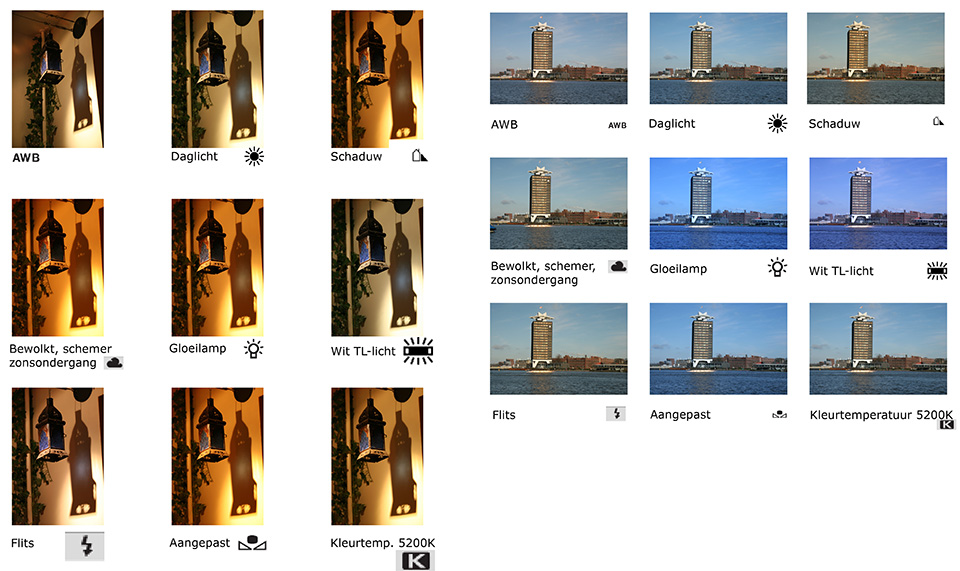
10. Mixed light
Sometimes you have to deal with a mix of daylight and artificial light, such as window light and fluorescent lighting in one room. This is very difficult to render, and these colour casts are difficult to remove.
Because the cast only affects part of the photo, you first have to select that part and then correct the cast there. A tricky job.
11. Sunlight and colour casts
When you photograph outdoors, you do not have that problem. You are dealing with just one light source, the sun. And the sun appears in different colours, strengths and contrasts.
If you use automatic white balance, it will try to neutralise all colour casts. A beautiful sunset can suddenly look pale and dull white.
If you want to retain the natural cast, it is best to lock the white balance to a certain value, for example 5000 Kelvin. You can always correct an excessive cast later in post-processing.
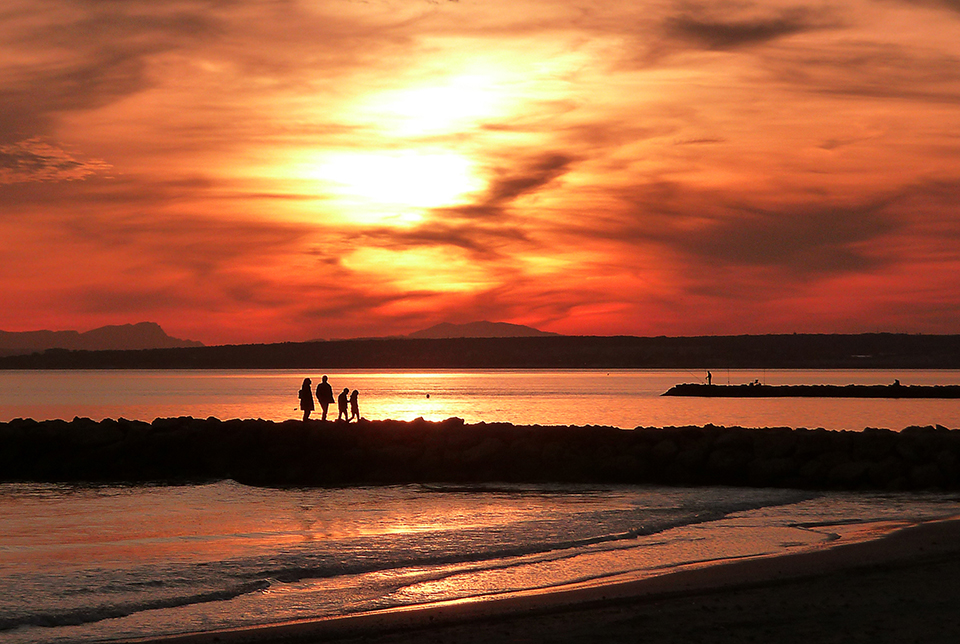
12. What are 'natural' colours?
Our perception is highly subjective. Our memories of colours, light intensity, depth and contrast are unreliable. So dare to intervene in what the camera presents you with and look for your own reality: photography is not just 'depicting', but much more about imagining!
13. Models and sunlight
If you have to deal with bright sunlight shining directly on your model, there is a good chance of problems. The model will squint, and you will also get very hard shadows on the face.
If you turn the situation around 180 degrees, so the model has their back to the sun, the face will look evenly lit. From behind, a hair light creates a nice effect. The difference in contrast can become quite large, however, making the face look black and the hair overexposed.
You can use a reflector opposite the model to prevent this. Let the model hold it themselves if necessary. You will see a huge improvement in the quality of the light. Have the model look slightly away from the reflector, otherwise it will be dazzling as well.
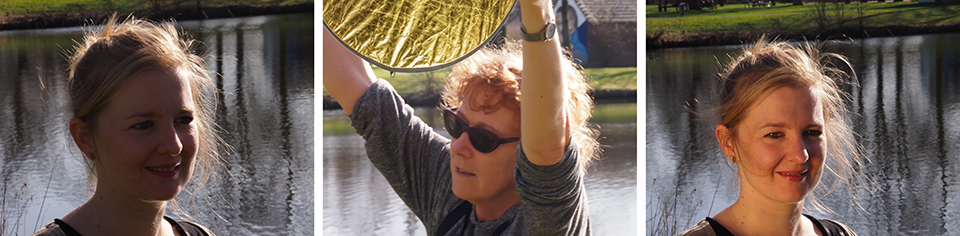
It is even better to avoid the sun altogether and seek out the shade. Light in the shade is much softer. If you want to work even more effectively, look for an overhang. The light will no longer come from all directions, creating sculpted lighting with plenty of light and shadow on the face.
14. Models and flash
In the studio, you can completely control the light. You can make the light as soft as you want with so-called 'light shapers'. You can think of softboxes or umbrellas that you flash through or into, which increase the size of your light source and make the light more diffuse. The quality of the light improves enormously as a result!
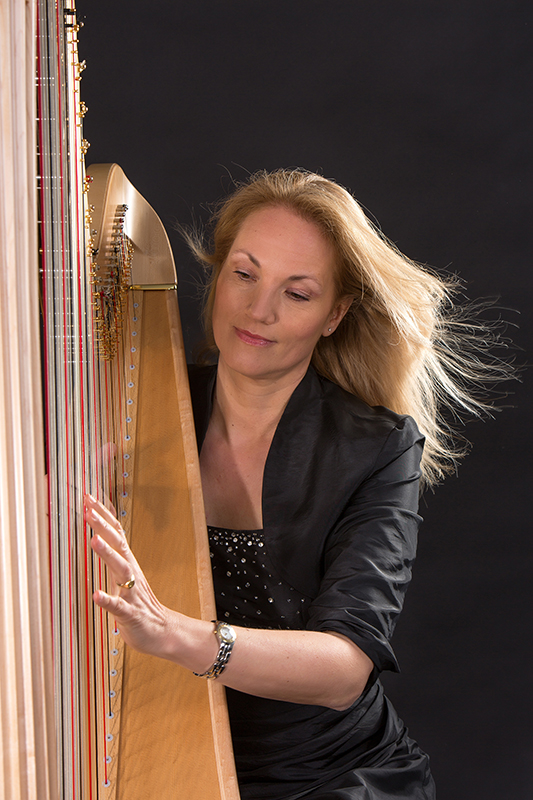
15. Using flash
If you use a reportage flash, tilt the head upwards and bounce the light back onto your model via the ceiling. This produces more diffuse light and it comes from above, just like sunlight. This looks natural. The ceiling must be white, as a brown ceiling also reflects brown light.
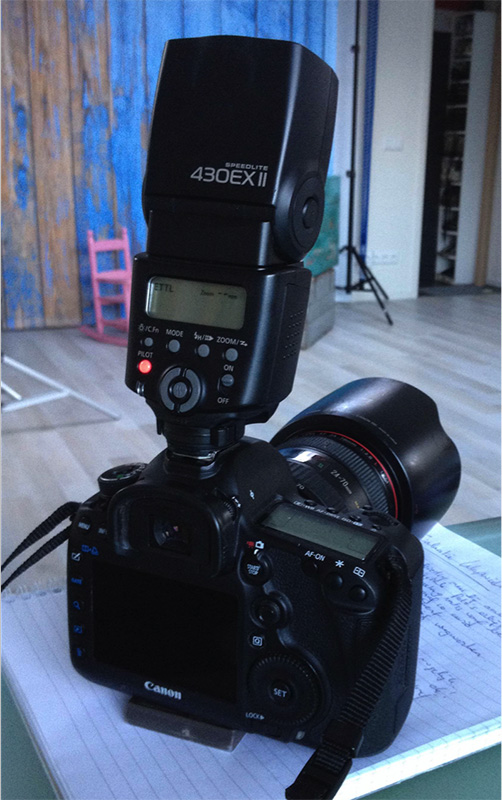
Use flash exposure compensation if the automatic flash does not expose correctly. This is a button or menu option on the camera, with a lightning bolt and plus-minus symbol as its icon. Separate flashes often have such a button as well. Do not confuse it with ordinary exposure compensation, which only has a plus-minus symbol.
Flashes do not provide continuous light. This makes it difficult to predict the effect. Put a bright torch on your camera and walk around your house in the evening to see how such a beam of light behaves.
Photographers often use the same fixed studio-light setup for all their photos. Change the lighting for once and experiment with it. Try working with one lamp, change the angle of incidence and try something exciting with a shadow.
16. Polarising filter
A polarising filter is a useful tool for reducing reflections. You can also use it to improve contrast: in a high-contrast blue sky, the clouds will be accentuated more clearly.
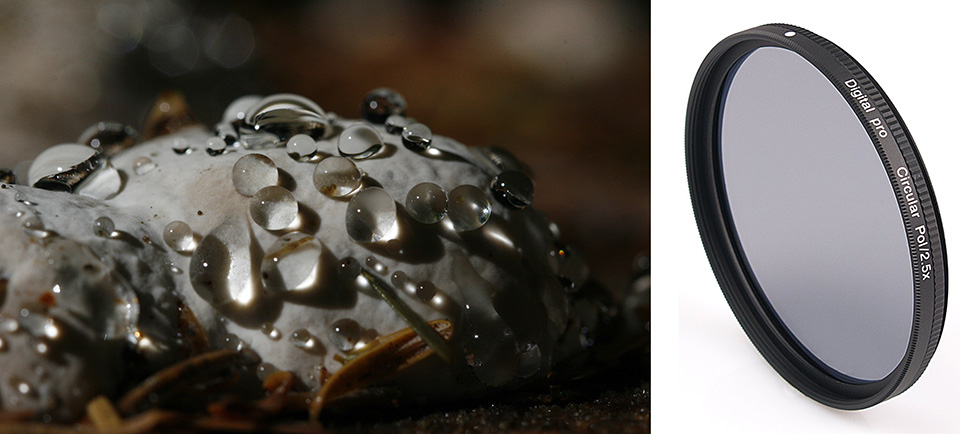
Turn the filter to polarise more or less. You get the best effect with side lighting. You can also use it to remove reflections from leaves or damp subjects perfectly, increasing colour saturation.
17. Exposing correctly
After taking your first test photo, check your histogram. Check that it does not touch the left or right edge. Use exposure compensation if you are working in aperture priority mode, A(v), or change the shutter speed if you are photographing manually.
If you apply positive exposure compensation, 'adding', the photo becomes lighter and the histogram shifts to the right. Conversely, if you 'subtract', the photo becomes darker and the histogram shifts to the left. This way, you try to prevent the histogram from touching the left or right edge and detail from disappearing in the highlights or shadows.
18. Exposing to the right
Try to make the photo as light as possible without losing detail in the highlights, by touching the right side of the histogram. This guarantees the highest quality. The histogram is positioned on the right and the photo has stored the maximum amount of light with the least noise in the dark areas.
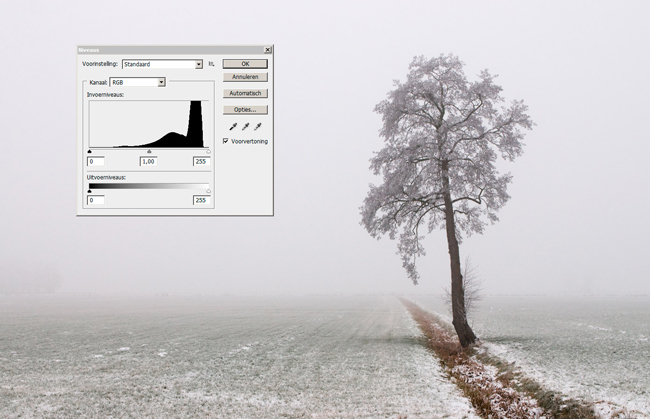
This only works with RAW files, because the photo needs to be made somewhat more contrasty and darker in post-processing. You often do this by bringing the highlights back down a little. This does not work with JPG files.
19. Knowledge of weather and skies
Learn to understand the weather and anticipate it. Cold nights with few clouds and/or little wind are very likely to produce mist in the morning. You increase your chances of beautiful light if you can anticipate this.
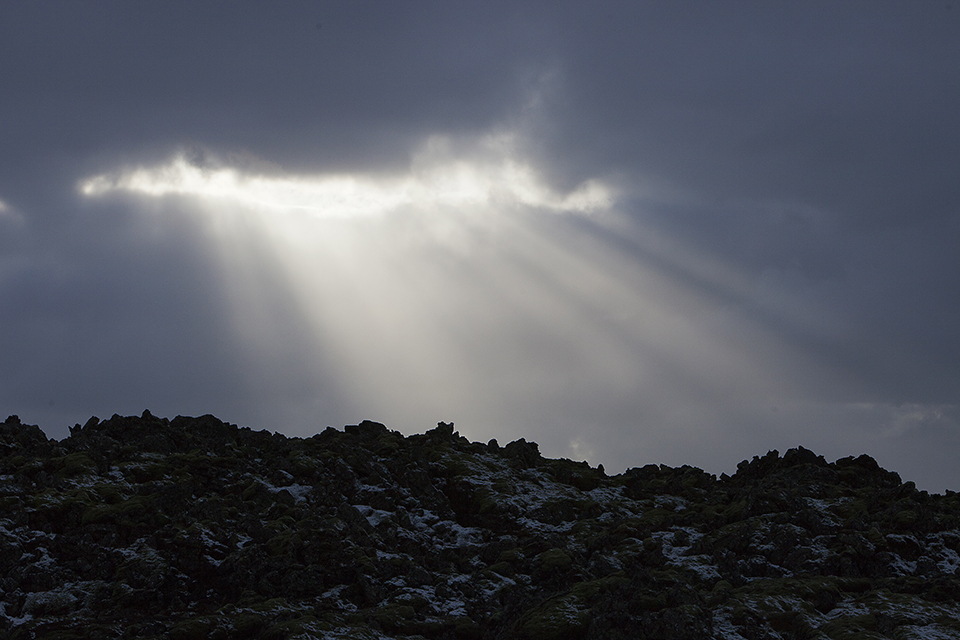
If the weather is bad, stand right in the middle of it, provided your camera body is weather-sealed, of course, otherwise you will get detached photos. Clouds can add to the tension in your photo. They soften the light and make the sky more interesting. You often get the most beautiful light after a rain shower, when the sun just appears from behind the clouds again.
Want to learn more about the basics of photography?
At Photofacts Academy, our online learning environment for photographers, we have a complete photography basics course. You can follow this course for two weeks with a free trial membership.
About the author
Michelle Peeters is fotografe en oprichter van DeuxBleus Fotografie. Michelle herkent het bijzondere in het gewone en het gewone in het bijzondere. Ze heeft zich nooit willen specialiseren en is daardoor van alle markten thuis.
You might also like
-
 Playing with shadows in portrait photography
by Frank Doorhof
-
 Street photography tip: Embrace the shadow
by Michiel Heijmans
-
 Removing shadows from faces with AI
by Elja Trum
-
 How to get buttery soft shadows in a small studio
by Elja Trum

2 comments
-

 Henk Hulshof
wrote on Tuesday 30 May 2017 at 10:53
| reply
A nice, but certainly also substantial list of 'photography problems' with possible solutions. Some aspects are a bit brief (or even 'oversimplified') and deserved more attention (in had a separate topic?).
Translated from Dutch.
But at the same time, it's also nice to see so much about just 'light' in one article. -
 Michelle Peeters wrote on Tuesday 30 May 2017 at 10:55
| reply
@Henk: the subject of 'light' indeed cannot be covered in a single article. So there will indeed be separate topics about specific aspects of this!
Translated from Dutch.
Have your say
Please note: Articles older than a week can only be commented on by signed-in visitors.Would you still like to comment? sign in or create a free account.
Become a better photographer every week
A practical photography tip in your inbox every week.
38,765 photography enthusiasts already receive the tips! More about the weekly mail. Or keep up to date via  Facebook.

Elja Trum
Photofacts; everything to do with photography!
Would you like to take better photos and keep up with what is happening in photography? Photofacts publishes articles that teach you something about photography — from a product announcement to a practical shooting tip or a look at a website. Photofacts covers photography every day and is a hobby project of Elja Trum's that got out of hand. The articles are written by a team of volunteer authors. If you would enjoy writing one or more articles for Photofacts, do get in touch.More about PhotofactsPhotofacts is made possible in part by
