

20 tips from sports photographer Nico Delmeire
Wednesday 12 December 2018, 14:58 by Michelle Peeters | 18,344 views | 15 commentsThis article was translated from Dutch with the help of AI. Read the original.
Eindhoven-based Nico Delmeire worked as a sports photographer for more than 12 years. He now focuses on coaching photographers. He is happy to share twenty useful tips about sports photography. Here they are!
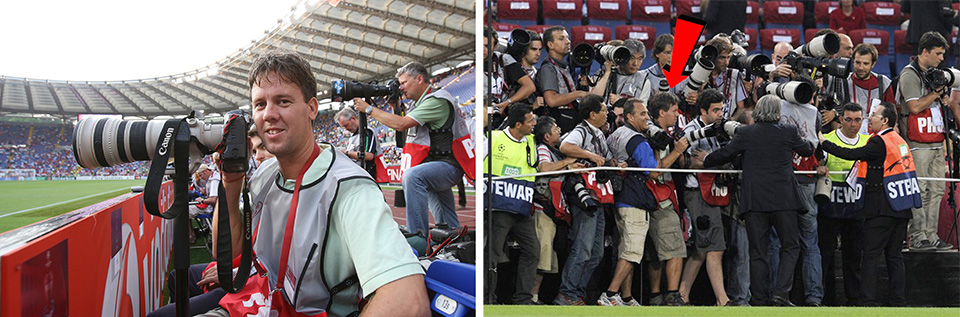
Nico travelled extensively, had the chance to photograph many famous sports heroes and gained a huge amount of knowledge and experience as a result.
1. Regular clients
If you want to become a sports photographer, you need to make sure you have enough income. If it starts costing money instead of bringing money in, you are better off stopping.
You need to be distinctively good and you need regular clients who send you out and who are certain to buy your photos.
2. Be distinctively good
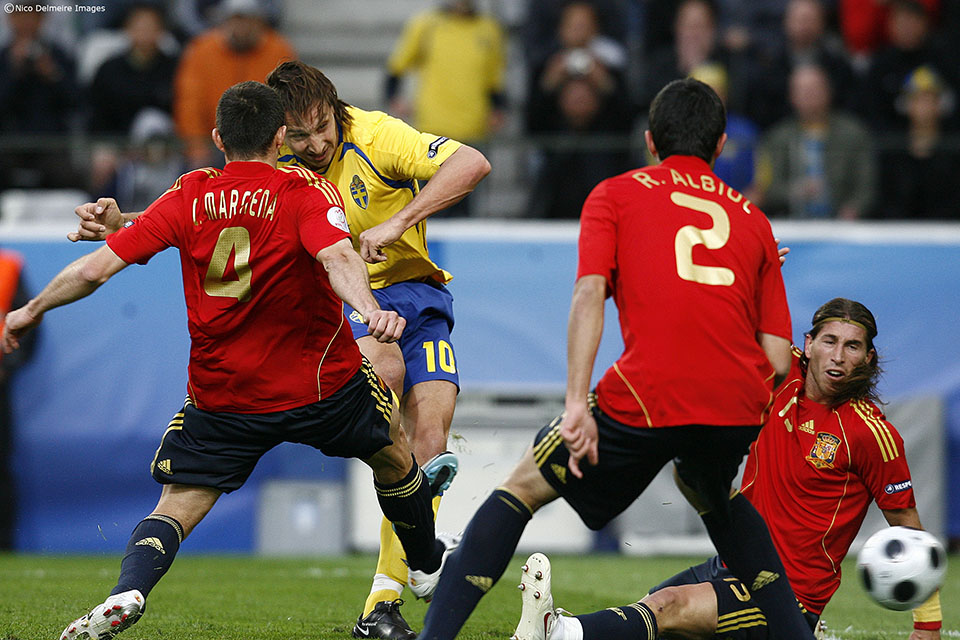
As a sports photographer, you need to stand out by delivering images that are right straight away. So with as little post-processing as possible. If an image is cropped, you can always see it.
To my regret, I see tilted horizons, players shown too small in the photo, cropped photos and things like that far too often.
Guus Dubbelman (Volkskrant) and Hans Heus do deliver beautiful sports images. They see different things and put them into a new perspective, which gives you surprising images.
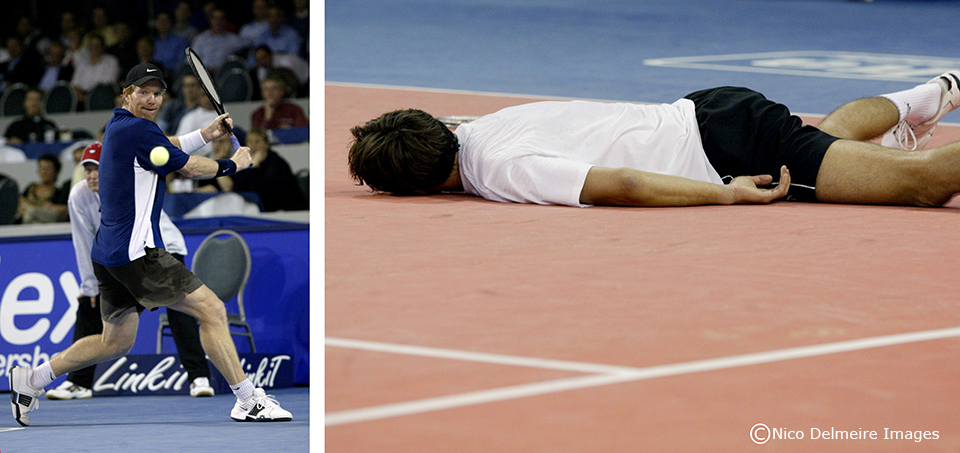
In the past, you had to shoot on rolls of film and you had to know exactly what you were doing. The photo simply had to be right straight away. Nothing could be corrected in post-processing.
You do learn from photographing that way! It gives you a better sense of how to make an image that is right straight away without using Photoshop.
3. Good preparation
Make sure you are well prepared before you start photographing and make sure you get there in plenty of time! Learn about the match, know who the important players are and what they are likely to do.
Also learn about the weather, make sure you have rain covers for your camera and lenses and waterproof clothing for yourself.
4. Learn about the sport
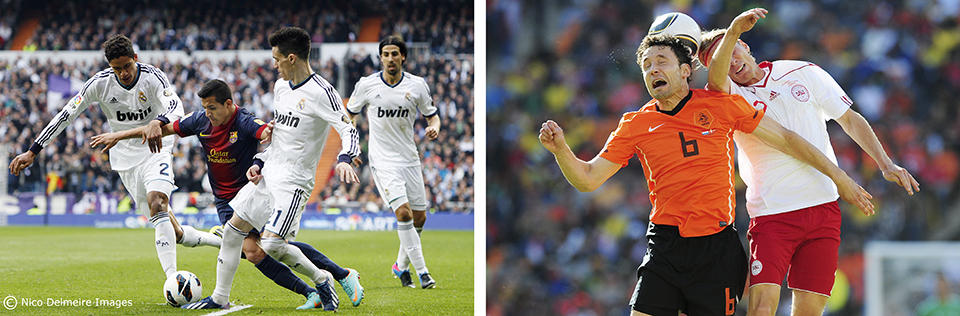
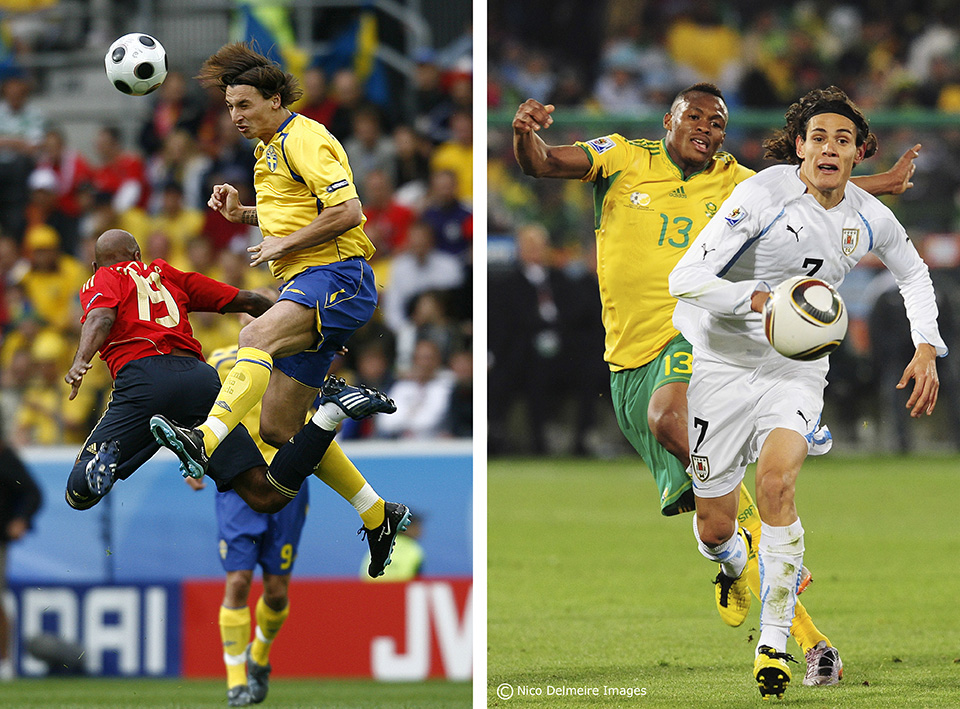
Football was my main sport, so I knew everything about it. And that is necessary too, because you need to be able to anticipate, know what might happen and then be in the right place. And at that moment, your cameras need to be set up correctly, ready to shoot.
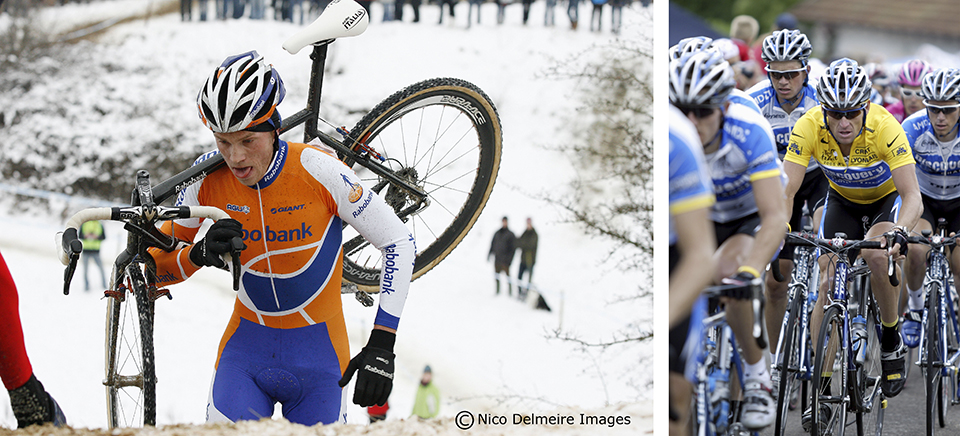
For the Tour de France, for example, you need to know the stages and where the wearer of the yellow jersey is. You stay up to date with all the news and information via a radio link. I always carried a radio with me.
With tennis, you need to know what the player’s strengths are. Richard Krajicek, for example, often hit aces, so there were few or very short rallies. You need to anticipate that in advance.
And you also need to make sure the ball itself is in the frame, although that applies to all ball sports, really.
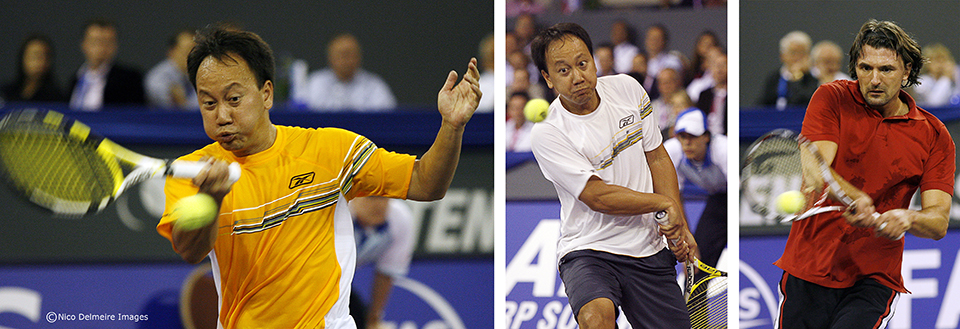
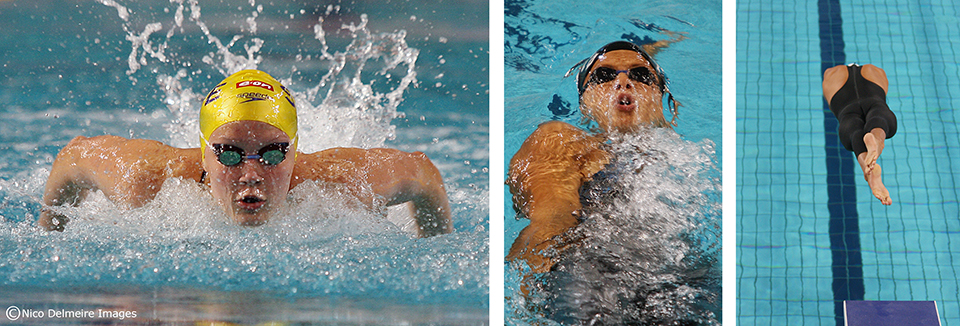
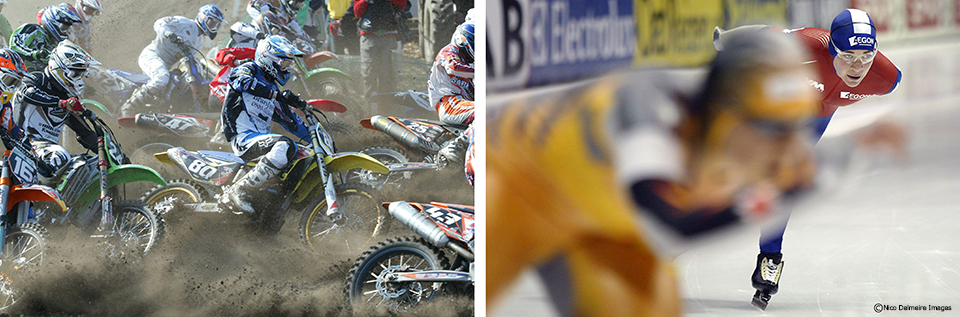
Although football was the main part of my work, I photographed a wide range of sports, including swimming, rallies, cycling and tennis. Every sport is a completely different way of photographing, with different rules, lighting conditions, speeds, distances and so on.
5. Three cameras with different lenses
I used both Canon (EOS 1D) and Nikon (D1) bodies and usually carried three cameras, all with fast lenses with different focal lengths:
- A 400mm f/2.8 lens
- A 70-200mm f/2.8 lens
- A 16-35mm wide-angle lens, also f/2.8
You do not have time to change lenses and if a sportsperson suddenly walks towards you (unexpectedly), you need to have your wide-angle lens close at hand.
If you photograph from a short distance, using a wide-angle lens, you become much more part of the action yourself than when you zoom in on an event. You can really see this in the photo! Of course, make sure you know your equipment well too!
For the long lens (400mm), I used a monopod. The lens collar is attached to the tripod, allowing you to move and turn the camera independently of the lens.
This gives you more freedom of movement while still providing some of the stability of a tripod. Indispensable, especially with long focal lengths.
I always took a stool with me, despite the fact that there were almost always chairs to be found. You never know what you will find when you get there. I practically always photographed from a sitting position. At the Tour de France or a marathon, sometimes sitting backwards on a motorbike.
6. Focusing method
I generally use the AI Servo focus method as standard for moving subjects (Continuous servo with Nikon).
Very useful with moving subjects, for example a group of runners running towards you. Because they are constantly moving, the autofocus needs to keep moving with them. Focusing takes place continuously.
You can take photos while focusing. When photographing in AI Servo AF, the focus confirmation light will not come on in the viewfinder.
I set the focus point in the centre as standard. For a corner or penalty, you can lock the focus with the AE lock button (the one with the star).
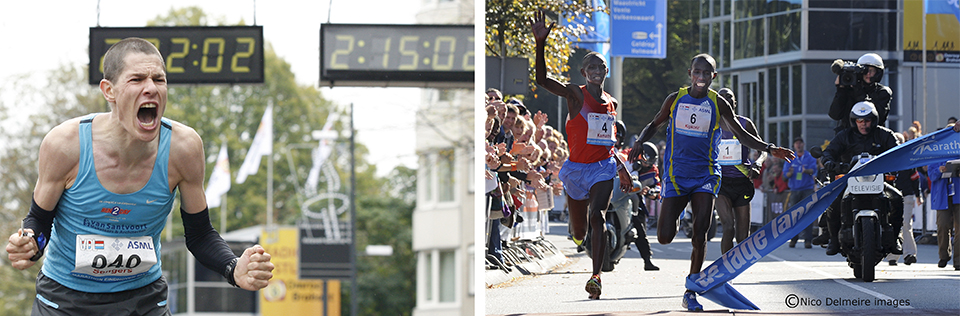
If I had to take a finish photo of the winner of a marathon, I focused in advance on the ribbon they had to run through. Here too, I used the AI Servo focus method because within a second the runner would already be a metre further on and would then run out of focus.
7. Metering
I always have the camera set to M(anual), never semi-automatic. Because the lighting conditions can vary so much in a short time, especially when photographing outdoors, this is the safest method. But it remains a matter of making choices.
If you have constant light, you can meter in advance and leave the setting as it is. But if there is a side of a football pitch in shadow and a side in the sun, you need to be able to switch quickly if you have metered the light on the shadow side and something happens on the sunny side.
You are actually constantly changing the settings. Given the lighting conditions, you often end up at an aperture of f/2.8 to f/4, but the shutter speed is the main setting you vary.
When photographing indoors, you do have constant light, including during evening matches in stadiums. Although you often have to deal with light fall-off there. This can make the difference between a good and a less good photo, so you need to pay close attention to your exposure.
Because the camera’s built-in light meter only measures reflected light, it is somewhat less accurate. A separate light meter that measures incident light could be useful, but it is not really practical in sports photography.
A tried and tested trick is to meter the light on the grass before a football match. This generally gives you a good exposure value.
8. Shutter speed
With sports photography, you should really never use a shutter speed below 1/600th of a second, otherwise you will get motion blur.
The background will almost always be blurry because of these fast shutter speeds and the associated large aperture. And that is fine, because all the attention then goes to the sportsperson, without a distracting background.
9. Flash
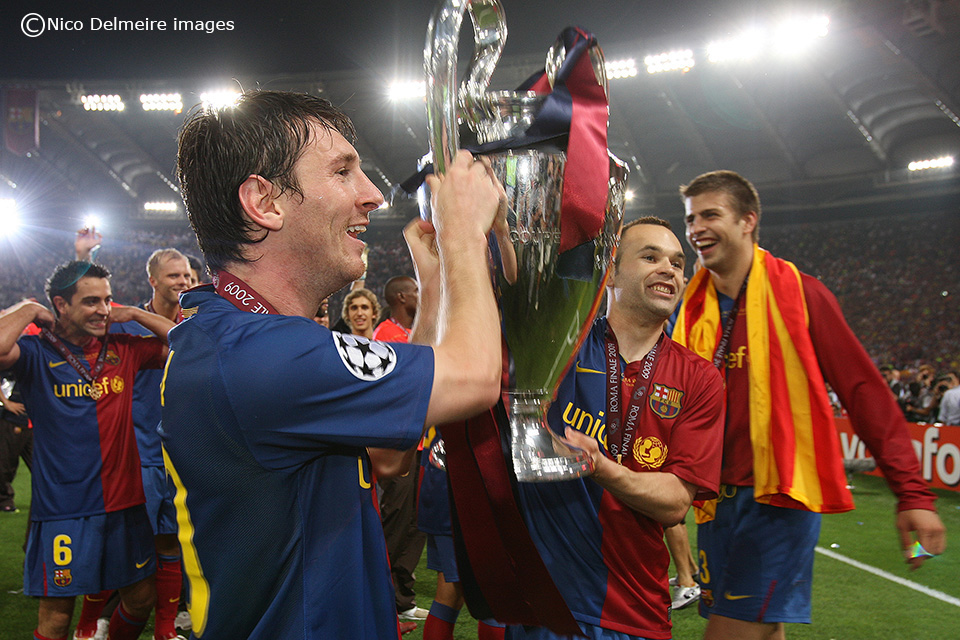
I practically never used flash for sports photography, not even during an awards ceremony. At most, if a player was walking around with a trophy. I would simply use direct flash, with the Omnibounce cap fitted to soften the light a little.
10. White balance
In the past, you had to use a grey card, and manually set the white balance for the lighting conditions you were in, to get a good white balance. These days, automatic white balance works well virtually all the time.
11. Emotion
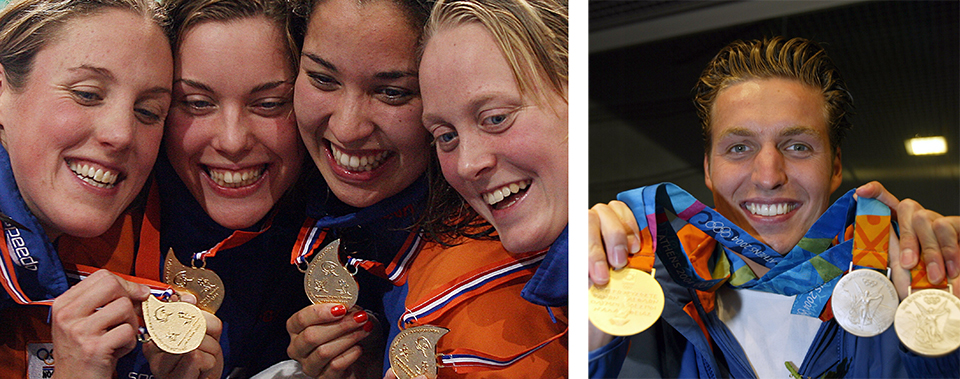
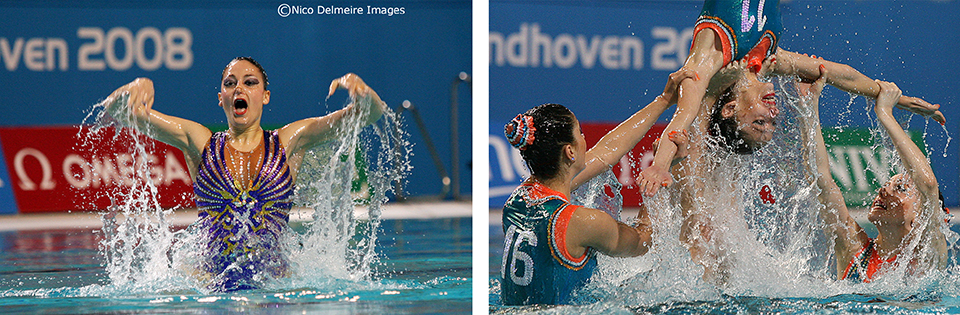
There needs to be emotion in your sports photo to make it a distinctive photo. If you suspect that Roger Federer is going to win, you need to capture the moment of celebration. The rest of the photos are less important then, it is that one photo that matters.
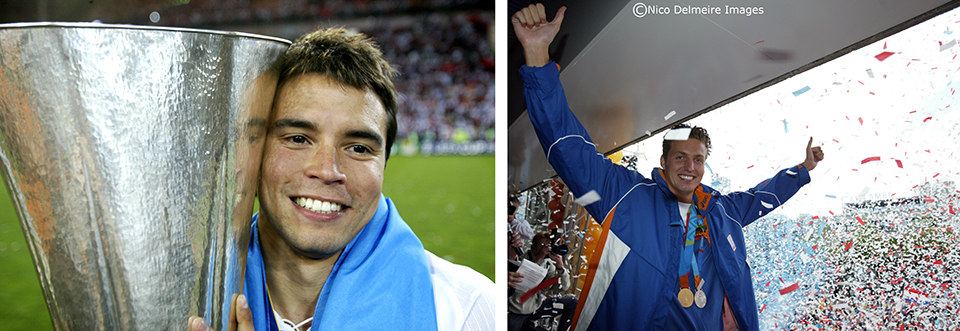
It helps enormously if you are a sports fan yourself, as you can then empathise well with all kinds of situations. It can be difficult when your favourite football team loses and you have to take the winners’ celebration photos with complete conviction.
At such a moment, you need to switch off your own emotions and work professionally.
12. Selection
I always take a lot of photos. In many matches, something can still happen in the final second. During the match, you should already have in mind which good photos you have taken that might be usable.
I made a quick selection using the programme Adobe Bridge, which allowed me to scroll quickly through the photos. You should not look at images you are unsure about again, unless it was an important moment, such as a red card being shown.
13. Post-processing
Until 2011, there was generally never much time for post-processing the photos. They also had to be supplied in JPEG format because RAW files were simply too large. I was therefore trained to deliver photos that were right straight away.
14. Journalistic aspect
Sports photography has a journalistic aspect that you need to master well. You need to have, or develop, a feel for the images your clients want to publish.
It is a difficult branch of photography, as you have nothing under your control. You need to be very well prepared and know a lot about sport. You need to be ‘in the match’ yourself and really follow what is happening.
15. NSP and AIPS card
To be able to photograph from the right places, you need an NSP (Nederlandse Sport Pers) card. It is not available to everyone, you need to have some standing in the world of sport. The AIPS (Association Internationale de la Presse Sportive) card is linked to it.
16. Photos online straight away
Press photos had to go online as quickly as possible. This was done via a laptop using WIFI connections. Photos were shot in JPG because they were far too large in RAW. They therefore had to be right straight away, as there was not much left to edit.
If the photos were online and were not downloaded, they had not been used. The faster you got them online, the greater the chance that they would be published.
17. Performing under great pressure
Because the photos had to go online quickly, and you also had to know which photos they would want, you were often under enormous pressure. Also because you were not allowed to miss the decisive moment.
I actually performed better under great pressure. I believe healthy tension is needed to perform at all. Most of the pressure quickly disappears once you have already taken some good and usable material.
18. Help and coaching
Pics United and Orange Pictures helped me get into the world of sport and also coached me.
You need someone to take you by the hand, so to speak, and help you enter the world of sport. It is a tough world in which you need to hold your own as a photographer.
From them, he learned that when a ‘cluster’ of photographers descends on an event, you should always briefly join the group. You take a number of photos and then leave the group again.
You check the photos and rejoin the group for another series. You do run the risk of missing the ‘moment supreme’, but this is still the best approach, with the greatest chance of success.
19. Forceful or calm approach
There are two ways to hold your own as a sports photographer. You can push your way to the front like a cocky show-off in a group of photographers and, if necessary, use a firm hand to hold your position so you can take your photo.
But you can also follow your own plan and remain calm inside. This was my method and it suited me better.
I would never hit someone if they stood in my spot at the moment supreme. I have noticed that if you become frustrated about a situation or the behaviour of another photographer, it completely takes over your attention. Instead of focusing on the image you need to shoot.
It is better to work calmly and with concentration. Find your own calm. But it is important to be clear. If you have been standing ready in a particular spot for some time, then that spot is simply yours.
20. Your own focus and calm
The most important tip I can give you as a sports photographer is to find your own focus and know what you are doing.
Sports photography course
Want to know more about sports photography? On Photofacts Academy, Nico gives a complete course on sports photography.
In this course, he shares his extensive knowledge of photographing athletics, football and indoor sports, among other things. Nico does this with concrete videos that are quick to watch. Discover how you too can capture the finest sports moments.
» Watch the promo for the sports photography course (47 seconds)
Your tips?
Do you have any good sports photography tips that are missing?
Please let us know in the comments!
Dit artikel is voor het laatst bijgewerkt op 12 december 2018.
De eerste publicatiedatum is maandag 10 april 2017, 15:51.
About the author
Michelle Peeters is fotografe en oprichter van DeuxBleus Fotografie. Michelle herkent het bijzondere in het gewone en het gewone in het bijzondere. Ze heeft zich nooit willen specialiseren en is daardoor van alle markten thuis.
You might also like
-
 Sports photography tip: The best position at a football match
by Nico Delmeire
-
 Tip for sports photography in the evening
by Michelle Peeters
-
 Sports photography: Know what your camera can do
by Nico Delmeire
-
 Synchronized skating, this is sports photography too!
by Richard Seijger
-
 Sports photography tip: Keep an eye on the coach
by Nico Delmeire
-
 3 Tips for Successful Sports Photography (and get my book free)
by Nico Delmeire
15 comments
-
 Wim Henddriks wrote on Monday 10 April 2017 at 20:21 | reply
Nice all-round story with tips that everyone can apply nowadays.
Translated from Dutch.
This way every photographer can give an outlet to his passion for the sport he can or no longer wants to practice,but still wants to be present at.
A little different from when you do it for your profession, then money has to come in immediately and that is the catch, get the shot and get it right straight away.
With digital photography that is no problem nowadays.. .....but it was with negatives in the past, you were limited to 36 or 72 (Illfort) or, as one person did, 250 shots with Kodak, then I suddenly remember a story by Guus de Jong that he was sitting on the field with a Speet Graffic and 4 cassettes with only 2 exposures per plate...well and what about Jaap Herschel, ZC sport of the Black Panther, the goalkeeper of DOS, nowadays FC Utrecht,reaching for the ball, also made with such a camera...and I could go on like this for a while about old colleagues now, who actually went through a whole era of slow negatives, fast black-and-white and colour rolls (3200asa) to digital images.
From these old colleagues,I got the same thing back then,so nothing has changed.
Including ... whether you like the photo or not.
-

 Michelle Peeters wrote on Monday 10 April 2017 at 20:26
| reply
@Wim: nice that you’re sharing your experiences too! Yes, I’m also quite convinced that it was a lot more difficult the ‘old way’, but it’s a very good learning experience! If you’re a professional, you also have to deal with the journalistic aspect, meaning that nothing may be manipulated. Zeeeer limited Photoshop adjustments, often simply providing it as a JPG straight from the camera...
Translated from Dutch. -
 Huub S. wrote on Monday 10 April 2017 at 20:45 | reply
really nice to read this. I've known Nico for a long time, from the days at the Eindhoven marathon, and I have enormous respect for him and for the quality of his sports photos. Class.
Translated from Dutch. -
 jacobs wrote on Tuesday 11 April 2017 at 13:36 | reply
I think the title could have been better:
Translated from Dutch.
'20 tips from commercial sports photographer Nico Delmeire'
This article focuses on immediately deliverable material, made with an undoubtedly expensive camera.
This certainly does not apply to all sports photographers.
Not everything has to go online immediately. With most football clubs, for example, it still takes at least several days and RAW can indeed be used.
There is also sports photography simply to portray the beauty of the sport and not to immediately make commercial profit from it. -
Michelle Peeters wrote on Tuesday 11 April 2017 at 14:02
| reply
@Jacobs: The fact that Nico used to be a commercial sports photographer already comes through sufficiently in the intro. And times have indeed changed. And it's true that you can of course practice sports photography on a non-commercial basis as well. For that, however, you can apply exactly the same (technical) tips. And you also have the advantage that you're not under that enormous performance and time pressure, which makes photographing a lot more relaxed!
Translated from Dutch. -
 Frans Reijs wrote on Tuesday 11 April 2017 at 15:30 | reply
In M mode, the photos are way too dark for me, I almost always use Av mode.
Translated from Dutch. -
 P. Liebe wrote on Tuesday 11 April 2017 at 15:47 | reply
A wonderful article with many tips. The author only talks about three 2.8 lenses (objectives), though. Obviously, changing lenses during a match is not possible. This does, however, also mean 3 (expensive) camera bodies. Not really within reach of a hobby photographer!!
Translated from Dutch.
Kind regards. Peter. -
Michelle Peeters wrote on Tuesday 11 April 2017 at 15:52
| reply
@Frans: you can also measure the light in M mode. Make sure your light meter comes out at 0 (neutral). The advantage is that your exposure is then 'fixed'. Especially when the lighting conditions the player is in change quite often, things can still go wrong in AV mode. And your background is well exposed instead of your subject, something you don't want.
Translated from Dutch.
@Peter: that's indeed correct, as a professional you will have to invest in (a lot of) good equipment! -
 Evert wrote on Tuesday 11 April 2017 at 16:25 | reply
Wow, what a fun and interesting story.
Translated from Dutch.
My challenge is sports photography and I would really like to test this with my Nikon D7000. I have a 2.8-75 lens with f2.8 and a 1.6-300 with f3.5
Furthermore, I can set it to what I call the paparazzi mode. So just rattle away one after the other.
With the tips mentioned, I am at least one step further again. Thanks for that! -
 marcel van vliet wrote on Tuesday 11 April 2017 at 18:47 | reply
nice to read something about sports photography for a change
Translated from Dutch.
i personally find it very difficult to indeed set the sunny and shady sides correctly, what is the best thing to do with your ISO settings then? and should I turn the shutter speed up and or down when I go from the shady side to the sunny side? -
Michelle Peeters wrote on Tuesday 11 April 2017 at 18:53
| reply
@Marcel: Nico only varied his shutter speeds and metered the light on the grass beforehand. As soon as the player moves from the sunny side to the shady side, you have to start varying again to get back to a neutral exposure of your main subject. Most modern cameras handle noise so well that you no longer have to worry so much about high ISO settings. I think even an auto-ISO mode could work quite well! What ultimately matters is the perfect timing and the expressive power of the sports photo.
Translated from Dutch. -
 Rob Bosma wrote on Thursday 13 April 2017 at 11:06 | reply
I actually wanted to show what I can do with my D3100 with Tamron 70-200 f2.8, using a few photos. I photograph football at amateur matches in the 3rd division. Might be nice to learn from each other. Is there an opportunity for that?
Translated from Dutch. -
Michelle Peeters wrote on Thursday 13 April 2017 at 11:26
| reply
@Rob: just send them to michelle@photofacts.nl
Translated from Dutch. -
 Ron van der Poel wrote on Friday 14 April 2017 at 19:43 | reply
Super nice article.Learned a lot again.good addition I happened to have also attended a talk by Pim Ras 2 weeks ago.
Translated from Dutch.
Also a sports Photographer (AD)but what I understood is that unlike Nico, Pim is a pusher and puller during the important moments.I myself perform very poorly under pressure,so it will not be for me to be a professional.I myself try to occupy myself with the sports: Obstacle runs, tennis, Running and Mountain biking.A lot of action and emotions, that is what I really love and enjoy the most.I would like to "go along" with a pro sports photographer for a day sometime.I still haven't made the perfect shot.
Bought the sports photography handbook,basically everything a sports photographer needs to know is in it. -
Michelle Peeters wrote on Friday 14 April 2017 at 21:01
| reply
@Ron: a good place to practice is also the local athletics track. During training sessions or competitions. You can gain a lot of experience there and they are often happy with your photos!
Translated from Dutch.
Have your say
Please note: Articles older than a week can only be commented on by signed-in visitors.Would you still like to comment? sign in or create a free account.
Become a better photographer every week
A practical photography tip in your inbox every week.
38,764 photography enthusiasts already receive the tips! More about the weekly mail. Or keep up to date via  Facebook.

Elja Trum
Photofacts; everything to do with photography!
Would you like to take better photos and keep up with what is happening in photography? Photofacts publishes articles that teach you something about photography — from a product announcement to a practical shooting tip or a look at a website. Photofacts covers photography every day and is a hobby project of Elja Trum's that got out of hand. The articles are written by a team of volunteer authors. If you would enjoy writing one or more articles for Photofacts, do get in touch.More about PhotofactsPhotofacts is made possible in part by
