

What can you do with EV (Exposure Value)
Monday 23 March 2020, 22:22 by Michelle Peeters | 29,220 views | 14 commentsThis article was translated from Dutch with the help of AI. Read the original.
You may have heard the terms 'light value' or 'EV' used when talking about the amount of light in a scene. But what does EV actually mean in photography, and why is it important for your photos? This article explains the concept and how you can use it to your advantage.
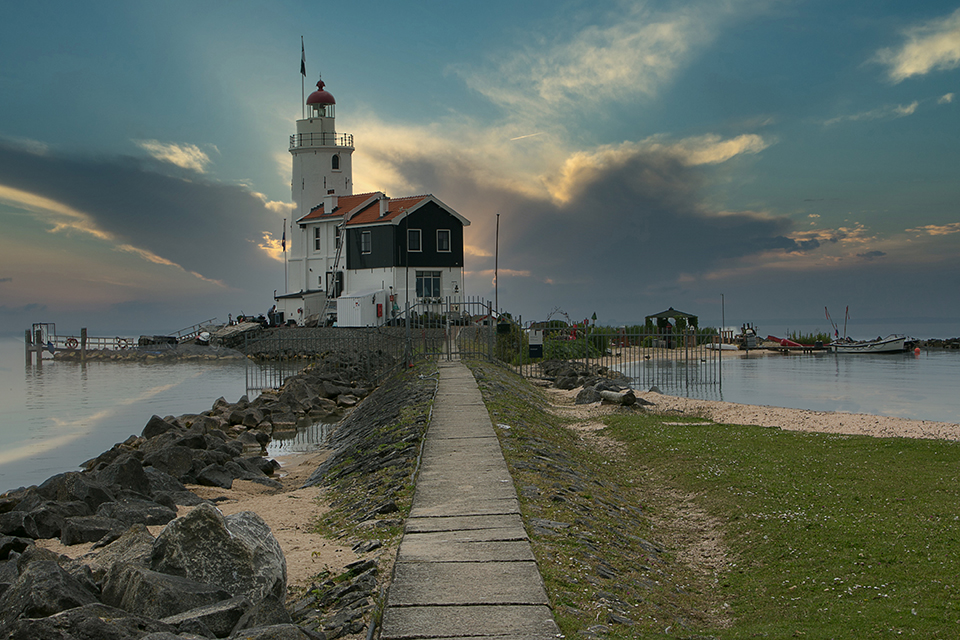
Making manual settings easier
Exposure Value or light value (LW), also known as Exposure Value (EV), was designed in the 1950s to make manual camera settings easier. It is a quick way of noting a particular light level, so how bright a scene is, expressed in aperture and shutter speed combinations at a particular ISO value.
The idea was to simplify choosing between equivalent exposure settings by replacing combinations of shutter speed and f-number (for example, 1/125 seconds at f/16) with a number (for example, 15).
Separate light meters often measure EV
Many separate light meters therefore use this system. With an external light meter, you measure the amount of light in EV measured at ISO 100 in various places and under different conditions.
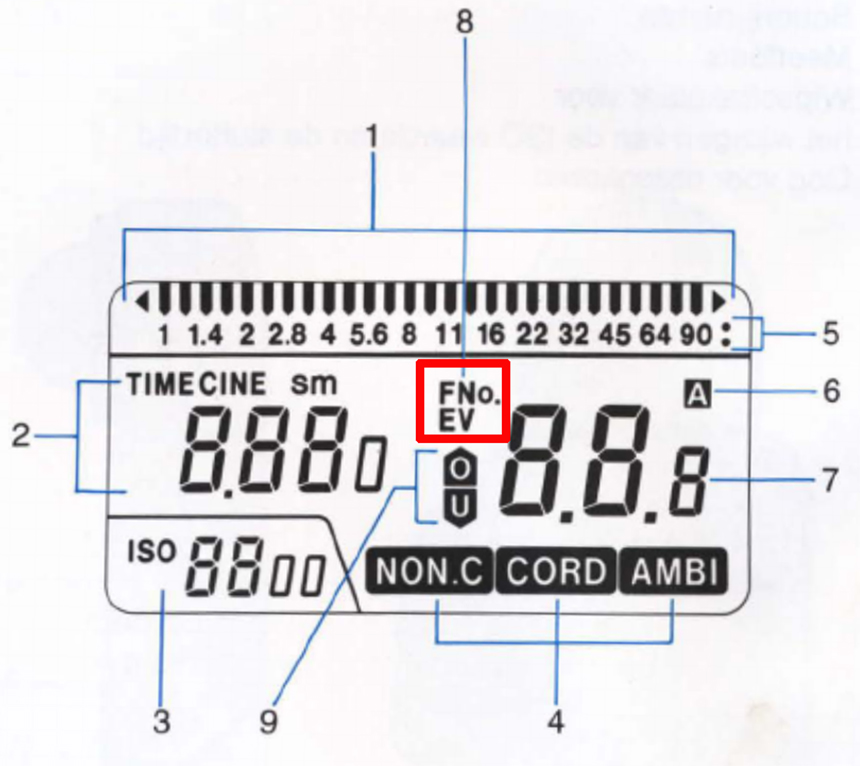
EV (short for Exposure Value) relates to light intensity. An EV of 0 is the light intensity needed to correctly expose a neutral, 18% grey card (the standard target for an exposure meter), with an exposure of 1 second, an aperture of f/1 and a sensitivity setting of iso100.
All other EVs are derived from this, ranging from EV -6 (a starry sky) to EV +20 (bright, reflective highlights).
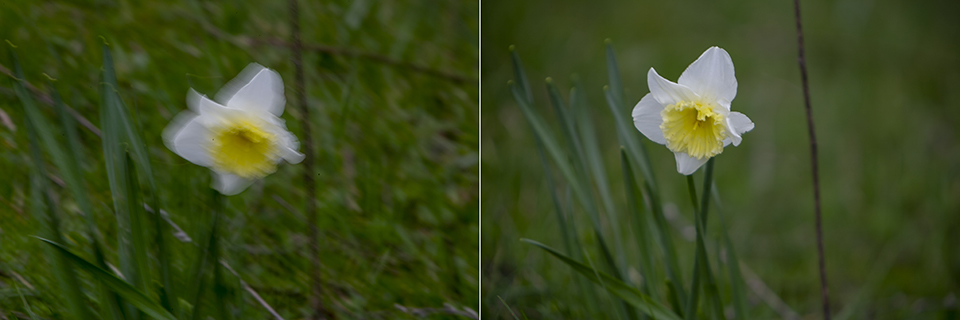
With every photo you take, you also make a decision about the effect you put into the photo. When you work with the aperture, you can play with depth of field. Increasing or reducing the depth of field in a photo changes the relationship between foreground and background.
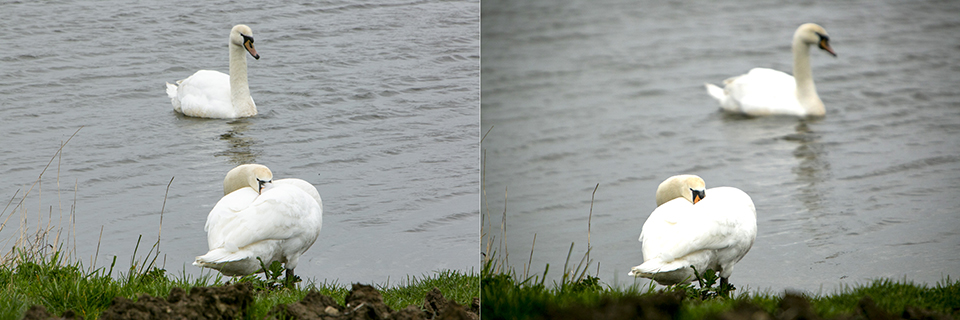
The subject in your photo also changes considerably as a result. The photos above were taken at f/29 and 1/60, and at f/5.6 and 1/2000. So here too, exactly the same amount of light, yet each photo has a completely different character.
Camera light meter not always reliable
The exposure of a digital image depends on many factors. The selected ISO value, aperture and shutter speed all affect the exposure of your final photo. Unless you photograph in manual mode, your camera automatically controls one or more of these exposure parameters.
Usually this works fine and you do not need to worry about correctly exposing your image. Your camera tries to achieve an even exposure for every shot, so that your photo is not under- or overexposed. Most beginner photographers therefore like to set the exposure to the (semi-)automatic mode.
But it does not always work well: if, for example, you take photos of a snowy landscape, the camera tends to underexpose, resulting in greyish snow.
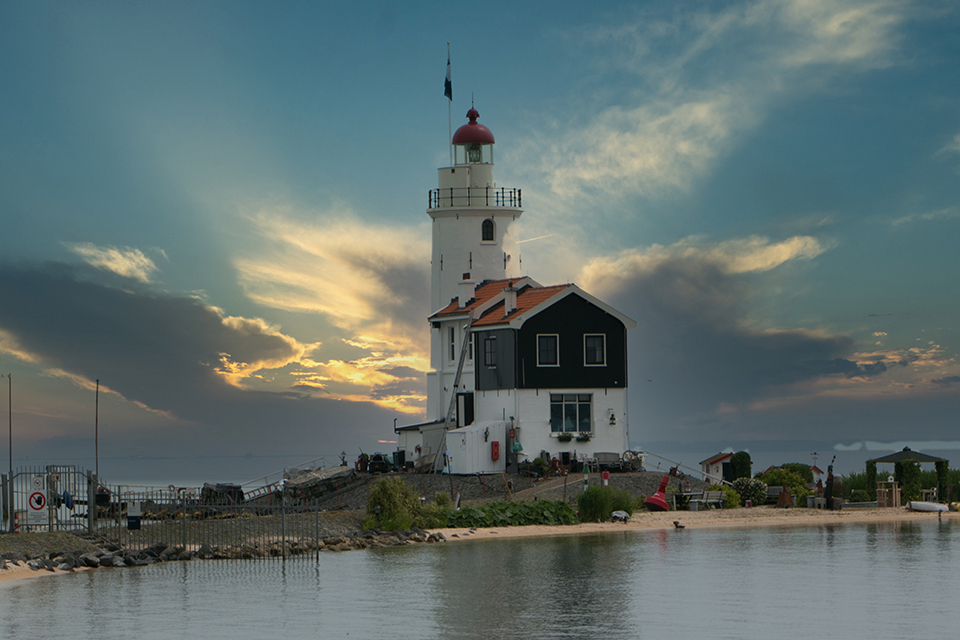
When taking backlit photos too (for example around sunrise or sunset), your camera will try to make the image darker than you would actually like. And if you take a photo of a black or white sheet of paper, they will both be shown as grey sheets unless you intervene yourself.
So unfortunately, you cannot always rely on your camera's exposure meter. This light meter can only compare light values with 18% grey values.
Your camera's light meter measures the light that is reflected. A separate light meter often measures incident light. As a result, the outcome of a light measurement (and EV number) can differ considerably due to the presence of point light sources and the brightness of the subject.
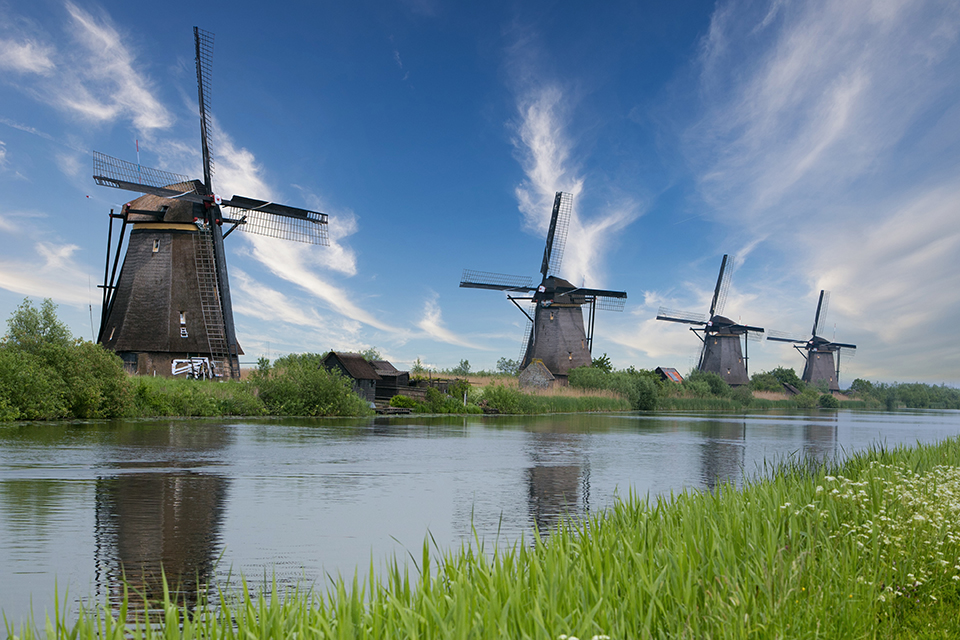
Light value of available light
When you go outside to take a photo, you use your camera to capture or record the available light. In complete darkness, there is no light available, so in theory you would not be able to record an image.
The amount of light present outside at that moment is determined by the time of day, any cloud cover, the shade of surrounding trees or buildings, and so on. You often say that it is a bright or a dark day.
Your camera does the same thing. It measures the available light and assigns a light value to it. A number called the Exposure Value (or Exposure Value, abbreviated to EV). For now, I will assume that this light value cannot be changed.
Three variables
This Exposure Value is calculated using 3 components that determine the exposure, namely:
* aperture (the f-number)
* shutter speed
* ISO (the sensor's light sensitivity)
If you set your camera to P mode, it will choose a combination of these three parameters. For example, aperture f/8 at a shutter speed of 1/60 and an ISO value of 400.
Remember that these three parameters are adjustable variables that you can change to suit your needs. However, you can never change just one value, because then you will under- or overexpose.
Mathematical product
Suppose you arbitrarily take the number 24 for that Exposure Value. You can see this number as the mathematical product of 4x1x6 or 3x4x2. You cannot now change just one number at random, because the result will no longer be 24. You must therefore also adjust at least one other number.
So if you want to adjust the aperture (which I had set to f/8 in the example above) to a higher or lower value, you must adjust either the shutter speed or the ISO value, and then in exactly the opposite direction.
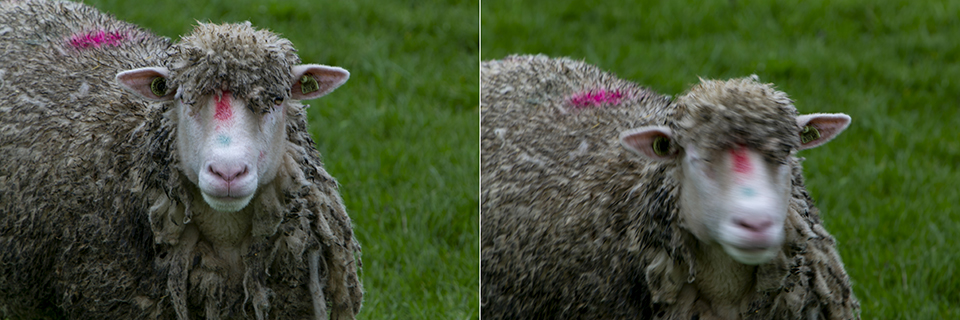
But why would you want to change those values? Suppose you want to photograph moving subjects, such as playing children or running dogs. You will need to use a faster shutter speed (for example 1/250 or 1/500) to avoid a blurred image.
You will then have to adjust the aperture value or ISO sensitivity accordingly to keep the Exposure Value (EV) the same. The light outside has not changed, after all.
In Program (P) mode, you can adjust your exposure to suit your preference by turning one of the two control dials for aperture and shutter speed. You will then see the other one adjust automatically. If your camera is set to auto-iso, the ISO value may also be adjusted.
Stops or 1/3 stops
These parameters are adjusted in stops or fractions of a stop. One stop is therefore one light value. Modern cameras often allow you to work with adjustments of 1/3 stops for greater precision.
The successive steps are shown below. At first glance, they may not always seem entirely logical, but you get used to them as you work with them for longer. Shutter speed is always expressed in seconds or fractions thereof. The series listed below are all full stops:
Shutter speed (the time is halved with each stop):
1 second 1/2 1/4 1/8 1/15 1/30 1/60 1/125 1/250 1/500 1/1000 1/2000 et cetera...
Aperture values (f-value). Each stop lets through half as much light:
f/1 f/1,4 f/2 f/2.8 f/4 f/5.6 f/8 f/11 f/16 f/22 f/32 f/45 et cetera...
ISO values (a higher ISO value is always double the lower value):
50 100 200 400 800 1600 3200 6400 12800 25600 et cetera...
EV table
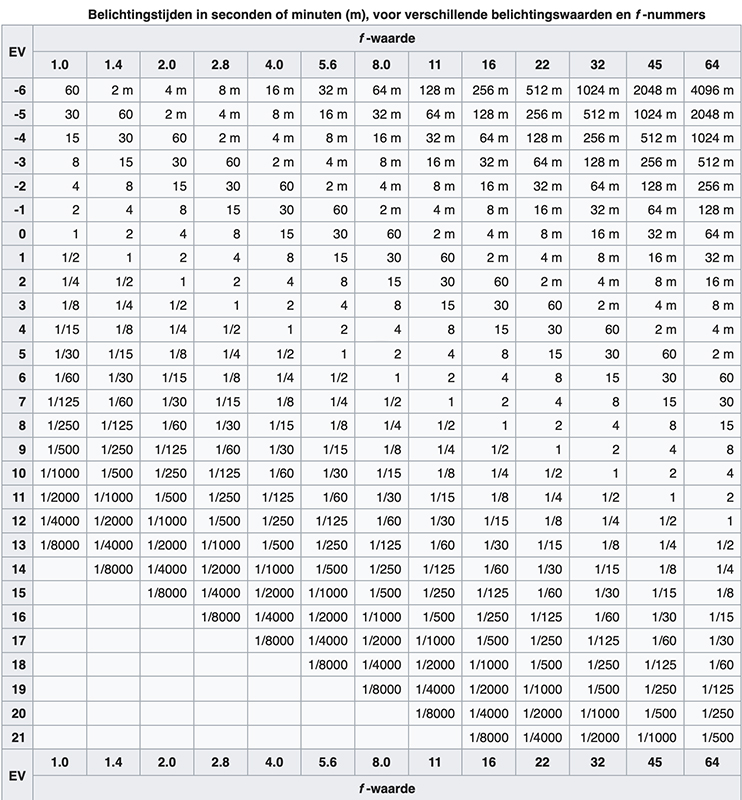
In the table below, you can read the Exposure Values on the left and the aperture values along the top. At the same Exposure Value (horizontal line), you can see the corresponding aperture values and shutter speeds. The ISO value remains constant here, at 100.
EV 0 at iso 100 has a shutter speed of 1 second at aperture f/1.0. As a guide, you can assume that an average interior will be 5-7 EV, an overcast day EV 10-12 and full sun EV 15-16.
An increase or decrease of one EV stop means doubling or halving the light intensity, so EV 2 is twice as bright as EV 1 and half as bright as EV 3, for example. In terms of 'actual' exposure, an EV stop is the same as adjusting the shutter speed, aperture or ISO by one full stop.
Playing children
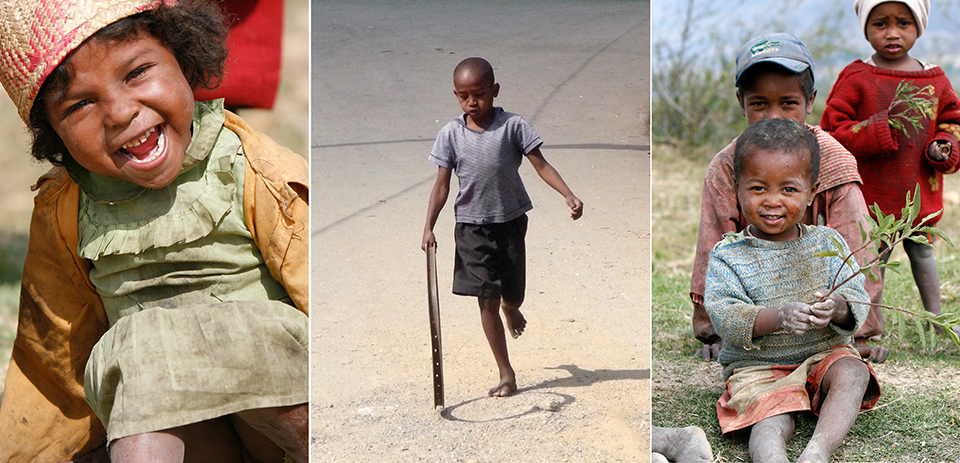
Let's return to the example above of an outside measured value of aperture f/8, at a shutter speed of 1/60 and an ISO value of 400. If you now want to capture playing children in that street, a shutter speed of 1/60 will probably be too slow, because their movements will not be frozen. You will get blurred photos.
So you need to adjust your shutter speed to 1/250, but then the aperture must also be adjusted, or the ISO value. Going from 1/60 to 1/250 means two stops less light entering, so you can open the aperture two stops further, from f/8 to f/4.
But you can also adjust the sensitivity of your sensor from iso 400 to iso 1600. Or choose a compromise and adjust the ISO value by 1 stop to iso 800 and the aperture to f/5.6.
Overcast versus clear
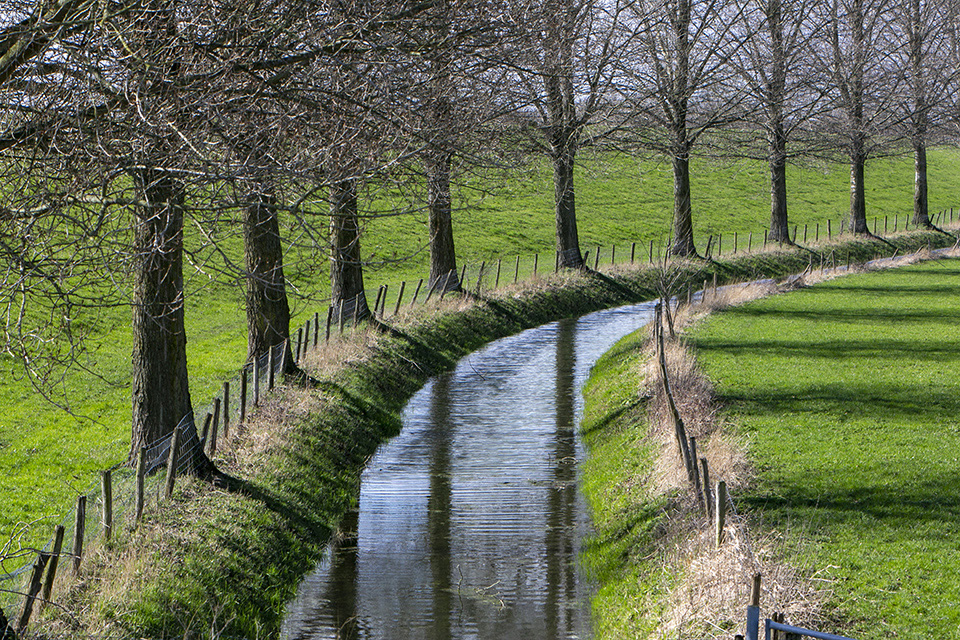
Another example: an overcast, bright scene is around EV 13, which could be exposed at 1/125 second, f/8, at iso 100. If the cloud becomes thicker, the EV drops to 12.
To compensate, you can make the shutter speed one stop faster, to 1/60 second, open the aperture one stop further (to f/5.6), or increase the ISO by one stop (to iso 200).
Each of these choices would compensate for the decrease in light intensity, but each of these fundamental exposure controls would affect the image differently in terms of depth of field or motion blur.
Light values (EVs) at 100 iso
The list below is a guide to exposure levels for a number of subjects, with their corresponding Exposure Value (EV) at an ISO 100 setting:
EV -6 Starry sky
EV -5 Half moon moonlight, weak glow
EV -4 Quarter moonlight, medium-intensity glow
EV -3 Full moonlight, bright glow
EV -2 Full moonlight on a snowy landscape
EV -1-1 Night-time city scenes (varying light intensity)
EV +2 Distant illuminated buildings (at night)
EV +3-5 Indoors, low light
EV +6-7 Interior
EV +7-8 Bright street scenes, sunrise and twilight
EV +9-11 Just before sunrise or just after sunrise
EV +12 Heavily overcast, or open shade with sunlight
EV +13 Overcast, bright without shadows
EV +14 Hazy sunlight with soft shadows or bright sun low in the sky
EV +15 Bright sunlight overhead with sharp shadows
EV +16 Bright sunlight on snow or light-coloured sand
EV +17-20 Reflective sunlight, intense artificial lighting
There are ultimately two key factors that contribute to determining an exposure. The first is the EV of the scene, the amount of light reflected by the scene you are photographing. The second is the combination of aperture, shutter speed and ISO needed to allow enough light to reach your camera sensor.
A range of options for the same EV
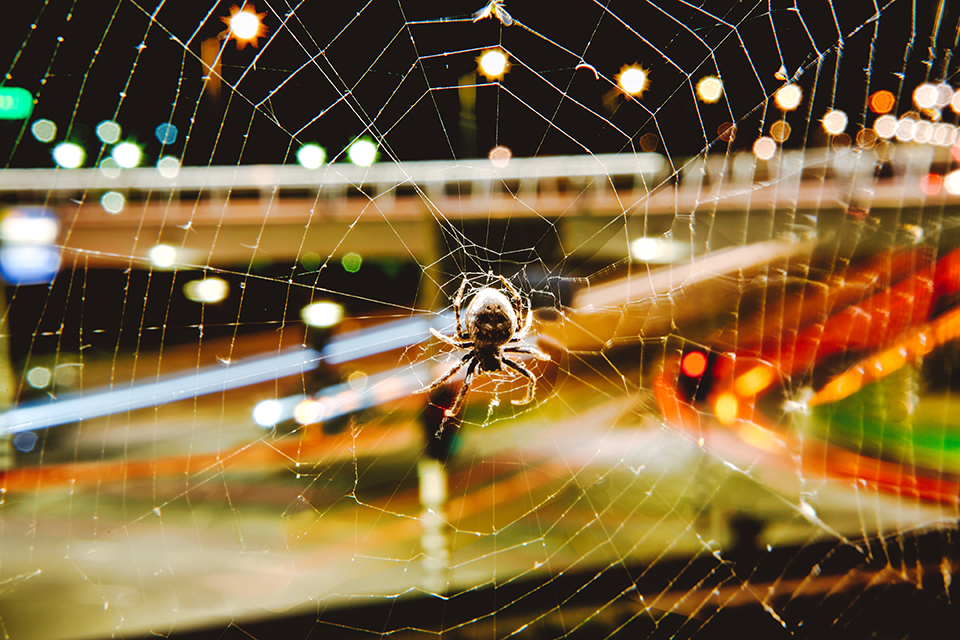
The same scene can be captured with a wide range of apertures (provided the shutter speed and ISO are adjusted accordingly), an equally wide range of shutter speeds and also ISO settings (again assuming that the other variables are set to maintain the overall exposure balance).
In that sense, every scene, however bright or dark, offers a huge range of photographic possibilities, from extremely safe to extreme. And that is exactly where the photographer's skill comes into play.
In this modern world of photography, EV only offers a little guidance. It is no longer something you really need to calculate. I do think, however, that you can still get a lot of valuable information from it, even though EV is not really a subject in its own right these days.
A basic skill you need to learn
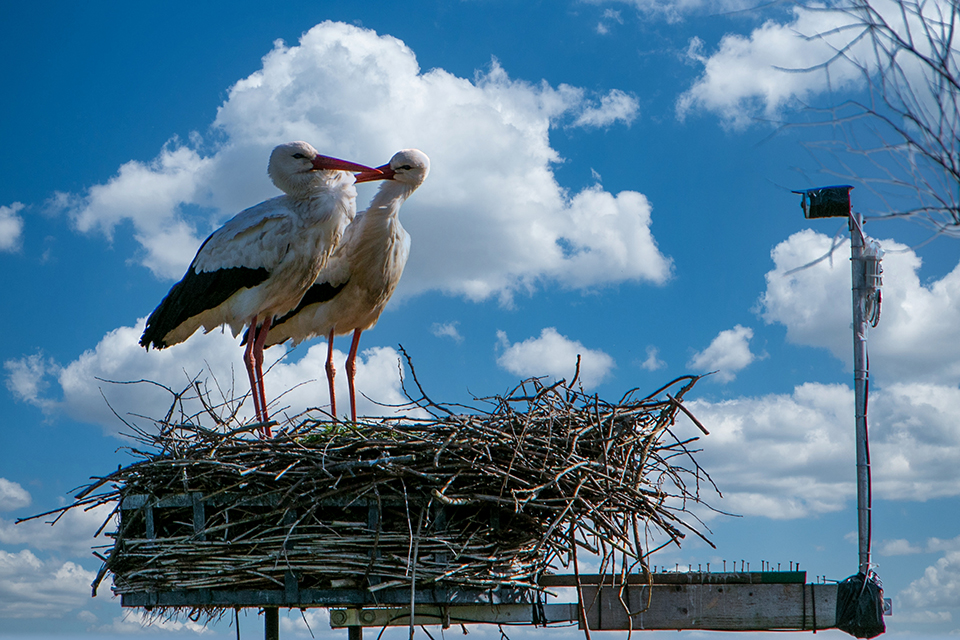
The light meter gives you an exposure, but the basic skill of photographic exposure involves evaluating the correct combination of equivalent exposures.
Knowing exactly when to choose what (essentially determining the relative importance of freezing action or increasing depth of field) is something every photographer should seriously learn.
It is also useful to visualise your image in advance in this way, so that you can see how changing the shutter speed or aperture affects your Exposure Value.
Pluses or minuses
You may also come across EV values in exposure compensation and flash power compensation. If you double your shutter speed, for example from 1/500 to 1/250, you change the light value by +1 EV.
The same applies when you open up the aperture (and therefore get a smaller f-value), for example from f/11 to f/8. So pay attention when you see this kind of notation!
When your camera does not choose the exposure you want, the EV setting also comes into play. You can often quickly increase or decrease the EV value measured by the camera using a handy dial on your camera, usually in steps of 0.3 or 0.5 EV, with both negative and positive values possible.
By changing the EV value, you can quickly adjust your exposure. At sunset, for example, you can make sure that the clouds are properly exposed.
You will always have to make a compromise, however. The clouds may be correctly exposed, but the ground will probably be underexposed as a result. And vice versa: if you correctly expose the ground with a positive EV value, you may get an overexposed sky.
Or if you use your camera's semi-automatic mode, the camera meter will handle this. You can apply +1 EV exposure compensation (or +1 EV flash compensation) to make the result brighter as desired. Using 1 EV is simply another way of expressing one stop of exposure change.
EV is certainly not something most photographers think about these days in their daily work, nor is it a concept you need to understand to get the correct exposure.
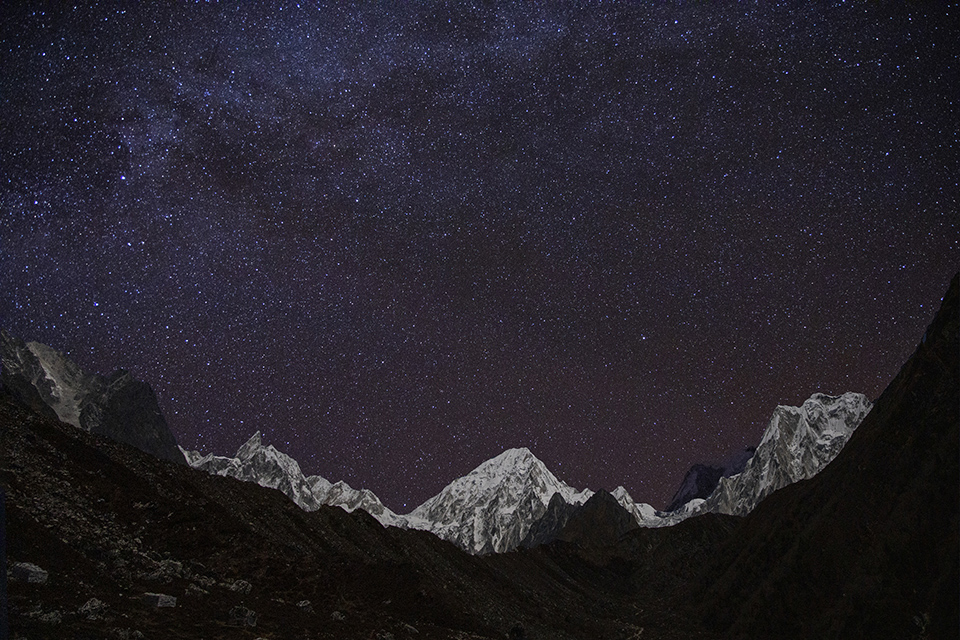
Light meter and histogram
With our current light metering systems, you no longer really need to work out which values to use yourself. The camera and the light meter do it all for you. When you increase the ISO value, the camera will find the correct values for you.
Of course, if you photograph in M mode, you have to enter the values yourself, but the light meter is always up to date with the newly set ISO value. You can also quickly adjust your overall exposure by 'plussing' or 'minusing'.
The ability to achieve an equivalent exposure with different settings (aperture combined with shutter speed) means that you have creative control over the image.
Even in manual mode, most photographers choose their camera settings by looking at the recommendation from the camera's light meter or by viewing their histogram.
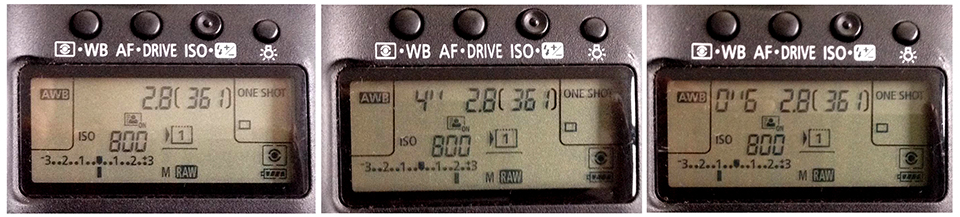
For a scene consisting mainly of light tones: overexpose, so move the EV towards the + setting. You then let more light in. For a scene consisting mainly of dark tones: underexpose, so move the EV towards the - setting. You then let less light in.
How much should you compensate? That depends on various factors. A completely white snowy landscape will require considerable compensation (overexposure), perhaps as much as 2 stops. But it is difficult to give a recipe for every scenario.
Estimating
Very few people go through the entire process of looking at the scene and trying to estimate where it sits on an EV chart, and then finding the corresponding aperture and shutter speed values for that EV.
So why should you still bother learning about EV? Because it can be very useful to know how your camera works and responds to every change in your settings.
This enables you to make a good decision when, for example, you need a faster shutter speed or greater depth of field, or simply more light. Should you increase or decrease the ISO value? Exactly, you will have an immediate answer to questions like that.
Health check
In short: equivalent exposures allow you to work creatively with the effect and character you want to put into your photos by using different combinations of aperture and shutter speed.
Despite its (relative) age, EV is still closely connected to concepts such as shutter speed, aperture, ISO and correct exposure. By the time you understand all the ins and outs of Exposure Values, you will have learned the other, more relevant things simply through association.
Plus, if nothing else, calculating EVs can serve as a kind of health check to see whether your exposures are reasonably correct. It is the world's simplest and least flexible meter, but it is still always within the range of a correct exposure.
Related articles
Well-exposed photos in all conditions
Which exposure for which photography genre?
Taking photos without light
10 tips for smart supplementary lighting
Available light in portrait photography
Controlling light with a reportage flash
19 tips on writing with light
About the author
Michelle Peeters is fotografe en oprichter van DeuxBleus Fotografie. Michelle herkent het bijzondere in het gewone en het gewone in het bijzondere. Ze heeft zich nooit willen specialiseren en is daardoor van alle markten thuis.
You might also like
-
 From dining table to winter wonderland
by Rob Zwart
-
 Watch: Canon Talks at Home
by Michelle Peeters
-
 A high ISO value? Or corrected underexposure?
by Nando Harmsen
-
 The Nikon Z fc. Does the vintage look add value?
by Nando Harmsen
-
 The challenges of publishing your own photobook
by Elja Trum
14 comments
-

-
 guest wrote on Tuesday 24 March 2020 at 14:42 | reply
Nice article... learned something again.... thank you
Translated from Dutch. -

 Michelle Peeters wrote on Tuesday 24 March 2020 at 15:23
| reply
Michelle Peeters wrote on Tuesday 24 March 2020 at 15:23
| reply
Thank you all!
Translated from Dutch. -
Filip Wieme wrote on Tuesday 24 March 2020 at 17:43 | reply
In that photo with the windmills (Kinderdijk?), shouldn't the 2nd option be 1/1250 instead of 250?
Translated from Dutch. -
Michelle Peeters wrote on Tuesday 24 March 2020 at 17:51
| reply
@Filip: yes you're right! From f/8.0 to f/11 is only 1 full stop, I thought it was 3. I'll adjust it. Very observant and you understood it correctly!
Translated from Dutch. -
 kris wrote on Tuesday 24 March 2020 at 22:04 | reply
cloudy versus clear:
Translated from Dutch.
typo? 1/12 should be 1/120? -
Michelle Peeters wrote on Tuesday 24 March 2020 at 23:42
| reply
@Kris: correct, good catch, I've adjusted it!
Translated from Dutch. -
 berten wrote on Wednesday 25 March 2020 at 10:53 | reply
For the photo with the windmills, shouldn't the first option be
Translated from Dutch.
ISO 100, 1/250, f/8.0 and the second 1/125, f/11 ? -
 osten wrote on Wednesday 25 March 2020 at 11:25 | reply
Very interesting
Translated from Dutch. -
Michelle Peeters wrote on Wednesday 25 March 2020 at 13:26
| reply
@Barten: the photo was taken at ISO 100 with f/8.0 and 1/2,500, you can also find this in the EXIF data. The 2nd option (which would also have been possible if you had stopped down the aperture by 1 full stop to f/11) would then result in half the shutter speed of 1/2,500, which is 1/1,250 second (which is 2x as slow as compensation for the smaller aperture).
Translated from Dutch. -
berten wrote on Thursday 26 March 2020 at 10:22 | reply
What I don't quite understand about the photo with the windmills is that it says EV-14 and when I look at the table it says f/8.0, 1/250 for ev-14
Translated from Dutch. -
Michelle Peeters wrote on Thursday 26 March 2020 at 11:33
| reply
@berten: good catch! This can only mean that my iso value at the time of taking the photo must have been higher than 100. I couldn't find this in the exif info, though. But don't get too fixated on the values in that table, okay, this article is only meant to indicate that it can be a rough guideline to know/check whether your exposure was correct. A sort of health check. And it also works really well for your understanding of the exposure triangle!
Translated from Dutch. -
 Rob Gipman wrote on Saturday 28 March 2020 at 13:23 | reply
Nice and useful, so if I understand correctly I don't need to worry that my DIY light meter has a 7 and the Gossen is just a little lower https://flic.kr/p/2iHuVCx
Translated from Dutch. -
Michelle Peeters wrote on Saturday 28 March 2020 at 17:08
| reply
@Rob: what exactly is the gossen?
Translated from Dutch.
Have your say
Please note: Articles older than a week can only be commented on by signed-in visitors.Would you still like to comment? sign in or create a free account.
Become a better photographer every week
A practical photography tip in your inbox every week.
39,024 photography enthusiasts already receive the tips! More about the weekly mail. Or keep up to date via  Facebook.

Elja Trum
Photofacts; everything to do with photography!
Would you like to take better photos and keep up with what is happening in photography? Photofacts publishes articles that teach you something about photography — from a product announcement to a practical shooting tip or a look at a website. Photofacts covers photography every day and is a hobby project of Elja Trum's that got out of hand. The articles are written by a team of volunteer authors. If you would enjoy writing one or more articles for Photofacts, do get in touch.More about PhotofactsPhotofacts is made possible in part by
