

The inverse square law in photography.
Saturday 8 August 2026, 18:18 by Frank Doorhof | 1,711 views | 8 commentsThis article was translated from Dutch with the help of AI. Read the original.
If there is one photography subject that clears a room faster than talking about taxes, it is the inverse square law.
The funny thing is that it is also one of the most important concepts to understand if you really want to control your light, your flash light and your studio photography.
Unfortunately, it is also one of the worst-explained subjects online.
You have probably seen the videos: someone places a light source one metre from the model and says: “If you move the light to two metres, you lose two stops of light because of the inverse square law.” Technically, that is correct, but many photographers then think that the inverse square law is only a formula for losing light over distance.
That is like saying that a Ferrari is only useful for bringing your shopping home. You completely miss what it is really about.

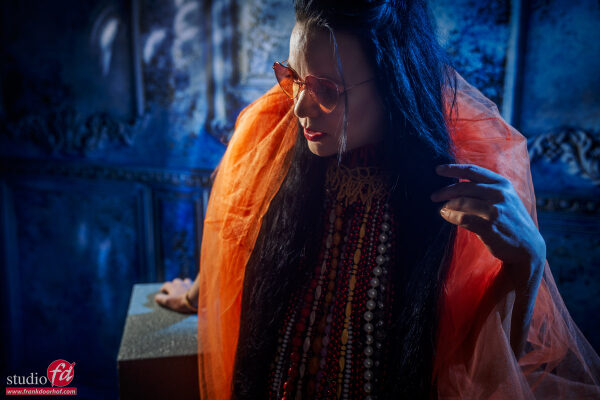
Inverse square law - f/5.6, 1/125s, 200 ISO @ 70mm
The rule is not about losing light
The inverse square law states that when you double the distance from a light source, the light intensity is only a quarter of what it was. That sounds frightening, mathematical and like something you would immediately forget after an exam.
But the real magic is not in the light loss itself. The real magic lies in understanding how quickly light falls off between different parts of your scene. That is where control comes from.
A simple example of light fall-off
Imagine you are photographing a model. Your light is one metre from her face. The background behind her is two metres from the light source. Because of the inverse square law, the background receives only a fraction of the light falling on her face. The result: a lovely dark background, without Photoshop.
Now move the same light four metres away. The model is then four metres from the light source and the background is five metres from the light source. Of course, you need to meter the light again. But suddenly, the difference between the model and the background is much smaller. The background becomes considerably lighter and the light looks much more even.
The same flash. The same power. A completely different look. This is exactly where many online explanations of the inverse square law stop far too soon.
The biggest misconception about flash light
Many photographers think: “Light close by means more power.” And although your exposure does indeed increase when you move the light closer, that is not the interesting part. Light close by mainly means faster light fall-off. That is the important thing.
You can always adjust the power using your flash settings. You cannot adjust the behaviour of the light fall-off. If I place a softbox very close to a model, I do not do that because I want more brightness. I do it because I like the fast transition from light to dark.
And if you think there is too little light falling on your background, you can correct that very easily by adjusting the relationship between the model, the background and the main light, if you have a good understanding of the inverse square law. The control you gain is enormous.
Why fashion photographers and portrait photographers need to understand this
In fashion photography, beauty photography, portrait photography and studio photography, understanding light fall-off can save you an enormous amount of post-processing.
Do you want a dark background? Move the light closer.
Do you want the body and face to have roughly the same exposure? Move the light further away.
Do you want dramatic shadow transitions? Move closer.
Do you want consistent exposure in a group photo? Move the light further away.
See the difference? We are not talking about flash power.
We are talking about light placement.
And light placement is everything.
The aha moment
Years ago, during a workshop, I asked why participants thought their backgrounds were lighter than expected. The answers were predictable: “My flash is set too high”, “I need different light modifiers”, or “I need to lower my exposure.” No. The light was simply too far away.
Five minutes later, we moved the modifier much closer. The background became darker, the image gained more depth and everyone looked at the monitor as if a magic trick had just been explained. That moment is always wonderful to see.
Why the inverse square law is important for creative lighting
The inverse square law is not a boring principle of physics that is only important to technicians. It is one of the foundations of creative lighting.
It determines how quickly shadows transition, how light or dark your background becomes, how much separation is created between your subject and its surroundings, how dramatic or flat your lighting setup looks and how much control you really have over your scene.
Once you understand this, you stop fighting your light. You start using it deliberately. And that is exactly where photography becomes really interesting.
To your client, it looks almost like magic.

Conclusion: from using flash to mastering light
The inverse square law is not about memorising numbers. It is about understanding behaviour.
Many online explanations focus entirely on how much light you lose when the distance changes. That is only half the story.
The real lesson is understanding how distance changes the relationship between your subject, your background and every other element in the image. Master that, and exposure suddenly becomes much less mysterious.
So stop thinking only about how much light you lose. Start thinking about where the light falls. Then you move from using a flash to controlling light, and become a true master of light.
You can already visualise your final result before taking the photo. More importantly, you learn to read other photographers’ images and recreate them on the spot.
About the author
Frank Doorhof blogt dagelijks in het Engels op zijn website en geeft wekelijks workshops model fotografie in zijn studio in Emmeloord, maar ook op locatie in binnen en buitenland. Van beginners tot gevorderde, iedereen kan bij Frank terecht. Ook voor specifieke 1 op 1 workshops, of maatwerk voor groepen.
You might also like
-
 Flash photography tip: Forget the inverse square law
by Elja Trum
-
 Recreating a Room in Your Studio
by Elja Trum
-
 5 Tips for Variety in the (Home) Studio
by Elja Trum
-
 Flash photography tip: Create your own home studio
by Elja Trum


8 comments
-
 Rob Zwart wrote on Monday 10 August 2026 at 11:57 | reply
Quick question: if you haven't adjusted your camera settings in a new situation, everything gets darker, right? So you first have to adjust the aperture or increase the ISO, right? Is that what you mean by measuring the light again?
Translated from Dutch. -
 Frank Doorhof wrote on Monday 10 August 2026 at 15:21 | reply
Measuring again indeed means either adjusting the flashes or aperture/ISO.
Translated from Dutch.
Not the shutter speed because the flash is a pulse and not cumulative. -
 Kees Jan wrote on Tuesday 11 August 2026 at 11:52 | reply
At the beginning of the story I thought oh dear here we go again.. but luckily finally someone who explains the whole story properly. I also almost let my models crawl into my 150 cm octabox (glare one... not the Godox one, those have color deviation!).
Translated from Dutch.
Or for more dramatic skin (nice wrinkles), one of 45 cm. The transition from light to dark is super cool and... super important... NO HOTSPOTS! -

 frank doorhof
wrote on Tuesday 11 August 2026 at 17:02
| reply
frank doorhof
wrote on Tuesday 11 August 2026 at 17:02
| reply
Thank you :D
Translated from Dutch. -
 Paul van Aken wrote on Tuesday 11 August 2026 at 12:21 | reply
Although I rarely work with artificial light or flashes anymore, I do find it a very clear piece.
Translated from Dutch.
Wonderfully explained why this is such an important fact. -
frank doorhof
wrote on Tuesday 11 August 2026 at 17:02
| reply
Thank you
Translated from Dutch. -
 Liesbeth Verkade wrote on Tuesday 11 August 2026 at 13:06 | reply
I'm not a math whiz at all. I lose track with a lot of the technical explanations, but this piece is written very clearly and suddenly I understand a number of things. One more question, though. Your article is about working with light in the studio. But I can also imagine that it works the same way on a sunny day in a place with lots of shadows. Then not moving the light closer or farther away, but you yourself as the photographer closer to the subject or farther away. Is that right or have I still not quite understood?
Translated from Dutch. -
frank doorhof
wrote on Tuesday 11 August 2026 at 17:08
| reply
Almost, but not quite.
Translated from Dutch.
In terms of light, the relationship between light source, subject and background is important. If you want to do something with shadows outside, you can only change the relationship between model and background, but because the sun is so incredibly far away, this will make no difference to the quality.
What does happen, of course, is that the shadow falls on the background in a different way. I sometimes call this the DEXTER RULE.
The serial killer/blood specialist.
Follow the lines in a scene and the scene tells the story. The same applies to light, draw lines in your mind from your light source to your subject and you can predict where they fall on the background. Because of the distance of the sun, you can move the shadow in terms of height (model away from the background), but not in terms of quality. If you do want that, there is a simple solution.
You have to create a new light source. This seems difficult but in fact you could use a translucent reflector. Since this is now your new light source, you can now play with the relationship between light source, subject and background. After all, the reflector is now the light source.
Hope this helps.
Have your say
Please note: Articles older than a week can only be commented on by signed-in visitors.Would you still like to comment? sign in or create a free account.
Become a better photographer every week
A practical photography tip in your inbox every week.
39,079 photography enthusiasts already receive the tips! More about the weekly mail. Or keep up to date via  Facebook.

Elja Trum
Photofacts; everything to do with photography!
Would you like to take better photos and keep up with what is happening in photography? Photofacts publishes articles that teach you something about photography — from a product announcement to a practical shooting tip or a look at a website. Photofacts covers photography every day and is a hobby project of Elja Trum's that got out of hand. The articles are written by a team of volunteer authors. If you would enjoy writing one or more articles for Photofacts, do get in touch.More about PhotofactsPhotofacts is made possible in part by
