

5 Tips for Variety in the (Home) Studio
Friday 3 October 2025, 12:24 by Elja Trum | 2,485 views | 0 commentsThis article was translated from Dutch with the help of AI. Read the original.
When you think of studio photography, you might picture a standard portrait against a white or black background. But there is much more you can do in a studio. And that can just as easily be a home studio.
Make use of props
Props are movable objects that you add to your image alongside your model and background. For example, a musical instrument, a book or a box to sit on.
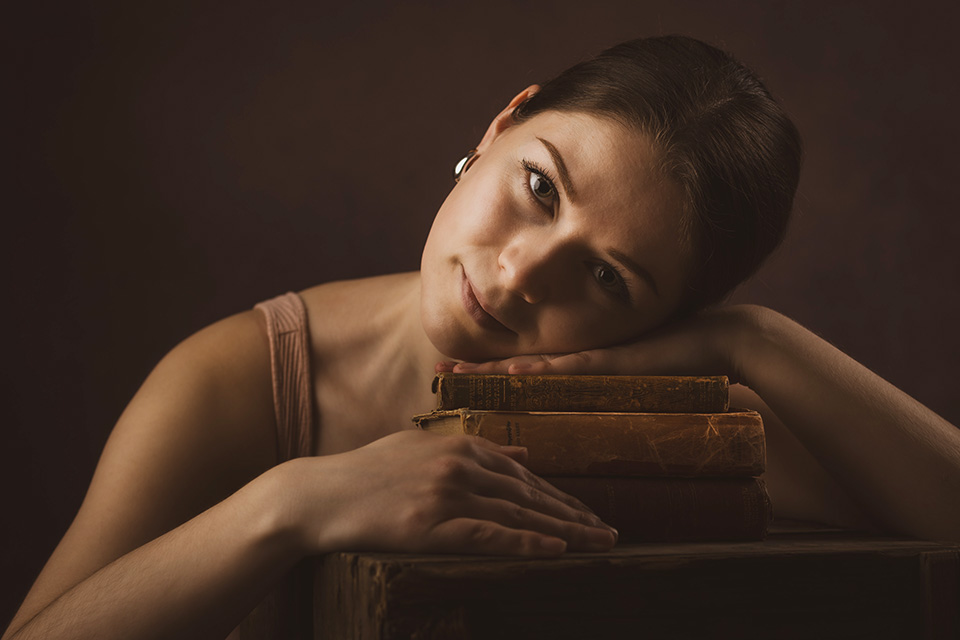
A prop gives the image a bit more to look at and can contribute to the story you want to tell. Another useful thing is that a prop gives your model something to do. This quickly gives you more natural-looking photos instead of very posed photos,
Use a few strips of wallpaper in the background
For some variety in your background, it can be fun to buy a few rolls of wallpaper, perhaps with different designs. Use double-sided tape to stick them to a wall and place your model in front of it. A few strips of wallpaper are usually more than enough.
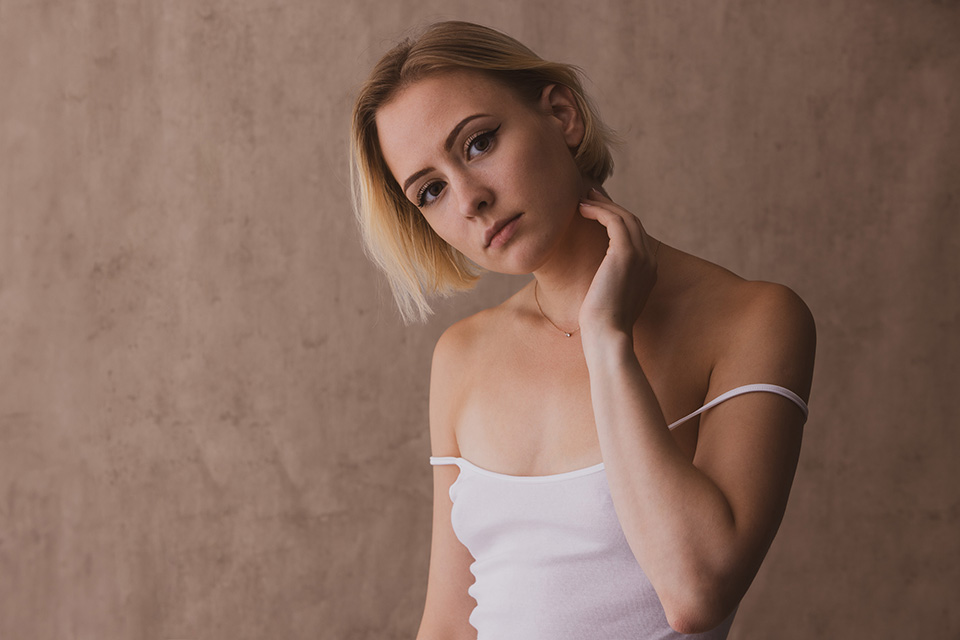
The double-sided tape makes the wallpaper easy to remove and replace with a new design, for example.
Create a 'room'
If you work in a home studio, it is of course easier to use an existing room, but it can also be great fun to create a room in a studio. It does not have to be very elaborate.
Using the wallpaper from the previous tip, a few curtains and a sofa bed, I recreated this bedroom in my studio, for example.
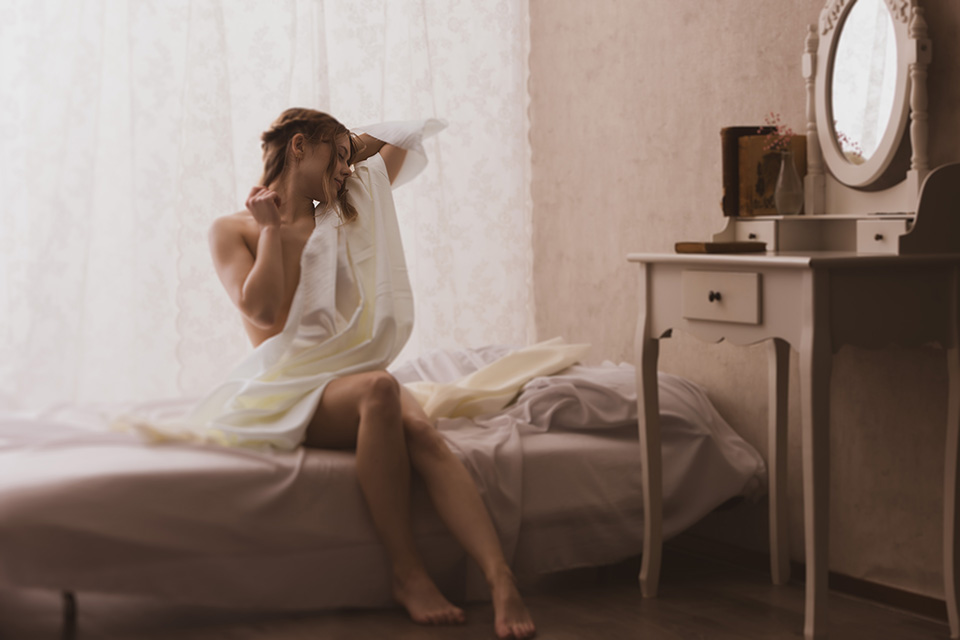
I let the flash light fall indirectly through the curtains. This gives me lovely soft light and makes it look realistic, like a bedroom window.
Make it rain
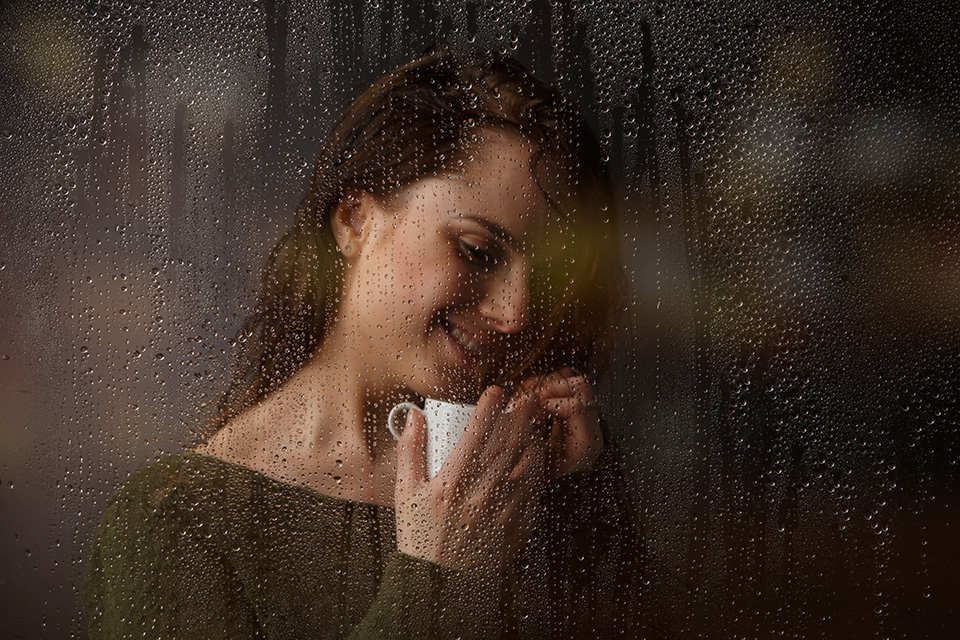
It is rainy outside today, so it might be fun to bring that feeling into your studio too. With a sheet of perspex and a plant mister, you can turn any space into a drizzly day, even when the sun is shining outside.
Add smoke and colour filters
By adding smoke and colour to your studio, you can create unusual photos. Colour filters are inexpensive and you can attach them in front of your flashes with a piece of tape. Do not let them touch the modelling light, as it gets very hot.
A smoke machine is affordable too, and the smoke fluid will probably last you for years. In my view, it is well worth buying for the great effects you can create with it.
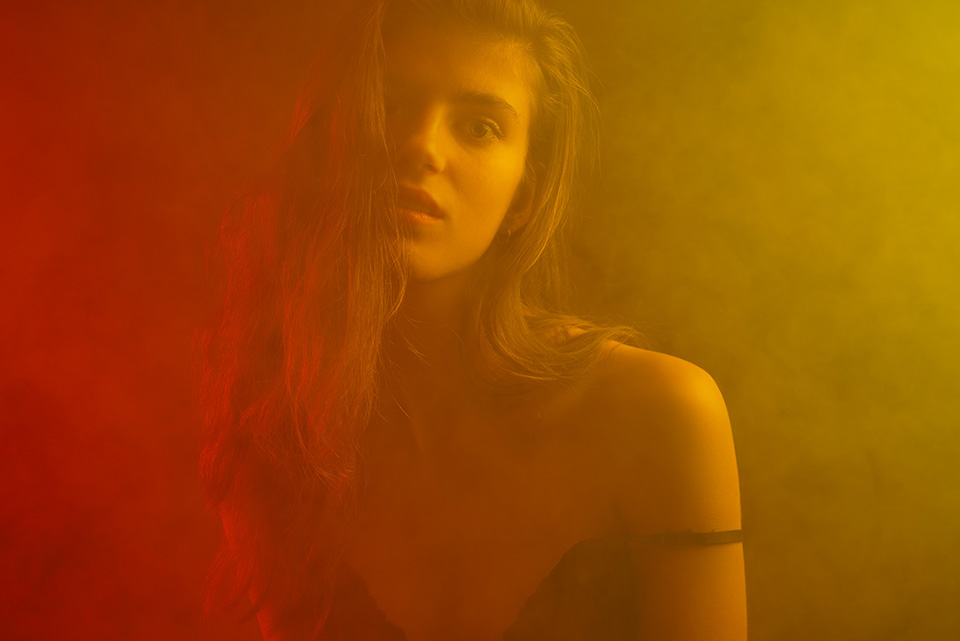
Use the smoke machine to place the smoke behind your model and in front of your flashes. That often works best, but do experiment with smoke and flash light coming from several directions too.
Fancy trying it out in the studio?
Do you have little or no studio experience? Then doing a studio shoot, even at home, can be difficult. Where do you start? Which settings should you use, and how do you actually find a model?
Sound familiar? Then why not join my Portrait Photography in the Studio Workshop.
With my help, you will work in the Photofacts studio, where all the photos in this article were taken. In one day, you will discover how to take beautiful studio photos yourself, including in your own home studio with affordable equipment.
About the author
Elja Trum is the founder of Photofacts and online photography course website Photofacts Academy. He has been writing about photography since 2006. Elja is also the author of (Dutch) books on composition, black-and-white photography, flash photography and portrait photography.
You might also like
-
 Recreating a Room in Your Studio
by Elja Trum
-
 Flash photography tip: Create your own home studio
by Elja Trum
-
 Studio photos with natural light in a garage
by Elja Trum
-
 Switching to the Mac Studio or not? Part 2
by Nando Harmsen
-
 From dining table to winter wonderland
by Rob Zwart
-
 Inspiration: Portraits in the Studio
by Elja Trum
0 comments
Be the first to share what you think!
Have your say
Please note: Articles older than a week can only be commented on by signed-in visitors.Would you still like to comment? sign in or create a free account.
Become a better photographer every week
A practical photography tip in your inbox every week.
39,079 photography enthusiasts already receive the tips! More about the weekly mail. Or keep up to date via  Facebook.

Elja Trum
Photofacts; everything to do with photography!
Would you like to take better photos and keep up with what is happening in photography? Photofacts publishes articles that teach you something about photography — from a product announcement to a practical shooting tip or a look at a website. Photofacts covers photography every day and is a hobby project of Elja Trum's that got out of hand. The articles are written by a team of volunteer authors. If you would enjoy writing one or more articles for Photofacts, do get in touch.More about PhotofactsPhotofacts is made possible in part by
