

Review: Location Shooting Tutorials Package (Joel Grimes)
Saturday 14 October 2017, 10:10 by Michelle Peeters | 5,656 views | 1 commentThis article was translated from Dutch with the help of AI. Read the original.
If you don't yet have the skills to take portraits on location, this is a good online workshop to follow.
In this series, one of the products in the '5DayDeal' package, Joel Grimes shows you step by step which equipment you can use and how to use it in every kind of light.
You might like to know that Joel also has a really enjoyable course on Photofacts Academy about motorcycle compositing!
1. Advertising Lifestyle Portrait
In the first video, Advertising Lifestyle Portrait, he shows on location in Anaconda, Montana, how he photographs a model as he would for a lifestyle shoot, such as for a magazine.
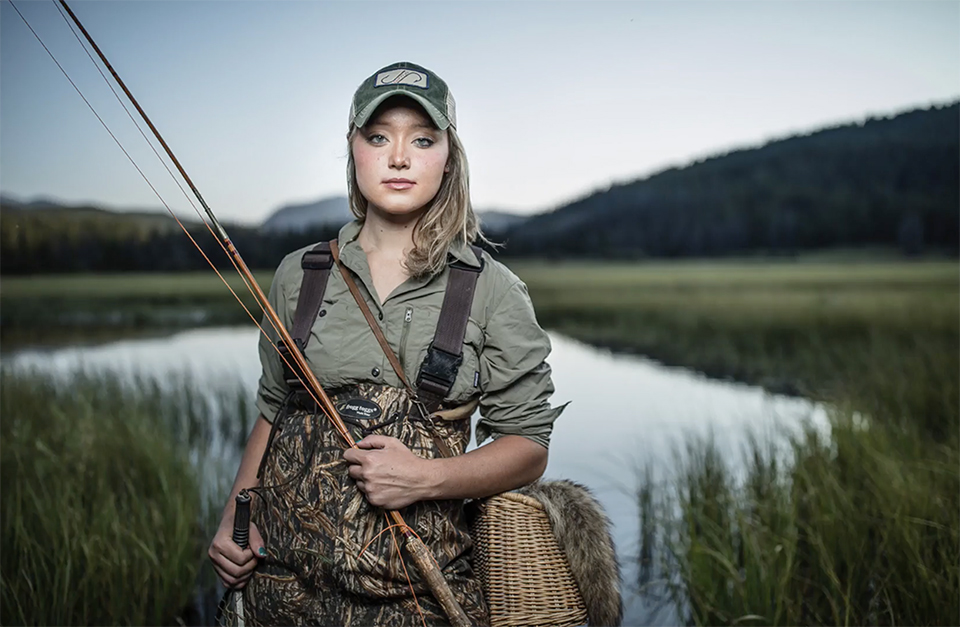
He has dressed his model in fishing gear, complete with rubber waders so she can easily stand in deep water.
He shows three different lighting setups:
- With natural light, without any aids
- Using a reflector
- With a Canon Speedlite 600EX flash and Westcott travel beauty dish modifier on a stand
He explains that the most beautiful light always comes from above at an angle, as this is the most flattering. The larger the light source, the softer the light. He also shows some composition techniques and warns against letting the horizon run through the eyes.
He spends most of his time on the third lighting setup, which is naturally also the most complicated. He demonstrates the effects of a wide aperture, f/1.4, with a 35mm wide-angle lens, and later a 70-200mm lens, using fast shutter speeds to keep the background dark and out of focus because of the wide aperture.
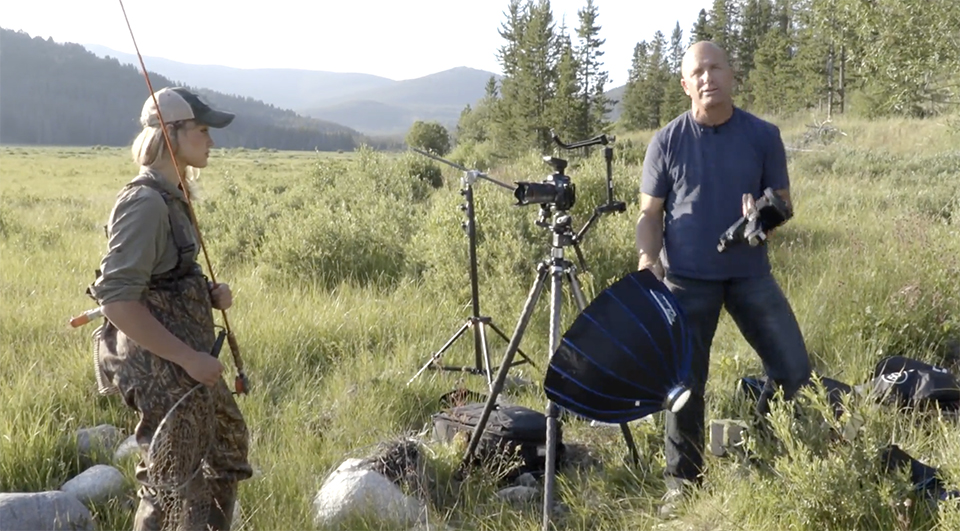
He also uses neutral density filters, from 3 to 6 stops, to make the background darker, making the model, who is lit with flash from a short distance, really stand out.
I thought the quality was very good. The level is quite high. He explains all the techniques, but everything moves at a fast pace. So you do need to know what he is doing and understand the possibilities in theory.
The course is suitable for the more advanced portrait photographer who enjoys photographing on location or who sometimes has to take on assignments for fashion or other lifestyle magazines.
2. Portrait Photography On Location
In the second video, Portrait Photography On Location, he shows a number of lighting techniques on location, as well as his workflow for post-processing:
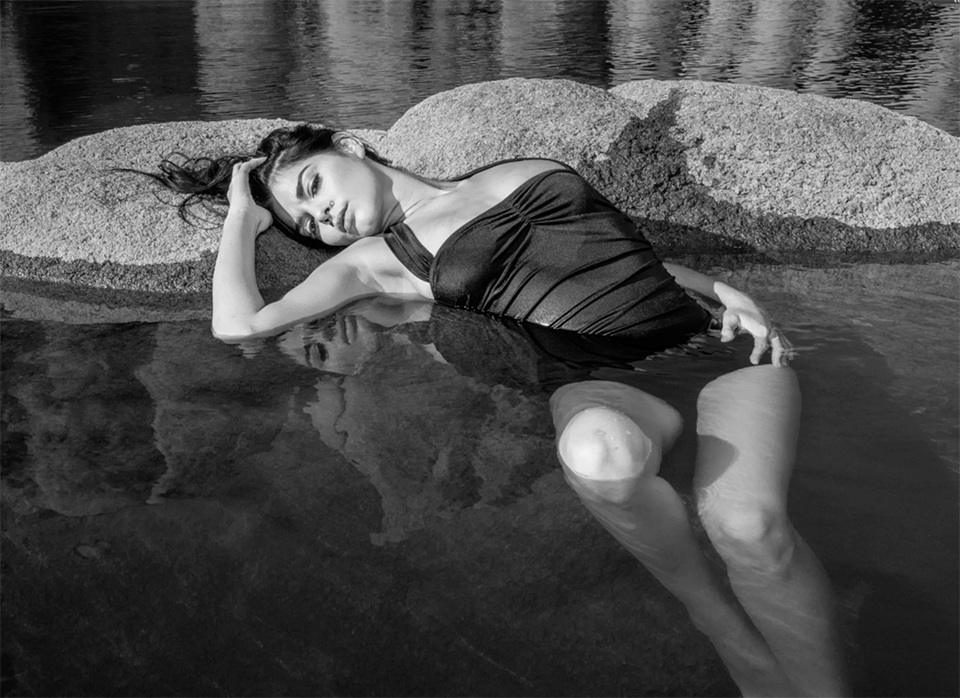
- Competing with the sun, so how can you use flash with a lot of available light without overexposing your photo
- How can you photograph with a wide aperture in bright light, so you get a shallow depth of field, which looks good in portraits
- Using neutral density filters, or ND filters
- Using a single light source with a modifier, how to position it in relation to your model to get the light as soft and natural as possible. He often places it just above the camera
- One light source at an angle above your model, the classic portrait lighting that is actually the most beautiful
- How do you create huge files by taking multiple shots of your model with a wide-angle lens while still retaining a very shallow depth of field, a lens perspective that does not really exist, and how do you stitch them together during post-processing?
- Using three light sources, one overhead light as the main light and two lights at the sides.
He emphasises that location shoots are far from easy because you face many unpredictable challenges.
He therefore spends a lot of time on the equipment he uses himself, such as some very sturdy stands with ball heads and sliders, and horizontal tubes that allow him to move the light, usually a single Einstein flash with a Westcott octabox modifier, forwards and backwards.
He usually uses three different lenses: a 24-70mm, 70-200mm and a 24mm tilt-shift lens. He also makes extensive use of ND filters, which block 2, 6 or 10 stops of light, so he can photograph with a wide aperture during the day, with lots of available light, while retaining a shallow depth of field.
Joel explains that he shoots most of his photos, including portraits, in bracketing mode, taking an underexposed, a neutral and an overexposed shot, after which he processes them as a 32-bit HDR image and then saves them again as a 16-bit file.
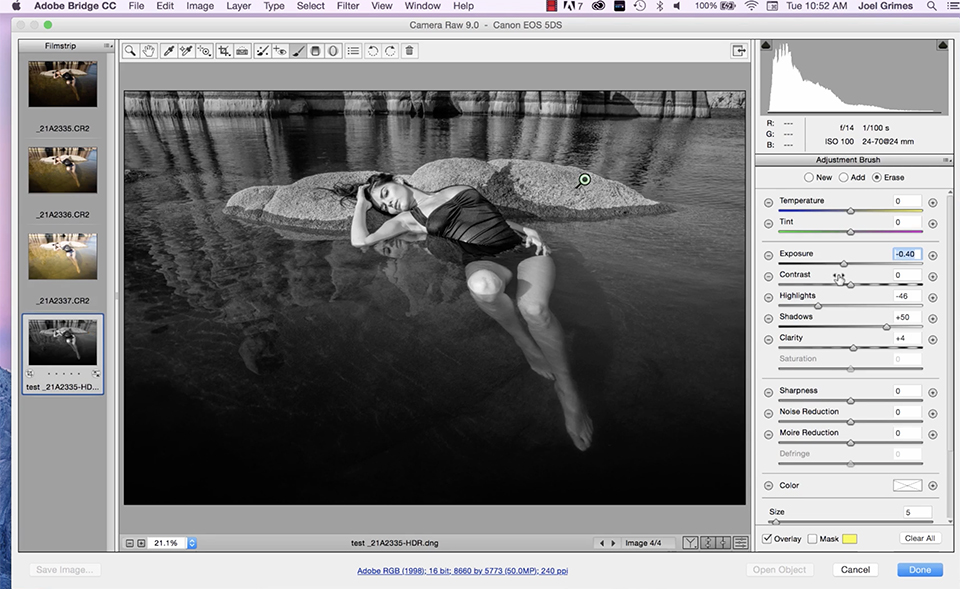
He demonstrates the huge benefits of working this way, the high level of detail in your photos and the soft transitions and shadows.
He demonstrates the entire post-processing process, his own workflow, in great detail. I learned quite a lot from it, especially from the way he creates masks and then selectively adjusts levels, dodges and burns, and removes overexposed and unwanted areas.
The Liquify tool was also new to me. He showed how to use it to make legs and arms a little slimmer and reduce some of the less attractive side effects of a wide-angle lens.
What did I think?
I found the courses easy to follow, but I can imagine that things may move quite quickly for a beginner photographer and photo editor. The advantage of watching online is, of course, that you can go back to a scene that may have gone a little too quickly and watch it again.
Joel is clearly a very experienced photographer and teacher. He describes difficult challenges well and offers clear solutions. He presents it in a very enthusiastic way, which makes you want to try it yourself.
His photos, which he regularly shows during behind-the-scenes footage, challenge you to try photographing on location instead of always working in a studio. Recommended!
5DayDeal
Would you like to take Joel's course too? It is part of the 5DayDeal offer. During this five-day promotion, which runs until Wednesday 18 October 2017 at 9:00 pm, you can buy a complete package of courses for 117 dollars. See a complete overview here.
» Buy 5DayDeal directly
Photofacts receives a fee if you buy 5DayDeal through the link above. This does not cost you anything extra.
Photofacts Academy
Would you rather follow Dutch photography courses? Then take a look at Photofacts Academy. In our online learning environment, you will find more than 40 courses about photography and post-processing.
Discover all the secrets of Lightroom and Photoshop and follow courses about property photography, autumn photography, landscape photography, portrait photography and much more.
For just 109 euros, you can watch everything you want for a whole year, as often as you like. This includes a completely new photography course every month and a short photography or post-processing tip every week.
» Improve your photography with Photofacts Academy
About the author
Michelle Peeters is fotografe en oprichter van DeuxBleus Fotografie. Michelle herkent het bijzondere in het gewone en het gewone in het bijzondere. Ze heeft zich nooit willen specialiseren en is daardoor van alle markten thuis.
You might also like
-
 Review: Shift Art: 50 Photoshop tutorials
by Michelle Peeters
-
 Review: Black and White Presets for Lightroom (Piet van den Eynde)
by Michelle Peeters
-
 Review: Shooting Portraits Like a Pro (Phil Steele)
by Michelle Peeters
-
 Review: Chris Knight - Finding Rembrandt
by Michelle Peeters
-
 Review: e-book: Mastering Exposure by Andrew S. Gibson
by Michelle Peeters
-
 Review: Nick Page - Mastering luminosity masks
by Michelle Peeters
1 comment
-

 Hans Hebbink
wrote on Tuesday 9 January 2018 at 13:42
| reply
Joel Grimes is a speaker with a lot of charisma. He was also at the Professional Imaging trade show, where I met him in 2016. There is really so much to learn from him!
Translated from Dutch.
Have your say
Please note: Articles older than a week can only be commented on by signed-in visitors.Would you still like to comment? sign in or create a free account.
Become a better photographer every week
A practical photography tip in your inbox every week.
38,765 photography enthusiasts already receive the tips! More about the weekly mail. Or keep up to date via  Facebook.

Elja Trum
Photofacts; everything to do with photography!
Would you like to take better photos and keep up with what is happening in photography? Photofacts publishes articles that teach you something about photography — from a product announcement to a practical shooting tip or a look at a website. Photofacts covers photography every day and is a hobby project of Elja Trum's that got out of hand. The articles are written by a team of volunteer authors. If you would enjoy writing one or more articles for Photofacts, do get in touch.More about PhotofactsPhotofacts is made possible in part by
