

7 useful tips for Capture One Pro
Monday 12 July 2021, 23:23 by Heike Jasper | 8,280 views | 1 commentThis article was translated from Dutch with the help of AI. Read the original.
There are many ways to achieve a goal in Capture One Pro. I would like to show you a few hidden functions or simpler methods to get there faster.
1. Automatic corrections
If you want to make a quick automatic correction, briefly click the magic wand in the toolbar. By default, it will adjust the entire photo. However, you can also apply a correction to just one element.
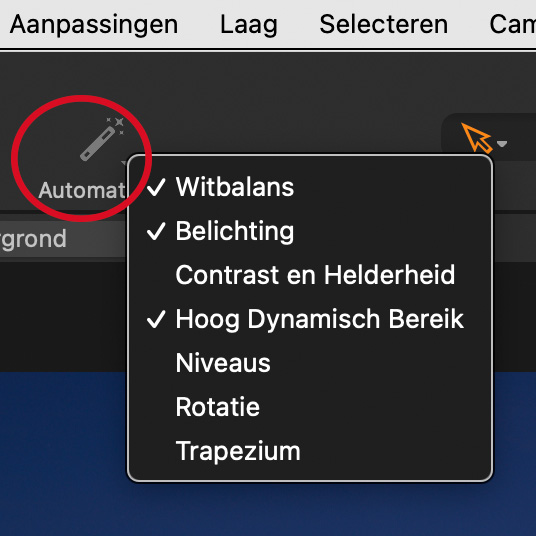
Hold down the mouse button, so press and hold the small tool icon, and you can choose from a list which functions you want to correct automatically. The ones with a tick will be corrected.
2. Before/after for a single tool
To see the effect of the tool you are using, you can switch between the before and after view. To do this, hold down the [optie/ALT] key and press and hold the small reset icon of the tool, a swirling arrow.
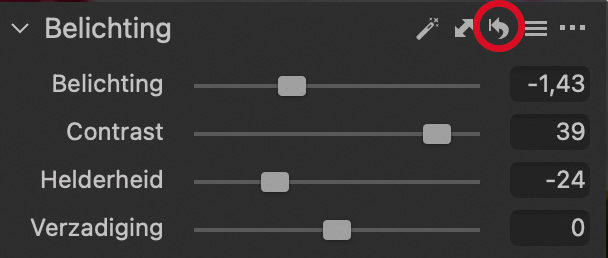
The same effect for all adjustments across the entire photo can no longer be applied using the global reset button in the top left. This now works with the Y keyboard shortcut or via the View, Before/After menu.
3. Sliders in a tool
Sliders make up most of the adjustment interface in Capture One. Although they seem simple, there are a few tricks to learn that can optimise the way you edit your images. Every slider has a before/after function. Click and hold the name of the slider to temporarily view the 'before' version.
If you place your cursor on a slider and use the scroll wheel, you move the slider. If you are working on a laptop, scrolling with the trackpad works in exactly the same way. You can reset any slider by double-clicking anywhere on it.
4. Loupe tool
With the loupe tool, keyboard shortcut: P, you can view a magnified version of a selected area of your photo in a loupe. If you press and hold the loupe tool in the centre at the top of the interface, you get several options. You can change the size of the loupe and the zoom level inside the loupe.
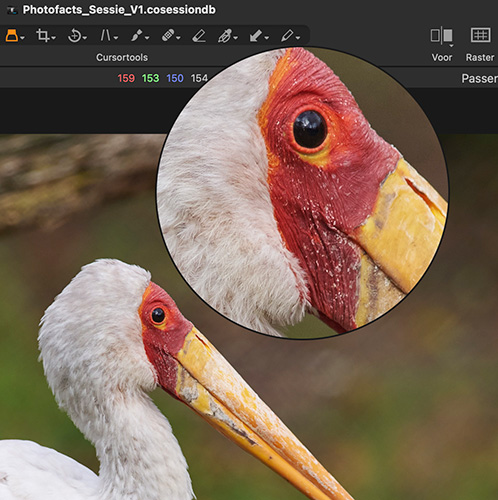
If you need a quick loupe without changing the cursor tool, press ALT + spacebar, CTRL + spacebar on a Windows computer, while holding the mouse pointer over the selected area of your image.
5. Workspace similar to Lightroom
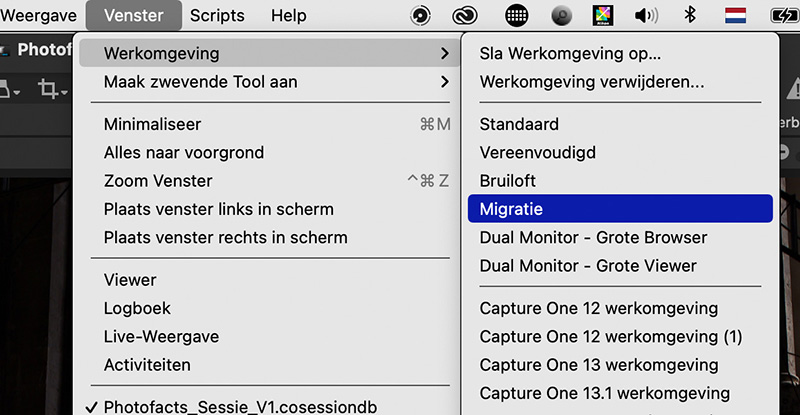
If you are used to the interface of Adobe Lightroom Classic, you can quickly change Capture One to match it by using:
Window > Workspace > Migration
After a few seconds, the panels will be on the right and the photo browser below the active photo.
6. Useful keyboard shortcuts
Too many photographers do not take the time to learn keyboard shortcuts. If you do use keyboard shortcuts, they will inevitably improve your workflow.
Here are five of my personal favourite keyboard shortcuts that make using Capture One quick, very dynamic and flexible:
[Cmd / Ctrl + +]: zoom in
[Cmd / Ctrl + -]: zoom out
[Y]: Before/After view
[V]: Switch after the arrow
[D]: Direct colour editor
[Cmd / Ctrl + Option / ALT + 1 ..2..3] : Switch between the tool tabs; 1 is Library, 2 Capture, 3 Lens and so on.
Like every keyboard shortcut in Capture One, these can also be customised:
Mac OS: Capture One 21 > Edit > Edit keyboard shortcuts...
Windows: Edit > Edit shortcuts...
7. Viewer background brightness
Sometimes you want to see your images with a lighter background than the standard dark grey. This is easy to do via Preferences > Appearance > Viewer > Colour.
For example, you can switch to white to get an improved visual evaluation process, as some images will be used on websites with a white background.
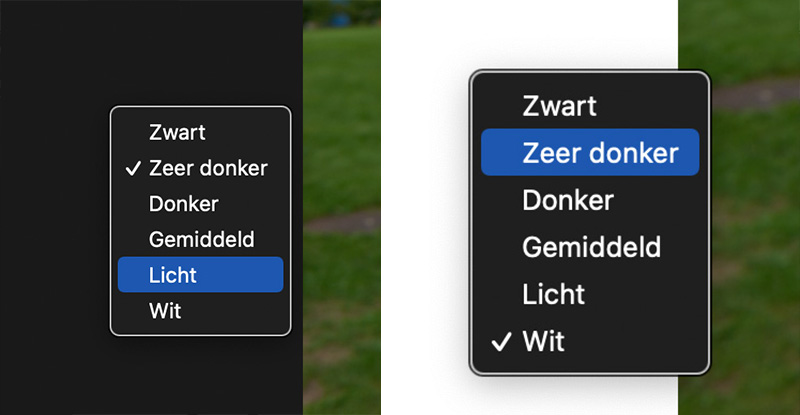
A quick alternative is to right-click in the viewer and select the desired background colour from the list.
More Capture One Pro tips?
Then check out my Getting started with Capture One course at Photofacts Academy.
About the author
Heike Jasper is bekend van haar boeken over de Nikon camera's. Ook kun je haar kennen van haar trainingen en lezingen. Een veel voorkomend onderwerp is Capture One.
You might also like
-
 Review: LRTimelapse Pro Timer 3 for timelapse photography
by Nando Harmsen
-
 Editing photos with the Apple Vision Pro
by Elja Trum
-
 7 Tips for Landscape Photography
by Elja Trum
-
 7 photography tips for rainy days
by Elja Trum
-
 7 reasons to choose Capture One instead of Lightroom, plus a bonus for Sony users
by Antonette de Groot

1 comment
-
 henk wrote on Tuesday 13 July 2021 at 19:00 | reply
i've read it, but i need to read it several times and immediately put it into practice. so that will take some time, but it seems very interesting to me
Translated from Dutch.
Have your say
Please note: Articles older than a week can only be commented on by signed-in visitors.Would you still like to comment? sign in or create a free account.
Become a better photographer every week
A practical photography tip in your inbox every week.
39,083 photography enthusiasts already receive the tips! More about the weekly mail. Or keep up to date via  Facebook.

Elja Trum
Photofacts; everything to do with photography!
Would you like to take better photos and keep up with what is happening in photography? Photofacts publishes articles that teach you something about photography — from a product announcement to a practical shooting tip or a look at a website. Photofacts covers photography every day and is a hobby project of Elja Trum's that got out of hand. The articles are written by a team of volunteer authors. If you would enjoy writing one or more articles for Photofacts, do get in touch.More about PhotofactsPhotofacts is made possible in part by
