

Review: Joopic Cambuddy Pro
Friday 14 April 2017, 15:51 by Michelle Peeters | 9,686 views | 11 commentsThis article was translated from Dutch with the help of AI. Read the original.
The Joopic Cambuddy Pro connects your camera to your smartphone. This lets you control your camera remotely with ease. The system works with many Canon and Nikon DSLRs, and also supports quite a few mirrorless cameras.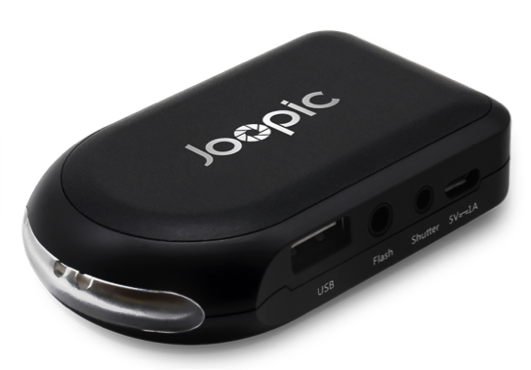
The Joopic Cambuddy Pro
You control the Joopic Cambuddy Pro using an app that is available free of charge for iPhone and Android smartphones.
From a distance of around thirty metres, you can adjust a large number of camera settings using your phone. With the help of live view, you can set the focus using your phone. Photos you take are immediately available on your phone.
Timelapse and plenty of creative possibilities
The interval function of the CamBuddy Pro lets you get started with timelapse photography. You can easily adjust the number of shots, interval and delay time. You can quickly review the photos you have taken and create a timelapse video.
Four sensors
The compact and lightweight Smart Controller is equipped with four sensors: sound, light, laser and radio, as well as a built-in radio transmitter. This gives you plenty of creative possibilities.
With sound-triggered shooting, the camera automatically takes a photo when a certain sound level is detected. Lightning-triggered shooting makes the camera take a photo as soon as it detects a flash of lightning.
With laser-triggered shooting, a photo is taken as soon as a subject interrupts a laser beam aimed at the CamBuddy. This is useful, for example, when photographing wildlife. You can use the optional Joopic Laser Generator for this.
Features of the Joopic CamBuddy Pro:
- Control your camera with your smartphone via a free app
- Range of up to 30 metres
- With live view
- Set the focus on your smartphone screen
- Includes an interval function for timelapse photography
- Four sensors for creative photography
- Equipped with a built-in radio transmitter
- Internal, rechargeable 1000 milliamp-hour (mAh) lithium battery
- Battery lasts for four hours of continuous operation
- Dimensions are 8.1 x 5.1 x 2.5 centimetres
- The Smart Controller weighs 58 grams
Test environment:
I tested the Cambuddy with an iPhone 7 running iOS 10.2.1 and the Joopic app (version 2.0.12). The camera I used was my Canon 5D Mark II. I also used my iMac (running macOS Sierra 10.12.3) together with the Joopic (version 1.0) software.
Joopic app
To use the Joopic app, you first have to register. The iPhone Joopic app then needs to be paired with the Cambuddy Pro. The pairing process takes place via the phone's Bluetooth connection. After pairing, the connection uses the phone's Wi-Fi connection.
It is possible and useful to set up the Wi-Fi connection using a repeater function, so that you retain your internet connection when the Cambuddy Pro is connected to your phone.
The Cambuddy Pro connects to your camera using the USB cable supplied with the camera. These cables are not supplied with the Cambuddy Pro.
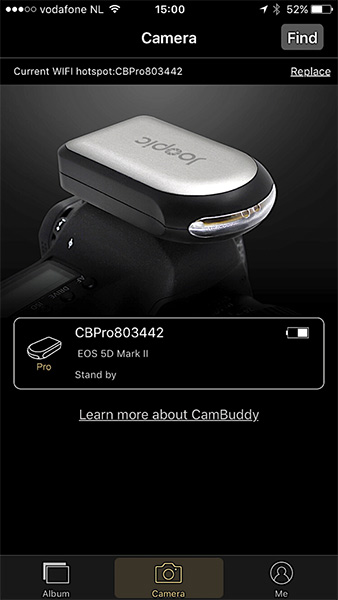
Using the camera USB connection
You can download the installation software via joobot.com. After installation, register using the same login details you used earlier on your iPhone. Then create a Wi-Fi connection with your Cambuddy Pro.
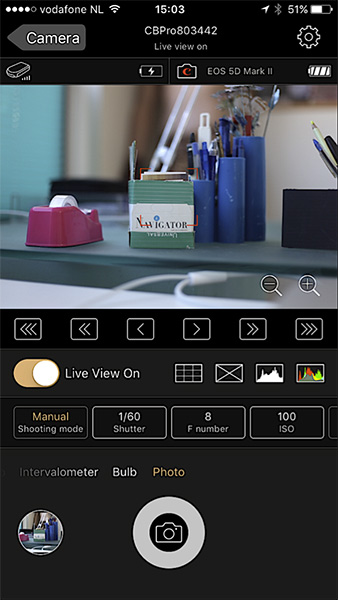
Connecting the camera and Cambuddy Pro via USB
Use the USB cable supplied with the camera to connect the camera and the Cambuddy Pro. You now have control over a wide range of camera settings via the iPhone. These include shutter speed, aperture, ISO setting, exposure compensation, white balance, drive mode, exposure meter settings and image quality, such as Raw and jpeg.
In live view mode, you can focus using your iPhone screen by tapping the correct spot on the screen.
You can choose to transfer the photos to your phone immediately. They are then saved in jpg format in a special album called 'Joopic'.
Using the 'shutter release' cable
Connect the supplied cable to the shutter input of the Cambuddy Pro and the remote control port of your camera.
In the iPhone app, you choose one of the nine available trigger options:
1. Radio triggered:
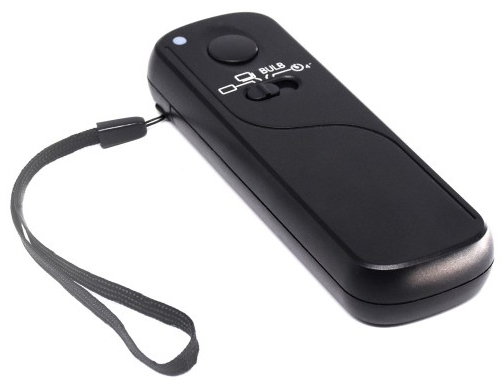
You can now trigger the camera or flash using the supplied wireless radio remote control, from up to one hundred metres away. You can choose single shot, multishot, bulb or timer, four seconds.
You can control several Cambuddy Pros at the same time. To control a flash, use the supplied flash cable.
2. Laser triggered:
With the optionally available laser, you can operate the shutter or flash as soon as the laser beam is interrupted. This can be very useful when photographing wildlife, for example.
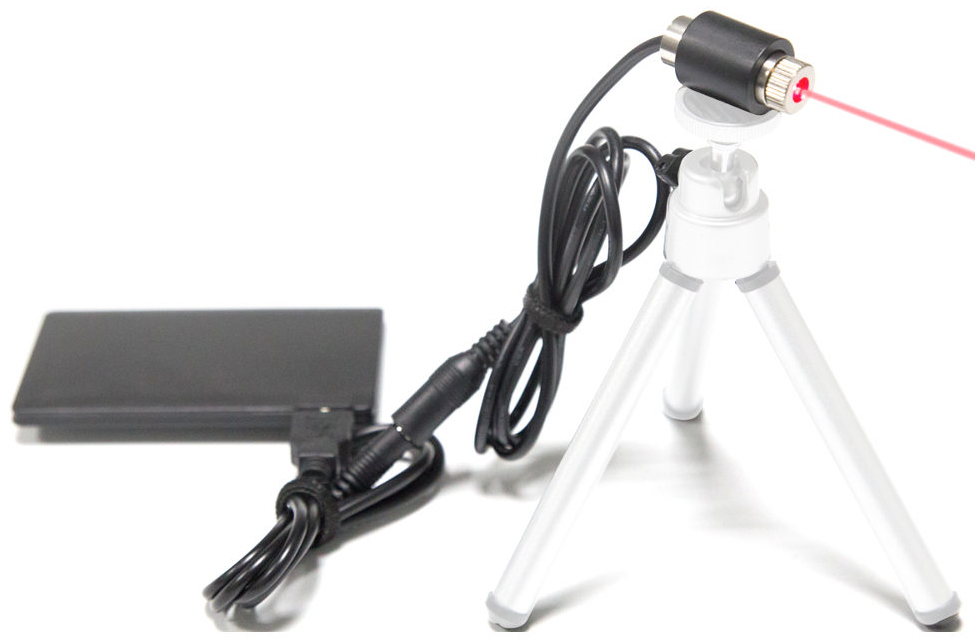
This also works when using several cameras and Cambuddy Pros. You can set a delay before the shutter is operated after the laser beam is interrupted.
3. Lightning triggered:
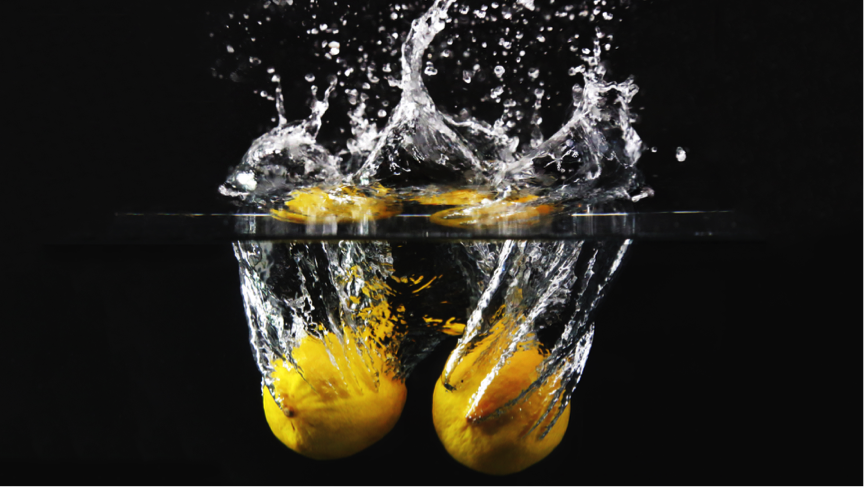
The shutter is operated immediately when the Cambuddy Pro detects a bright flash of light, such as lightning or a flash.

4. Sound triggered:
You can also operate the shutter or flash using a sound signal. You can set the sensitivity of the sound signal. The delay before the shutter is operated after detecting a sound signal can also be set, up to a maximum of thirty seconds, accurate to the millisecond.

5. Timing triggered:
In this mode, the Cambuddy Pro is used to transmit a radio signal at a set interval, which could trigger another Cambuddy Pro. I was unable to test this further.
6. Video:
When used with the Canon EOS 5D Mark II, I was unable to get the video function working without an extensive manual. At least, I couldn't get it to work.
7. Intervalmeter:
In this mode, you can operate the shutter automatically at a set interval. The interval time, the time between two shots, can be set in hours, minutes and seconds. The number of shots can be set to a maximum of 500, in increments of 5. Or to infinity.
Bulb mode can also be set for up to 24 hours. Instead of specifying a number of shots, you can also specify how long the total interval shooting period should be. For example, one hour with an interval of one minute.
8. Bulb:
To use this function, you obviously need to set the camera to Bulb mode first. The bulb triggering duration can be set to a maximum of 24 hours, 59 minutes and 60 seconds.
9. Photo:
This is a simple mode for operating the camera shutter from the iPhone screen.
Control from a computer
The Joopic software is also available for MacOS, Windows and Linux computers. However, the trigger functions are not available in that case.
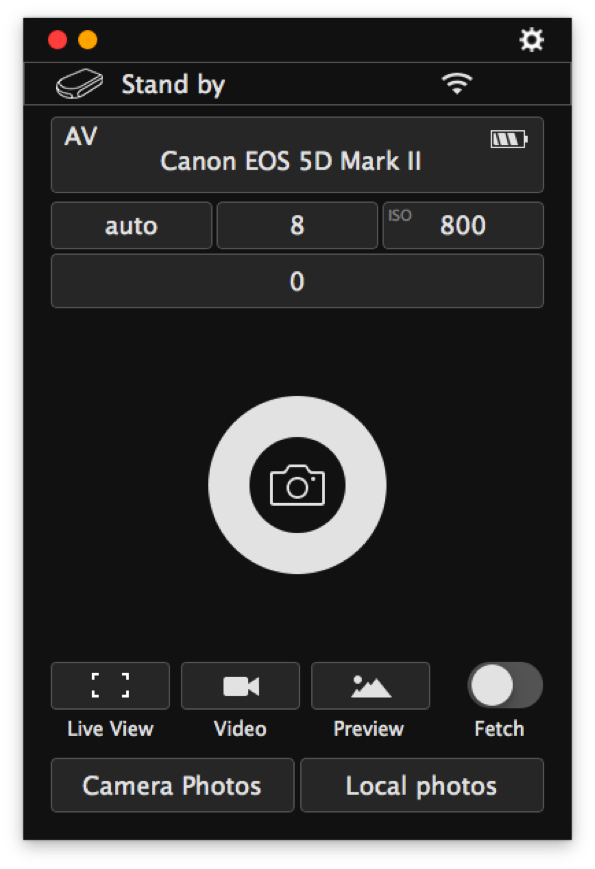
You now have similar control options to those in the iPhone app at your disposal. This includes Live View, a useful preview mode and video mode.
Photos you take are automatically copied to the computer, but only in Jpeg format and into a special folder called 'Joopic'. However, it is easy to transfer the raw files from the camera to the computer as well by selecting the 'Camera Photos' button.
The video recording also could not be saved in the iMac app.
Using multiple cameras
One of the Cambuddy Pro's special and original applications is the ability to trigger up to 128 cameras simultaneously. This can be done directly via a Wi-Fi connection, in simultaneous mode.
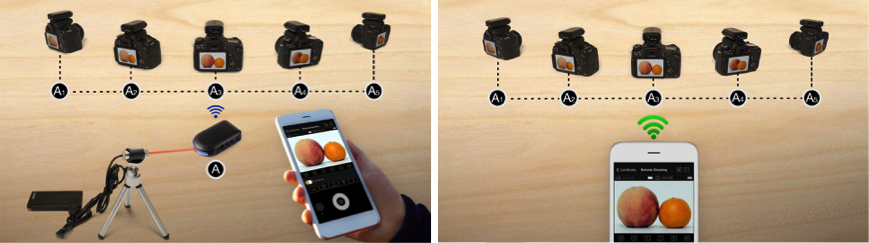
Or you can use the built-in radio transceiver of one of the Cambuddy Pros, in master-slave mode, which in turn controls all the other Cambuddy Pros.
Conclusion:
The Cambuddy Pro has great potential, with many different possible uses.
However, there are also some disadvantages. I find the lack of an extensive manual the biggest drawback. You sometimes have to puzzle things out and search for how certain functions work and exactly how the photos you take are saved.
To use the app on your smartphone or the software on your computer, you have to log in. When restarting the app or the software on the computer, you sometimes have to log in again and restore the Wi-Fi connection, and sometimes you don't.
The video mode does not seem to work properly, yet, in my test environment with the Canon 5D Mark II. A few times, I had to reset the Cambuddy Pro because, for example, it stopped responding to the laser trigger.
The price is fairly steep, at 199 euros. The optional laser costs another 39 euros, and the radio remote control 29 euros.
You can order the Joopic CamBuddy Pro from CameraNU.nl, among others.
About the author
Michelle Peeters is fotografe en oprichter van DeuxBleus Fotografie. Michelle herkent het bijzondere in het gewone en het gewone in het bijzondere. Ze heeft zich nooit willen specialiseren en is daardoor van alle markten thuis.
You might also like
-
 A critical look at connecting to a camera wirelessly
by Nando Harmsen
-
 Review: Sony Xperia 5 III smartphone for photography
by Nando Harmsen
-
 Review: Canon EOS R50 mirrorless camera
by Nando Harmsen
-
 Review: Haida MagSafe Magnetic Filter Holder for Smartphones
by Nando Harmsen
-
 Review: Sony Xperia 1 IV smartphone for photography
by Nando Harmsen
-
 Review: Canon EOS R3
by Nando Harmsen
11 comments
-

-
 Frank wrote on Sunday 16 April 2017 at 13:20 | reply
But Triggertrap doesn't have live view, right, or am I mistaken? And unfortunately, they have been 'out of business' since January..
Translated from Dutch. -
 Huub wrote on Sunday 16 April 2017 at 13:24 | reply
I have 'played' with and described the Cambuddy. I don't know Triggertrap and have no experience with it.
Translated from Dutch. -

 Donald Willemsen
wrote on Sunday 16 April 2017 at 23:18
| reply
I think this little gadget is completely unnecessary. Many cameras have wifi, NFC or Bluetooth. To be honest, I see it as a money grab. Besides, there are also remote controls using IF and cable releases.
Translated from Dutch.
I can control my camera perfectly well with my smartphone via wifi without such a little box, just download and install an app from Canon. Nothing wrong with that. -
 huub wrote on Monday 17 April 2017 at 22:56 | reply
@donniebelg: yes, because most modern cameras almost all have built-in wifi and/or bluetooth, in such a case the Cambuddy described is less interesting, because there are enough alternatives to be found at that point. Unless you are specifically looking for the extra functionality, such as laser triggering or sound triggering, for example. The Cambuddy is therefore clearly intended (if you are willing to spend the money on it, because there are cheaper alternatives) for when your camera does not have wifi or anything like that.
Translated from Dutch. -
 rudyc wrote on Tuesday 18 April 2017 at 21:37
| reply
In itself, this system does have a number of nice points.
Translated from Dutch.
Nowadays, indeed, many cameras have wifi (I myself have only had a camera with wifi for a few days).
what distinguishes this trigger from the others is that they make use of the usb port, so you are actually working tethered.
And so it is mainly important how well they have managed the software integration, since they directly address the camera's software. So as far as I'm concerned, it is a missed opportunity that they do not yet have this completely in order.
There are many triggers on the market that cost considerably less than this one (or can be made yourself), but they all make use of the remote shutter port.
In itself, there is nothing wrong with that, except that this port has limitations in e.g. bulb mode which you do not have via the usb port.
The triggertrap mentioned above also makes use of the remote shutter port.
Triggertrap has written an extensive piece about the limitations of Bulb ramping via the remote shutter port.
-
 huub wrote on Tuesday 18 April 2017 at 21:50 | reply
@rudyc: thank you for this meaningful addition. A while ago I also tested the Case Air Wireless. That one also uses tethering and is also a bit cheaper, but has somewhat fewer options than this Cambuddy. If I compare them a little, this Cambuddy is still my preference. See also the article from March 17 on Photofacts.nl
Translated from Dutch. -
roy wrote on Tuesday 18 April 2017 at 21:59 | reply
I use the Camfi, you can control almost everything with it, including video,and a fast connection between my Samsung Galaxy and 5DmarkII
Translated from Dutch. -
 Wouter J. van Duin wrote on Monday 22 May 2017 at 13:24
| reply
You wrote: It is possible and convenient to set up the WiFi connection via a repeater function in such a way that you retain your internet connection when the Cambuddy Pro is connected to your phone.
Translated from Dutch.
The question is how to achieve this? Because in my case, I can't really get the connection to work. Cambuddy Pro does create the WIFI connection, but my phone cannot establish the connection because no Internet connection is possible via the WIFI connection of the Cambuddy Pro. -
Donald Willemsen
wrote on Monday 22 May 2017 at 14:36
| reply
@Wouter J, if your mobile data connection is on, then you simultaneously have internet via 4G and a Wi-Fi connection with the camera.
Translated from Dutch. -
HuubS
wrote on Tuesday 23 May 2017 at 11:33
| reply
@WouterJ.: Wouter, I played around with this Cambuddy for a while back then. I'll look into exactly how that Wifi repeater function works eventually, but that may take a while due to being busy at the moment. Maybe the supplier's FAQ can already help you a bit further.
Translated from Dutch.
It's here.
Have your say
Please note: Articles older than a week can only be commented on by signed-in visitors.Would you still like to comment? sign in or create a free account.
Become a better photographer every week
A practical photography tip in your inbox every week.
38,764 photography enthusiasts already receive the tips! More about the weekly mail. Or keep up to date via  Facebook.

Elja Trum
Photofacts; everything to do with photography!
Would you like to take better photos and keep up with what is happening in photography? Photofacts publishes articles that teach you something about photography — from a product announcement to a practical shooting tip or a look at a website. Photofacts covers photography every day and is a hobby project of Elja Trum's that got out of hand. The articles are written by a team of volunteer authors. If you would enjoy writing one or more articles for Photofacts, do get in touch.More about PhotofactsPhotofacts is made possible in part by
