

7 tips for sharp photos in strong winds
Wednesday 12 December 2018, 15:11 by Michelle Peeters | 13,450 views | 15 commentsThis article was translated from Dutch with the help of AI. Read the original.
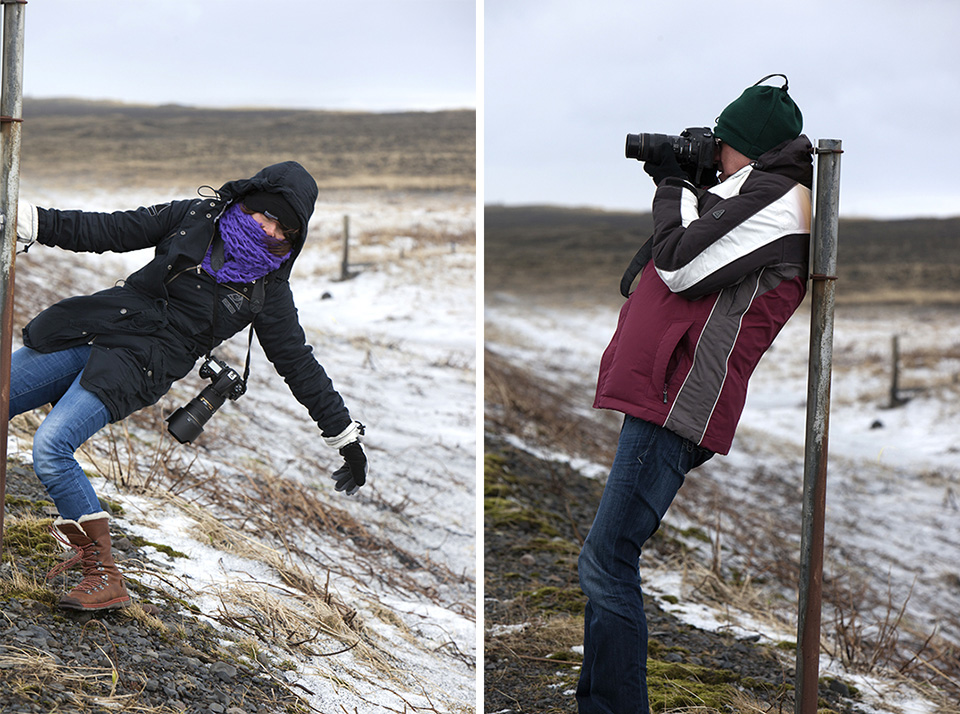
Normally, you do not have to worry too much about strong winds when you use a tripod. But there are a few exceptions to this rule.
If you have ever taken photos in strong winds, you know how difficult it is to get sharp photos. And if you use a telephoto lens, it can seem almost impossible.
What should you do if your tripod does not offer enough stability to keep your camera still? Fortunately, there are ways to improve your sharpness, even in stormy conditions, so your photos are still usable. Below, I will show you a number of methods.
1. Lower the tripod centre column
This should be obvious, but it is still one of the easiest mistakes for photographers to avoid in windy conditions. They use the manually adjustable centre column of their tripod.
Even in normal conditions, using this central column requires plenty of experience, especially with cheaper tripods. It adds a weak point to your setup, making everything very susceptible to vibrations from the surroundings.
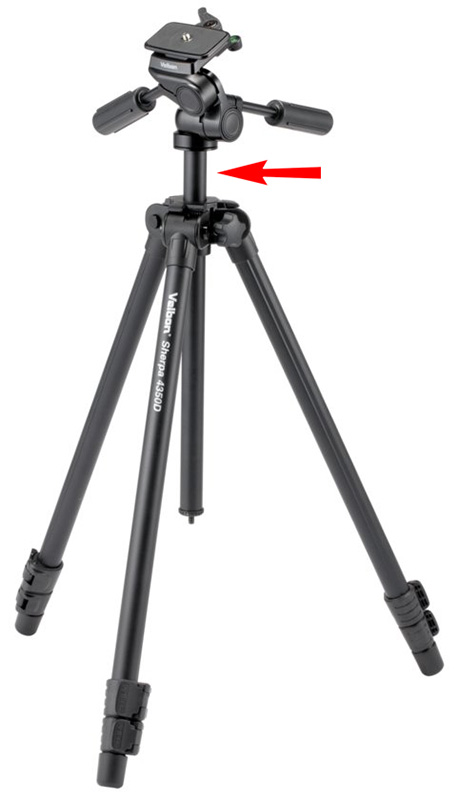
That does not mean they are never useful. Sometimes you simply need the centre column to reach a certain height. But it will seriously affect your sharpness when you use it in strong winds. Keep it as low as possible!
2. Keep your tripod low
Assuming your composition allows it, you will immediately see an improvement in sharpness by lowering your tripod by a foot or two. Even in gentle winds, you get less sharpness when you use a sturdy carbon-fibre tripod at full height.
Just collapsing a single section of a tripod leg can already cause a lot of blur and softness. In windy conditions, this is one of the best ways to achieve optimum sharpness in your photos.
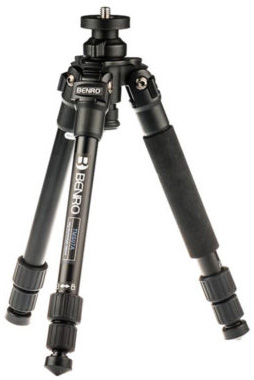
Another important aspect is that when one of your tripod sections is retracted, it should be the thinnest section. Thin tripod sections are much more susceptible to vibrations.
The only situation where this does not apply is when you take photos in sand or in the ocean, if you do not want sand or salt to damage your tripod's hinges. In that case, it is best to extend the lowest, thinnest sections of your tripod further.
3. Use the stabiliser
Although you are always told to switch off the stabiliser, in the lens or body, when working from a tripod, this is a situation where that advice definitely does not apply.
Vibration reduction, also known as optical stabilisation or vibration compensation, works very well to reduce blurry, soft photos in the wind. Just look at the difference in the photos below. Both were taken at 100mm in strong winds and both were taken at 1/4 second:
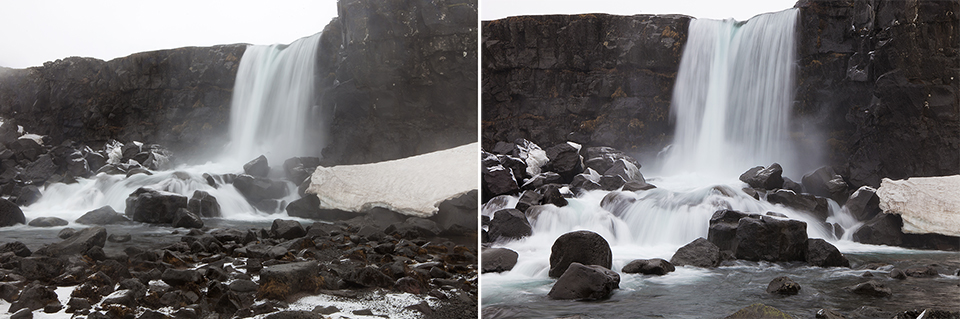
The difference between the two photos is clear, in favour of the photo on the right, which was taken with the stabiliser switched on.
When it is windy and you are using a tripod, simply switch on vibration reduction, or do not switch it off. Even if you think the wind is not strong enough to cause blurry photos. It is always worth it!
4. Do not hang a weight under your tripod
One of the strangest suggestions I have ever heard from photographers is to hang a bag under your tripod in windy weather. Some tripod manufacturers even attach a hook at the top to make this easier.
It does not help at all. In fact, if there is enough wind to make your tripod move or vibrate, there is also enough wind to make the bag hanging from it swing around, leaving you with completely blurred photos.
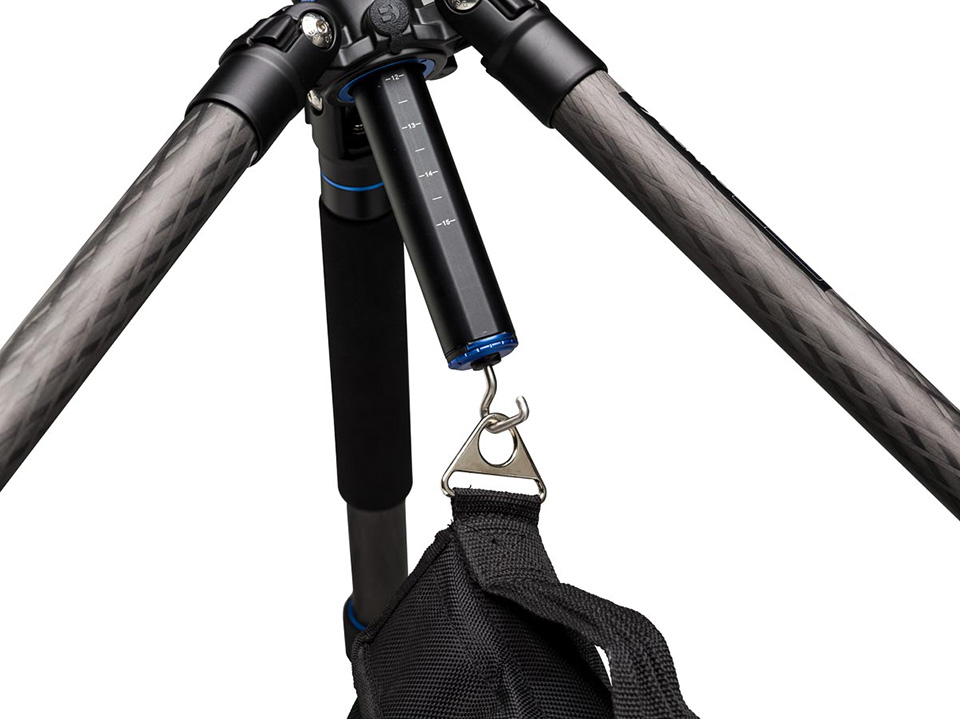
Unless there is a risk of your tripod being blown away, there is no advantage to hanging a bag or weight from your tripod.
5. Do not hold on to your tripod
Do not hold on to your tripod in the hope of stopping vibrations. You will only cause extra movement, making your photos even blurrier.
Fortunately, not many photographers do this, but it does happen occasionally. Unless you are taking photos in a river or ocean and are worried that your tripod will be washed away, there is no reason to hold on to your tripod while taking photos.
It is even better not to touch the tripod at all and to use the self-timer. The best thing is to stand a short distance from your tripod, so you can grab it if it falls.
Tripods, especially high-end versions, are good tools with the sole purpose of being as stable as possible. We photographers, on the other hand, cannot even keep our own hands still. Tripods always win on this front!
6. Take lots of photos!
I do not really like seeing people photograph landscapes in Highspeed (Continuous High), as I see landscape photography as a slower and more deliberate process.
However, when you are taking photos in very windy conditions, it is a useful tool to have available.
For every frame you would normally take, you should capture five or six. If you are making a panorama or HDR image, take a few photos at a time before changing your composition or camera settings.
This is one of the few situations in which the 'Continuous High' mode is useful for landscape photography.
That is because wind, when it is present, is random. There is no way to predict when your photo will be sharp or blurry during a breeze. Your best chance of minimising the damage is to take as many photos as possible.
This does not guarantee a sharp result, but it is a good way to maximise your chances.
7. Use a fast shutter speed
Although it is frustrating to increase your ISO setting for landscape photography, it may be necessary if you are still getting blurry photos after carrying out all the steps above.
Your last resort is to use a faster shutter speed, which will probably require a higher ISO setting than you would normally want.
This choice can still be worth it. It is much better to get a sharp photo at ISO 400 and 1/20 second than a blurry photo at ISO 100 and 1/5 second. Blur caused by camera movement is much worse than the extra noise from a high ISO. It is definitely worth it.
Conclusion
There is no guarantee of perfect photos in windy conditions, but there are certainly things you can do to improve your chances.
- First, lower the centre column of your tripod, or do not extend it at all. If your composition requires your camera to be at a certain height, first retract the thinnest tripod legs to minimise vibrations.
- Keep your tripod low for as much stability as possible
- Next, switch on image stabilisation. Although IS is usually not necessary when using a tripod, this is clearly a solution that makes a difference!
- Do not hang heavy objects from your tripod in the hope that this will make it more stable. Unless you are worried that your entire tripod will be blown or washed away. It only adds vibrations when the weight swings in the wind.
- Do not hold on to your tripod in the hope of making it more stable. You will only create extra vibrations and movement. Preferably, do not touch your tripod at all when pressing the shutter
- Finally, take lots of photos for each composition to increase your chances of success. Then choose the sharpest one during post-processing.
- And if everything else fails, you can always increase your ISO setting and use a faster shutter speed.
These tips will not save you, but they will make your life easier when you want to take photos in particularly windy conditions. Plus, since bad weather often works well for landscape photography, this information is likely to be quite useful.
By optimising your camera settings, you can optimise the possibility of taking usable photos. Even in the most extreme situations, including windy conditions.
Want to learn more about the basics of photography?
At Photofacts Academy, our online learning environment for photographers, we have a complete basic photography course. You can follow this course for two weeks with a free trial membership.
About the author
Michelle Peeters is fotografe en oprichter van DeuxBleus Fotografie. Michelle herkent het bijzondere in het gewone en het gewone in het bijzondere. Ze heeft zich nooit willen specialiseren en is daardoor van alle markten thuis.
You might also like
-
 Using Motion Blur to Your Advantage
by Nando Harmsen
-
 Photographing the Strong Viking Obstacle Run
by Elja Trum
-
 Photographing the Strong Viking Mud Run
by Elja Trum
-
 Watch water and wind when setting up a tripod
by Nando Harmsen
-
 Portrait photography tip: Use a wind machine
by Elja Trum
-
 Playing with blur
by Laura van der Burgt
15 comments
-
 Mac wrote on Tuesday 6 June 2017 at 10:55 | reply
You forgot the most important tip. this only applies if there is the possibility to, of course.
Translated from Dutch.
go stand out of the wind. Behind a hut, rock etc if possible. Really seek shelter. You are immediately protected against flying sand etc. -

 Michelle Peeters wrote on Tuesday 6 June 2017 at 12:10
| reply
@Mac: absolutely right! If that option is available (often it isn't unfortunately..) then you should definitely make use of it!
Translated from Dutch. -
 Peter Van Dinther wrote on Tuesday 6 June 2017 at 14:21 | reply
I think a weight on the tripod will work as long as the weight is heavy enough. Then it won't move.The question is whether you can achieve that with your bag alone, probably not.
Translated from Dutch. -
Michelle Peeters wrote on Tuesday 6 June 2017 at 14:23
| reply
@Peter: it is indeed about preventing the weight from swinging in the wind. I recently saw a very nice solution somewhere that is for sale. I’ll look for it again and share it!
Translated from Dutch. -
Peter Van Dinther wrote on Tuesday 6 June 2017 at 14:33 | reply
@Michelle. I'm curious about your solution. Regards
Translated from Dutch. -
Michelle Peeters wrote on Tuesday 6 June 2017 at 15:46
| reply
@Peter: I’m searching like crazy but can’t find it anymore! I think the principle was that you had to pin the tripod into the ground using a tent peg (so bring a little hammer too). You attach the line to the hook underneath the tripod. I’ll keep looking for a bit longer!
Translated from Dutch. -
Peter van Dinther wrote on Tuesday 6 June 2017 at 16:22 | reply
@Michelle. Yes, I read that somewhere too. I think a ground anchor (hammering it in with a hammer indeed and a tie-down strap gets you quite far. Solved.
Translated from Dutch. -
Michelle Peeters wrote on Tuesday 6 June 2017 at 16:24
| reply
@Peter: indeed, improvising yourself often works best and is also the cheapest
Translated from Dutch.
-
 Ronnie Vos wrote on Tuesday 6 June 2017 at 17:47 | reply
If it's not possible to stand out of the wind, create a windbreak yourself with your body and make sure your tripod is out of the wind.
Translated from Dutch. -
Michelle Peeters wrote on Tuesday 6 June 2017 at 17:48
| reply
@Ronnie: also a useful one indeed!
Translated from Dutch. -
 Wouter wrote on Thursday 8 June 2017 at 14:13 | reply
It is sufficient to clamp a taut rope or elastic cord to the ground with your foot under your tripod.
Translated from Dutch. -
Michelle Peeters wrote on Thursday 8 June 2017 at 18:11
| reply
@Wouter: that does limit your freedom of movement, perhaps?
Translated from Dutch. -
 Fabienne wrote on Friday 9 June 2017 at 15:21 | reply
Really good tips, for a semi-beginner like me!
Translated from Dutch. -
 Freek wrote on Tuesday 28 November 2017 at 23:33
| reply
Another option is to temporarily remove the lens hood, depending on the angle of the wind and sun.
Translated from Dutch. -
 Willy van Dreumel wrote on Tuesday 16 January 2018 at 17:58
| reply
The hook at the bottom of your tripod's center column is not pointless in my opinion: If you hang a weight from it (e.g. a sandbag, which you can empty again afterwards), as low to the ground as possible, this brings the tripod's center of gravity closer to the ground. And that does make the combination of camera and tripod somewhat more stable. Rule of thumb: if you see the weight (sandbag or the like) swinging back and forth, you'd be better off leaving it off!
Translated from Dutch.
Have your say
Please note: Articles older than a week can only be commented on by signed-in visitors.Would you still like to comment? sign in or create a free account.
Become a better photographer every week
A practical photography tip in your inbox every week.
38,764 photography enthusiasts already receive the tips! More about the weekly mail. Or keep up to date via  Facebook.

Elja Trum
Photofacts; everything to do with photography!
Would you like to take better photos and keep up with what is happening in photography? Photofacts publishes articles that teach you something about photography — from a product announcement to a practical shooting tip or a look at a website. Photofacts covers photography every day and is a hobby project of Elja Trum's that got out of hand. The articles are written by a team of volunteer authors. If you would enjoy writing one or more articles for Photofacts, do get in touch.More about PhotofactsPhotofacts is made possible in part by
