

How to Make and View Your Own Stereo Photos (3D)
Saturday 24 June 2017, 14:14 by Jan Platteeuw | 17,441 views | 5 commentsThis article was translated from Dutch with the help of AI. Read the original.
These days, more films are shown in 3D than in 2D. For a few tens of euros, you can also buy a decent, often cardboard, headset for your smartphone to experience 3D and Virtual Reality. New viewers keep appearing, each with a specific purpose.
To view homemade stereo photos, it is still enough to take two photos next to each other, just as people did at the beginning of photography. Even before photography became known, stereo drawings were being made.
Viewing three-dimensional pairs of photos is a sensation because of the beautiful sense of depth that comes closest to reality. You can easily get acquainted with stereo photos to see what extra dimension you get compared with an ordinary photo. For example, by making one yourself.
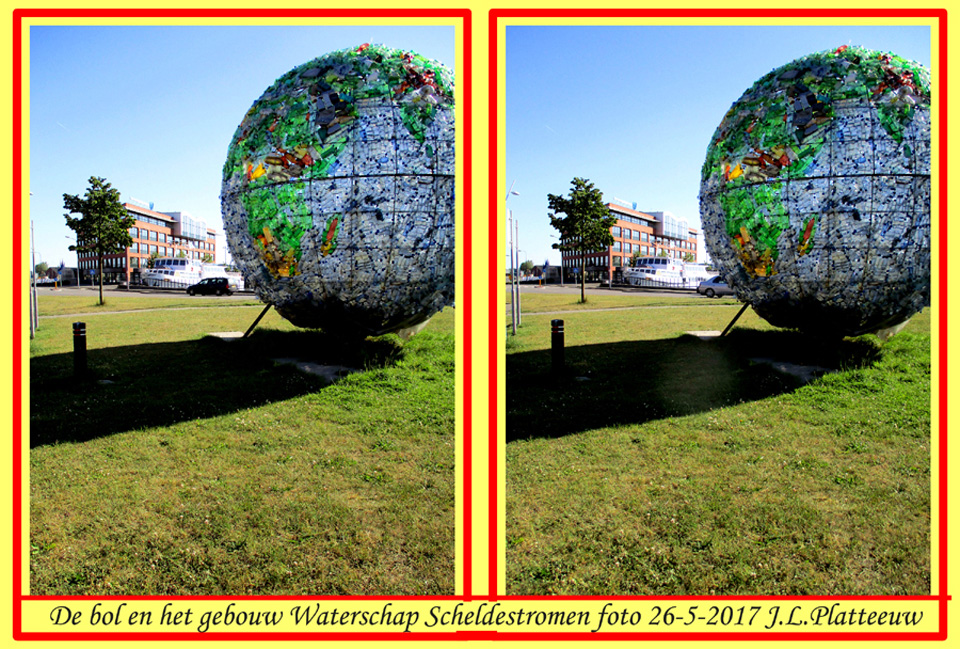
How do you make a stereo photo yourself?
Anyone who can take a photo can also make a stereo pair. You do need to follow a few basic rules. Pick up this old hobby, as old as photography itself, again, but use the modern equipment we have available today.
These are the basic rules:
- Keep in mind that you should maintain a distance of 1.75 metres or more from the object to be photographed to your camera. Otherwise, you are in front of the so-called imaginary window, which usually does not produce good images. For example, an arm or a leg becomes much too long when it is in front of the imaginary window
- Nothing that appears in the image may move between taking the first and second photo. Buildings and statues are always fine, but trees, people, animals and other moving things can cause quite a problem
- Take the second photo approximately 65 millimetres to the right of the first photo, on the same horizontal line
- Make sure there are objects spread throughout the image, such as a bush, a post, a pile of stones, and so on. This creates a coulisse effect to indicate depth, resulting in a beautiful pair of photos
- Preferably do not use flash when working with one camera, because the shadows will not match. And when using a Loreo attachment, the flash does not work on a Nikon D90
You can easily take the photos with your own camera. To try it out, take a small plank with an edge on it and mark a centimetre scale on it. Place this plank horizontally on a wall or something similar, with your camera on it.
Take the first photo, move it 65 millimetres and take the second photo. Voilà, that is all there is to it.
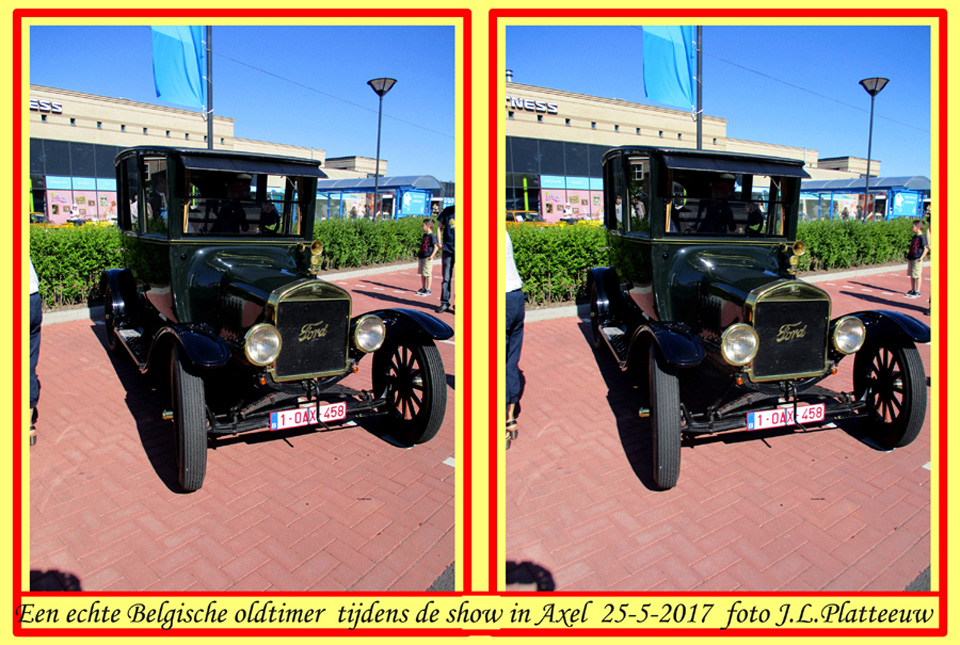
Finishing off
Now load the two photos you have taken onto your computer and place them next to each other. This is the simplest way to start. Make sure that you actually place the left photo on the left. Make it a fixed rule that the first photo you take is the left one. You move the camera to the right for the right photo.
Put them on the screen as described below and you can view them. The image is somewhat coarse because of the screen grid. Prints look better.
If you want to take it further, you do it differently. Load a free programme that lets you edit and merge the photos. Then view the merged pair on the screen.
Viewing a stereo photo
Your eyes cannot diverge, so the pair must not be wider than twice the distance between your eyes, which is approximately 13 centimetres. Now you can see what you have made. You can do this with an inexpensive viewer.
But you can learn to do it without a viewer by looking slightly cross-eyed, or staring, or by using a card with holes in it, approximately 4x4 centimetres at eye distance, or two toilet rolls. If you view the photo in one of the last-mentioned ways, you see three photos next to each other and have to concentrate on the middle one.
Another method is to mirror the left photo. A mirror is placed between the two images, with the mirror side facing the left photo. You then look into the mirror with your left eye and at the right image with your right eye.
With this method, and with the viewer, the pair may be a few centimetres larger, which is an advantage. To view even larger images, for example on a monitor or television, special viewers are available. There are several addresses in the Netherlands that sell viewers. The cheapest costs three euros.
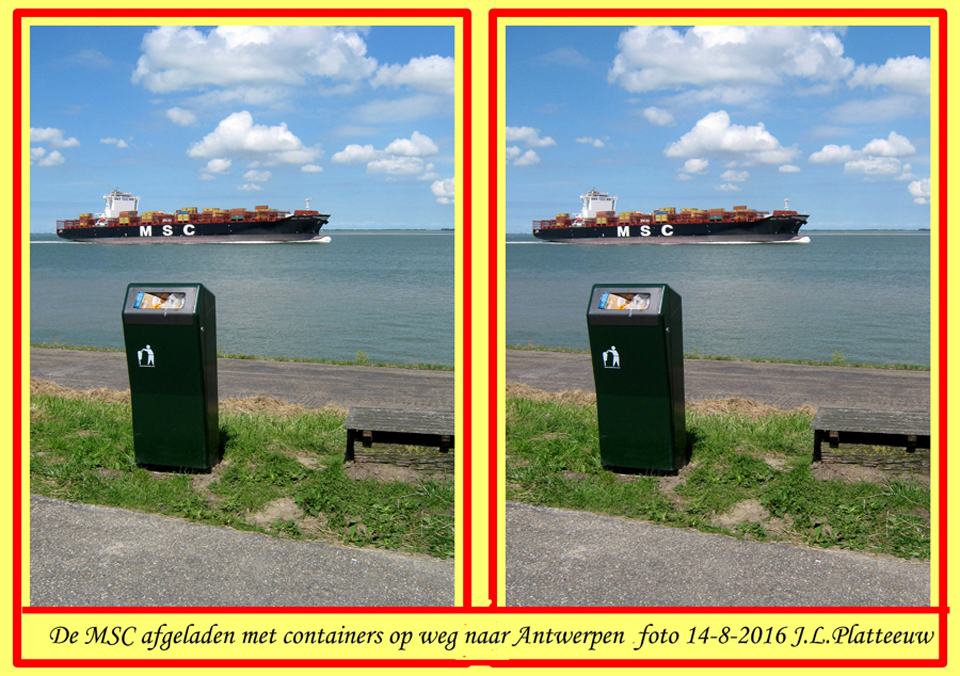
Viewing one at a time
Unfortunately, none of the methods mentioned makes it possible for more than one person to view the image at the same time. You can of course print out the stereo photo, and it will certainly look better than on the screen.
Warning: Having prints made by a commercial print service does not produce good results, so do not do it.
Even more convenience
For photographing distant subjects, you can make the distance much greater than 65 millimetres, but then it becomes a matter of experimenting.
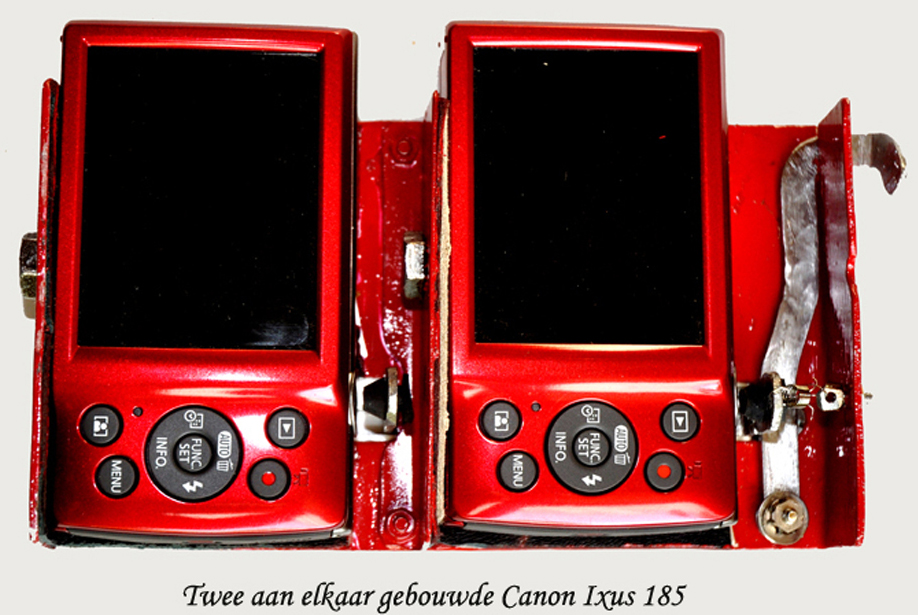
For ordinary work, it is easier to take photos with two cameras built together. Even with a mechanical coupling, you can get fairly good synchronisation.
When buying the two cameras, make sure they have a tripod socket in a suitable position. You need this to connect the two cameras together. The USB connection should also not be on the side next to the tripod socket. Because of the frame construction, you should also check where the flash is.
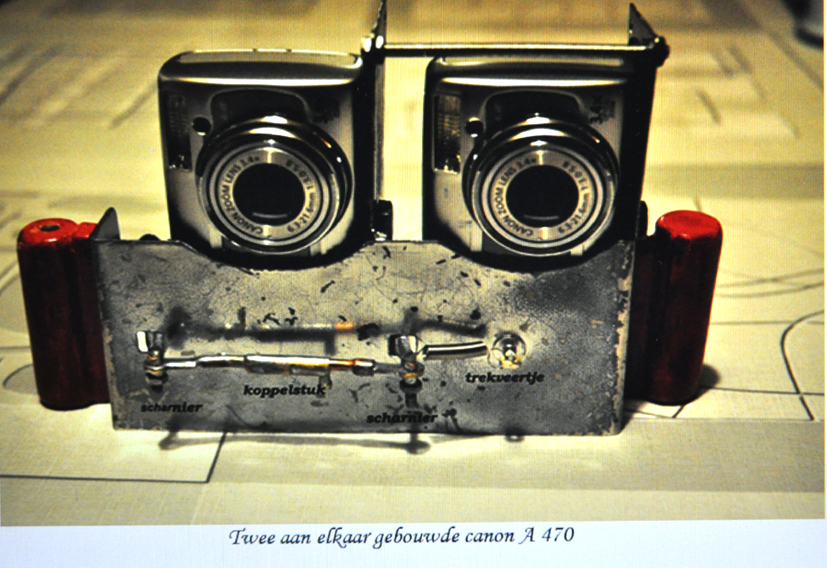
With the Canon IXUS 185, the battery is underneath next to the tripod socket. So to charge it, you always have to unscrew the two cameras. Since you can take many photos on a single charge, this does not have to happen often.
There are also attachment lenses for sale. You can mount these on a DSLR with an interchangeable lens. This has one major advantage, namely that the shutter is always synchronised. But you often get a narrow soft-focus edge in the middle of the photo and/or at the edge, which is very distracting.
You also only get an image with the quality of the lenses in the attachment, and that is usually lower than the lens of the camera you are using.
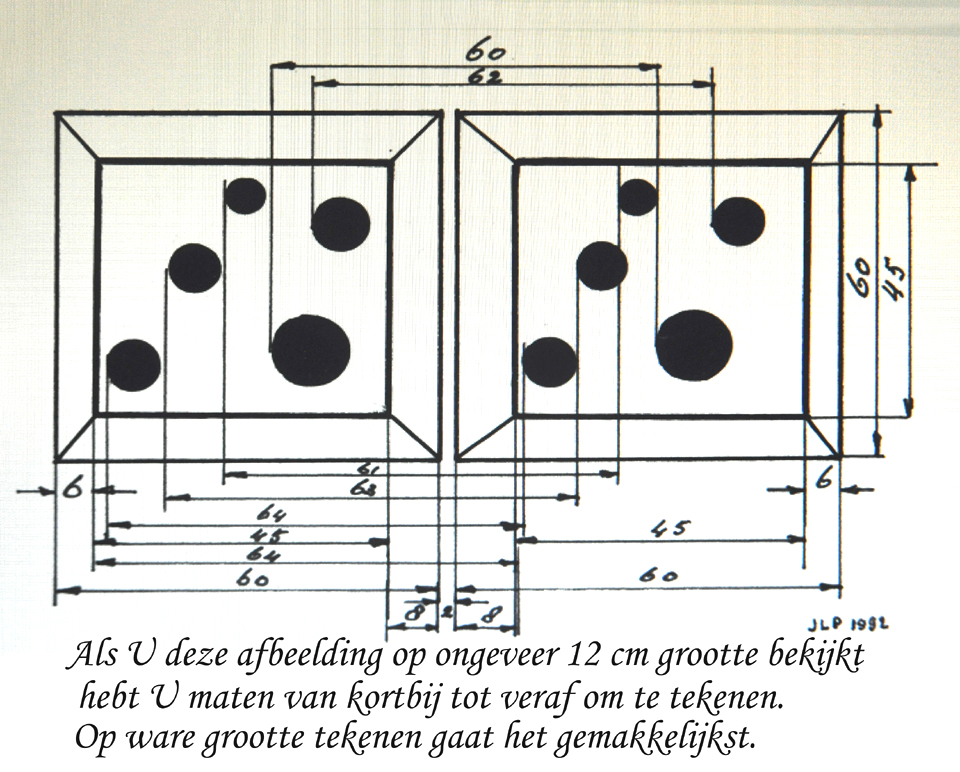
If you view the image above in stereo at approximately 12 centimetres wide, you can see the correct dimensions for the depth needed to draw something yourself. With the 60-millimetre measurement, you reach the imaginary window.
The imaginary window is an imaginary window, so it cannot be seen. But in a photo taken in front of the imaginary window, everything in front of that window is stretched and therefore distracting.
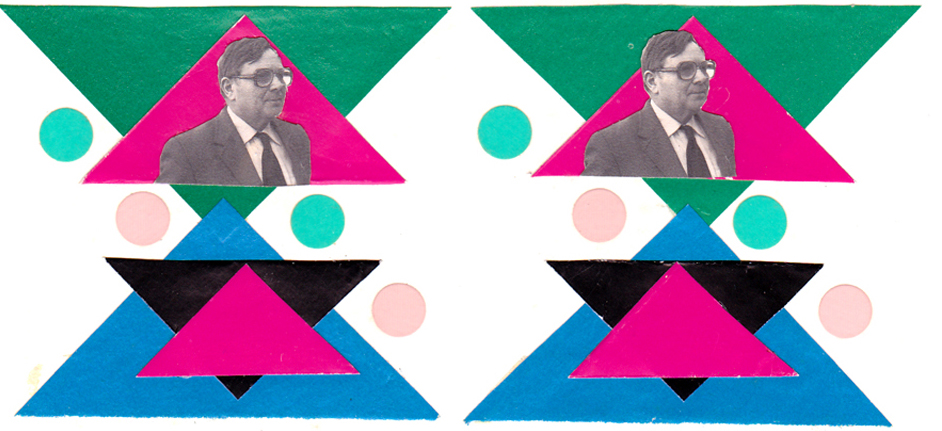
You can draw something, but you can also paste something, though remember the distances between the objects.
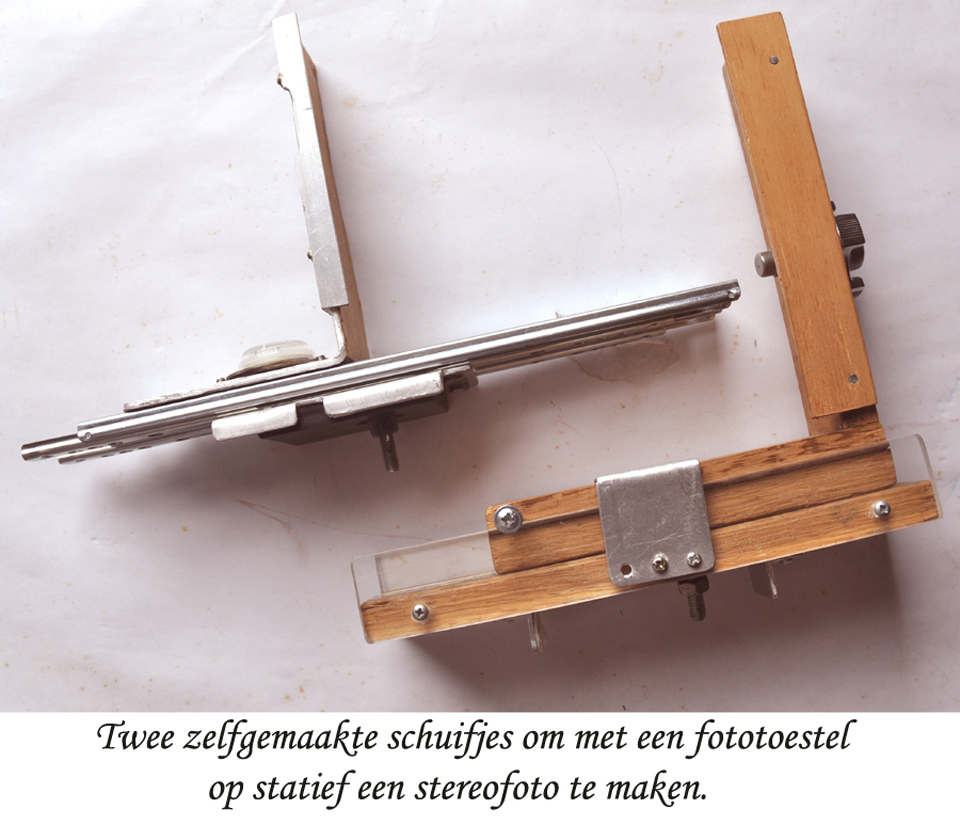
Once you have caught the stereo photography bug, you use a slide to move the camera and take the second photo. You can make or buy such a slide, and then you can set it not only to 65 millimetres, but also to other distances.
If, for example, you want to photograph a flower that is 60 centimetres away, you only need to move the camera two centimetres for the second photo.
As a rule of thumb, for every 30 centimetres of distance between the object and camera, you should move the camera one centimetre, up to 6.5 centimetres. To take stereo photos from a very long distance, you can use a longer slide.
About the author
Jan is 88 jaar en fotografeert sinds kort na de tweede wereldoorlog. Jan heeft jarenlang zelf foto's ontwikkeld en afgedrukt en is erg actief met stereografie.
You might also like
-
 3D photos on Facebook
by Michelle Peeters
-
 Is Apple Vision the breakthrough for 3D photography?
by Elja Trum
-
 Ten tips for better black-and-white photography
by Nando Harmsen
5 comments
-
 Fred wrote on Tuesday 27 June 2017 at 15:40 | reply
De gemakkelijkste manier om 3D-foto's te maken is met de demo-versie van Basrelief. Te downloaden van http://www.3dphotopro.com/software.html
This comment was written in another language and has not been translated yet.
Dit programma maakt van één losse foto een anaglyph. Je kunt dus in principe van elke foto een anaglyph maken. Het is wel zo, dat de ene foto zich daar beter voor leent dan de andere. Kwestie van uitproberen.
Fred -
 Han Seijger wrote on Tuesday 27 June 2017 at 20:36 | reply
Bekijk het werk eens van Jeffrey Robb, een Engelse 3D fotograaf. Je vind werk op YouTube en gewoon via Google. Op YouTube zie je hoe hij het doet. Veel kijkplezier.
This comment was written in another language and has not been translated yet. -
guest wrote on Wednesday 28 June 2017 at 17:26 | reply
Hoera!weer een stereo fotograf
This comment was written in another language and has not been translated yet. -
guest wrote on Wednesday 28 June 2017 at 17:34 | reply
Maar Jan plaats geen opnames in stereo op ons Forum!
This comment was written in another language and has not been translated yet. -
Han Seijger wrote on Wednesday 28 June 2017 at 18:54 | reply
Tegenwoordig is het wel mogelijk om met meerdere personen tegelijkertijd een 3D foto te bekijken. Zoals ik al hiervoor vertelde. Jeff Robb doet het op een andere wijze. Hij gebruikt een lens voor de foto. Ik heb dat ook gedaan en het is precies werk. VOORBEELD: ieder kent wel de kaartjes die je op en neer kunt bewegen. Bijvoorbeeld van een portret. Kaartje de ene kant op en de ogen zijn open en de andere kant zijn de ogen dicht. Als je met je vingers over een dergelijk kaartje gaat dan voel je allemaal ribbels. Elke ribbel is een lensje met een eigen brekingsindex. Je kunt deze lenzen via internet bestellen.....maar dan ben je er nog niet.
This comment was written in another language and has not been translated yet.
Werkwijze. Plaats je camera op een rail voor het tafereel dat je wilt vastleggen. Beweeg nu de camera over de rail van LINKS naar rechts en maak elke cm een foto. Maak er een stuk of twintig. Nu heb je een Computerprogramma nodig dat van die twintig foto's : een foto maakt. Eigenlijk snijd het programma van elke foto steeds een dun strookje af en plaats die twintig dunne strookjes naast elkaar in een breedte gelijk aan een 1 ribbeltje van de lens. Deze foto druk je af en nu is het zaak om die lens erop te plakken. En dit is een precies werkje.
Wil je hier meer van weten, zoek dan eens onder Lenticulair. Zo heet namelijk deze methode. Veel plezier.
Have your say
Please note: Articles older than a week can only be commented on by signed-in visitors.Would you still like to comment? sign in or create a free account.
Become a better photographer every week
A practical photography tip in your inbox every week.
38,836 photography enthusiasts already receive the tips! More about the weekly mail. Or keep up to date via  Facebook.

Elja Trum
Photofacts; everything to do with photography!
Would you like to take better photos and keep up with what is happening in photography? Photofacts publishes articles that teach you something about photography — from a product announcement to a practical shooting tip or a look at a website. Photofacts covers photography every day and is a hobby project of Elja Trum's that got out of hand. The articles are written by a team of volunteer authors. If you would enjoy writing one or more articles for Photofacts, do get in touch.More about PhotofactsPhotofacts is made possible in part by
