

Photographing a volcanic eruption
Saturday 22 September 2018, 14:14 by Michelle Peeters | 9,298 views | 6 commentsThis article was translated from Dutch with the help of AI. Read the original.
Photographing volcanic eruptions is quite challenging and sometimes dangerous. But anyone who faces these dangers will be rewarded with the most incredible photographs from the heart of our planet.
Chimborazo in Ecuador
My interest in volcanoes began in 1995. I made a long journey through Ecuador and climbed the Chimborazo volcano, which stands 6,268 metres above sea level.
During the climb, I was remarkably aware of the simmering power deep beneath my feet. In this barren landscape, I felt very close to nature and the whole, untouched planet. After that came Arenal in Costa Rica, Pacaya in Guatemala, and Etna, Vesuvius and Stromboli in Italy.
Since then, volcanoes and deserted landscapes have fascinated me. I am often asked why I feel so magically drawn to volcanoes.
Volcanoes make me feel the power of nature in every way: the ear-pleasing explosions, terrifying shockwaves, falling lava bombs and unbearable heat of nearby floating lava, plus the visual spectacle of endless fireworks.
Active and accessible Stromboli
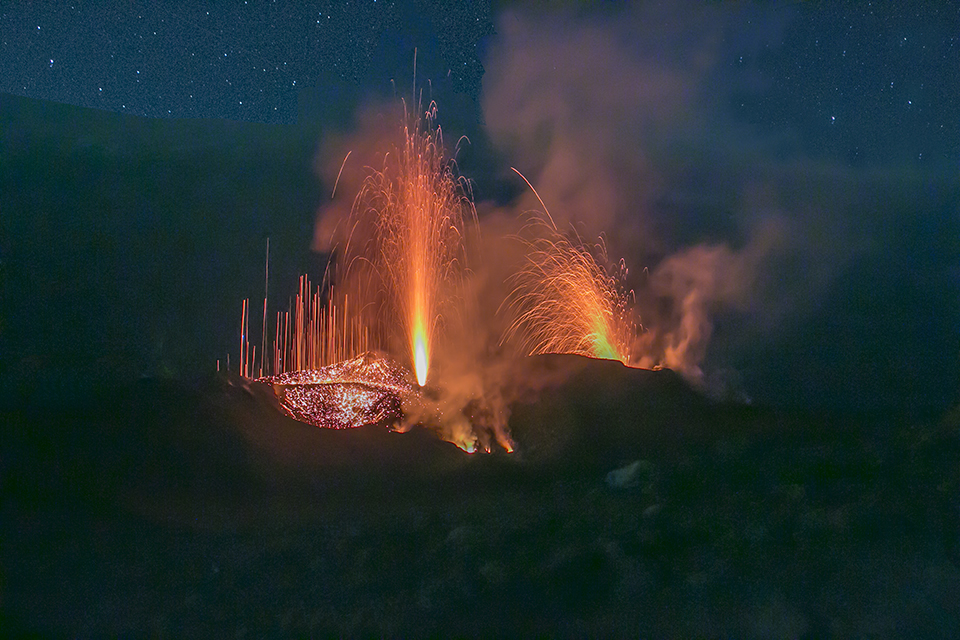
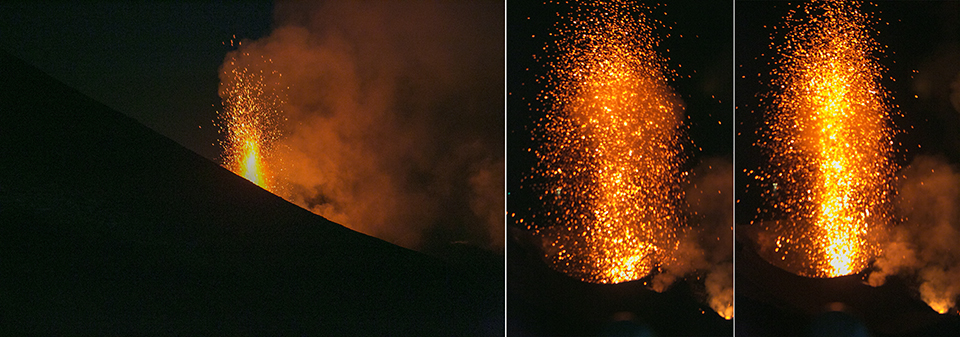
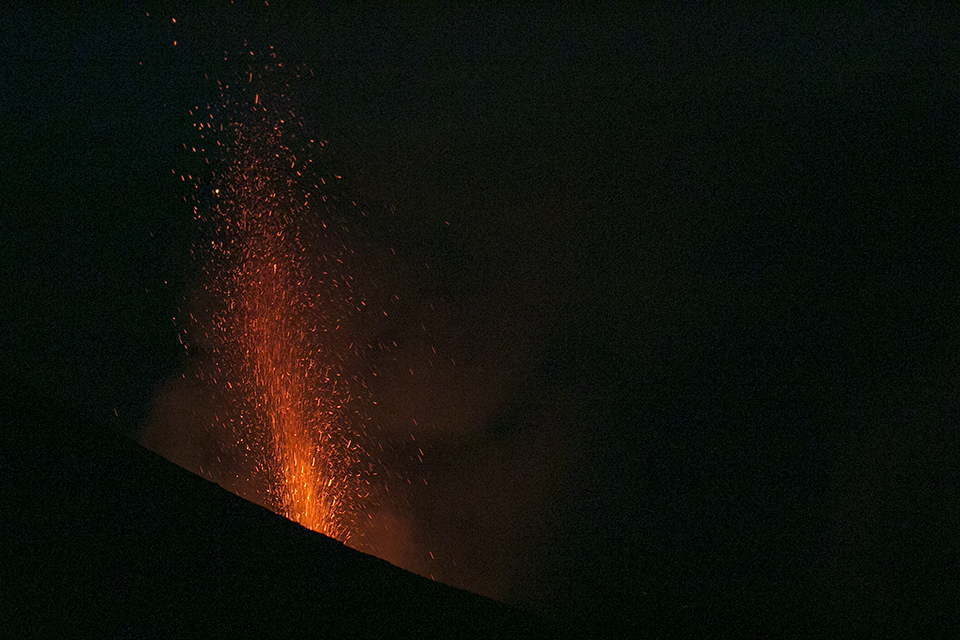
Stromboli is the most active volcano in Europe, and it is also fairly accessible. Three craters at the top of the volcano continuously produce explosions, followed by glowing volcanic bombs, which create spectacular images, especially at night.
There was a major eruption in 2014, during which lava flowed all the way to the sea. After that huge explosion, Stromboli remained very quiet for a long time and barely made itself heard.
Until spring 2017, that is. The explosions returned, much to the delight of the guides on Stromboli, with such beautiful regularity that you can climb the volcano again to see all the spectacle up close.
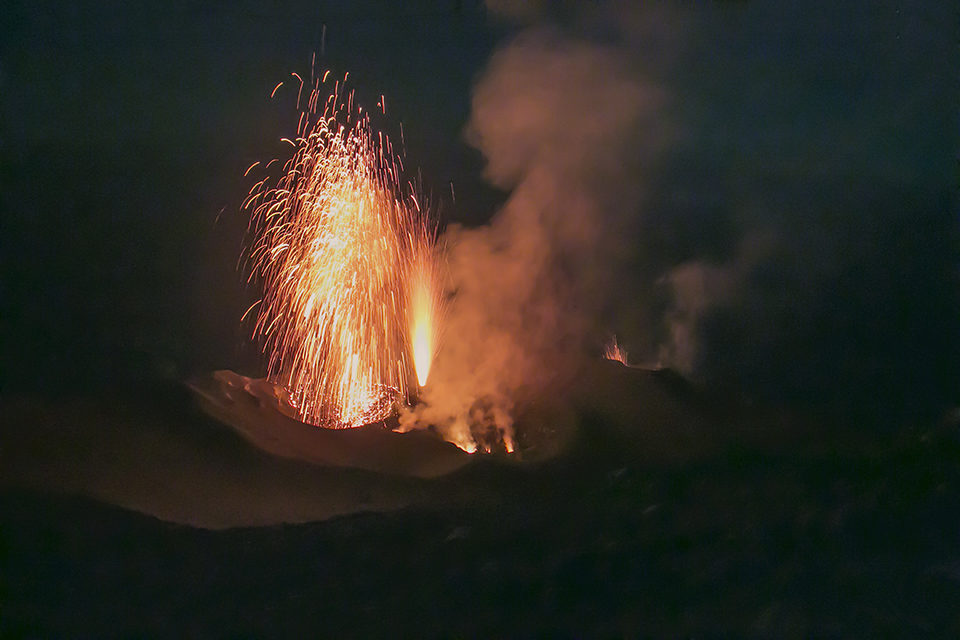
I had already visited the volcano in 2001 and took photographs there with my Canon SLR camera. After development, they were rather disappointing. This was still in the analogue days... I also did not have a tripod with me and had to improvise by resting the camera on a stone.
This time I did carry a heavy Manfrotto tripod up with me, and it certainly paid off!
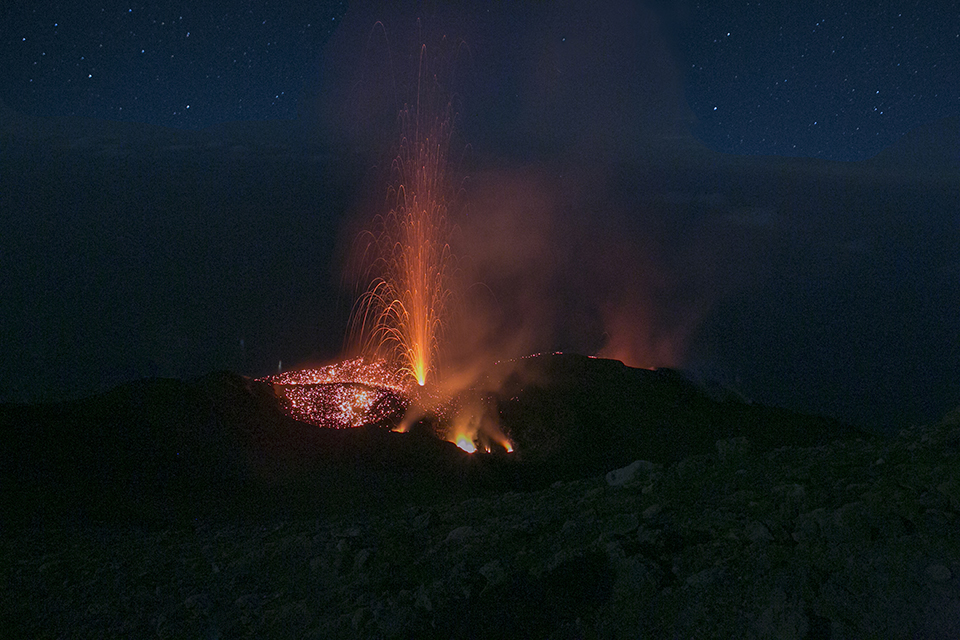
If you book a tour on Stromboli itself, you leave at around 5:30 pm and the guide leads you up in about three hours. Hiking boots are essential, as are enough water and provisions for both the outward and return journeys, as well as a headlamp.
The tour office provides plastic helmets, although I do wonder whether one would help if you happened to get a glowing stone on your head...
The difference in altitude from the village square to the craters is almost 900 metres, but it is manageable for both young and old.
You walk along the north-east side of the volcano, the safe side for making this trip. Eventually, you end up higher than the craters, which are just below the summit.
Just below Stromboli's highest point, you get a first view of the outer crater. An eruption took place here occasionally. A violent explosion, a fireball followed by ash and glowing lava bombs that were hurled several hundred metres into the air.
It makes an overwhelming impression to see an active volcano with your own eyes from a relatively short but safe distance. Stromboli treats you to a show every five to ten minutes.
The final section to the summit takes only fifteen minutes. Eventually, you see the craters in the depths, constantly spitting fire. One of them explodes every few minutes.
Challenges and requirements
As a volcano photographer, you need physical, psychological and technical skills. To begin with, some of the most attractive volcanoes are in the most inhospitable areas. In that respect, Stromboli is a very pleasant and accessible exception.
Long treks, heavy rucksacks, limited food rations and rough terrain are often the conditions involved in trying to reach your 'glowing' destination.
Safety must of course always come first, and you should try to avoid as much risk as possible. That is not always easy, of course, given the potentially spectacular photographic moments you might miss.
Sometimes you even need special protective equipment, such as a helmet or gas mask. At Kilauea volcano in Hawaii, for example, the deceptively innocent-looking escaping gases would otherwise lead to death in no time.
Other dangers in these fiery places come from unstable crater edges, caused by loose material and stray lava bombs.
In addition to the precautions mentioned above, it is important to spend some time monitoring the intensity and direction of volcanic activity before coming closer. Planning an escape route over solid ground in advance has already proved very useful, for example on Mount Etna in Sicily.
When hell suddenly breaks loose at the volcano, it is not only essential to find perfect image compositions and camera settings, but also to keep an eye on the entire surroundings.
In particularly dangerous situations, it is highly recommended that companions take turns photographing and studying the volcano.
If these guidelines are followed, taking close-up photographs of active volcanoes is not as dangerous as most people think
Photo equipment for volcano photography
My photographic equipment has a total weight of about 17 kilos and consists of a five-year-old Canon 5D Mark III with two fast and light-sensitive lenses: a Canon 24-70mm and a 70-200mm.
However, I mainly prefer taking photographs with the 24-70mm lens, which I think covers an optimal angle. It saves a lot of weight to leave the 70-200mm lens at home.
Your sensor can easily be ruined by fine ash while changing lenses. You also risk missing the perfect photograph just when you are changing a lens. I prefer to use a somewhat wider angle and choose the perfect crop on the computer at home.
As extra protection for your lenses, you can screw a UV filter onto the front. I also carry a sturdy Manfrotto tripod and a remote control for long exposures and shooting in the dark, partly in very windy conditions.
For photographs and recordings during the trek, it is also useful to have a compact camera or smartphone to hand that fits in your trouser pocket.
Although the Canon 5D Mark III has a dustproof metal body, you can protect it further with an extra waterproof bag. After every trip, I have the camera professionally cleaned.
Another important tip is to check the ground temperature regularly to prevent shoes and tripods from melting and to protect other equipment from heat damage.
Photography tips for volcanoes
A volcanic eruption at night is a popular photographic subject. When taking photographs at night, you as a photographer face several problems, or challenges.
From bitter personal experience, I recommend making several manually focused test shots in the dark to find the optimum focus point, even if the autofocus system does not work at night.
The problem is that you have to focus on dark areas, particularly the volcano itself. If you can plan your trip during a full moon, this offers many advantages for focusing!
I had the great advantage that a permanent fire was burning in the large crater on Stromboli, which I could autofocus on and then switch the focus to manual.
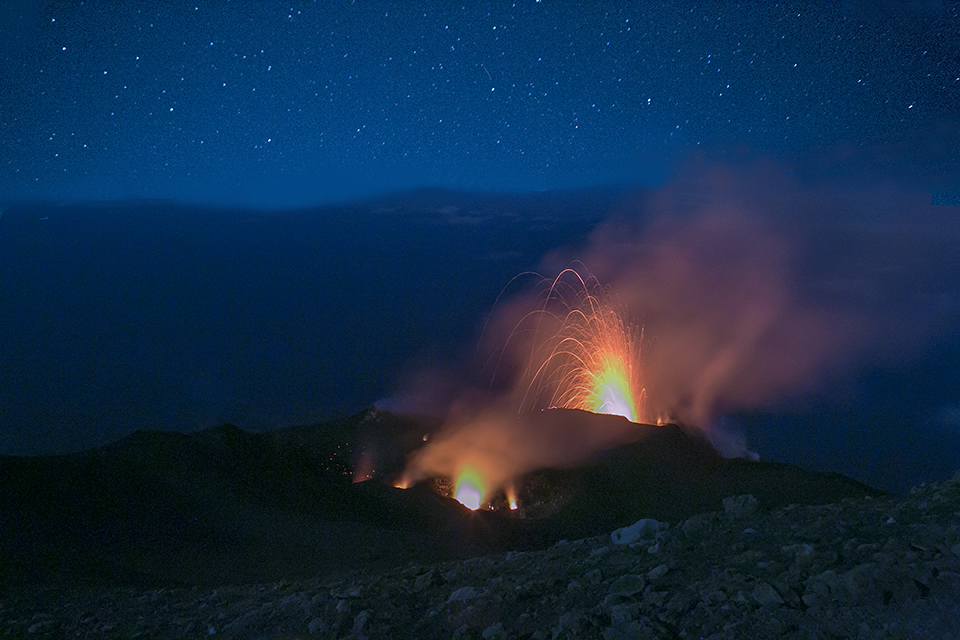
It is also very useful to already be at the location during the blue hour. At that time, you can often take very beautiful photographs, and the eruptions are already clearly visible. You can focus properly and get yourself set up at that point.
You can then turn off autofocus so that the camera does not try to focus again at the crucial moment, causing you to miss the important photographic opportunity.
Before I reached the large crater, I could focus on several headlamps belonging to climbers making their way up in the distance. The best way to focus manually is to zoom in first, focus using the live view screen, and then zoom out again.
The other difficulty lies in the major risk that light in the very hot and therefore extremely bright parts of the escaping lava can become completely white and clip. In that case, choose a slightly lower ISO value or stop down the aperture a little further.
In post-processing, I had to lift the shadow areas to be able to see something of the surroundings, which had become completely black. You can then remove the typical grain with noise reduction, which works fine with Photoshop or Lightroom.
Camera settings
As far as daytime settings are concerned, I usually rely on the camera's semi-automatic system while setting the ISO and aperture manually to create different atmospheres in the photographs.
You have several options available for this: high ISO values up to 800 can be used to freeze lava chunks photographically, while low ISO values combined with a small aperture are used to achieve blurring effects in escaping lava and ash clouds.
Both are fun to try and look great!
In general, a cloudy sky is favourable for daytime settings, as bright sunlight causes escaping gases to look like a white veil in photographs.
As far as volcano photography is concerned, the best time is actually the so-called blue hour, sunrise or sunset. The hot lava already shows a red glow, and there is still enough detail visible in the dark parts of the photograph.
But of course, you cannot always decide that for yourself, especially when you are travelling with a guide and a group, which is often recommended for safety reasons. In my case, we did not reach the crater rim until 8:20 pm, and we had already had our headlamps on for some time because it had grown dark.
Composition
Finally, something about the general image composition. Of course, the first priority is to focus on the eruptions described above and 'the fireworks' themselves.
In addition, I think it is important to show some photographs of the eruption in context. This means that you could also show the surroundings of the volcano, as well as the relative proportions. So do not just take close-ups, wide-angle shots also work very well!
Finally, use all the composition techniques you know: diagonal lines, leading lines, filling the frame with the main subject, the golden ratio, the rule of thirds. In fact, you can use and apply anything, just as you would in landscape photography.
Video
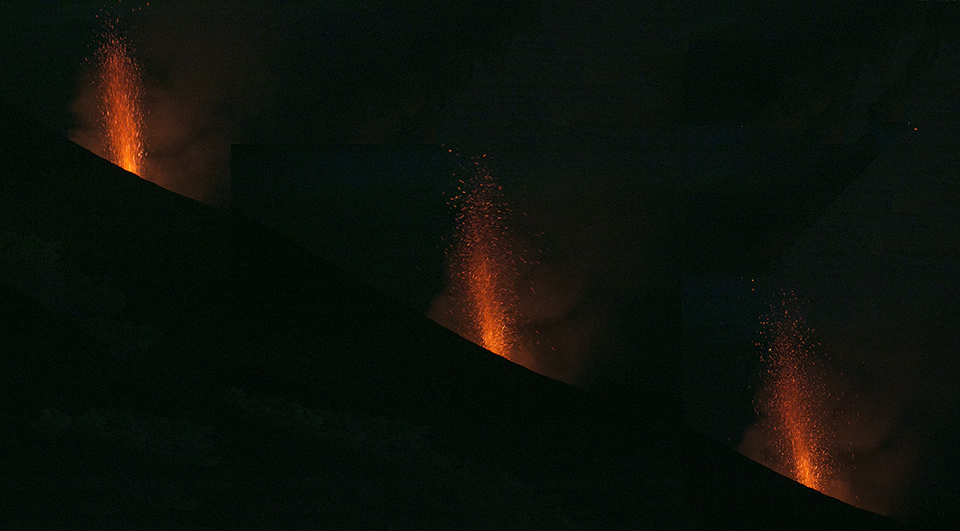
Huub Sanders made the video below of three volcanic eruptions at the same time on Stromboli:
More tips?
All in all, it takes quite a bit of improvisational talent to successfully photograph an erupting volcano. Especially if you are doing it for the first time. Hopefully these tips will help you.
If you have ever photographed an active volcano or volcanic eruption yourself, I would of course be very interested to hear about your experiences and any tips!
About the author
Michelle Peeters is fotografe en oprichter van DeuxBleus Fotografie. Michelle herkent het bijzondere in het gewone en het gewone in het bijzondere. Ze heeft zich nooit willen specialiseren en is daardoor van alle markten thuis.
You might also like
-
 Digital remake of analogue photos after 20 years
by Michelle Peeters
-
 Must Do in Sicily: Photographing Mount Etna
by Michelle Peeters
-
 Removing shadows from faces with AI
by Elja Trum
-
 The Nikon Z 400mm is dangerous for people with pacemakers
by Nando Harmsen
-
 Light the space, not the face
by Elja Trum
-
 If You're Not Careful, You'll Get Punched in the Face
by Michiel Heijmans
6 comments
-
 Roos wrote on Saturday 22 September 2018 at 14:27 | reply
Beautiful!
Translated from Dutch. -
 Huub wrote on Monday 24 September 2018 at 21:59 | reply
It remains a very impressive natural phenomenon, and on Stromboli it is reasonably easy to experience. Stromboli is easily accessible from various ports in southern Italy, the climb to the top costs some sweat, but you do get your money's worth. Definitely highly recommended.
Translated from Dutch. -
 Joey Lindeman wrote on Tuesday 25 September 2018 at 21:33 | reply
Why no bracketing? I think you could have gotten more out of it. Perhaps bursts in the context of the surroundings instead of all this deep black.
Translated from Dutch. -

 Michelle Peeters wrote on Tuesday 25 September 2018 at 21:47
| reply
@Joey: bracketing doesn't work with something that's constantly moving. With raw, you can still recover a lot of detail.
Translated from Dutch. -
 Petra wrote on Saturday 13 April 2019 at 15:38
| reply
And do you get any use out of Bulb? Or isn't it necessary if your camera can do shutter speeds of up to 30 sec?
Translated from Dutch. -
Michelle Peeters wrote on Saturday 13 April 2019 at 22:10
| reply
@Petra: bulb is indeed useful for exposure times longer than 30 seconds.
Translated from Dutch.
Have your say
Please note: Articles older than a week can only be commented on by signed-in visitors.Would you still like to comment? sign in or create a free account.
Become a better photographer every week
A practical photography tip in your inbox every week.
38,890 photography enthusiasts already receive the tips! More about the weekly mail. Or keep up to date via  Facebook.

Elja Trum
Photofacts; everything to do with photography!
Would you like to take better photos and keep up with what is happening in photography? Photofacts publishes articles that teach you something about photography — from a product announcement to a practical shooting tip or a look at a website. Photofacts covers photography every day and is a hobby project of Elja Trum's that got out of hand. The articles are written by a team of volunteer authors. If you would enjoy writing one or more articles for Photofacts, do get in touch.More about PhotofactsPhotofacts is made possible in part by
