

Must Do in Sicily: Photographing Mount Etna
Sunday 27 May 2018, 22:44 by Michelle Peeters | 7,679 views | 6 commentsThis article was translated from Dutch with the help of AI. Read the original.
The symbol of Sicily, Mount Etna. When you think of this Italian island, you automatically think of this remarkable natural phenomenon too.
At the end of April, I climbed the volcano during a photography week in Sicily. In this article, six tips for photographing it at its best.
Active volcano
Smoking and rumbling, spewing ash and lapilli (small pieces of lava rock), Etna has attracted attention for thousands of years.
Almost nowhere in Europe can you admire the spectacle of an active volcano better than here, at the approximately 3320-metre-high Mongibello (Mountain of Mountains), as the locals call it.
Etna also owes its mystical appearance to its location. The volcano rises alone on the coast of the Ionian Sea, enclosed between the Simeto to the west and south and the Alcantara to the north.
Visible from a long way away, its evenly shaped silhouette stretches into the sky. Its fertile slopes are dotted with hundreds of villages and farms.
Activity
Etna is the most active volcano in Europe after Stromboli and one of the most active in the world. It is always releasing vapour and there are regular eruptions.
Eruptions occurred in, among other years, 1978, 1981, 1986, 1987, 1989, 1991-1993, 1999, 2000, 2001, 2002, 2004 and every year from 2006 to 2017. The major eruptions from long ago that are remembered took place in 1381 and 1669, when the lava reached the city of Catania.
In 1669, around 25,000 people died in the eruption. The largest eruption of the last hundred years was in 2001. It lasted 24 days and destroyed many buildings and the cable car.
The summit of Etna has changed over the years. The current volcano has five active main craters: Voragine (formed in 1950), the north-east crater (formed in 1911), Bocca Nuova (formed in 1968), the south-east crater (formed in 1971) and the new south-east crater (formed in 2007).
The summit of the south-east crater stopped erupting in May 2007. Around September 2007, the flank of this crater split open and a new crater mouth formed. The eruptions then continued through this "pit crater", which is now called the "new south-east crater".
The new crater is the most active crater and grew very quickly because of the large number of eruptions. Between January and November 2011 alone, Etna grew by around 200 metres, making it the world's fastest-growing volcanic mountain.
Since then, the crater has continued to grow in height and size.
Rifugio Sapienza
From our villa in Portopalo, where we were staying with the group of photographers, we drove north to the southern side of Etna: Etna Sud. Rifugio Sapienza, just past Nicolosi, is the mountain refuge where the cable car leaves from and what you need to enter into your GPS system.
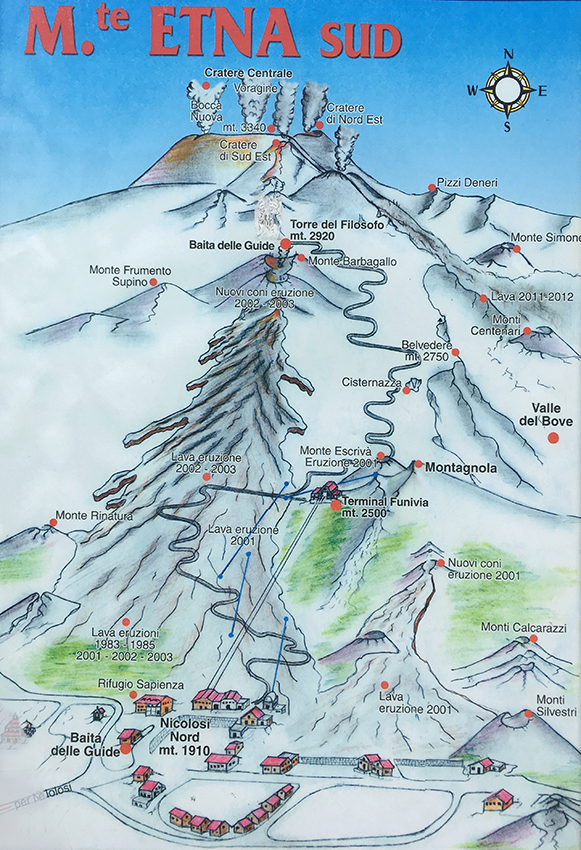
We eventually drove there by instinct, following signs, looking at Etna and occasionally asking locals for help in our broken Italian. After driving for a few hours, we arrived at a road where old lava flows and some buried houses are still clearly visible.
At Rifugio Sapienza (you can drive this far), you can take the cable car to a higher point on Mount Etna. During our cable-car ride, we saw people walking below us, which also makes sense, as tickets for the cable car are rather expensive.
The price for the cable car at Etna is 35 euros (return ticket), and if you take both the cable car and the truck to the second-highest crater and back, it costs 65 euros.
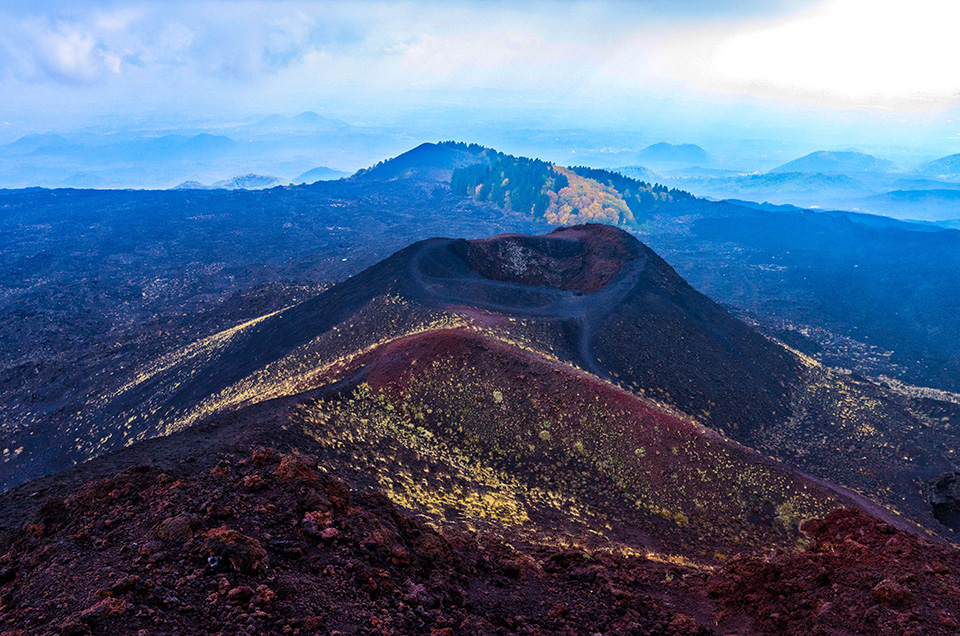
The Silvestri Crateri, the volcanic craters formed in 1893, are within walking distance and are certainly worth a visit. However, if you want to visit Europe's largest volcano from closer up, you can take the cable car to the station (Terminal Funivia at 2500 metres) on Etna.
From the mountain station, you can walk to the Monte Escrivia craters, with a short climb. There were still eruptions here in 2001. You can also take a sort of bus with very large wheels and lots of tread, which takes you to Torre del Filosofo at 2920 metres.
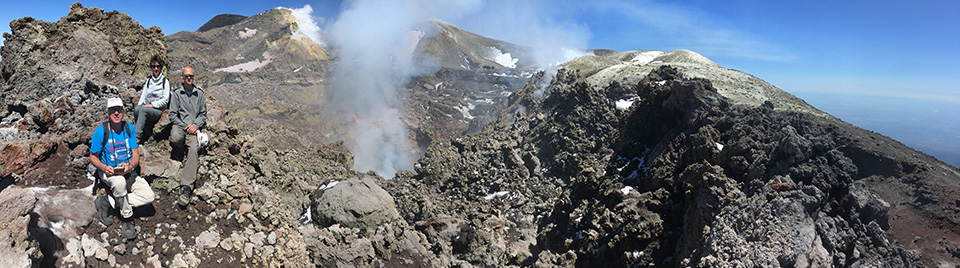
We saved the extra 30 euros and walked/climbed to this crater (not particularly impressive) in just over an hour, and then continued to Cratere di Sud Est at 3340 metres. Not many people do this section, and it is manageable depending on the weather conditions and volcanic activity.
6 tips for photographing Etna
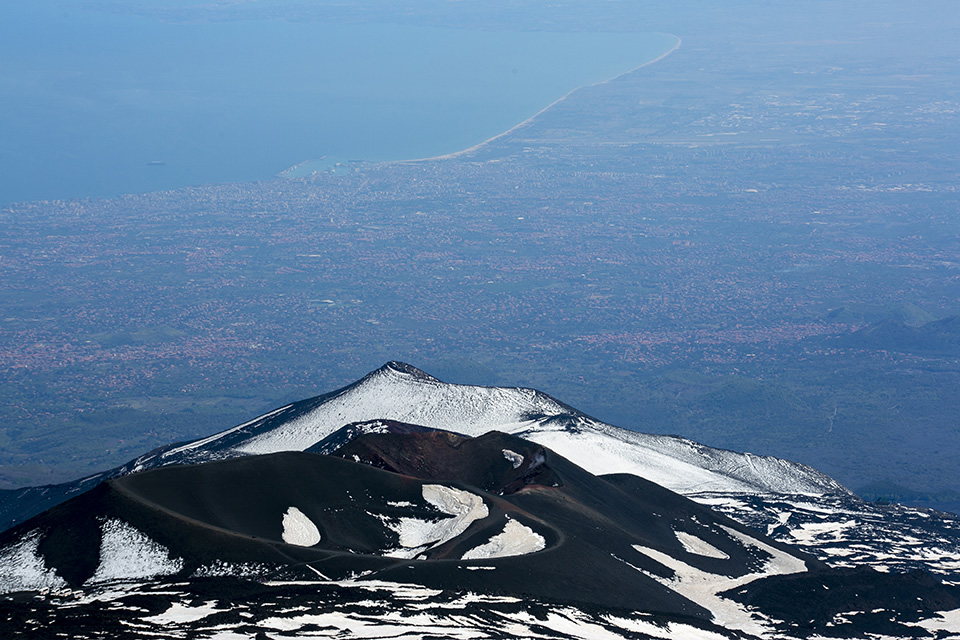
Here are some tips for photographing on and around Etna. Because the landscape is so overwhelming, it is often difficult to fit this three-dimensional scene into a flat photograph.
1. Living landscape
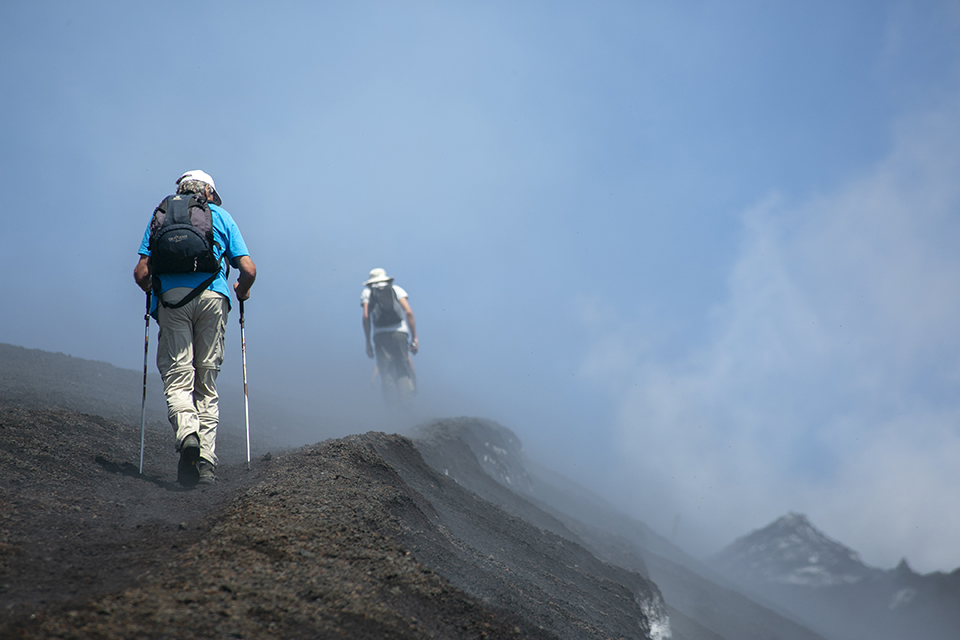
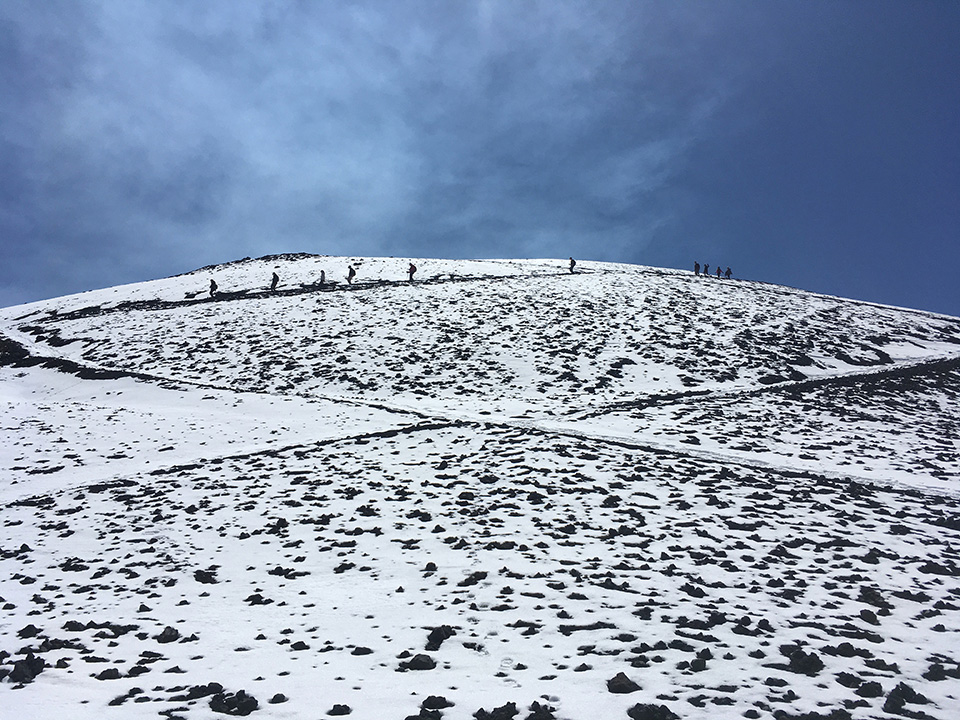
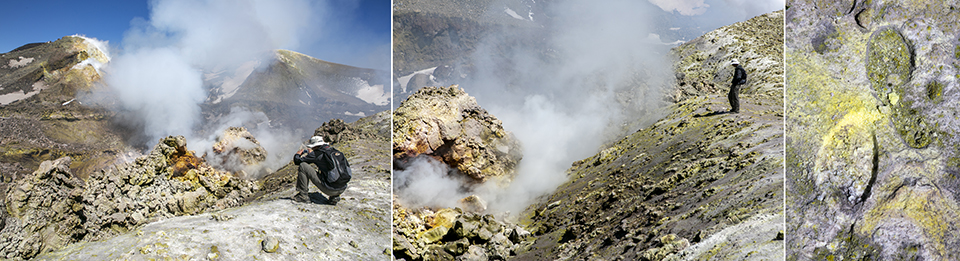
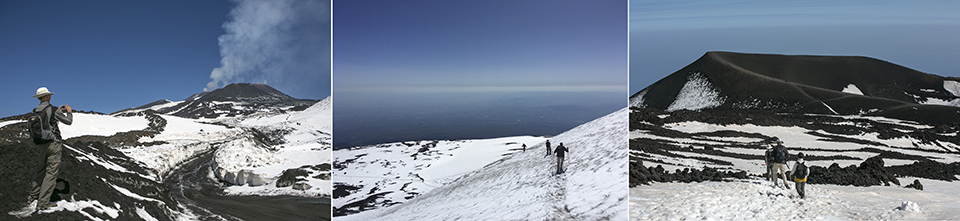
Try to look for elements that add depth to the photograph and make clear how immense nature is in that place. One thing you can do is add people. They make the photograph lively (something is happening) and also clearly show the scale between people and nature.
Adding walkers to the volcanic landscape gives you a better impression of its overwhelming size.
2. Take your time and walk calmly
Etna still erupts regularly, the last time in 2003. There is no churning lava here at the moment, but there are enormous fresh craters with volcanic ash and fumaroles. The air at almost 3 kilometres above sea level is very thin and dizzying.
Climbing upwards with heavy camera equipment is quite hard, and you often find yourself gasping for breath.
Still, try to keep looking around you (it is a good distraction!) and catch your breath before taking a photograph. This greatly reduces the risk of camera shake. Breathing in, breathing out halfway and then taking the photograph works extremely well.
3. Stay alert
Etna is not programmable: the mountain can suddenly decide to put on an exciting show that starts and erupts within 15 minutes (as happened during the majestic eruption in 2002/2003).
But after such an eruption, with columns of smoke and glowing lapilli, you often have to wait again without anything spectacular happening.
And it does not look as though this will happen any time soon. So there is little chance of eruptions or lava flows. If there is a chance, you can only photograph them in the evening or at night from a distance with a telephoto lens.
4. Composition
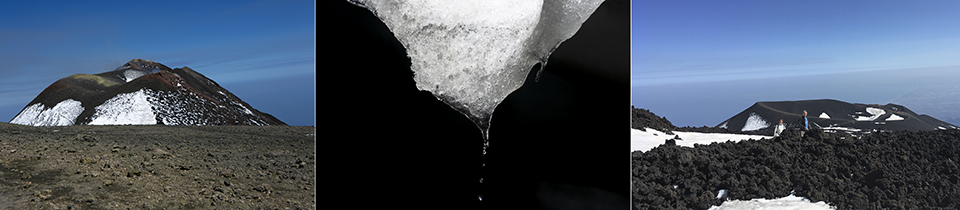
A tripod and remote control are obviously useful preparation. In our situation, it was simply a matter of keeping a close eye out for attractive compositions that appeared, often unexpectedly.
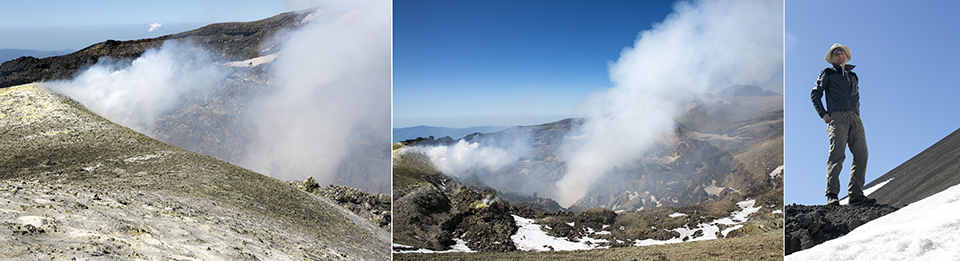
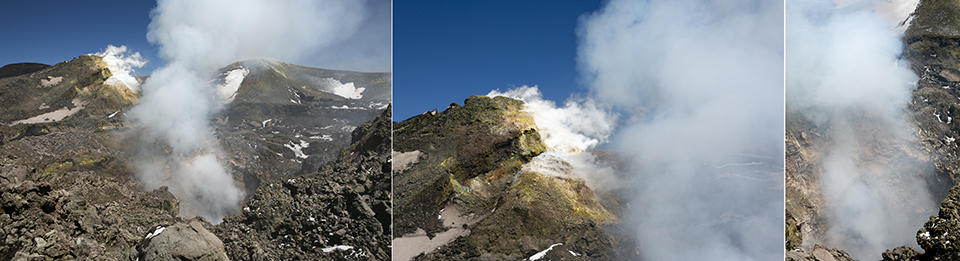
Someone suddenly crossing a snowfield, a beautiful diagonal line, a drop sliding from an icicle in backlight, a huge cloud of smoke rising from the crater, and so on.
Also make sure you follow the Rule of Thirds and do not place the main subject (for example, a person you are photographing) in the centre of your frame. This makes for a much more exciting image.
Naturally, it is a different matter if you photograph someone filling the frame.
5. Colours
The scenes offered by the volcano are extremely varied, from white snow to black lava running through thousands of flowers, and from lava rivers to columns of ash. One thing is certain: Etna's beauty is guaranteed all year round.
Etna is much more than just the colour black. For example, one of the craters we saw was almost completely reddish brown. That is not something you would quickly expect when standing at the top of a volcano. We had an image of destructive black lava in our minds.
Light is extremely important for colours. Objects reflect light. When light hits an object, certain light waves are absorbed and others are not.
This determines the colour of an object. If something looks red, more red light is reflected and other light is absorbed. Only black objects absorb all the light (although not literally all the light, otherwise it would form a black hole), while white reflects all colours evenly.
Red and yellow have the property of quickly attracting the eye's attention, while cooler colours (such as our blue sky) do this less.
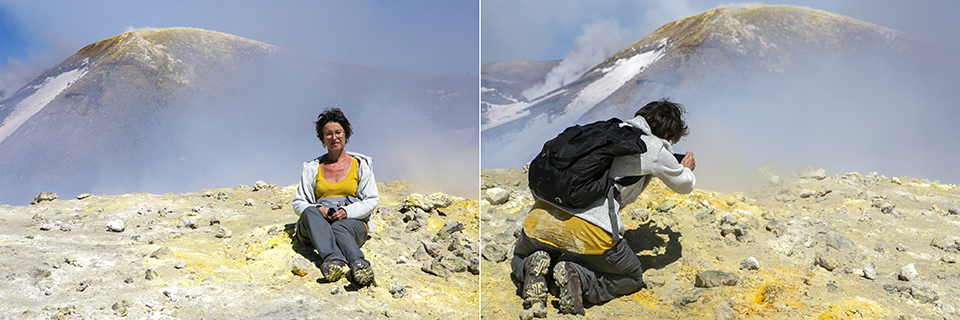
Because we were lucky enough to have a blue sky and there were many complementary colours present (read more about this in the article on using colour in your photography), we were able to take many vivid photographs.
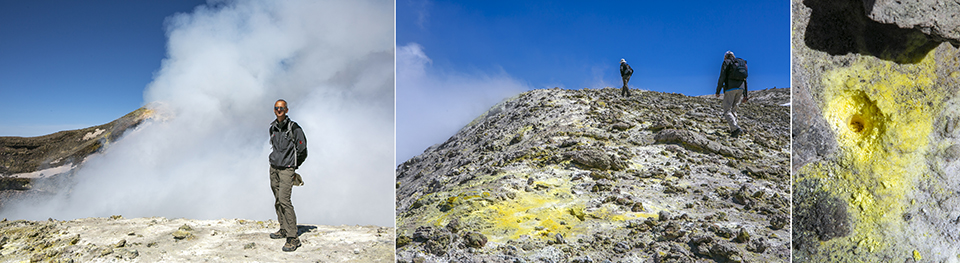
There were many colours to see, including the deep blue of the sky, the white of the snow, the deep black of the lava, the reddish brown and sometimes green of some crater rims and the villages below, and the bright yellow colour of the sulphur at Cratere di Sud Est.
6. Snow and exposure
Taking photographs in snow is not really easy. Snow is white and reflects light. It is difficult to get good photographs when you set the camera to automatic mode.
Your camera is calibrated for middle grey. The light in a particular scene is analysed based on these mid-tones.
Normally this works quite well, but the bright white colour of snow, especially when the sun is shining on it, means that the camera cannot meter correctly, causing your photographs to be underexposed. The snow will appear grey in the photograph.
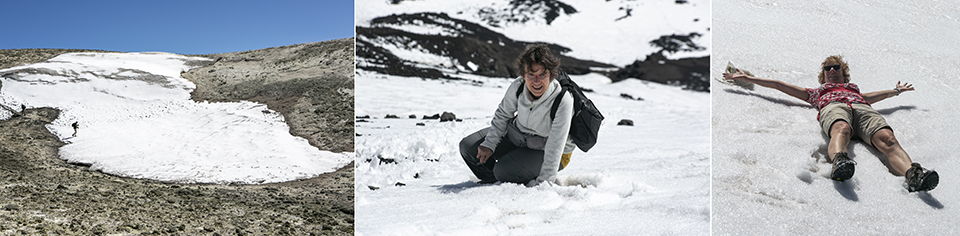
So always check your exposure and change it if necessary. You will often find a +/- function on the camera. Use it to get the right exposure compensation for beautiful white snow in your photograph.
Snow should be overexposed by around +1 stop when it is dominant. But a black lava plain/crater, or a black beach, should instead be underexposed by around -1 stop when it is dominant. If there is enough bright sky, this is not necessary, but when the photograph is 90% lava, it will usually be too bright.
I often photograph in semi-automatic Av mode, so I can set my aperture (and therefore depth of field). In this mode, you can also easily add exposure (overexpose) to get a correct exposure in the snow.
Incidentally, these kinds of tips have become less relevant since, especially if you photograph in RAW, you can also correct things afterwards...
More or better tips?
If you have more or better tips for photographing a volcano yourself, please let us know in the comments!
Photographing a volcano that erupts regularly (such as Stromboli) naturally requires many more skills and adjustments as a photographer.
You will need to photograph in the evening and use a tripod, and you must stay very alert! This is also not without risk, so caution is required!
About the author
Michelle Peeters is fotografe en oprichter van DeuxBleus Fotografie. Michelle herkent het bijzondere in het gewone en het gewone in het bijzondere. Ze heeft zich nooit willen specialiseren en is daardoor van alle markten thuis.
You might also like
-
 Film location in Sicily
by Michelle Peeters
-
 Photographer in Sicily: Luca Migliore
by Michelle Peeters
-
 Sigma introduces a 50mm F1.2 DG DN Art for L and E-mount
by Nando Harmsen
-
 Review: SmallRig VB99 Pro mini V-mount battery
by Nando Harmsen
-
 Tamron introduces its first lens for Fujifilm X-mount
by Nando Harmsen
-
 Sigma's very compact full-frame camera with L-mount
by Michelle Peeters
6 comments
-

 Stefan ALEN wrote on Tuesday 29 May 2018 at 11:36
| reply
I was there at the beginning of April and was very impressed by the raw beauty of the volcano. When photographing, I mainly focused on the contrasts between the black of the lava, the white of the snow (there was still quite a lot of snow at the time), the steel blue of the sky and the wispy haze of the sulfur fumes. I hope to have finished the photo series in the next few days. If desired, I’ll keep you posted. Best, Stefan
Translated from Dutch. -
 Michelle Peeters wrote on Tuesday 29 May 2018 at 11:59
| reply
@Stefan: please do, I'm very curious!
Translated from Dutch. -
Stefan ALEN wrote on Wednesday 30 May 2018 at 18:09
| reply
Hello Michelle (and everyone else interested).
Translated from Dutch.
Because of you, I finished the series, otherwise it probably would have remained unfinished for quite some time.
I posted it on Flickr in the following album:
https://www.flickr.com/photos/stefan-alen/albums/72157691657248540
Comments are always appreciated.
greetings,
Stefan -
Michelle Peeters wrote on Wednesday 30 May 2018 at 18:16
| reply
@Stefan: thanks for sharing! Nice photos. I especially like the one of the little lake and the icicle!
Translated from Dutch. -
 guest wrote on Thursday 31 May 2018 at 18:58 | reply
Wonderful story, impressive surroundings, top professional photos!
Translated from Dutch. -
 ook-gast wrote on Thursday 31 May 2018 at 20:10 | reply
What a wonderful inspiring environment and what a beautiful story and photos.
Translated from Dutch.
Have your say
Please note: Articles older than a week can only be commented on by signed-in visitors.Would you still like to comment? sign in or create a free account.
Become a better photographer every week
A practical photography tip in your inbox every week.
38,890 photography enthusiasts already receive the tips! More about the weekly mail. Or keep up to date via  Facebook.

Elja Trum
Photofacts; everything to do with photography!
Would you like to take better photos and keep up with what is happening in photography? Photofacts publishes articles that teach you something about photography — from a product announcement to a practical shooting tip or a look at a website. Photofacts covers photography every day and is a hobby project of Elja Trum's that got out of hand. The articles are written by a team of volunteer authors. If you would enjoy writing one or more articles for Photofacts, do get in touch.More about PhotofactsPhotofacts is made possible in part by
