

7 tips for taking photos at a fairground
Monday 26 February 2018, 20:02 by Yvonne Vloemans | 15,133 views | 8 commentsThis article was translated from Dutch with the help of AI. Read the original.
If you are not going on holiday, our own country offers all kinds of opportunities for taking great photos. One of them is photographing the fairground.
The lights, people and fast-moving rides provide quite a challenge, but can produce beautiful atmospheric images.
When photographing at a fairground, you can have fun practising with different settings, viewpoints and subjects. There are many things to consider when photographing a fairground. Here are 7 tips:
1. Tripod
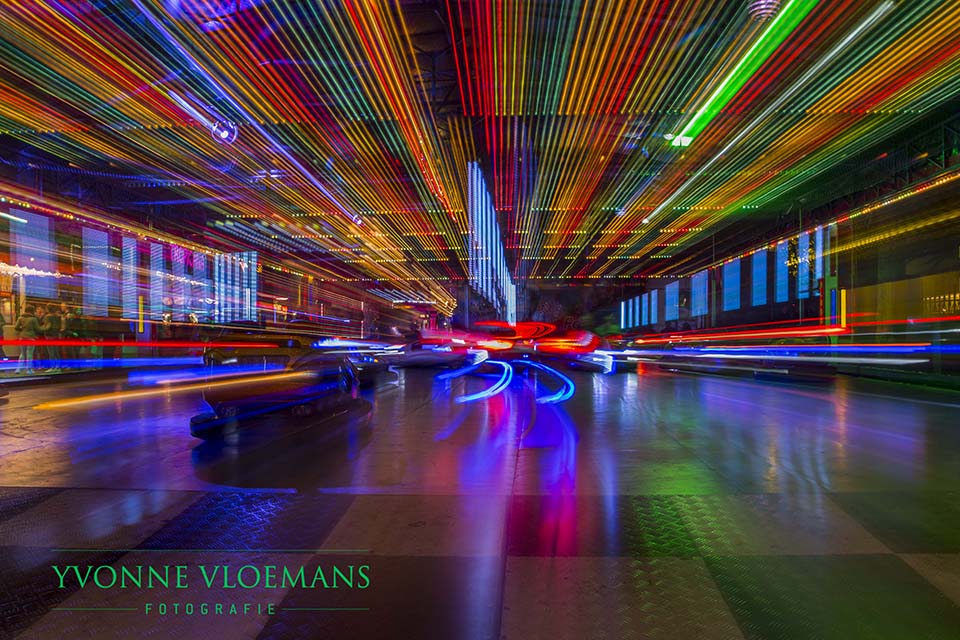
The photos were taken at the fairground in Oirschot. To take these photos, you need a tripod to get a good and sharp result with a long shutter speed. For the photo with the bumper cars, I also zoomed in and out to create a special effect.
With a longer shutter speed and a tripod, only the non-moving subjects will of course be sharp in the photo. But that is exactly why it is fun to try to create shapes with the light. With rotating rides, for example, you can capture light trails that form a circle in your image. You are actually light painting.
2. Camera settings
The most difficult part of photographing a fairground is setting the correct exposure. Because of all the flashing lights, the camera will judge the conditions to be brighter. The result is quickly an underexposed photo.
That is why it is advisable to overexpose the photo slightly, by one or two stops, so that you see more than just points of light and the complete ride, including its contours, is nicely lit in the image. I did not apply this to my own photos. It is more of a general tip.
Check your histogram after taking the photo to see whether you also have clipped areas. Do make sure that no large parts of your photo become overexposed.
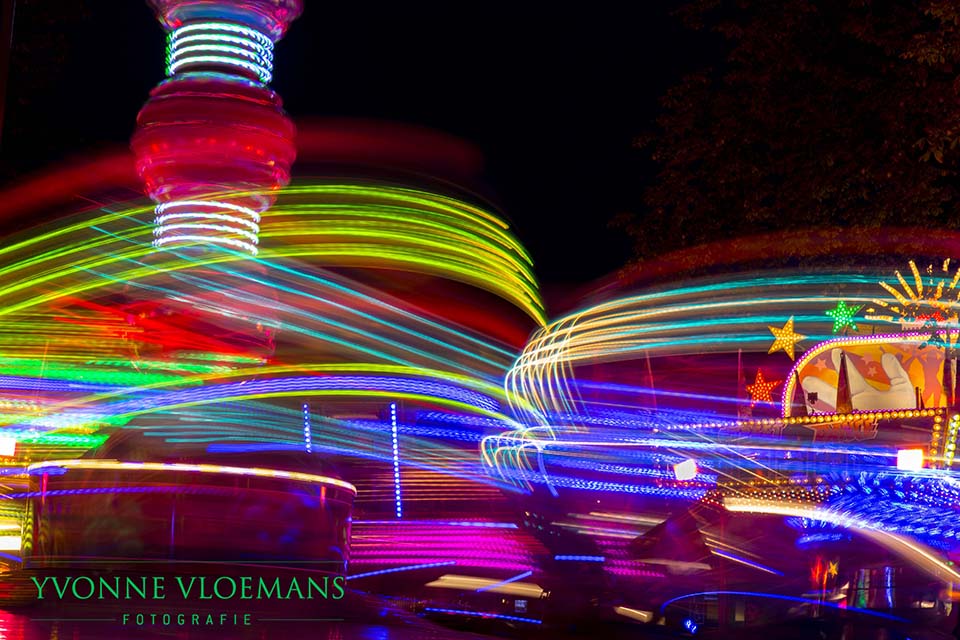
It is important to photograph with a small aperture, a large number, otherwise you will not get a long shutter speed. But of course, this can differ from one situation to another.
Because the rides make many different movements, every photo is completely different. So it is good to experiment with the shutter speed and aperture.
It is important to set the ISO as low as possible. In my case, that was ISO 100. This is to avoid noise, and a higher ISO will of course also make your shutter speed shorter. It is also a matter of trying out which shutter speed works best for each ride.
3. Manual mode
When you photograph in your camera's manual mode, you can decide for yourself how much light reaches your sensor and experiment more easily with your shutter speed. For example, do you want to photograph a moving carousel? Then you need a different shutter speed than when you want to freeze something.
4. Timing
The best time to photograph the fairground is during the blue hour. The sky is not completely black yet, but there is still a blue glow in the sky. This adds more dynamism to your photos, because there are still details visible in the sky.
The fairground looks its best just after sunset. During this period, the sky takes on a deep blue colour and the lights are more visible.
5. Lens
A wide-angle lens is the easiest lens to use at a fairground. This gives you the opportunity to capture an entire ride and combine movement and static elements in one image.
6. Viewpoint
It is best to try out different viewpoints. Chair-o-planes, for example, are beautiful to photograph from a low viewpoint with a wide-angle lens, while with some rides it is especially effective to capture just one detail.
With quieter rides, you could even photograph from inside the ride itself.
About the author
Yvonne heeft de fotovakopleiding aan de Fotovakschool afgerond. Ze wil zich verder gaan specialiseren in portretfotografie. Ze heeft een vrij brede interesse en woont op het platteland van Oirschot (Noord-Brabant), alwaar ze veel natuurschoon vastlegt. Daarnaast doet ze ook veel aan macrofotografie.
You might also like
-
 Paintshoot; playing with paint in the studio
by Elja Trum
-
 10 tips for light painting
by Liesbeth van Asselt
-
 Light painting: a creative form of photography
by Nando Harmsen
-
 Artist creates huge light painting with drones
by Elja Trum
-
 An Ode to Holiday Snapshots
by Michiel Heijmans
-
 Classic paintings recreated as hilarious quarantine photos
by Michelle Peeters
8 comments
-
 Martin van Wulfen wrote on Monday 26 February 2018 at 21:12 | reply
Good story Yvonne.
Translated from Dutch. -
guest wrote on Tuesday 27 February 2018 at 12:52 | reply
Thank you, Martin.
Translated from Dutch. -
 Henk wrote on Tuesday 27 February 2018 at 13:59 | reply
Also use a cable release
Translated from Dutch. -
guest wrote on Tuesday 27 February 2018 at 14:35 | reply
Nice series and (fortunately) no huge walls of text, so my sincere and heartfelt compliments!
Translated from Dutch. -

-
 Chantal wrote on Tuesday 27 February 2018 at 15:32 | reply
interesting tips thank you very much for this.
Translated from Dutch. -
 Marius Hultermans wrote on Friday 2 March 2018 at 13:39 | reply
Beautiful photos and a good and clear explanation.
Translated from Dutch.
Marius Hultermans -
 Rias.Photography wrote on Friday 2 March 2018 at 21:35 | reply
Thanks for these great tips!
Translated from Dutch.
Have your say
Please note: Articles older than a week can only be commented on by signed-in visitors.Would you still like to comment? sign in or create a free account.
Become a better photographer every week
A practical photography tip in your inbox every week.
38,765 photography enthusiasts already receive the tips! More about the weekly mail. Or keep up to date via  Facebook.

Elja Trum
Photofacts; everything to do with photography!
Would you like to take better photos and keep up with what is happening in photography? Photofacts publishes articles that teach you something about photography — from a product announcement to a practical shooting tip or a look at a website. Photofacts covers photography every day and is a hobby project of Elja Trum's that got out of hand. The articles are written by a team of volunteer authors. If you would enjoy writing one or more articles for Photofacts, do get in touch.More about PhotofactsPhotofacts is made possible in part by
