

10 tips for light painting
Monday 3 January 2022, 14:41 by Liesbeth van Asselt | 7,985 views | 4 commentsThis article was translated from Dutch with the help of AI. Read the original.
With light painting, you draw in your photo during the exposure. Usually with a combination of long shutter speeds and a dark environment. This lets you create dream worlds without using Photoshop.
In this article, 10 tips for light painting based on the questions I am asked most often.
1. How do you make yourself invisible when you are painting in front of the camera?
There are three handy ways to make yourself invisible. Start by putting on dark clothing. A black coat reflects much less light than a white one. So dress as darkly as possible.
Cover the back of your light source, so that no light shines on you. The light only needs to go towards the camera, of course.
And the final tip for making yourself invisible is to line yourself up properly behind your model. Is your model standing with her legs apart? Stand that way yourself too. It is of course useful if you have a model who is taller than you, as you can hide behind her more easily.
2. What is stamping?
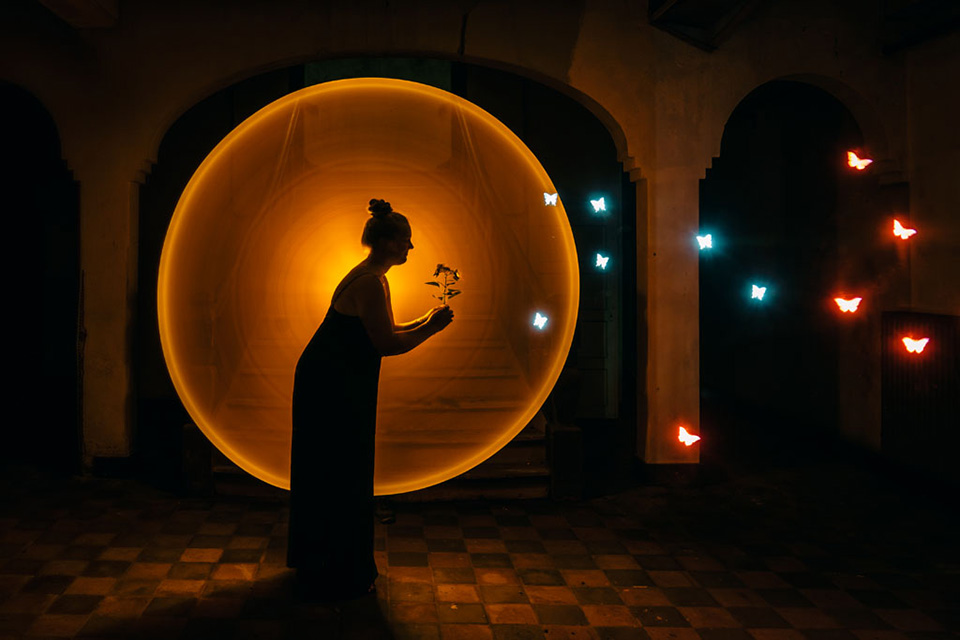
With 'stamping', you briefly switch on your torch for a moment, or give a test flash, while there is a stencil over your light, for example. This stamps the stencil into your photo, as it were.
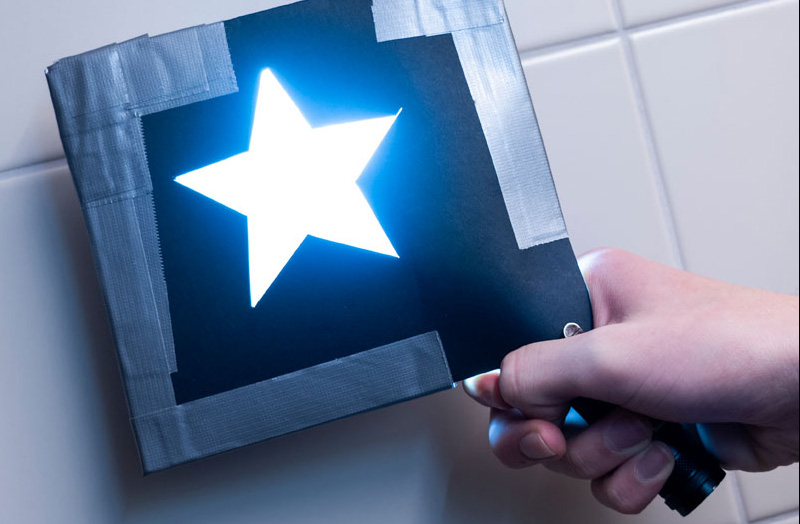
You move your torch, with the stencil, to a different spot each time before switching it on again.
You can make that stencil yourself very easily. Just like lots of other light painting equipment! Above you can see a stencil of a little star on a torch. But of course you can come up with all sorts of things for this. The photo below was made with a butterfly stencil.
3. What do you use as a light source?
You can really use anything that gives off light for light painting. Sparklers, ice fountains, bicycle lights, emergency lights, finger lights, Christmas lights, LED candles and, of course, torches.
4. How do you make a nice circle?
I make lots of circles in my light painting photos. I make them by turning an illuminated tube around behind my model. I do this by hand. But what if you are not so good at that?
Then use a drill or a paint roller. By attaching a stick to the head of a drill and fixing, for example, a Christmas light to that stick, you get beautiful round circles.
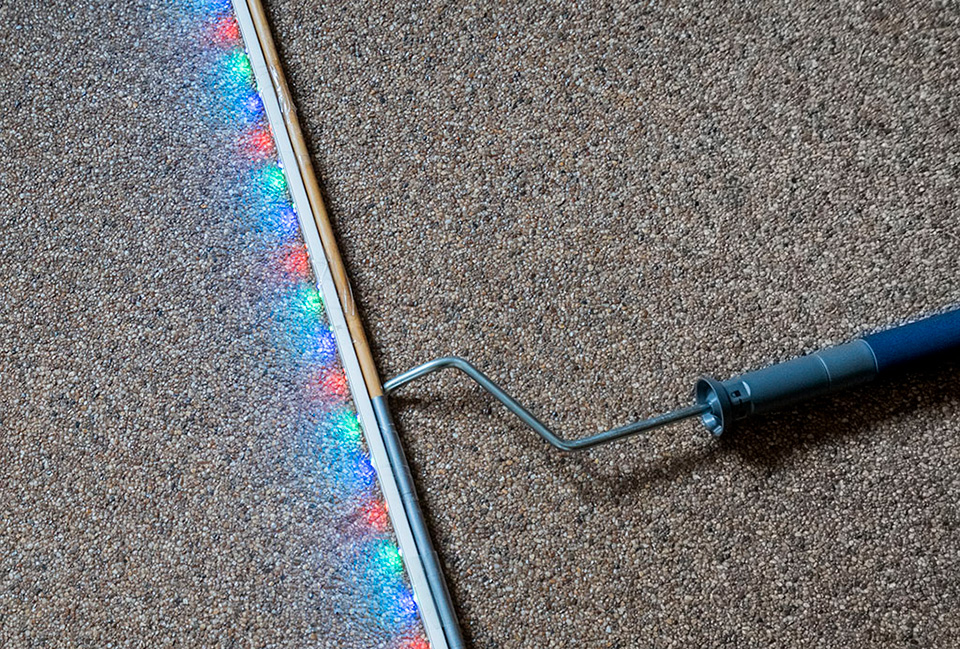
I often find a drill too difficult to control, so I prefer to use a paint roller. You can buy paint rollers where the handle is not fixed in place.
You then attach the stick with the lights to the bracket of such a paint roller. Then turn the bracket around and your circle is ready!
5. How do you get that edge of fire around the circle behind the model?
I make the circle with a tube, either homemade or a ready-made fluorescent tube sleeve, with a torch inside it.
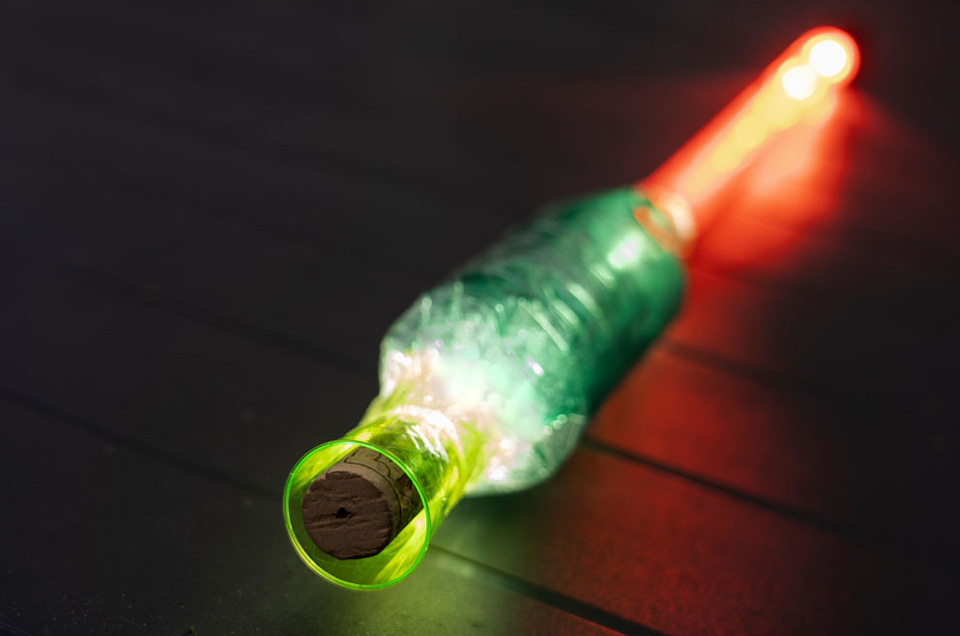
By placing a cork in the top of the tube, you can attach a sparkler or an ice fountain to the end of the tube. You simply push the wire of the sparkler into the cork.
6. How do you also get light at the end of the tube?
If you cap the tube and stick aluminium foil to the inside of the cap, the light from your torch is reflected back into the tube.
7. How do you make a coloured tube?
I make my own tubes by rolling 0.2 mm PVC foil into a tube. I then roll coloured filters inside it.
In my case, these are Lee filters, which I also use for my studio flashes. But of course it can be any material that has a colour and lets enough light through.
8. How do you get stripes and blocks in your painting?
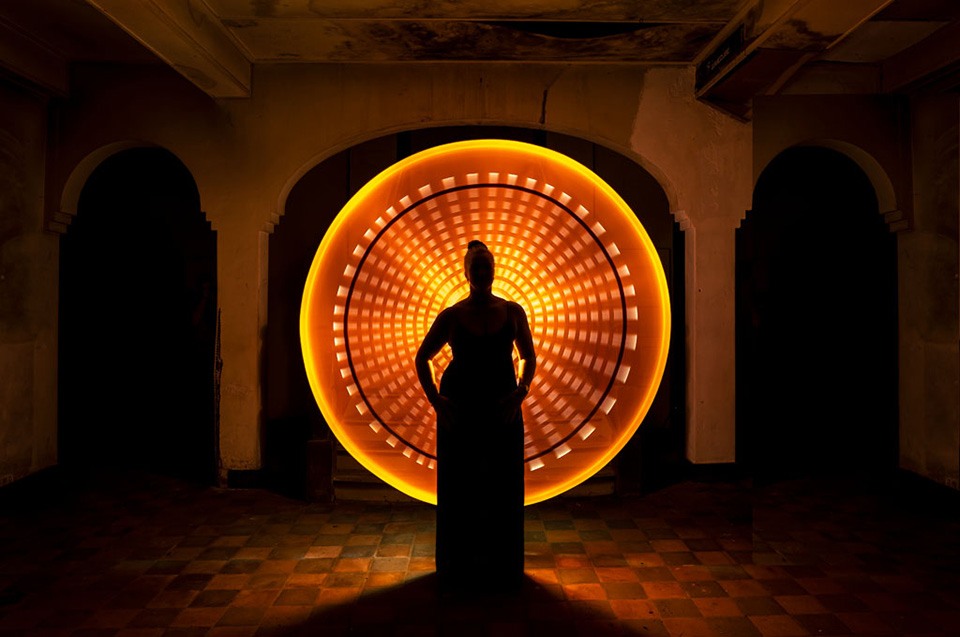
By sticking strips of duct tape to the tube, you get stripes in your painting.
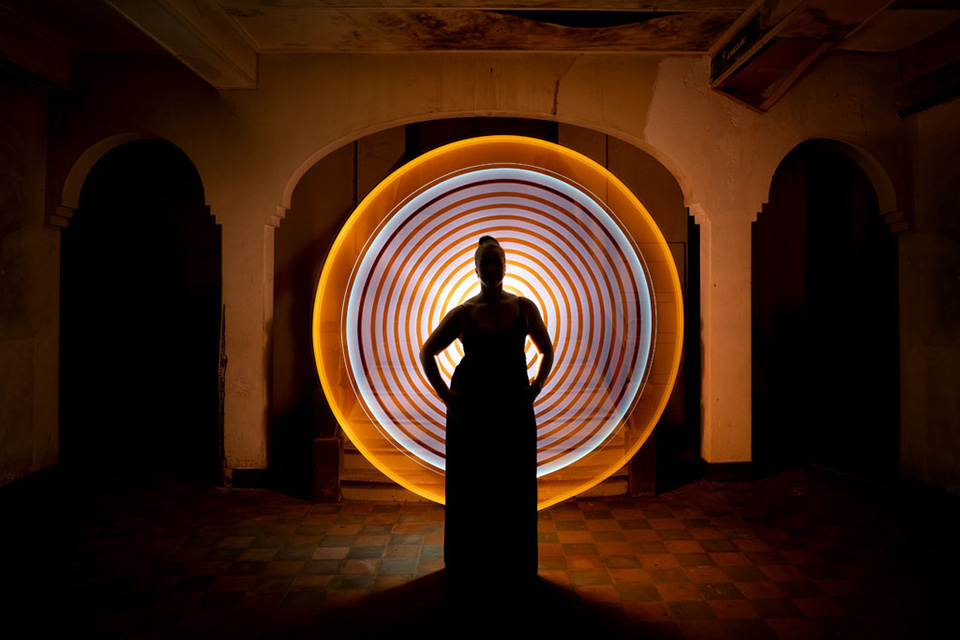
If you then set the torch to its flashing function, these become blocks.
9. Are there any special requirements for the model?
The most important thing is that the model can stand still properly for a longer period of time. So she is not wearing heels, at least. When we paint, I count down to 3 and at 2 she breathes out completely, or completely in if she prefers. She holds that.
At count 3, I start the painting. When I am finished, the model can breathe again.
 If the model moves, you see it straight away in the photo. You then get a black edge around the model.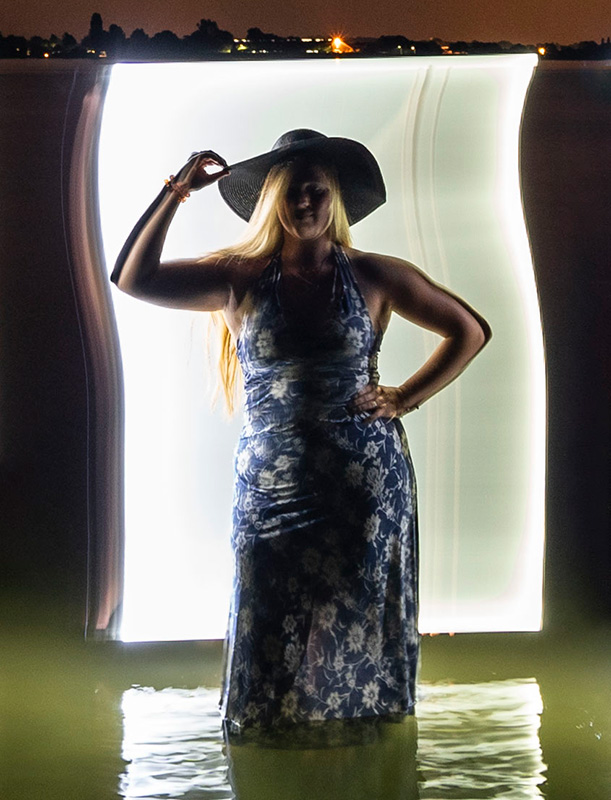
10. How do you remove feet from photos of orbs?
First of all, I often find it quite funny when those feet are visible underneath, so I do not always remove them. If you do not want them in the image, you can shine your torch on the spot where your feet are for a moment after the painting.
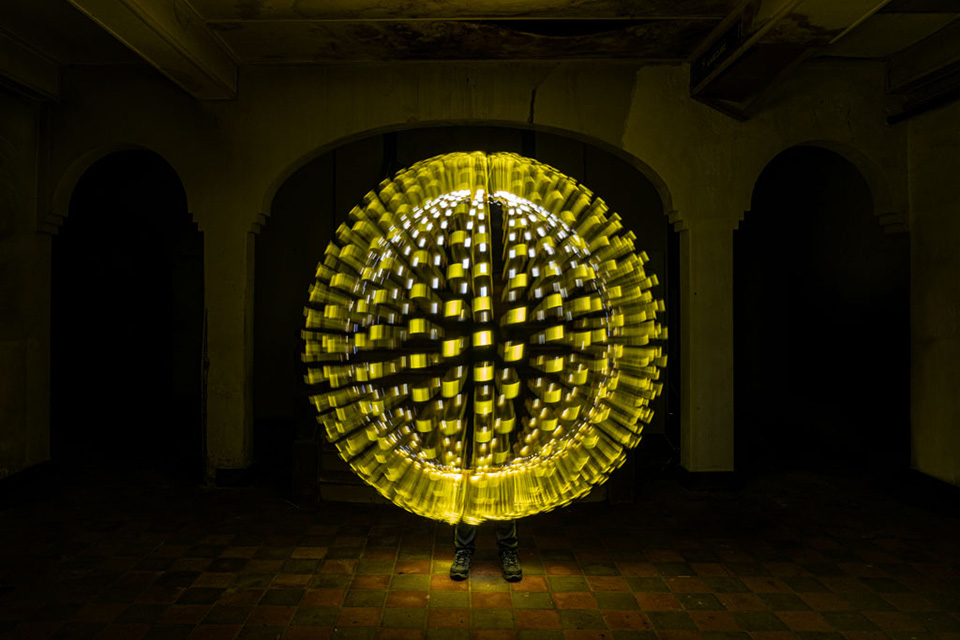
So light up the grass or the leaf you are standing in. There will then be so much light on the sensor in that spot that your feet disappear into it.
This usually works fine with dark surfaces such as grass and leaves, but with light surfaces you often get an annoying white spot beneath the orb. In that case, there is nothing else for it but to remove the feet in post-processing.
About the author
Liesbeth fotografeert met haar bedrijf stapfoto.nl voor websites van bedrijven. Daarnaast verzorgt ze al sinds 2004 (vooral creatieve) workshops zoals lightpainting, flitsen in de natuur, fine art, frozen flowers, paintsplash, infrarood, icm en multi exposure. Daarnaast is er een Stapfoto vakgroep voor de meer gevorderde fotografen.
You might also like
-
 Paintshoot; playing with paint in the studio
by Elja Trum
-
 Light painting: a creative form of photography
by Nando Harmsen
-
 Artist creates huge light painting with drones
by Elja Trum
-
 Classic paintings recreated as hilarious quarantine photos
by Michelle Peeters
-
 Wacom launches four new drawing tablets
by Elja Trum
-
 What came of my New Year's resolution?
by Nando Harmsen
4 comments
-

 martinphili wrote on Monday 3 January 2022 at 21:46
| reply
martinphili wrote on Monday 3 January 2022 at 21:46
| reply
I actually mainly know light painting from a different angle, namely when photographing cars at night. The subject, the car, is illuminated with a flashlight or another light source so that only the subject is properly lit in the photo. Combined with carefully planned lighting of the surroundings, this can produce surprising images.
Translated from Dutch. -
 Robert wrote on Tuesday 4 January 2022 at 10:24 | reply
Nicccceeeee !
Translated from Dutch. -
 André Kremer wrote on Tuesday 4 January 2022 at 13:29 | reply
Nice and practical, instructive video. It inspires me to do it again too. I've done it once before, but now I see many areas for improvement.
Translated from Dutch. -
 Liesbeth van Asselt
wrote on Tuesday 4 January 2022 at 13:43
| reply
Liesbeth van Asselt
wrote on Tuesday 4 January 2022 at 13:43
| reply
@Martin that's right, that's a form of light painting that I also do often. Not with cars but in nature
Translated from Dutch. . For example, beautifully lighting a tree in its surroundings. Fun to do and often with beautiful results!
@Robert: thank you!
Have your say
Please note: Articles older than a week can only be commented on by signed-in visitors.Would you still like to comment? sign in or create a free account.
Become a better photographer every week
A practical photography tip in your inbox every week.
39,023 photography enthusiasts already receive the tips! More about the weekly mail. Or keep up to date via  Facebook.

Elja Trum
Photofacts; everything to do with photography!
Would you like to take better photos and keep up with what is happening in photography? Photofacts publishes articles that teach you something about photography — from a product announcement to a practical shooting tip or a look at a website. Photofacts covers photography every day and is a hobby project of Elja Trum's that got out of hand. The articles are written by a team of volunteer authors. If you would enjoy writing one or more articles for Photofacts, do get in touch.More about PhotofactsPhotofacts is made possible in part by
