

White balance and exposure in snow
Monday 27 December 2021, 20:10 by Nando Harmsen | 9,620 views | 4 commentsThis article was translated from Dutch with the help of AI. Read the original.
Now that winter has started, we are naturally hoping for snow as photographers. What could be more beautiful than a landscape under a white blanket, children playing in the snow, or photographing in a snowstorm?
There is a chance that your camera will get confused when you start shooting. So pay attention to white balance and exposure in snow.
Photographing a snowy world, or taking photos in it, is not that difficult. You just need to take a few things into account for the best results.
That all has to do with white balance and exposure. These two things can sometimes lead to unexpected results.
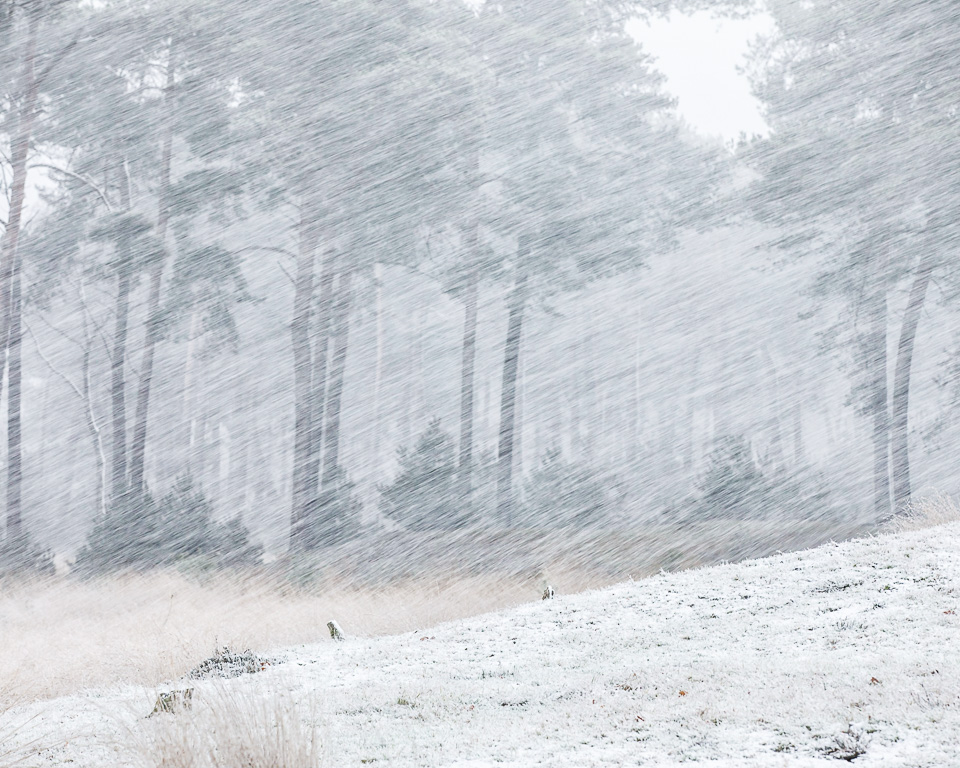
For photographers who shoot raw, this may be slightly less relevant. They can often correct these things during post-processing. White balance, at least. Correcting the exposure can perhaps cause some extra noise, depending on your camera.
If you are a jpeg photographer, it is much more important to get the white balance and exposure right. So do not blindly rely on what the camera sets for you. With all that white snow, the metering system gets confused.
White balance
Anyone who shoots with automatic white balance runs the risk of having a different white balance set for every photo. After all, the camera measures it again for every photo.
Modern cameras have very good auto white balance, but it can be useful to set it manually for each lighting situation.
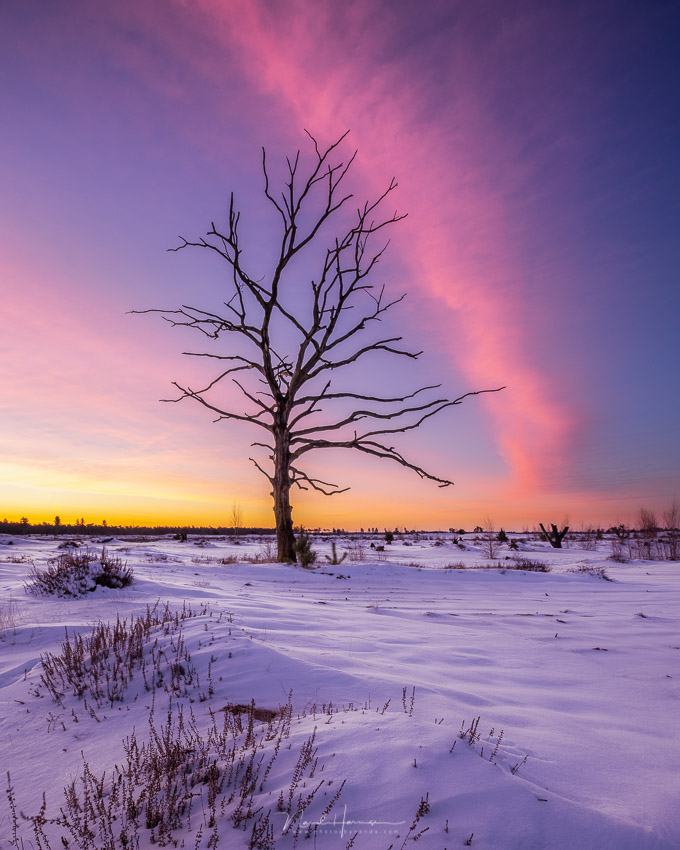
Remember that a white snowy surface is a perfect reflector. White reflects light, and therefore the colour of the light too. If there is a beautiful sunset with intense colours, the snow will be anything but white. White balance can sometimes compensate for those reflected colours.
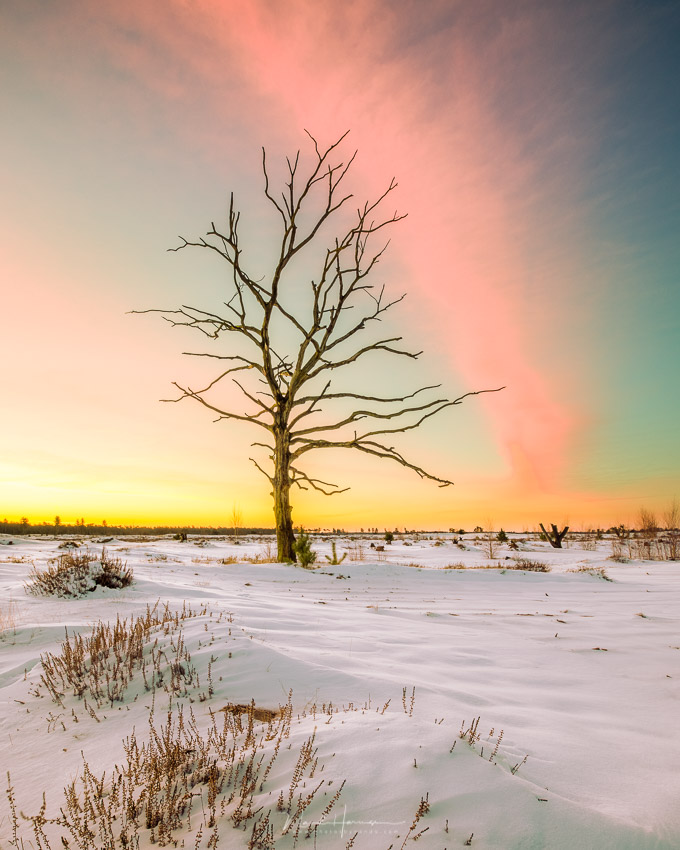
You also need to take the correct colour balance into account during post-processing. Pure white snow under a coloured sky at sunrise or sunset is simply not possible. So be careful with the white balance, and choose a value that does not distort reality.
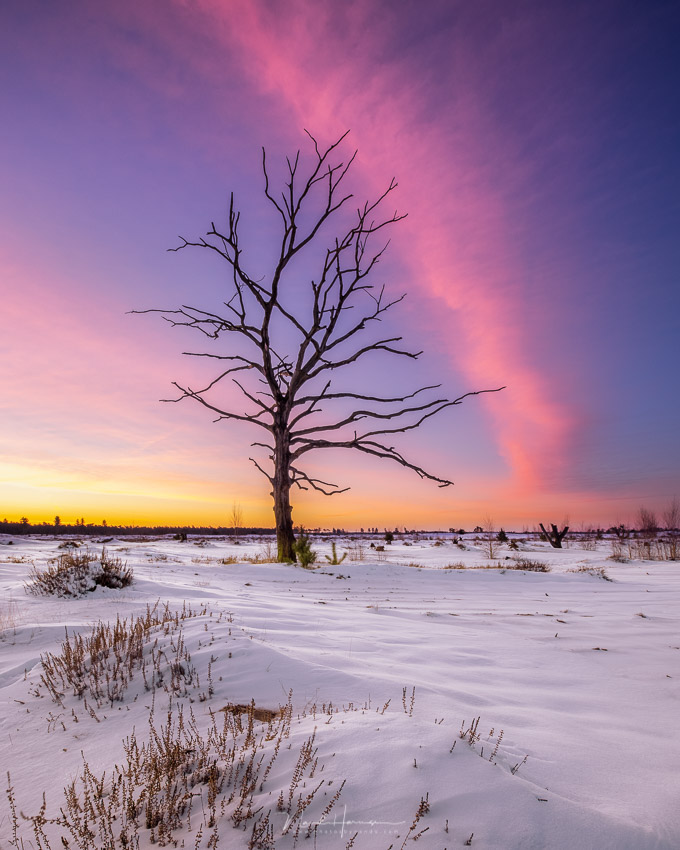
For the jpeg photographer, this is essential because the photo is the final result. For the raw photographer, it is less important. They can still adjust everything afterwards. As long as they remember that white snow takes on the colour tint of the available light.
Exposure
Exposure often goes wrong. Especially when the snow fills large parts of the photo, the exposure meter will get confused.
This is because the exposure meter assumes that the average brightness of the photo corresponds to 18% reflected light. This is also commonly called 18% grey.
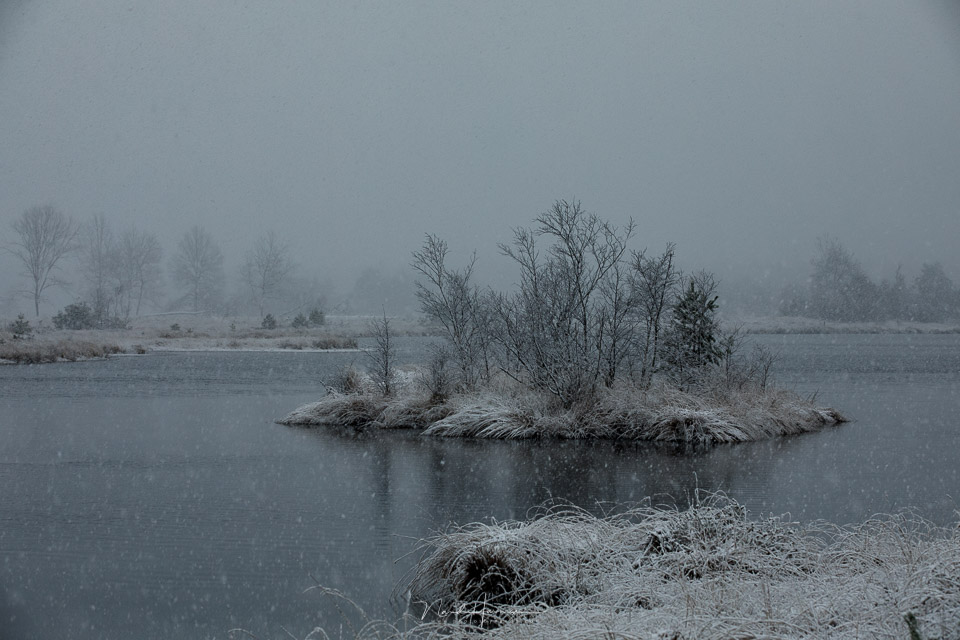
A photo with a lot of white snow in the frame will therefore always be underexposed. The photo can be up to 2 stops too dark. So it is a good idea to set the metered exposure 1 or 2 stops brighter when there is snow in the frame.
If you are a photographer who shoots in A mode or S mode, aperture priority or shutter priority, you can set the exposure compensation button to +1 EV or +2 EV. This will automatically make every photo 1 or 2 stops brighter.
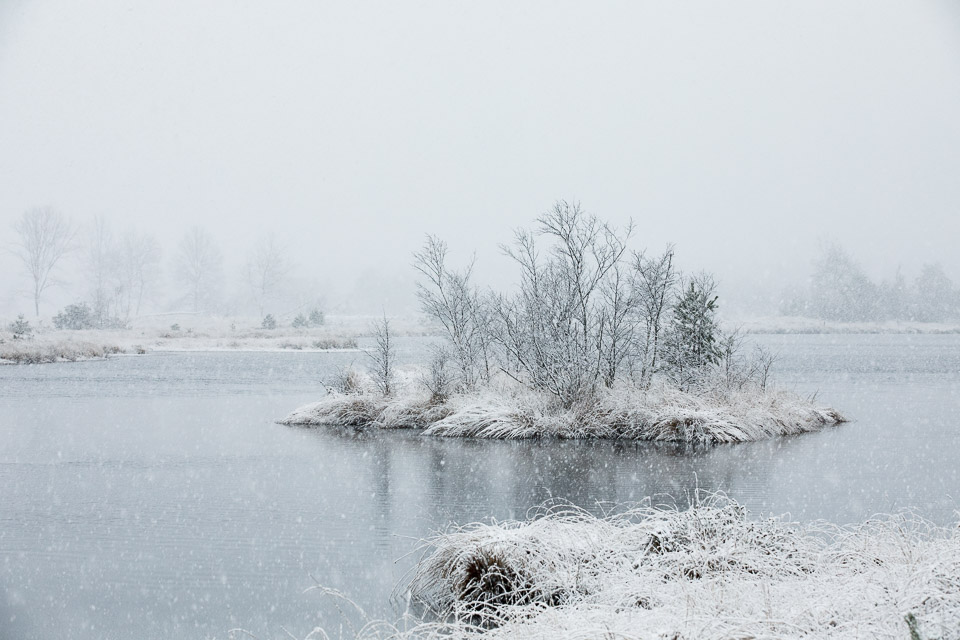
If you are a photographer who prefers to set everything manually, you need to make the shutter speed 1 or 2 stops longer for each measurement, or open the aperture by 1 or 2 stops.
Of course, you can also choose to increase the ISO by 1 or 2 stops. Remember that you have to apply the correction manually for every new light measurement.
When should you expose 1 stop longer, and when 2 stops? That depends on the amount of white in your photo. The more white you have in the photo, the more stops you need to correct.
In any case, use your histogram to see whether the photo you have taken is light enough. It will at least give you an indication.
When snow is falling
When snow starts falling, head out. Make sure you are the first photographer to arrive at your destination. That way, you will still have a landscape without footprints. In any case, be careful and enjoy the winter landscape.
About the author
Nando Harmsen has been photographing for more than 40 years. He specialises in wedding photography and landscape photography. Nando also gives talks, workshops, masterclasses and photo trips, and regularly reviews new and interesting equipment.
You might also like
-
 7 tips for snow photos
by Elja Trum
-
 Winter fun! Photographing in the snow
by Laura van der Burgt
-
 A few tips for photographing in the snow
by Nando Harmsen
-
 10 tips for fantastic snowy landscapes
by Nando Harmsen
-
 Collected tips for snow photography
by Elja Trum
-
 The best snow photos from our members
by Nando Harmsen
4 comments
-
 guest wrote on Tuesday 28 December 2021 at 13:09 | reply
In terms of exposure, you can also use a gray card with the exposure set manually.
Translated from Dutch.
That is particularly important with JPG photography (and/or with video).
Also useful for people in backlight, where the people should not be shown as silhouettes. -
 Gerard wrote on Tuesday 28 December 2021 at 13:22 | reply
Thanks! These tips come at just the right time, next week I'm going to Sweden, there's snow there !
Translated from Dutch. -
 Buiterbeeld wrote on Wednesday 29 December 2021 at 13:30 | reply
For snow photography I always use my separate light meter and measure the incident light. I set these settings in the camera using manual mode and the photos are always well exposed.
Translated from Dutch. -
 henriette wrote on Wednesday 29 December 2021 at 17:34 | reply
..slightly underexposed is less bad than (too) overexposed.. because then the picture can't be recovered anymore..
Translated from Dutch.
Have your say
Please note: Articles older than a week can only be commented on by signed-in visitors.Would you still like to comment? sign in or create a free account.
Become a better photographer every week
A practical photography tip in your inbox every week.
39,024 photography enthusiasts already receive the tips! More about the weekly mail. Or keep up to date via  Facebook.

Elja Trum
Photofacts; everything to do with photography!
Would you like to take better photos and keep up with what is happening in photography? Photofacts publishes articles that teach you something about photography — from a product announcement to a practical shooting tip or a look at a website. Photofacts covers photography every day and is a hobby project of Elja Trum's that got out of hand. The articles are written by a team of volunteer authors. If you would enjoy writing one or more articles for Photofacts, do get in touch.More about PhotofactsPhotofacts is made possible in part by
