
Night photography on Schiermonnikoog (part 2)
Sunday 10 October 2021, 22:22 by Erik Nevels | 5,068 views | 9 commentsThis article was translated from Dutch with the help of AI. Read the original.
In part 1 of my blog 'Night photography on Schiermonnikoog' I told you about photographing the rising moon, the lighthouse and noctilucent clouds at night.
In this part 2, I describe my first experiences photographing the Milky Way on a clear night at the beginning of September.
Masterclass
On the weekend of 11 and 12 September, I am on Schiermonnikoog for the second time this year. At the last minute, I decided to take part in a Masterclass given by nature photographer Johan van der Wielen.
The idea of a Masterclass is to deepen your photography. You think up your own project beforehand and carry it out during the weekend.
Photographing the Milky Way is not part of my project, but it is something I would like to do this weekend, provided a clear night occurs.
Preparation
You cannot just photograph stars off the cuff. Good preparation is more than half the work. Which location will I choose? What is the weather like? Will the moon be visible? What time will I set off? What equipment will I take with me? Which camera settings will I choose?
Fortunately, in the few weeks I had left before the Masterclass, I took Johan van der Wielen's online Night Photography course and Nando Harmsen's Photofacts Star Trails course. There is quite a lot involved in this branch of photography.
It would go too far to explain all of this in detail in this blog. As for the settings of the exposure triangle, you can find them with each photo.
The location
During the day, I cycle around the island looking for a suitable location with an interesting foreground. To avoid light pollution as much as possible, I want to be several kilometres away from the village.
During the earlier bus journey from the ferry to my guesthouse, I had already seen a beautiful windblown tree in the landscape, and I am now looking for it. I soon find it, but unfortunately it is right next to a fence, so it is no good for me. I cycle on, but do not find another suitable location.
Later that day, Johan shows me a location with beautiful little trees and no fence. I place a Google Maps pin on my phone so that I can easily find the spot again in the dark.
The weather and the moon
The various weather apps make it clear that cloud is expected tonight, with clear spells in between. Johan suggests keeping a close eye on the weather and deciding later in the evening whether or not to go for it.
At least we will not have to contend with the light from the moon. It sets at 9.39 pm. Setting off earlier is pointless now, at the beginning of September on Schiermonnikoog. It is not really dark until after the various twilight periods, from around 10 pm today.
It is just before 10 pm when Johan asks the group who is still coming along, despite the cloud that is still there at that moment. I enthusiastically raise my hand as the only one, and five minutes later we are on our bikes.
Clear or not?
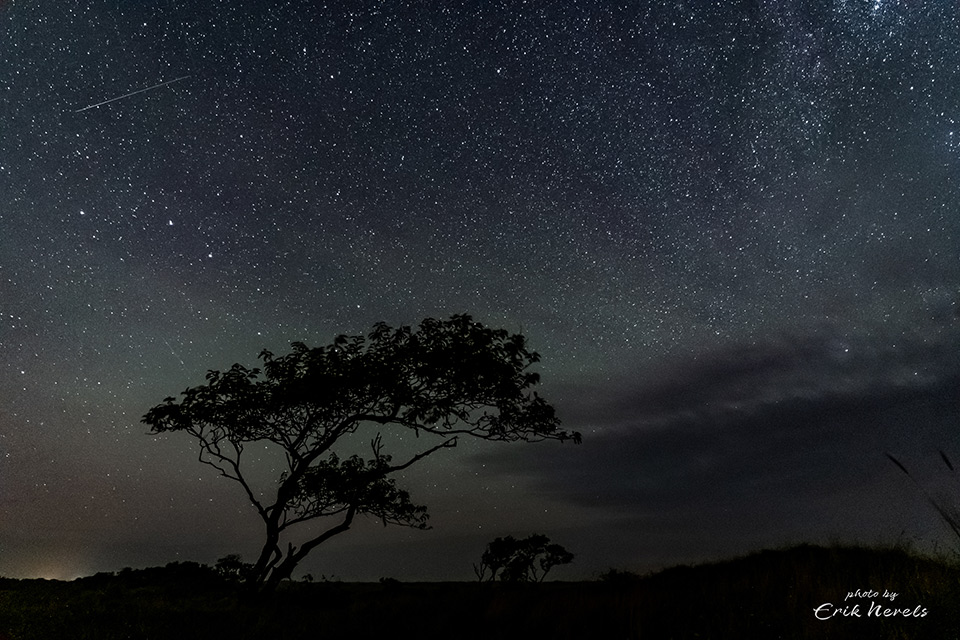
About 25 minutes later, we arrive at the location. The clouds slowly disappear and a beautiful starry sky appears.
I can already see a few little trees that I want to use as the foreground in the photo. My headlamp is absolutely necessary to walk over to them in this darkness.
My first star photo
I thoroughly enjoy the next hour and a half. With plenty of trial and error, both literally and figuratively, I take my first photos of the starry sky. Johan gives me some more pointers on the correct settings. What I learned in the online course has not yet become automatic when it matters.
Another viewpoint
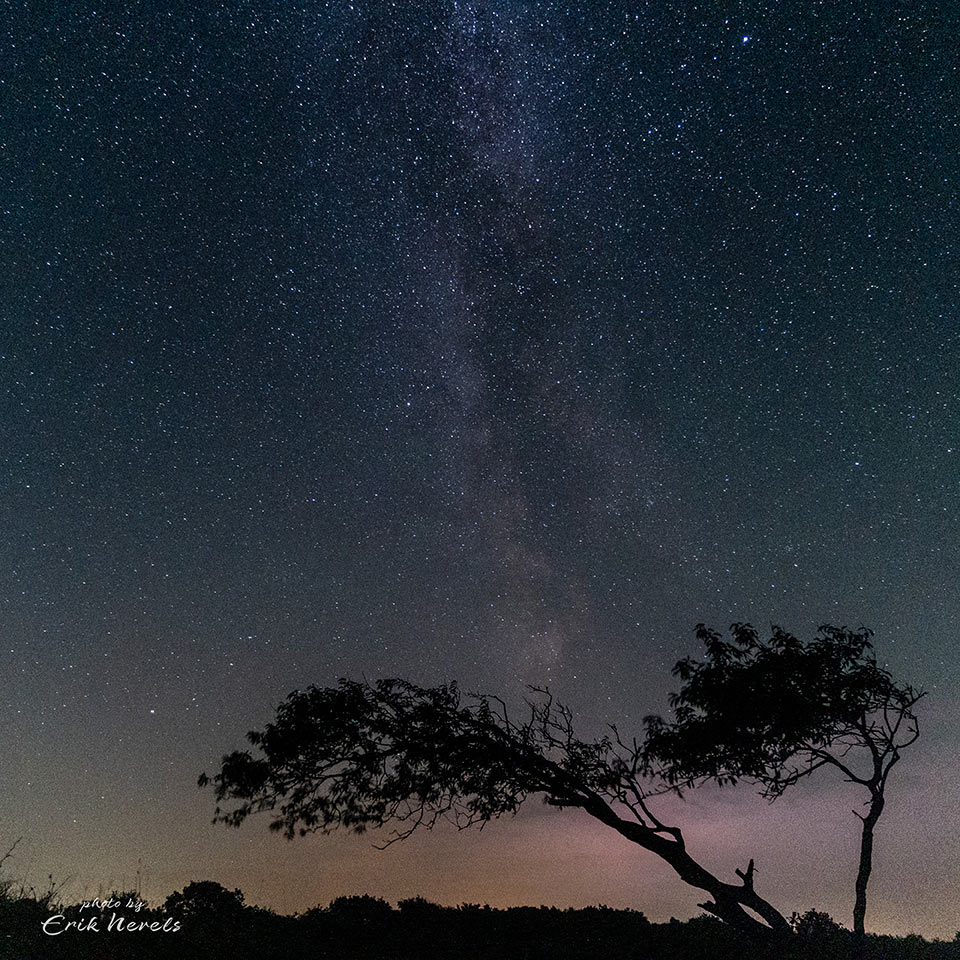
The little trees make a fine foreground, but when I look behind me, the Milky Way is much more visible there than it was fifteen minutes ago. I needed those fifteen minutes to let my eyes adjust to the darkness.
Now that they have, I can see many more stars. Simply fantastic! I decide to look at the other side of the little trees.
I use the red light from my headlamp so I can see. Red light allows my eyes to stay adjusted to the darkness. However, it is not easy to compose a good image using red light. After several less successful attempts, this is the result.
More cloud
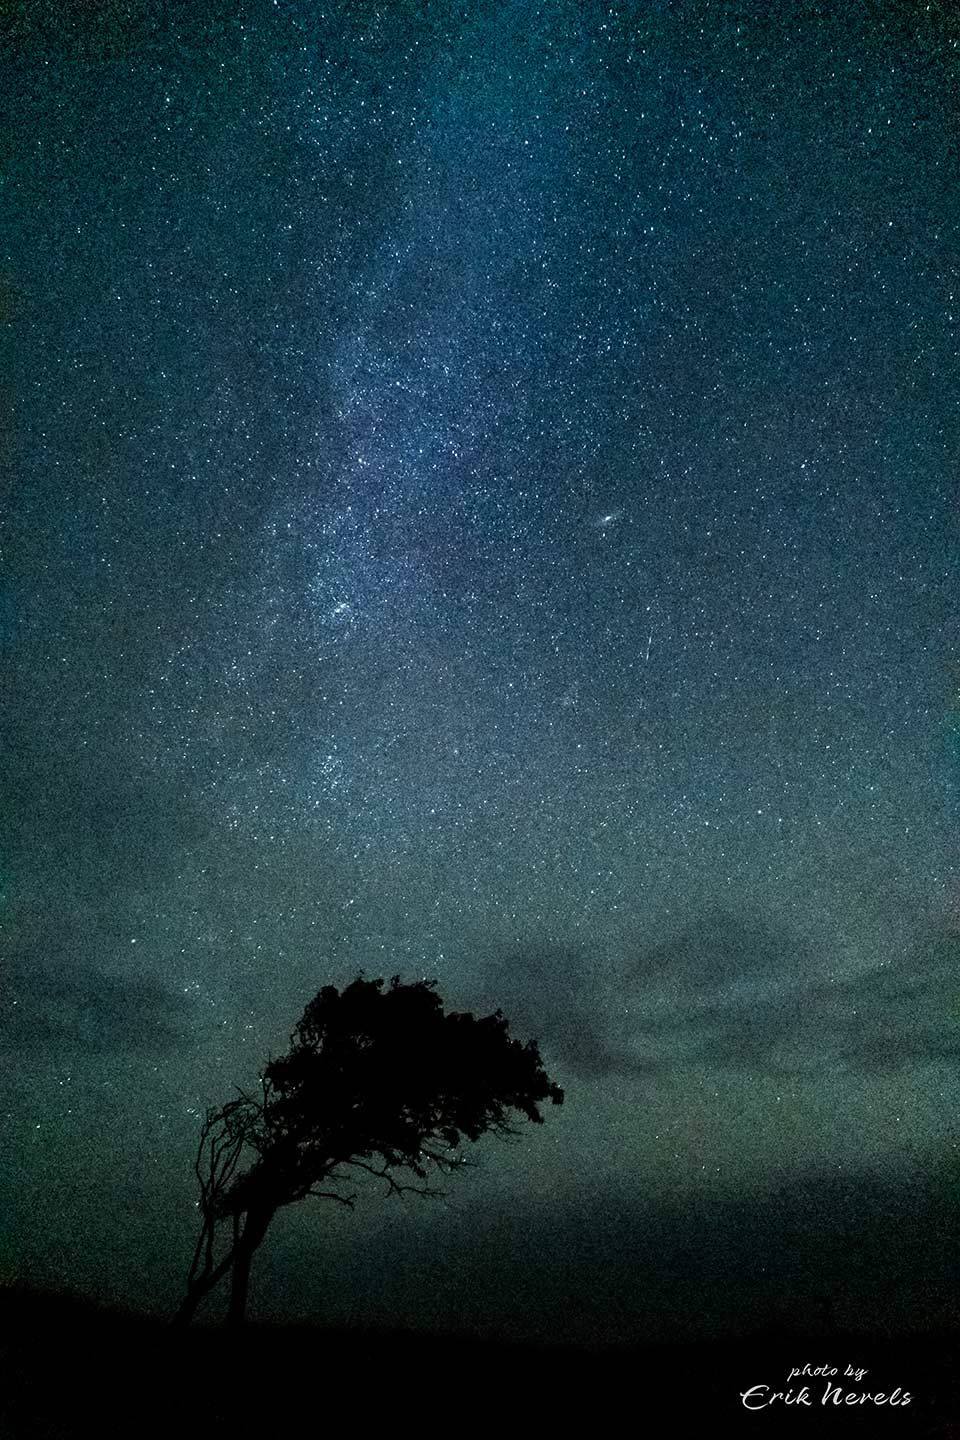
According to Johan, more cloud is on the way. I quickly choose my third viewpoint of the night. In my enthusiasm, I have not yet thought of switching to portrait orientation, which would allow me to capture more of the Milky Way.
As the first clouds start to appear in the frame, I take my final series of photos.
Hopefully again tomorrow
On the way back to the guesthouse, I continue to enjoy the experience. The silence, the literally brilliant firmament and photographing it have left an unforgettable impression. Hopefully I will get another chance tomorrow.
About the author
Steeds weer boeiend en op zoek naar de essentie! Dat is wat fotograferen in de natuur voor mij is. Gefocust op het landschap of het onderwerp in diens omgeving tracht ik meer dan alleen te registreren. Een continue uitdaging waarvan ik elke keer volop geniet. Meer foto's? Volg mij op Instagram en/of kijk op mijn website
You might also like
-
 Night photography on Schiermonnikoog, part 1
by Erik Nevels
-
 Photograph the Milky Way in just 5 minutes!
by Michelle Peeters
-
 Use a foreground for star photos
by Nando Harmsen
-
 6 Tips for Creating Star Trails
by Nando Harmsen
-
 Night photography tip: photograph the moon at twilight
by Nando Harmsen
-
 Falling stars (Lyrids), photographic contributions
by Michelle Peeters
9 comments
-

 Donald Willemsen
wrote on Tuesday 12 October 2021 at 23:38
| reply
Donald Willemsen
wrote on Tuesday 12 October 2021 at 23:38
| reply
Cool story that you illustrated with a few beautiful starry sky photos. Cool that you also included the most important EXIF data with them. Among other things, the ISO values used make me raise my eyebrows. If I use values of 6400 or higher, I end up with a beautiful noisy sky instead of a beautiful starry sky.
Translated from Dutch.
Ok, I don't own a camera from the professional high-end segment, but a mid-range camera, EOS 70D and 80D.
Now I do know how to tackle and reduce noise in Ps's RAW converter, but then you are also forced to sharpen, because noise reduction causes blurriness and sharpening in turn produces noise that you actually want to get rid of.
Does that mean that you necessarily need a camera from the high-end segment? They do often have a better image sensor, after all. -
 W wrote on Wednesday 13 October 2021 at 16:42 | reply
Beautiful photos on the bottom one the Andromada nebula can also be seen
Translated from Dutch. -
 Erik wrote on Wednesday 13 October 2021 at 22:18
| reply
Erik wrote on Wednesday 13 October 2021 at 22:18
| reply
@Donald
Translated from Dutch.
Thanks for your enthusiastic response. As for the ISO values, the following. Of the exposure triangle, this is the value I determine last. The aperture is fully open (f2.8). The shutter speed is also set as high as possible, taking the 400 rule into account (400 / focal length of your lens, 17mm = 23.5sec = max shutter speed), at 20 seconds. Then check which ISO is needed to still get a sufficiently exposed photo, and that can get quite high. Noise is therefore inevitable, and I have to look for an 'optimal' balance between noise reduction and sharpening (in my case in Lightroom). In that respect, I think that beautiful star photos are also possible with your cameras in this way. -
Erik wrote on Wednesday 13 October 2021 at 22:20
| reply
@W.
Translated from Dutch.
Thank you for the compliment! And learned something again; the Andromeda Nebula! -
 jos schiffelers wrote on Sunday 24 October 2021 at 12:42
| reply
jos schiffelers wrote on Sunday 24 October 2021 at 12:42
| reply
Thanks from my side too, Erik.
Translated from Dutch.
I have the same problem as Donald, I also have an 80D. I find it difficult anyway to find the right settings for night photography. Especially difficult to see on such a small screen and then in the dark as well. But anyway, just keep going. By the way, I did take some nice photos of the sunset on Ameland last month. -
Erik wrote on Sunday 24 October 2021 at 18:00
| reply
@Jos
Translated from Dutch.
You're right. Working in the dark on such a small screen isn't easy. As I also said to Donald, vary your ISO and keep checking your result until you see a well-exposed photo on your screen. And as you say yourself: 'Just keep going'. The persistent one wins! -
Donald Willemsen
wrote on Monday 25 October 2021 at 23:48
| reply
Hello Erik, I'm coming back to your story. Among others, Haida sells the so-called Haida NanoPro Clear-Night Filter. Do you have experience with this type of filter and would it work well?
Translated from Dutch. -
Erik wrote on Tuesday 26 October 2021 at 15:24
| reply
@Donald.
Translated from Dutch.
I do have some experience with it. The photos on my blog were taken with such a filter (a different brand, admittedly). It helps and mainly removes yellow-orange artificial light. Still, some of the light pollution remains visible, as you can also see in my photos. -
Donald Willemsen
wrote on Tuesday 26 October 2021 at 17:14
| reply
Thank you Erik for the quick response. Since such a filter comes at a considerable price, it is still important to know whether such a purchase makes sense. With your information, I can at least move forward.
Translated from Dutch.
Have your say
Please note: Articles older than a week can only be commented on by signed-in visitors.Would you still like to comment? sign in or create a free account.
Become a better photographer every week
A practical photography tip in your inbox every week.
38,981 photography enthusiasts already receive the tips! More about the weekly mail. Or keep up to date via  Facebook.

Elja Trum
Photofacts; everything to do with photography!
Would you like to take better photos and keep up with what is happening in photography? Photofacts publishes articles that teach you something about photography — from a product announcement to a practical shooting tip or a look at a website. Photofacts covers photography every day and is a hobby project of Elja Trum's that got out of hand. The articles are written by a team of volunteer authors. If you would enjoy writing one or more articles for Photofacts, do get in touch.More about PhotofactsPhotofacts is made possible in part by
