

Photographing in the Shape of a Kaleidoscope
Sunday 27 February 2022, 16:32 by Laura van der Burgt | 6,167 views | 5 commentsThis article was translated from Dutch with the help of AI. Read the original.
Winter still seems to be dragging on, while we are already longing for spring. We need to be patient a little longer. Until then, why not head into the woods to make some spectacular kaleidoscope or mandala-like photos?
Perhaps you remember it from years ago. A kaleidoscope produces images in which patterns repeat symmetrically in countless variations.
You can recreate this effect with your camera. The technique involves layering multiple exposures in a circle. Your camera must have the option for "multiple exposure".
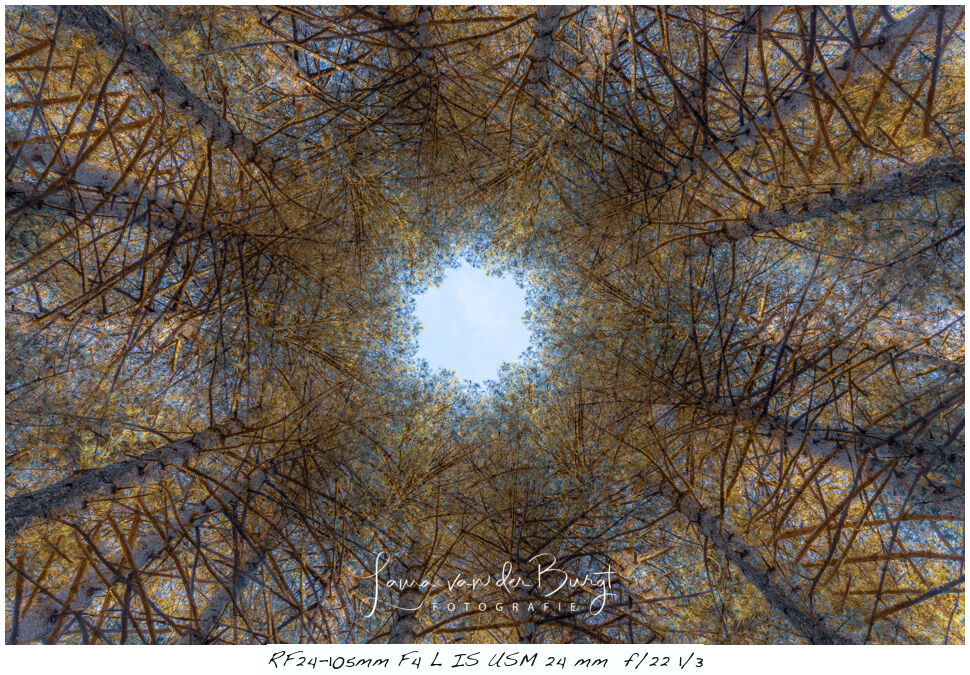
It may sound complicated, but it isn't. Try it a few times and you'll get the hang of it. Both literally and figuratively, because it is great fun and fascinating to do.
As a subject, you don't need much more than a few (gnarled) treetops. These can be bare treetops, the tops of pine trees or a mixture of different trees.
It is important that there is a small opening in the centre. Avoid bright sunlight, an overcast day is ideal.
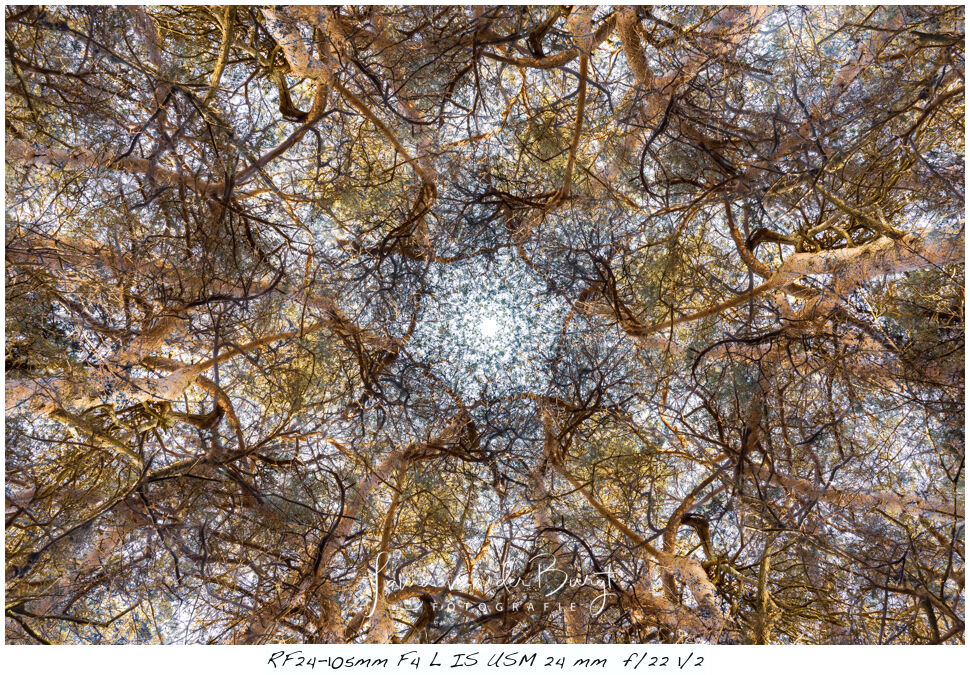
How does it work?
Point the camera lens straight upwards and take at least 6 photos while moving the camera in a circle around the centre.
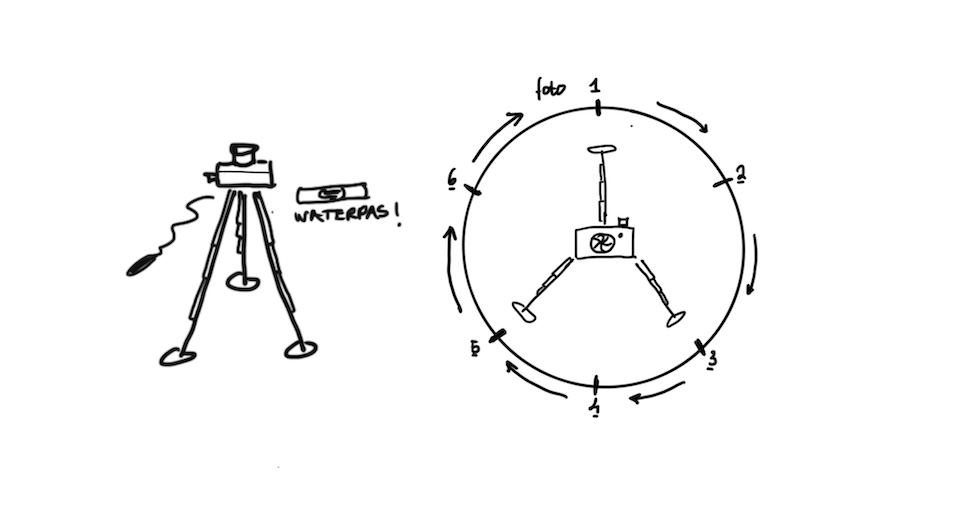
The easiest way to do this is with a tripod. This helps you achieve an even and symmetrical distribution in your composition. See the drawing below.
In short, these are the requirements and the method:
- Set the camera to 6 multiple exposures, with the setting on "dark".
- Lens choice: wide-angle. For example, 24mm at f/22.
- If necessary, increase the ISO slightly to shorten the shutter speed.
- Set exposure compensation to +2 stops
- Shoot in JPEG and save only the result
- Put the camera on a tripod with a ball head
- Point the lens straight upwards and level the camera
- Use the flip-out screen to determine your composition
- Take 6 photos in total, turning your camera 60 degrees after each photo.
- The three tripod legs are a useful aid here.
- Focus once for the first photo, then switch off autofocus.
After taking the last photo, an image appears that you could not have imagined beforehand. If you have done it properly and precisely, a kind of symmetrical heart will form in the centre.
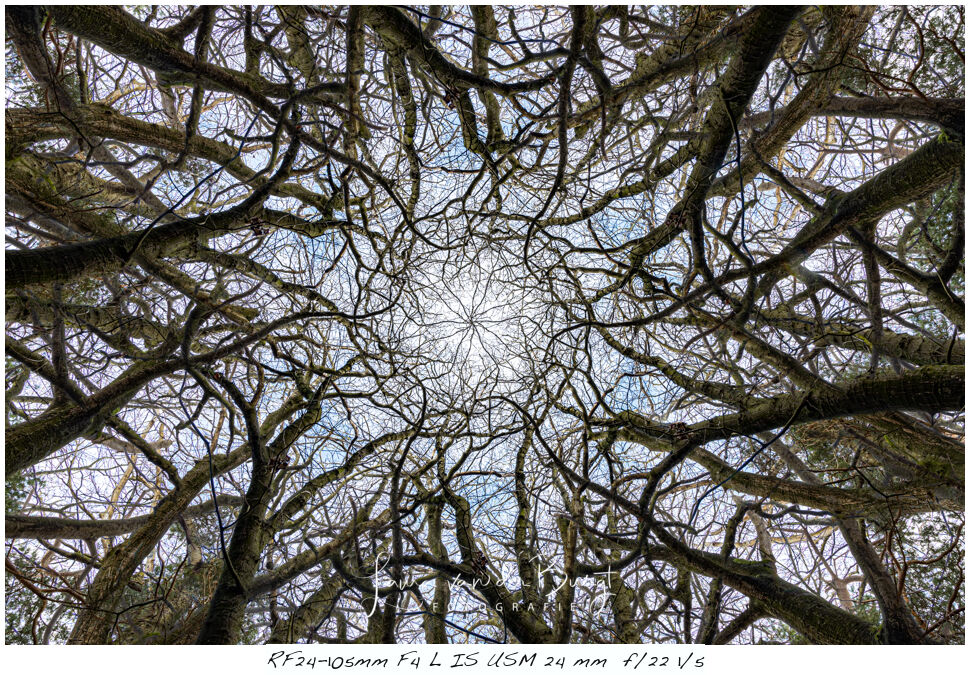
Take a look at Hans Schot's website too. Hans came up with the term 'Kaleidography'.
.jpg "Laura van der Burgt Kaleidography")
About the author
Natuurfotografie is voor Laura een samensmelting van het ongelooflijk genieten van in de natuur zijn en haar passie voor fotografie. Het fotograferen met een minimale scherptediepte is favoriet en ook trekt ze er vaak met de lensbaby op uit.
You might also like
-
 Photographing Like Pep Ventosa
by Laura van der Burgt
-
 Disappointment over multiple exposures in new Canon cameras
by Nando Harmsen
-
 Taking creative portrait photos
by Elja Trum
-
 Does the Shape of Your Catchlight Matter?
by Elja Trum
-
 Spring in pictures - photos from our Photofacts Academy community
by Nando Harmsen
-
 Creative photography with dandelions
by Laura van der Burgt
5 comments
-
 Karijn wrote on Monday 28 February 2022 at 09:18 | reply
Nice technique because the result is difficult to predict. I really like the last photo. Makes me want to go out.
Translated from Dutch. -
 Sietske wrote on Tuesday 1 March 2022 at 12:14 | reply
Nice idea Laura! Last summer I started taking lots of photos with multiple exposure during Art Zuid in Amsterdam. At the time I only used the 'average' setting. Can you explain why you need to use the 'dark' setting here?
Translated from Dutch. -
guest wrote on Tuesday 1 March 2022 at 17:25 | reply
Yes indeed, Laura is loud and clear again in her pleasantly readable story, compliments. Beautiful photos and well, the last one is unusual again, a real Laura😊😉
Translated from Dutch. -
guest wrote on Tuesday 1 March 2022 at 20:30 | reply
@Sietske, I'm going to try to explain it.
Translated from Dutch.
After every photo with 'average' exposure, the contrast (the dark parts) in your final photo will have been reduced, probably even disappeared. After every exposure, you get an increasingly flatter, greyish final result.
With 'dark', you emphasize the dark shapes of the branches against the sky. The dark parts are retained from every exposure and provide contrast in your final photo. Because you are layering at least 6 offset photos on top of each other, you want to continue seeing the structure of the trees and branches in every photo, but also retain the bright sky. For the latter, you then expose 2 stops over. -
Sietske wrote on Wednesday 2 March 2022 at 07:33 | reply
Thanks for the clear explanation, 'guest'. I'll try it soon.
Translated from Dutch.
Have your say
Please note: Articles older than a week can only be commented on by signed-in visitors.Would you still like to comment? sign in or create a free account.
Become a better photographer every week
A practical photography tip in your inbox every week.
39,083 photography enthusiasts already receive the tips! More about the weekly mail. Or keep up to date via  Facebook.

Elja Trum
Photofacts; everything to do with photography!
Would you like to take better photos and keep up with what is happening in photography? Photofacts publishes articles that teach you something about photography — from a product announcement to a practical shooting tip or a look at a website. Photofacts covers photography every day and is a hobby project of Elja Trum's that got out of hand. The articles are written by a team of volunteer authors. If you would enjoy writing one or more articles for Photofacts, do get in touch.More about PhotofactsPhotofacts is made possible in part by
