
The Magic of Photography with Multiple Exposures
Sunday 8 November 2020, 16:32 by Laura van der Burgt | 9,256 views | 7 commentsThis article was translated from Dutch with the help of AI. Read the original.
Create photos that are the result of your imagination and creativity, without having to travel to exotic places (which is difficult these days anyway) or buy expensive equipment. It can be done!
All you need is... Yes, a camera and an interest in multiple exposures.
Multiple exposures can produce magical results. Using this technique gives your photos an extra dimension because the image consists of several layers.
But be careful, because it could become addictive.
A quick explanation. Multiple exposure means layering two or more different photos on top of each other in-camera (!).
The way you arrange and combine images gives you endless variation, reaching as far as the limits of your imagination. It requires creativity, but above all the courage to step outside your comfort zone. And plenty of trying.
Assuming your camera has this function, go to the menu setting. The camera will then ask you how you want to combine the images and how many you want to use.
You have four options:
1) average (average)
2) dark tones (dark)
3) lighter tones (bright)
4) high key (additive)
If you have never done this before, I recommend starting with average and a maximum of two images.
One of the most common applications is creating a dreamy atmosphere by layering a sharp and an unsharp image of the same composition.
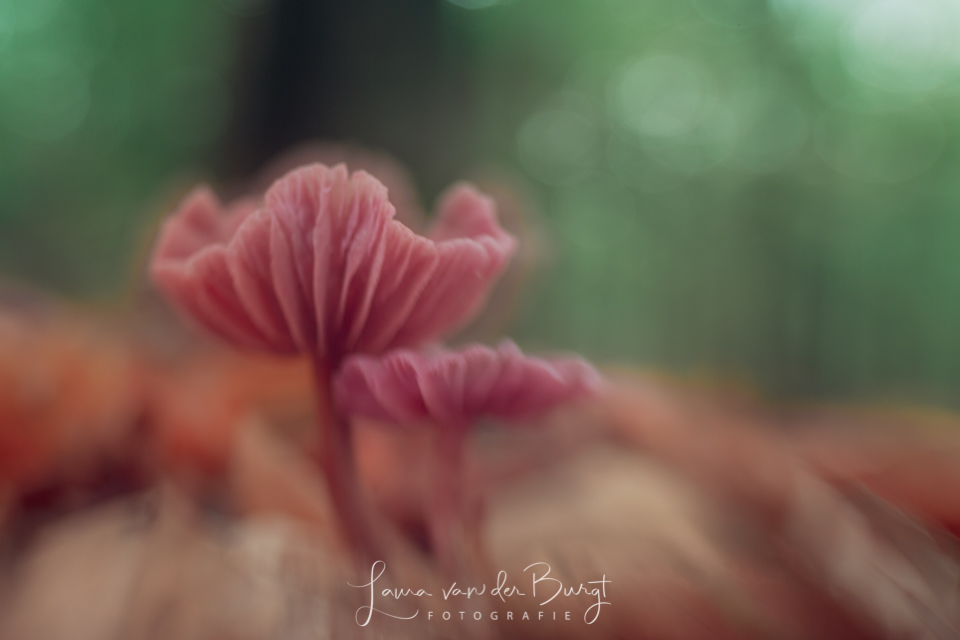
This creates a kind of halo around your sharp subject, which is softened at the same time by the blur of the second image, the so-called Orton effect.
If you like a magical, fairytale atmosphere, this setting is the one to choose.
Other options with the 'average' setting include combining even more exposures of the same composition. Try starting with five images. By shifting some images slightly and varying the sharpness, an artistic effect can already be achieved.
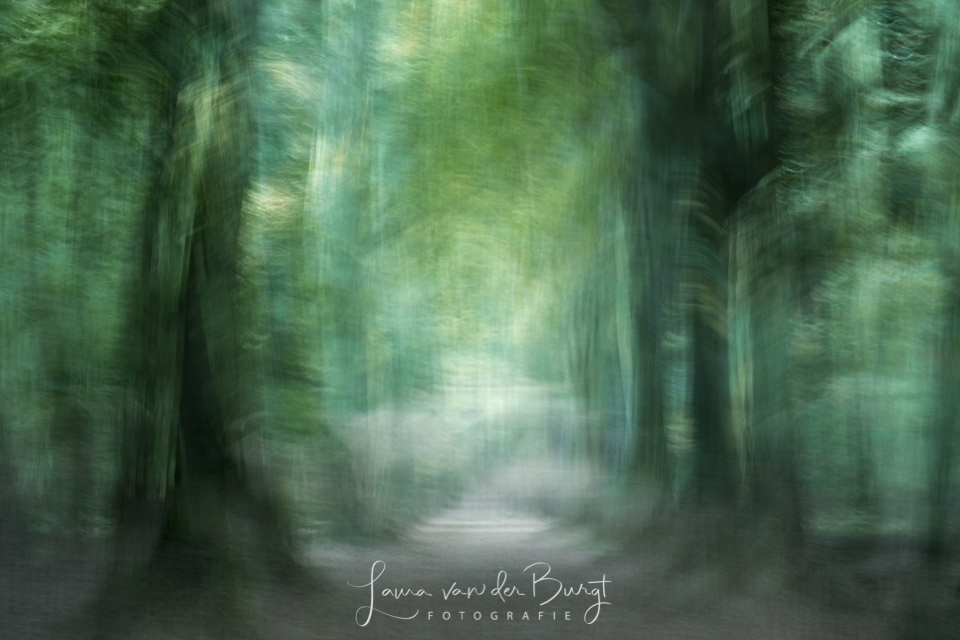
Or combine a still image with a moving image. Move the camera up and down, or from left to right. You can even use an upside-down image for very surprising results. A kind of homemade reflection.
Don't make it too difficult to begin with! With enthusiasm and a desire to experiment, you will soon discover new possibilities.
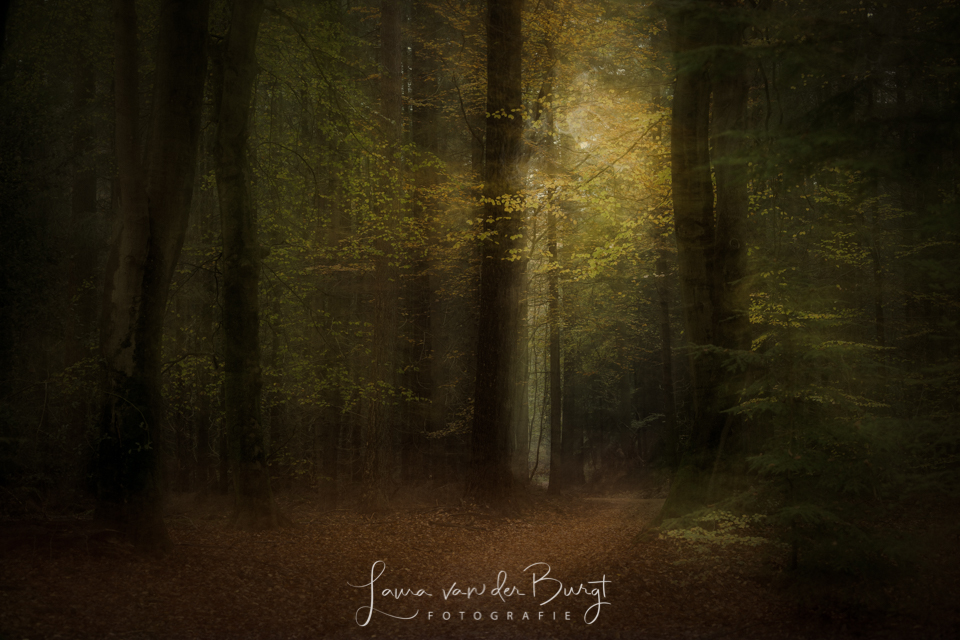
The advanced modes Dark, Bright and Additive are techniques for the more advanced illusionists among us, but they are also the most challenging. So, if you've had enough of average, then...
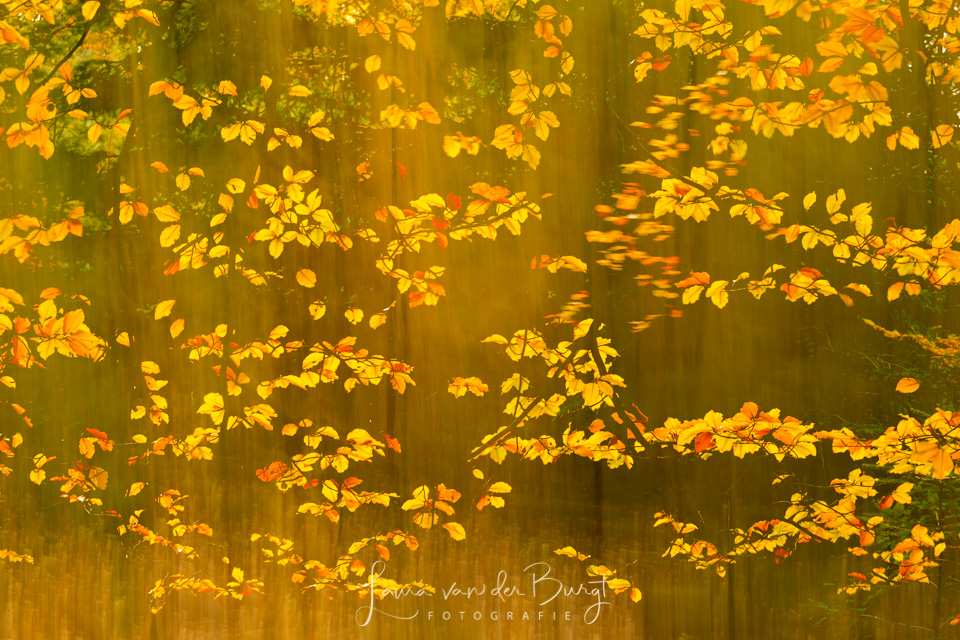
The photo below is a multiple exposure using the 'Bright' setting. The first photo is a blurred image of tree trunks, which are dark. The second image shows sunlit autumn leaves. Because priority is given to light tones, the leaves stand out.
Newer cameras can save all these images or just the result. When I experiment, I usually choose to save only the result.
But if, for example, you want to do some further editing in Photoshop, it is best to save them all. However, an in-camera result is the most satisfying, and you also get a RAW image as a bonus. If you enter photography competitions, the latter is a requirement.
There is a huge amount of information about it online. Try looking for tutorials or YouTube videos specifically about this function in your camera.
If you don't have an advanced digital camera, you can turn to Photoshop or use an app on your phone to blend images. For example, Snapseed or Photo Blender.
I wish you endless magical fun!
About the author
Natuurfotografie is voor Laura een samensmelting van het ongelooflijk genieten van in de natuur zijn en haar passie voor fotografie. Het fotograferen met een minimale scherptediepte is favoriet en ook trekt ze er vaak met de lensbaby op uit.
You might also like
-
 Review of the handy Haida Magic Stick-It Wrapper Cloth
by Nando Harmsen
-
 Don't Buy Photography Equipment, Rent It
by Nando Harmsen
-
 The magic of landscape photography
by Laura van der Burgt
-
 Disappointment over multiple exposures in new Canon cameras
by Nando Harmsen
-
 Photographing in the Shape of a Kaleidoscope
by Laura van der Burgt
-
 5 tips to turn your holiday photos into great travel photos
by Nando Harmsen
7 comments
-

 scoot-shooter
wrote on Tuesday 10 November 2020 at 10:36
| reply
scoot-shooter
wrote on Tuesday 10 November 2020 at 10:36
| reply
Seems like fun and I will definitely experiment with it. Thanks for your clear explanation
Translated from Dutch. -
 Laura van der Burgt
wrote on Tuesday 10 November 2020 at 15:02
| reply
Laura van der Burgt
wrote on Tuesday 10 November 2020 at 15:02
| reply
Hello scoot-shooter, or rather Juliette
Translated from Dutch. Thanks for your compliment and I'm curious to see your results!
 -
 ingrid schot wrote on Tuesday 10 November 2020 at 15:56 | reply
beautiful photos. I recently experimented with double exposure too. It works fine in my camera (Canon 5D mkIV) but my card reader can't read the final photo, I get some sort of error code. It does read the original photos but not the composite photo. Am I doing something wrong ? Thank you in advance for your answer.
Translated from Dutch. -
Laura van der Burgt
wrote on Tuesday 10 November 2020 at 18:47
| reply
Hello Ingrid, I also shoot with Canon, but have never had this problem. Is it only the card reader that has a reading problem or is the new RAW file not being written to the card? If it's the former, it's time for the process of elimination
Translated from Dutch. . Have you already tried another card reader, or connected your camera directly to your computer?
 -
scoot-shooter
wrote on Friday 13 November 2020 at 12:25
| reply
Hello Laura, I have been working with your tips, but there is much less choice in my camera than you indicate. I can choose from : off.... or on 2f (2 frames) and then I can still choose overlay ( over another photo that had already been taken.) The choices : average, bright, highkey and dark are not available on my Olympus M5-III... as a result I didn't get much further. Shame
Translated from Dutch.
greetings,
juliette -
Laura van der Burgt
wrote on Friday 13 November 2020 at 21:01
| reply
Hi Juliette, I suspect that my Canon R is somewhat more advanced when it comes to multiple exposure. I read that your camera can layer 2 to 3 images on top of each other and make 1 raw image from them. You can also get surprising results with this. Another possibility is to apply these modes in Photoshop. Kind regards Laura
Translated from Dutch. -
scoot-shooter
wrote on Saturday 14 November 2020 at 10:11
| reply
thank you Laura; I've been layering photos over each other in Paintshop Pro (I don't have Photoshop) for years, but the effect still isn't quite what you show with multiple exposure. But.. if you never try anything, you'll never have anything either, so : thanks for your inspiration !
Translated from Dutch.
greetings, juliette
Have your say
Please note: Articles older than a week can only be commented on by signed-in visitors.Would you still like to comment? sign in or create a free account.
Become a better photographer every week
A practical photography tip in your inbox every week.
39,078 photography enthusiasts already receive the tips! More about the weekly mail. Or keep up to date via  Facebook.

Elja Trum
Photofacts; everything to do with photography!
Would you like to take better photos and keep up with what is happening in photography? Photofacts publishes articles that teach you something about photography — from a product announcement to a practical shooting tip or a look at a website. Photofacts covers photography every day and is a hobby project of Elja Trum's that got out of hand. The articles are written by a team of volunteer authors. If you would enjoy writing one or more articles for Photofacts, do get in touch.More about PhotofactsPhotofacts is made possible in part by
