

Landscape photography tip: zoom with your feet and your lens
Saturday 5 December 2020, 20:02 by Nando Harmsen | 4,709 views | 1 commentThis article was translated from Dutch with the help of AI. Read the original.
Zooming with your feet is often mentioned as an alternative to zooming with a lens. But that is not correct, they are two completely different things. So why not use both? This way, you can get the photo exactly as you want it.
You know the saying, a photographer using a prime lens has to zoom with their feet. If that photographer wants to get something larger in the frame, they will have to move closer to the subject. To get the subject smaller in the frame, they have to increase the distance.
This means that you have to change the distance to your subject when using a fixed focal length. Someone with a zoom lens can often stay in one place when the subject needs to appear larger or smaller in the frame.
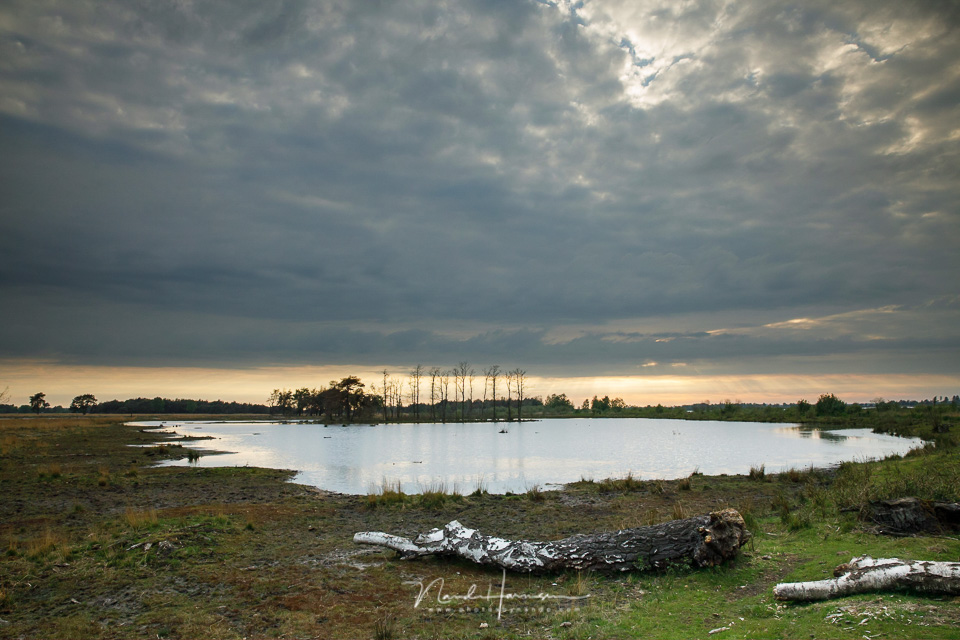
Yet both methods produce completely different photos. This has everything to do with the angle of view associated with a focal length. The photographer who does not zoom and moves closer does not change the angle of view. The photographer who stays where they are and zooms in changes the angle of view.
Look past your subject, at the background. When the angle of view changes because you zoom in, less of the background appears in the frame. Although less of it is visible, it still has to fill the entire width of the photo. This means it will appear larger in relation to your subject.
If you look at the background when you do not zoom but move closer, the amount of background in the frame will not change. It stays the same, while your subject appears larger in the frame.
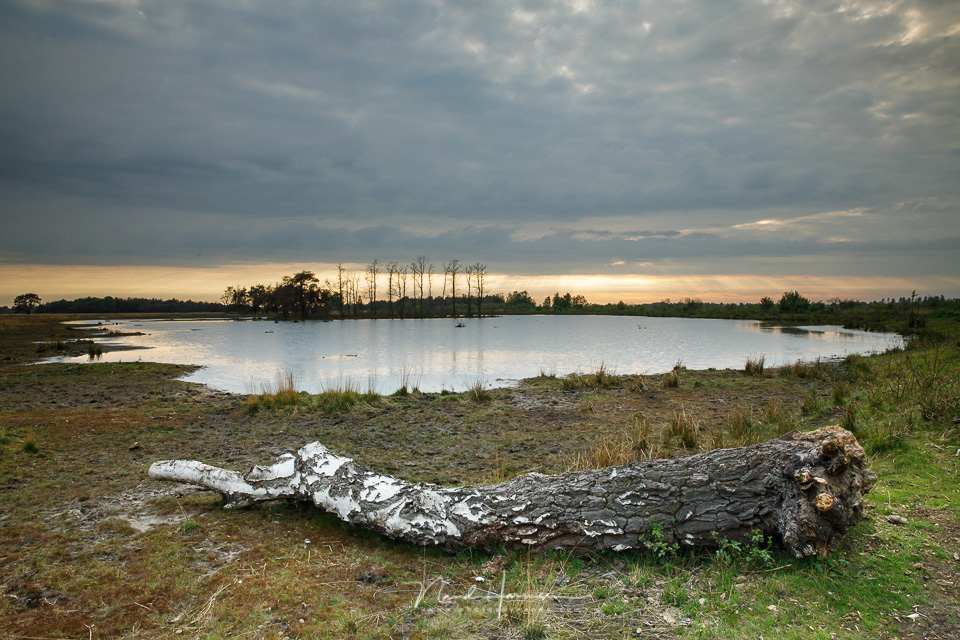
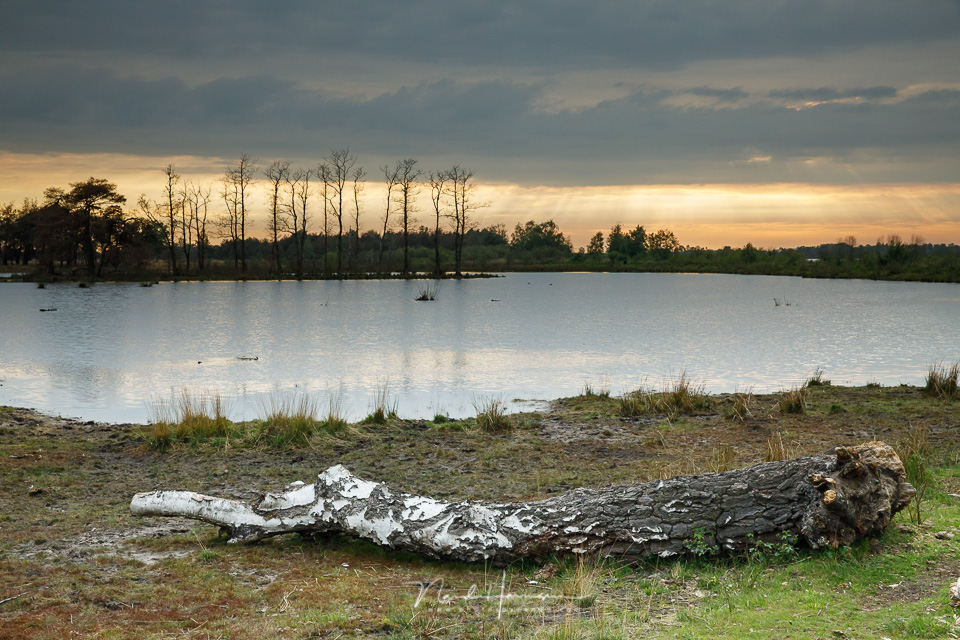
That is why you should use both methods when using a zoom lens, or several lenses with a fixed focal length. First decide how large you want the subject to appear in the frame, then consider how much of the background you want to include. Choose the focal length to get the desired amount of background in the frame, then change the distance to your subject to get it to the desired size in the photo.
De Landschapsbijbel, with 101 tips for magnificent landscape photos
This tip is part of the book De Landschapsbijbel, in which I give 101 tips for magnificent landscape photos. The book, full of beautiful photos, gives you all the information you need to start taking your own fantastic landscape photos.
Don't have De Landschapsbijbel yet? Order it via the order page and buy the book on its own, or at an attractive discount together with a membership of Photofacts Academy.
About the author
Nando Harmsen has been photographing for more than 40 years. He specialises in wedding photography and landscape photography. Nando also gives talks, workshops, masterclasses and photo trips, and regularly reviews new and interesting equipment.
You might also like
-
 Why zooming with your feet is not the same as zooming with a lens
by Nando Harmsen
-
 ACDsee Gemstone as a Photoshop alternative
by Nando Harmsen
-
 DxO PhotoLab as an alternative to Lightroom
by Nando Harmsen
-
 Alternative portraits, portrait photos with a twist
by Elja Trum
-
 Haida magnetic filters, a perfect alternative to a filter system
by Nando Harmsen
-
 RapidRAW, het gratis Lightroom-alternatief
by Nando Harmsen
1 comment
-
 Eduard Barreveld wrote on Wednesday 9 December 2020 at 22:58 | reply
Nando, a very clear article(let) with a very good example. Strange that you normally don't stop to think about that! The difference is indeed crystal clear and also conveys a different atmosphere! Yet another 102nd tip! Thanks.
Translated from Dutch.
Have your say
Please note: Articles older than a week can only be commented on by signed-in visitors.Would you still like to comment? sign in or create a free account.
Become a better photographer every week
A practical photography tip in your inbox every week.
39,077 photography enthusiasts already receive the tips! More about the weekly mail. Or keep up to date via  Facebook.

Elja Trum
Photofacts; everything to do with photography!
Would you like to take better photos and keep up with what is happening in photography? Photofacts publishes articles that teach you something about photography — from a product announcement to a practical shooting tip or a look at a website. Photofacts covers photography every day and is a hobby project of Elja Trum's that got out of hand. The articles are written by a team of volunteer authors. If you would enjoy writing one or more articles for Photofacts, do get in touch.More about PhotofactsPhotofacts is made possible in part by
