

5 photo edits for portrait photos with Lightroom Classic
Monday 20 May 2024, 22:44 by Elja Trum | 4,469 views | 3 commentsThis article was translated from Dutch with the help of AI. Read the original.
The portraits I shoot are usually edited using only Adobe Lightroom Classic. Lightroom lets you improve your photos so much. The edits I make can vary from photo to photo, but I apply these five steps to almost every photo.
Discover many more Lightroom tips in our brand-new book, the Lightroombijbel. We are launching this new book next Thursday at 2 pm. Get more from the free live book launch and get 10 Lightroom Classic tips from Lightroom Classic Expert Nando Harmsen. Of course, you can also ask him your Lightroom Classic questions.
1. Remove blemishesAlmost nobody has completely flawless skin. You do sometimes see it in children, and good make-up can hide a lot too, of course. In practice, the first step I take when editing a photo is to remove blemishes.
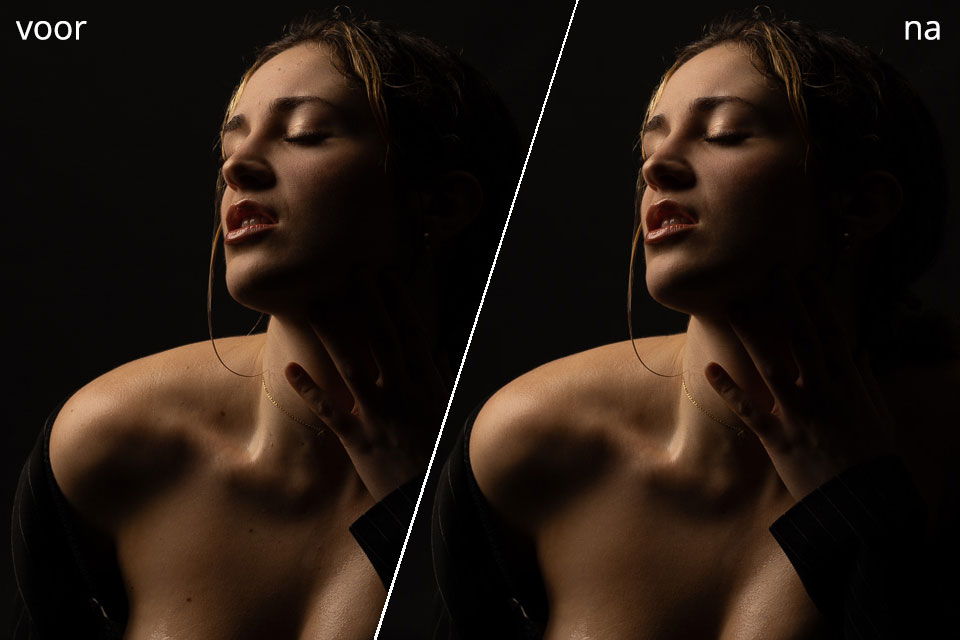
For this, I almost always use the Spot Removal tool, the Q shortcut, in Lightroom Classic. Usually with the feathering set to around 50 and the opacity at 100. The size naturally varies depending on what is needed. You can make the brush larger with the square brackets ] or smaller [.
Depending on the purpose of the photo, I edit more or less. If I really want to make a portrait of the person, I mainly remove temporary blemishes, such as spots or a stray hair falling across the face.
I then dab moles with the Spot Removal tool while setting the opacity to, for example, 40 per cent. This makes them less visible, while they are still present.
Sometimes I also choose to remove moles. In that case, it is usually not about the person, but about the image I am creating.
2. Soften the skinHave you removed all the obvious blemishes? The skin will usually still look a little uneven. It helps to soften the skin a little more.
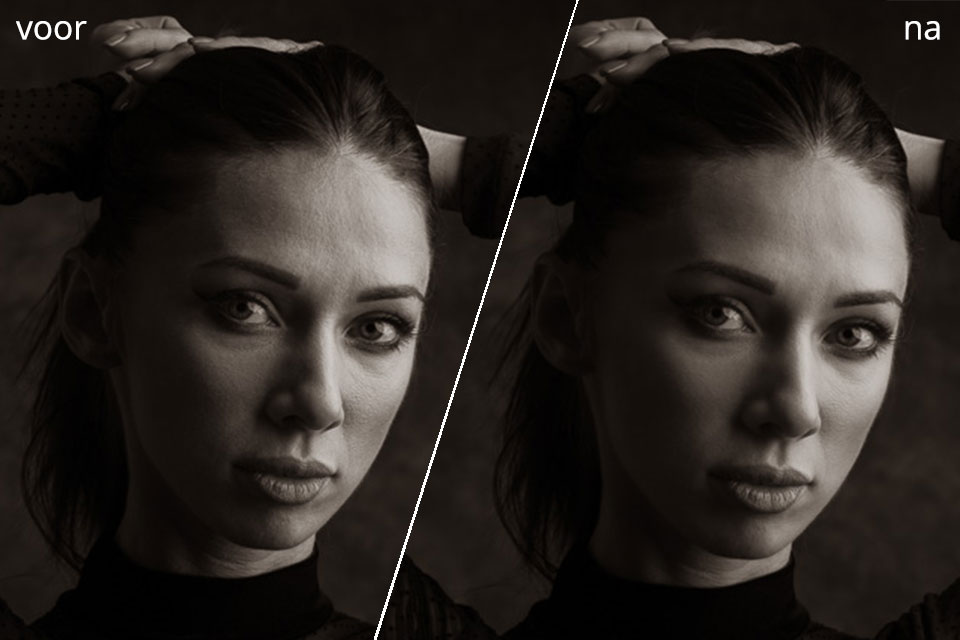
For softening the skin, I use a simple technique combined with Lightroom Classic's handy masking features, SHIFT - W. I choose 'People', then tick 'Facial Skin' and 'Body Skin', and have it create one mask.
The only adjustment I make to this mask is to reduce the 'Texture' slightly under 'Effects'. For example, to -20 or -40. Are you having problems with bright spots on the skin? You can also reduce the 'Highlights' under 'Tone' a little.
For both sliders, the same applies: do not take the edit too far, as it will look unnatural.
I mainly apply this step to women, by the way. With men, it often looks better to leave the skin a little rougher.
3. Apply a preset
I often use a preset to adjust the colours to my liking. Using one means you can add, for example, a colour tint consistently. This makes your photos more cohesive.
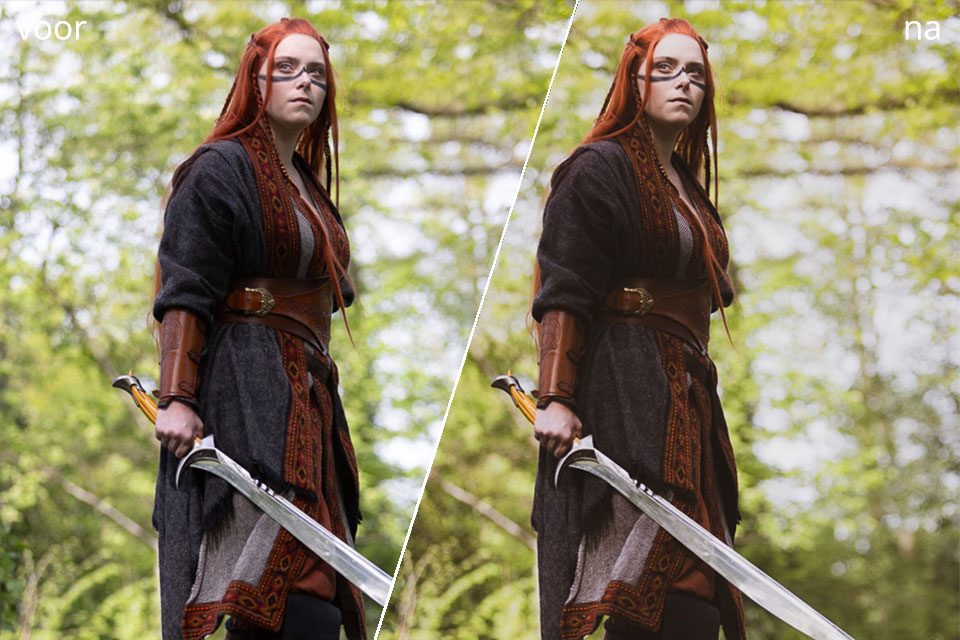
You can create a preset yourself, or use an existing preset. Mark the presets you like to use as 'favourites'. They will then appear conveniently at the top of your list of presets.
4. Darken the background
In a portrait photo, you want the attention to go to your model, your subject. A handy trick for drawing more attention to your subject is to make your subject lighter than the rest of the photo.
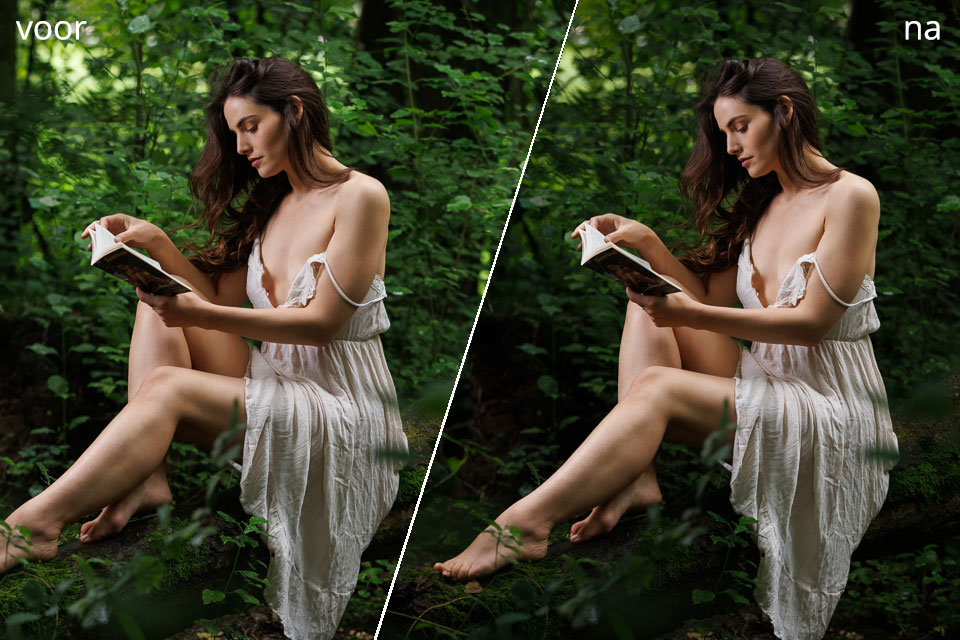
That is why it works well in many photos to make the background a little darker. You can do this easily in Lightroom Classic by using a mask again. You then choose the 'Background' mask.
This automatic method usually works well. It creates a selection of the surroundings in one go. The only thing you then need to do is move the 'Exposure' slider to the left, making the background in your photo darker.
5. Add vignetting
Basically, vignetting does much the same as darkening the background: it draws attention to the subject. With vignetting, the corners of the image become darker than the rest of the photo.
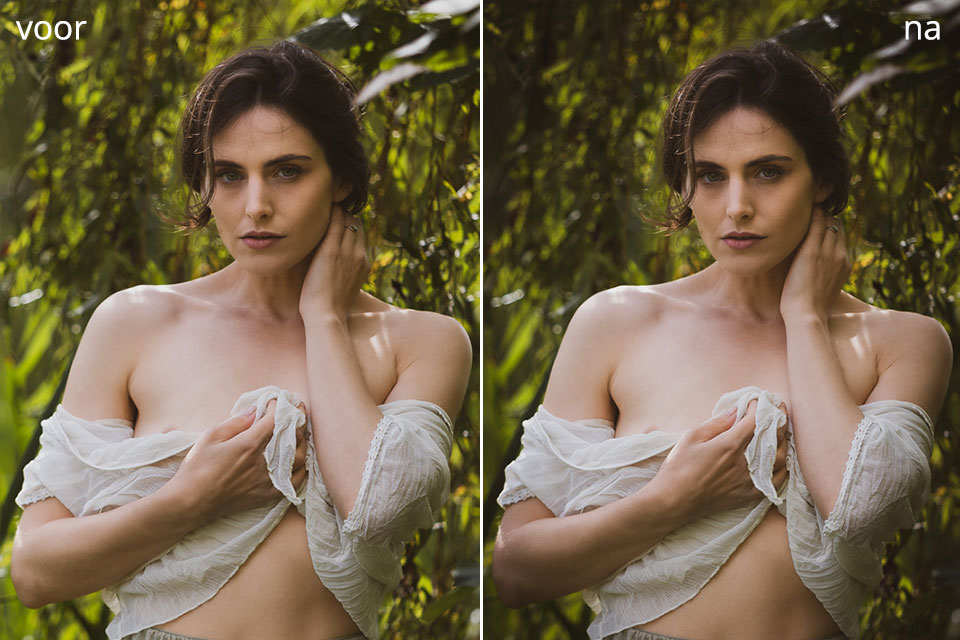
Basically, this is a lens fault. These days, it is usually corrected automatically in the camera, but it can also genuinely improve your photo.
I therefore add a subtle vignette to my photos as a matter of course. Your vignette should be so subtle that it is not noticeable that you have used the effect.
You add a vignette by going to 'Effects' and moving the Amount slider to the left. Minus 15 is often enough.
About the author
Elja Trum is the founder of Photofacts and online photography course website Photofacts Academy. He has been writing about photography since 2006. Elja is also the author of (Dutch) books on composition, black-and-white photography, flash photography and portrait photography.
You might also like
-
 What is the Comments tab in Lightroom Classic for?
by Nando Harmsen
-
 What's new in the Lightroom Classic 13 update?
by Nando Harmsen
-
 Adobe updates Lightroom (Classic) with new AI masks
by Elja Trum
-
 Speed up Lightroom Classic by reinstalling it
by Elja Trum
-
 The new Lightroom Classic updates
by Nando Harmsen
-
 5 tips to work faster in Lightroom Classic
by Thijs Schouten
3 comments
-
 Donald Willemsen wrote on Tuesday 21 May 2024 at 11:57 | reply
Hello Elja, I have questions about 2 of your tips. The first is 'softening skin'. Why is that necessary? Should a model be made to look more beautiful than he/she is? Is it the client who asks for it?
Translated from Dutch.
Every person has their own unique skin type that belongs to that person. Concealing those gives me the impression that a little wrinkle, pimple, spot is bad. What is the point of removing it.
The following concerns making the background darker so that the model stands out better. I think that with the example photo you have missed the mark quite badly. You make the background darker, causing the hair of a dark-haired model to disappear into the darkened background. That doesn't seem to me to be the intention. I would actually make parts of the background somewhat lighter to make the model stand out. -

 Elja Trum
wrote on Tuesday 21 May 2024 at 13:56
| reply
Elja Trum
wrote on Tuesday 21 May 2024 at 13:56
| reply
Nothing is required, of course, Donald.
Translated from Dutch.
In practice, I notice that models generally appreciate it. Besides, for example, a pimple stands out much more in a photo than it does in reality.
Almost everyone likes it when they look a little better in a photo than they perhaps do in reality.
You have to decide for yourself, of course, where you draw the line regarding how far you want to go. In my case, that includes removing pimples and making the skin a little softer.
Ohw, and as for the hairs against the darker background; I can still see them just fine here. Maybe your monitor is set a bit too dark?
The same applies here, of course: you should simply do what you think looks good. I usually prefer a slightly darker background; it draws attention to your model. -
 martinphili wrote on Tuesday 21 May 2024 at 21:24
| reply
martinphili wrote on Tuesday 21 May 2024 at 21:24
| reply
That hair can also be seen perfectly well here, you know.
Translated from Dutch.
And perhaps not entirely within the scope of this little article but: not diamonds, but Photoshop is a girls best friend
Have your say
Please note: Articles older than a week can only be commented on by signed-in visitors.Would you still like to comment? sign in or create a free account.
Become a better photographer every week
A practical photography tip in your inbox every week.
39,027 photography enthusiasts already receive the tips! More about the weekly mail. Or keep up to date via  Facebook.

Elja Trum
Photofacts; everything to do with photography!
Would you like to take better photos and keep up with what is happening in photography? Photofacts publishes articles that teach you something about photography — from a product announcement to a practical shooting tip or a look at a website. Photofacts covers photography every day and is a hobby project of Elja Trum's that got out of hand. The articles are written by a team of volunteer authors. If you would enjoy writing one or more articles for Photofacts, do get in touch.More about PhotofactsPhotofacts is made possible in part by
