
Illuminated mushrooms (part 2)
Saturday 2 January 2021, 14:14 by Erik Nevels | 5,271 views | 2 commentsThis article was translated from Dutch with the help of AI. Read the original.
Adding extra light to a mushroom can produce beautiful results. In this second part, the main focus is once again on using artificial light when photographing mushrooms.
Last time, the LED lamp was the light source. This time, it is the flash's turn. I will take you along on my first journey of discovery into using flash when photographing mushrooms.
» Read also: Illuminated mushrooms, part 1
Fine mist
About a year ago, I saw a mushroom photo by nature photographer Johan van der Wielen on Instagram. A photo that came close to the maximum score of 10 on my WOW ladder.
'How did he make it, and especially the background?' was the question I asked myself. Johan's answer was: 'A fine mist'.
It was clear to me that artificial light was also involved. I did not look into it any further at that point. The mushroom season was already coming to an end.
Tutorials
This autumn, I remember Johan's photo and start looking for more information about the techniques used. A few tutorials by Johan provide some clarity.
You can already play around with light quite nicely using LED lamps, and achieve very fine results (see part 1 of my blog). Flashguns offer many more possibilities.
Transmitter and built-in receiver
An important requirement for using flash creatively turns out to be having a transmitter or trigger, a small device that allows you to control the flash remotely.
After some market research, I buy a radio trigger that fits the hot shoe of my Sony camera. I replace the flash I already had with one with a built-in receiver that is controlled by the trigger.
I enter the desired flash settings into the trigger, which communicates wirelessly and seamlessly with the flash, even though they cannot see each other. A tree trunk between the camera and the flash is therefore no problem.
M mode
Buying a flash and trigger is one thing, learning to operate them is another. Most flashes and triggers have many settings, which requires some study. Fortunately, manuals and courses such as the Photofacts course Getting started with flash can help.
Step by step, this course teaches you to control the flash. I use M mode when photographing mushrooms. This allows me to set the light intensity and zoom (the width of the light beam) exactly as I want.
Backlighting
At the beginning of November, the time has come. With the brand-new trigger and flash in the camera bag, we head out into nature as we do every week. I look for mushrooms that are standing in the open, or even better, higher up, for example on a fallen tree trunk.
The search takes a while. There are mushrooms, but they are not suitable. Fortunately, persistence pays off here too. Yes! I see a fine specimen between the moss on a tree trunk. I can work with this!
Do I photograph it from this side, or from the other side after all? It will be this side, and I get down on my knees properly. The trigger goes on the camera, and the camera in turn goes on the tripod.
Happy with the composition, I consider the depth of field and focus. Then things get exciting. I practised using the trigger and flash at home, but how will it work out in the field?
The trigger is set to the minimum flash power of 1/128. I might as well start there. I place the flash on the ground behind the mushroom and point it at the mushroom to create backlighting. It is too low, so I put it on the stand, which raises it a little.
I check that it is not now too high and appearing in the frame. It is not, but perhaps it is too far away? Well, there is only one way to find out. I press the shutter button and the timer does its job.
The first result is far from what I had in mind. I forgot about the shutter speed. It needs to be much shorter if I want to get the desired black background.
A quarter of an hour and many changed settings later, I cannot suppress the WOW I shout towards my partner. This is starting to look like it. I continue my learning process enthusiastically, including in the weeks that follow. As long as there are mushrooms, I am triggered!
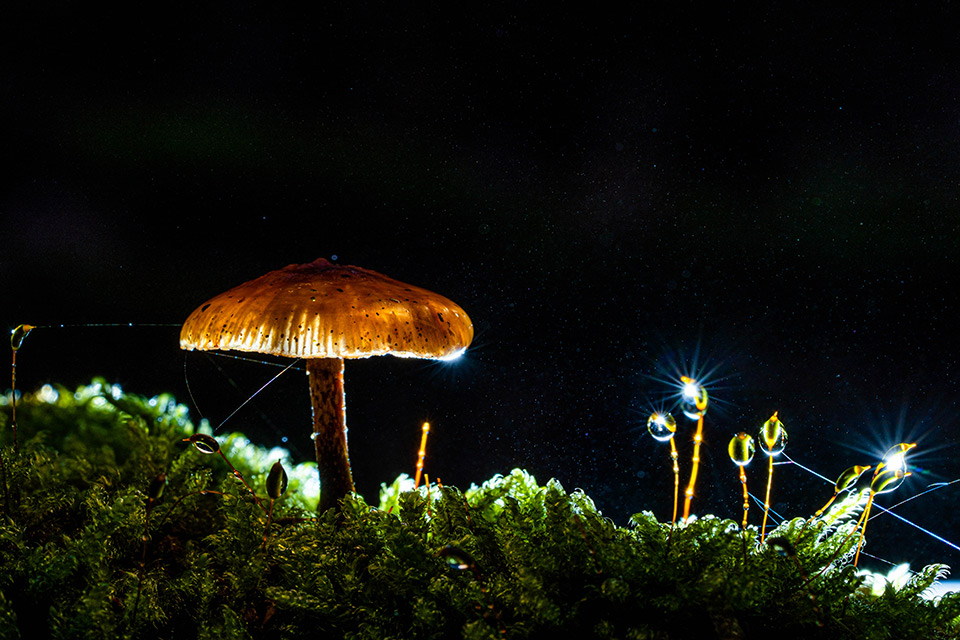
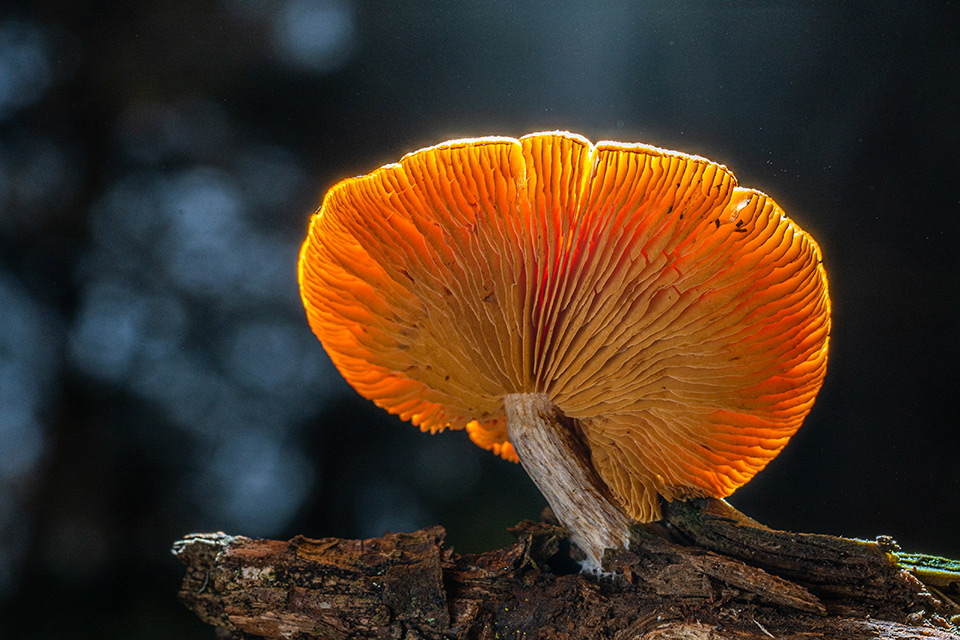
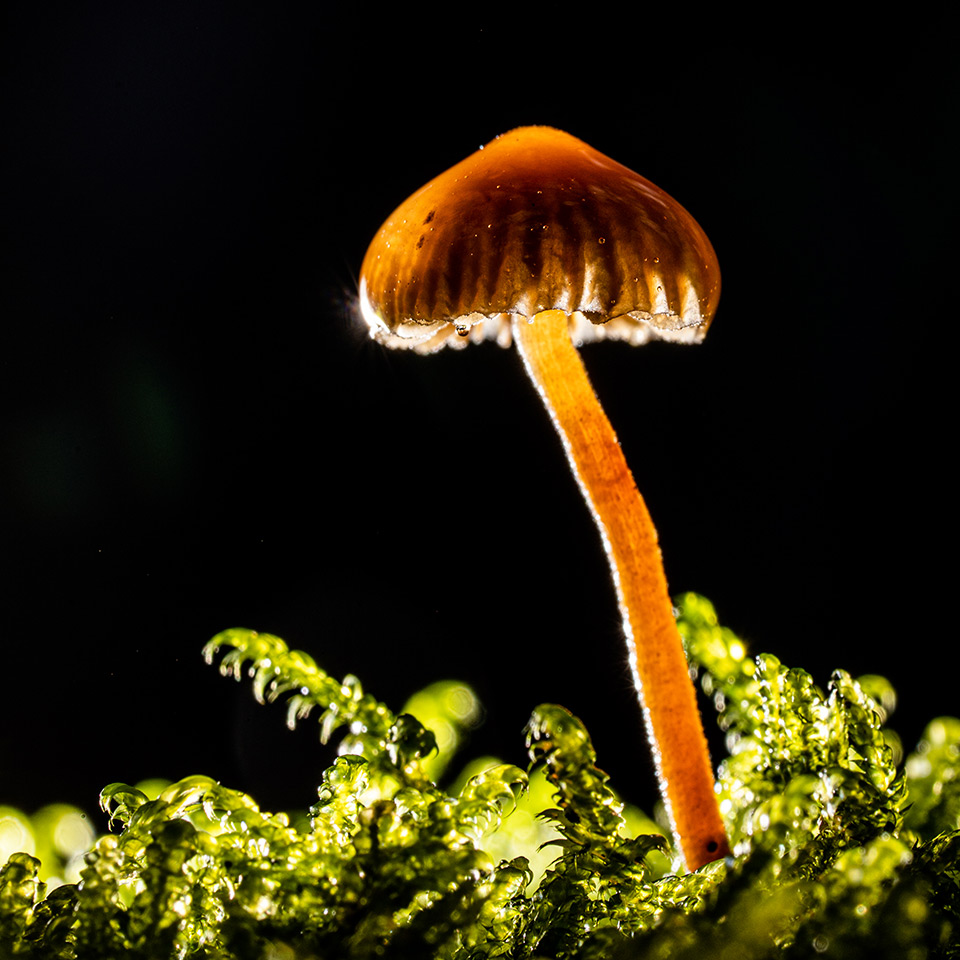
Here you can see a few results, all made with the flash behind the mushroom, so with backlighting.
About the author
Steeds weer boeiend en op zoek naar de essentie! Dat is wat fotograferen in de natuur voor mij is. Gefocust op het landschap of het onderwerp in diens omgeving tracht ik meer dan alleen te registreren. Een continue uitdaging waarvan ik elke keer volop geniet. Meer foto's? Volg mij op Instagram en/of kijk op mijn website
You might also like
-
 Illuminated mushrooms (part 1)
by Erik Nevels
-
 Photographing mushrooms in your own local rain shower
by Nando Harmsen
-
.jpg "Illuminated mushrooms (part 3)") Illuminated mushrooms (part 3)
Illuminated mushrooms (part 3)by Erik Nevels
-
 Mushrooms without a macro lens, plus a few extra tips
by Nando Harmsen
-
10 tips for photographing mushrooms
by Nando Harmsen
-
 Mushrooms with bokeh
by Erik Nevels
2 comments
-
 W.O wrote on Tuesday 5 January 2021 at 13:36 | reply
Isn't it a bit late for this information
Translated from Dutch. -

 Erik wrote on Tuesday 5 January 2021 at 17:18
| reply
Erik wrote on Tuesday 5 January 2021 at 17:18
| reply
@W.O
Translated from Dutch.
I understand your reaction. Most people associate mushrooms with autumn. However, they also occur in all the other seasons. Even in a winter like this one, when it hardly freezes. In my blogs I always describe recent photo adventures. The photos were taken at that time. For example, the photos for my upcoming blog were taken last Saturday. Even now, in this wet period, I find more mushrooms than in the dry period in autumn.
Have your say
Please note: Articles older than a week can only be commented on by signed-in visitors.Would you still like to comment? sign in or create a free account.
Become a better photographer every week
A practical photography tip in your inbox every week.
39,079 photography enthusiasts already receive the tips! More about the weekly mail. Or keep up to date via  Facebook.

Elja Trum
Photofacts; everything to do with photography!
Would you like to take better photos and keep up with what is happening in photography? Photofacts publishes articles that teach you something about photography — from a product announcement to a practical shooting tip or a look at a website. Photofacts covers photography every day and is a hobby project of Elja Trum's that got out of hand. The articles are written by a team of volunteer authors. If you would enjoy writing one or more articles for Photofacts, do get in touch.More about PhotofactsPhotofacts is made possible in part by
