

Illuminated mushrooms (part 3)
Saturday 9 January 2021, 20:10 by Erik Nevels | 6,063 views | 6 commentsThis article was translated from Dutch with the help of AI. Read the original.
In my previous blog, I announced that I would tell you about using a spray bottle when photographing mushrooms. Here it is!
Using a series of three photos, I show what flash light and then a spray mist add to the original image. Finally, I briefly look at adjusting the white balance or colour temperature.
All in all, there are plenty of creative possibilities, and perhaps a challenge for you to experiment properly.
It is a grey day when, at around half past nine in the morning, I discover my friend busy on the ground. She started an hour earlier and has already found a great subject.
She has even done some preparatory work for me and points out a beautiful little mushroom among the moss on a fallen tree trunk. Because it is beautiful and stands out nicely, I accept the challenge and take off my rucksack. The fun can begin.
Before unpacking my equipment, I first walk around my subject. From which side am I going to photograph it? Half an hour later, I conclude that I chose the wrong side after all, and move my tripod and camera to the other side. Much better!
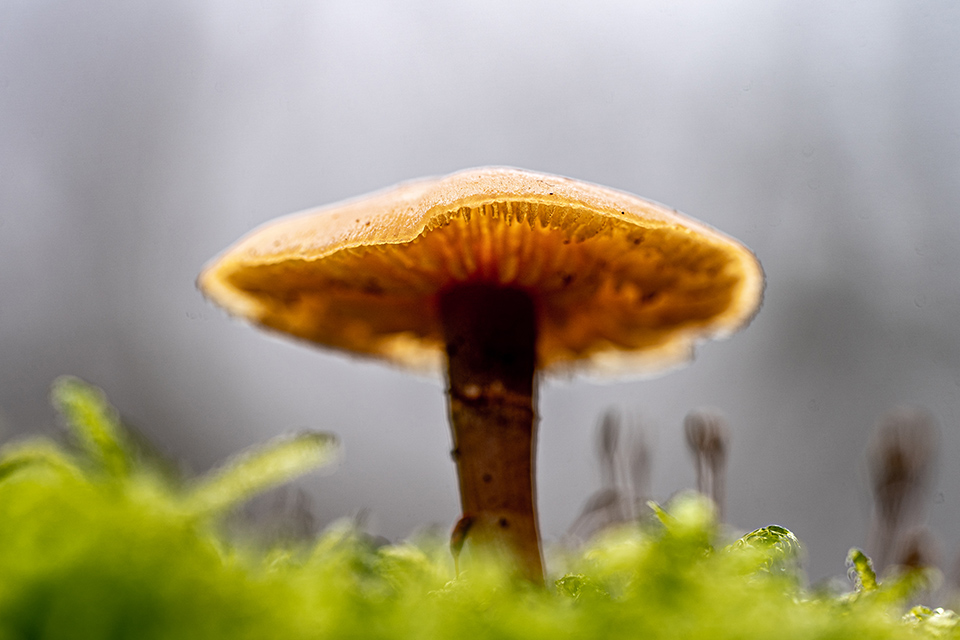
First, I take photos without using a light or flash. I want to be happy with the viewpoint and composition first. You can see the result above.
I choose f/5 because this aperture keeps the background just blurred enough, while still giving me a little more depth of field in the cap. So I did not use a flash or light for this first photo.
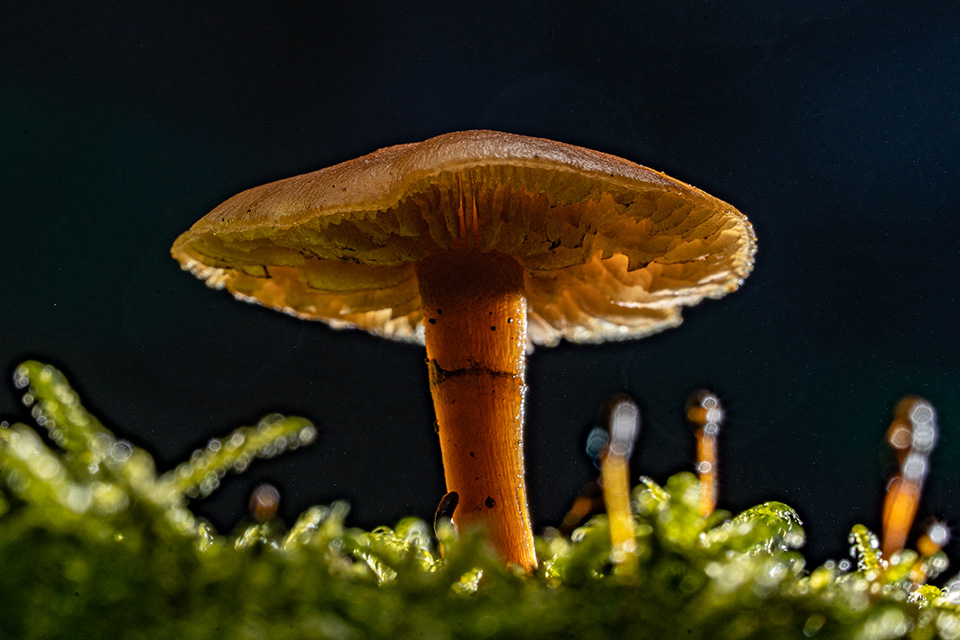
Because the mushroom is on a tree trunk, I can point the flash at the cap diagonally from below. The flash now becomes my main light, in the form of backlighting.
I decide to go for more depth of field and choose f/16. By shortening the shutter speed as well, I make the background turn black.
I take a few photos and think the top of the cap deserves some light too. I am actually running out of hands now. I need one hand to hold the light and another for the flash. But with the camera on a timer, I have both hands free to hold them.
I experiment enthusiastically. I regularly check the results, which vary because of differences in flash power and the way I work manually. When I am happy, I bring out my final trump card. The spray bottle.
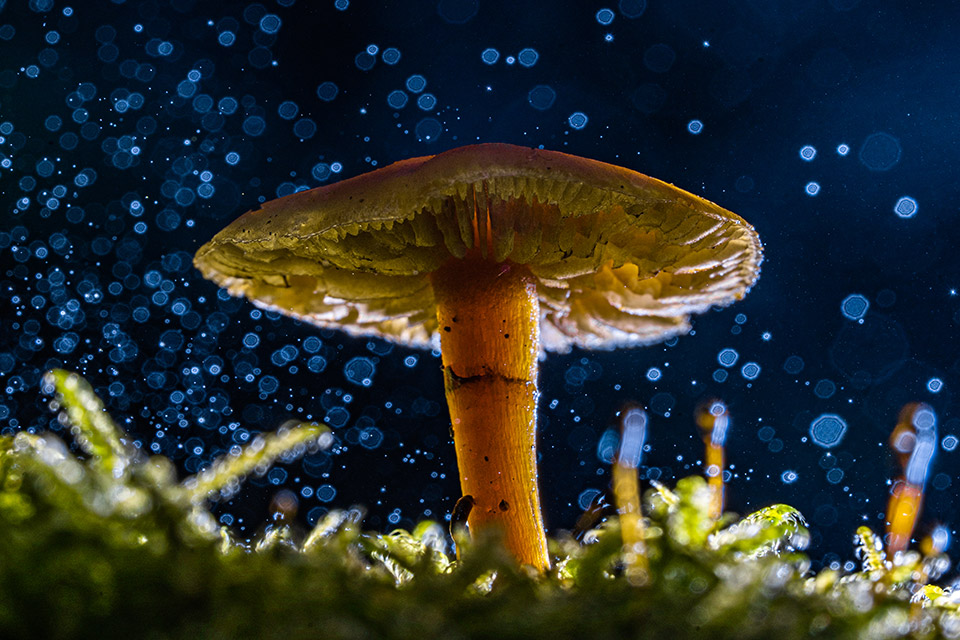
I leave the camera settings unchanged. The only thing I am going to add is a spray mist. I spray a mist of water between the flash and the mushroom using the spray bottle. I do this just before the flash fires.
The 5-second timer is useful for this, especially because the red front light on the camera flashes five times. That way, I know exactly when the flash is coming.
Now I am really running out of hands. I have managed to position the flash so that I no longer need to hold it. After pressing the shutter button, I point the light with one hand and spray with the other.
Now I take several photos before checking them. Sometimes you spray too late, and sometimes too early. It also makes a difference whether you spray close to the flash or close to the mushroom. But that is what makes experimenting so much fun.
I am always curious about the results and try to make them more and more to my liking while practising. In the photo above, you can see spray mist in the form of blue bubbles in the background.
Colour temperature
The final step with my photos is post-processing in Lightroom. One of the possible adjustments is changing the colour temperature or white balance. This works perfectly when shooting in RAW.
In the third photo, I choose a cooler, bluer colour temperature, which makes the bubbles blue. If you choose a warmer temperature, they become more grey-white. And if I want to see that blue effect in the field already, I adjust the white balance in the camera on the spot.
Plenty of creative possibilities
I already mentioned it in my previous blogs: 'You either love it, hate it or fall somewhere in between'. But if you are enthusiastic, tools such as lights, a flashgun and a spray bottle offer plenty of creative possibilities.
Have fun, experiment and be surprised by the results.
About the author
Steeds weer boeiend en op zoek naar de essentie! Dat is wat fotograferen in de natuur voor mij is. Gefocust op het landschap of het onderwerp in diens omgeving tracht ik meer dan alleen te registreren. Een continue uitdaging waarvan ik elke keer volop geniet. Meer foto's? Volg mij op Instagram en/of kijk op mijn website
You might also like
-
 Illuminated mushrooms (part 2)
by Erik Nevels
-
 Illuminated mushrooms (part 1)
by Erik Nevels
-
 Photographing mushrooms in your own local rain shower
by Nando Harmsen
-
 10 tips for photographing mushrooms
by Nando Harmsen
-
 Beware the so-called perfect white balance
by Nando Harmsen
6 comments
-
 Georges wrote on Tuesday 12 January 2021 at 11:32 | reply
Clear explanation that I can use, worth trying.
Translated from Dutch. -
 guest wrote on Tuesday 12 January 2021 at 12:01 | reply
It was a pleasure to read. Awesome when you turn it into such a challenge to make something beautiful out of it. That extra step makes the magic between your camera and the subject so beautiful when you have complete control...
Translated from Dutch.
Great! -

 Erik wrote on Tuesday 12 January 2021 at 12:09
| reply
Erik wrote on Tuesday 12 January 2021 at 12:09
| reply
@Georges
Translated from Dutch.
Great that my blog inspires you to experiment. Good luck! -
Erik wrote on Tuesday 12 January 2021 at 12:42
| reply
@guest
Translated from Dutch.
Thanks for your enthusiastic response! -
 Nijs wrote on Tuesday 12 January 2021 at 13:17 | reply
Beautiful photo and also thorough explanation.
Translated from Dutch.
Thanks for the inspiration for my next photo project!! -
Erik wrote on Tuesday 12 January 2021 at 17:26
| reply
@Nijs
Translated from Dutch.
Thanks! You're welcome.
Have your say
Please note: Articles older than a week can only be commented on by signed-in visitors.Would you still like to comment? sign in or create a free account.
Become a better photographer every week
A practical photography tip in your inbox every week.
39,079 photography enthusiasts already receive the tips! More about the weekly mail. Or keep up to date via  Facebook.

Elja Trum
Photofacts; everything to do with photography!
Would you like to take better photos and keep up with what is happening in photography? Photofacts publishes articles that teach you something about photography — from a product announcement to a practical shooting tip or a look at a website. Photofacts covers photography every day and is a hobby project of Elja Trum's that got out of hand. The articles are written by a team of volunteer authors. If you would enjoy writing one or more articles for Photofacts, do get in touch.More about PhotofactsPhotofacts is made possible in part by
