

How to prevent flare in a photo with the sun in it
Saturday 4 July 2020, 14:14 by Nando Harmsen | 6,794 views | 4 commentsThis article was translated from Dutch with the help of AI. Read the original.
Nothing is more annoying than unwanted flare in a photo. When it appears in a part of the photo with little detail, it can be easy to remove the flare in Photoshop or Lightroom. But often the flare can be seen in places where it is almost impossible to do anything about it.
There are also times when flare looks good, and you want to keep it for the atmosphere. Sometimes you even look for flare, but in landscape photography, where extra filters are often used, flare can quickly become unwanted.
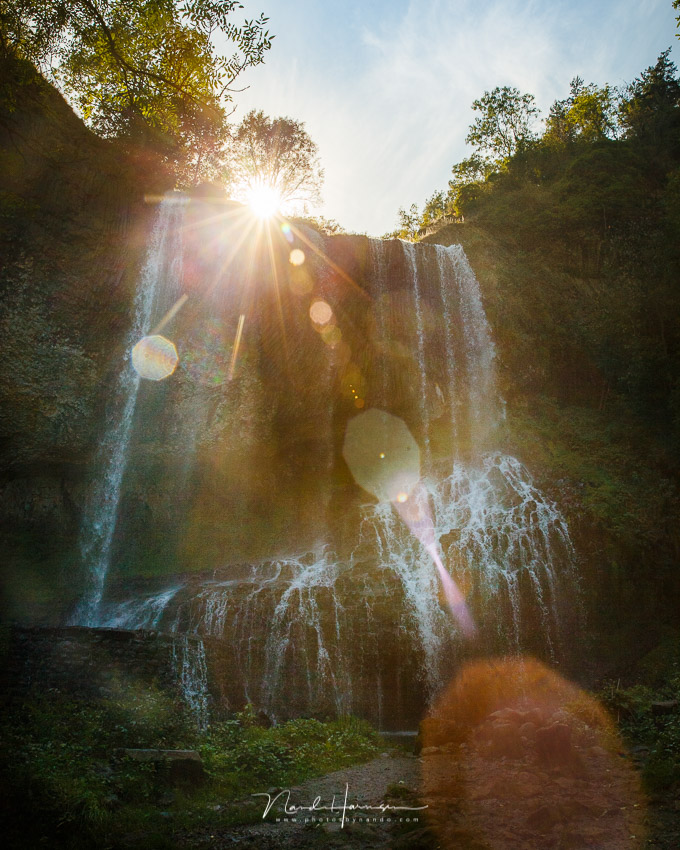
Do you want to remove flare? Then this tutorial is for you. It focuses on landscape photography, where you work with a tripod. In my case, that also means using a combination of graduated filters to control the dynamic range of the scene, so I don't need to use HDR.
A tutorial in two parts
This tutorial actually consists of two parts. First, you need to make sure you take the right photos on location. If you don't, this method won't work.
It therefore requires some insight into what you want to do with your photo in post-processing. Think of it as preparation for the edit.
The second part is removing the flare itself, for which I use Adobe Photoshop. I show this in the tutorial as a three-step plan, and I assume you have some knowledge of working with Photoshop.
Don't you? Then the Working with Layers in Photoshop course at Photofacts Academy can certainly help.
Taking photos with a finger in the shot
What you need to remove flare is a photo without the flare. That sounds more difficult than it is. All you need is your finger, and you always have that with you.
A tripod is also highly recommended for this technique, to make sure you can take two photos with exactly the same crop and composition.
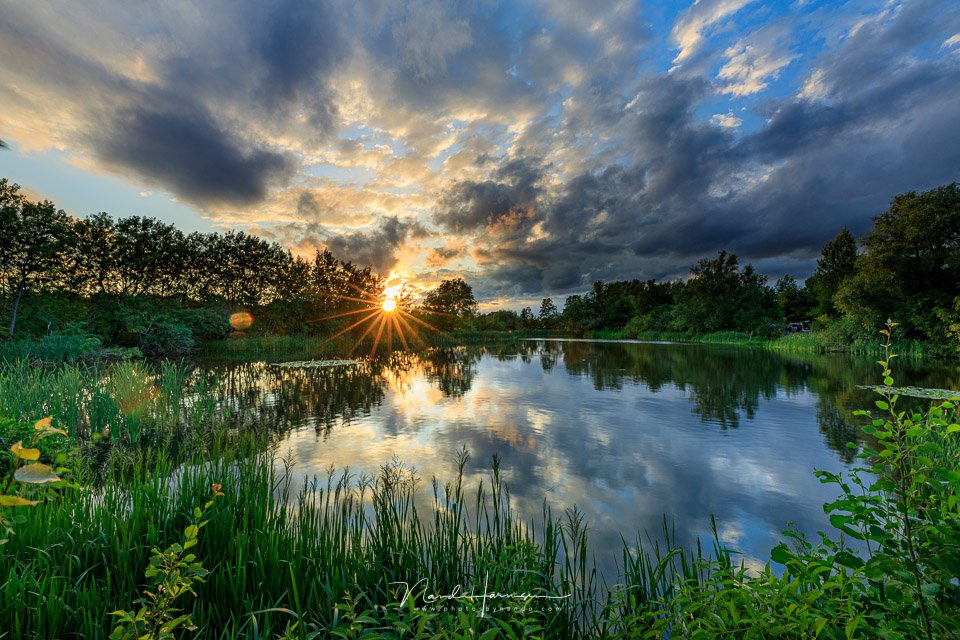
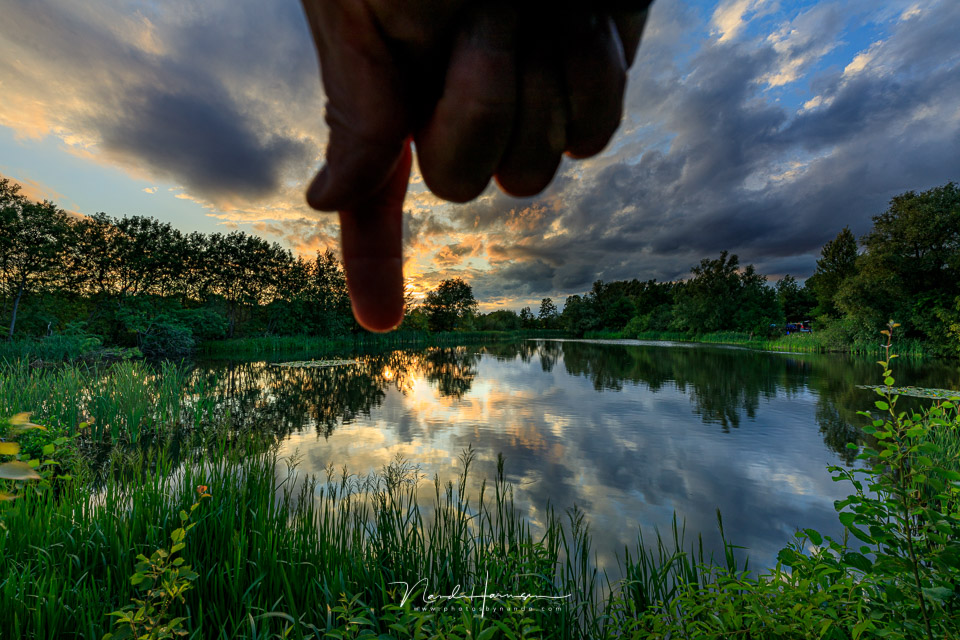
Set up your camera, compose the shot, and take the photo of your landscape. There is a good chance there will be flare in the shot, especially if you are using filters, as I am in this example. If that is the case, hold your finger in front of the sun and take the same photo.
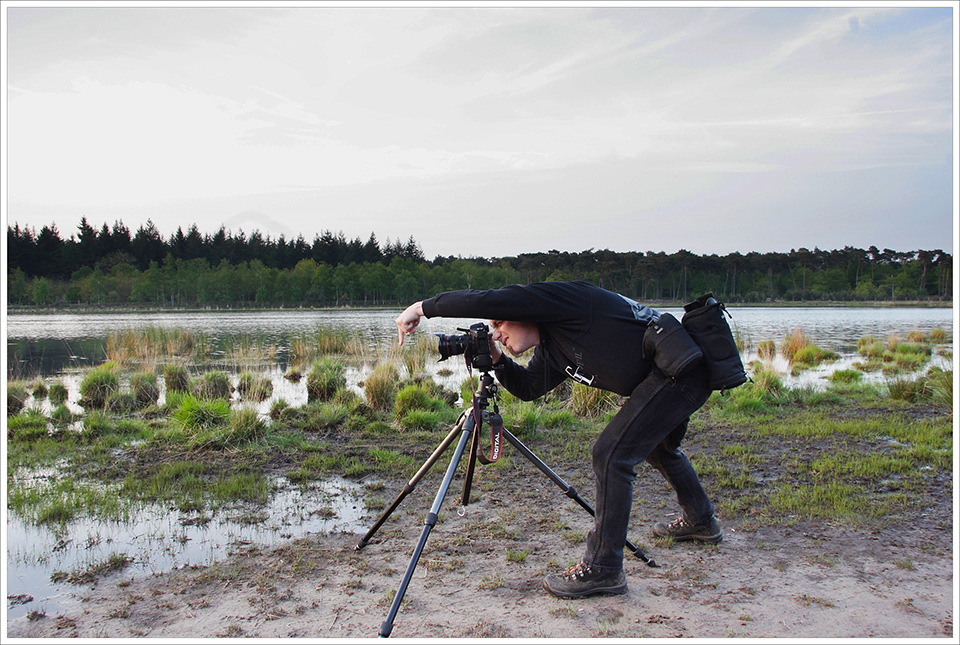
Make sure you use exactly the same exposure, because if you are working in aperture priority mode (A mode or Av mode), your finger can cause a different exposure.
This only really works with wide-angle photos. The longer the focal length, the more difficult it becomes. From experience, I know that it becomes almost impossible at around 200mm.
Normally, you don't want a finger in the shot, but in this case the finger blocks the bright light source that causes the flare. You now have two photos that are almost exactly the same. One with the flare and no finger, the other with a finger and no flare.
Combining in Photoshop
The second part takes place in post-processing. For this, I use Lightroom to give both photos exactly the same edit, editing one photo as desired and then synchronising all the edits with the second photo.
I then transfer both photos to Photoshop, where the final removal of the flare takes place.
Step 1: Open the photos as layers in Photoshop
It doesn't matter which version of Photoshop you have, all versions can work with layers and masks. And that is what we are going to do to remove the flare and the finger. We do this step by step, starting by opening the two photos as layers in Photoshop.
You can do this directly from Lightroom by choosing the "Open as Layers in Photoshop" option, or you can open the two photos directly in Photoshop, with or without using Adobe Camera RAW.
If you opened the photos separately, you will have to copy the photo with the finger manually and then place it as a layer in the photo with the flare.
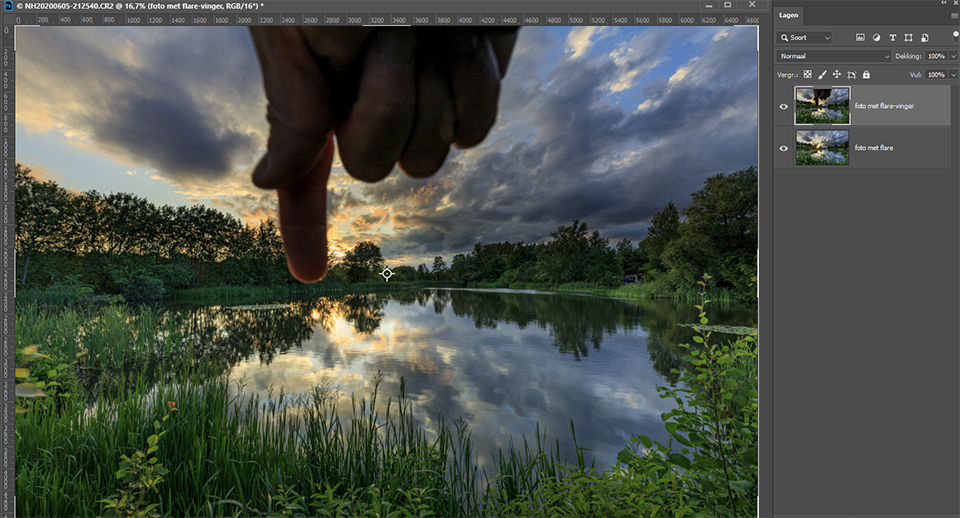
Step 2: Mask the layer with the finger
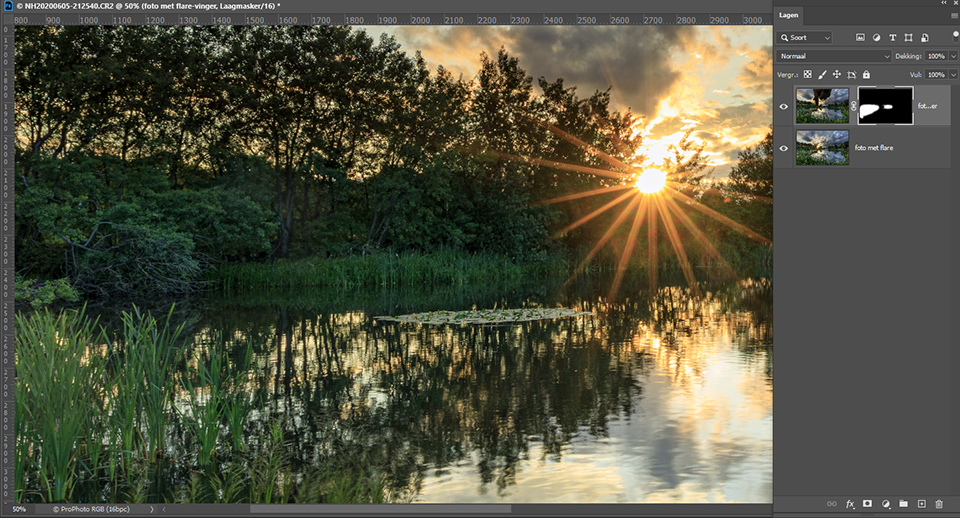
Make sure the top layer is the photo with the finger. Add a mask to this layer and make sure it is completely black. Anything that is black in the mask will not be visible. In other words, the top layer is completely masked so that we only see the layer underneath.
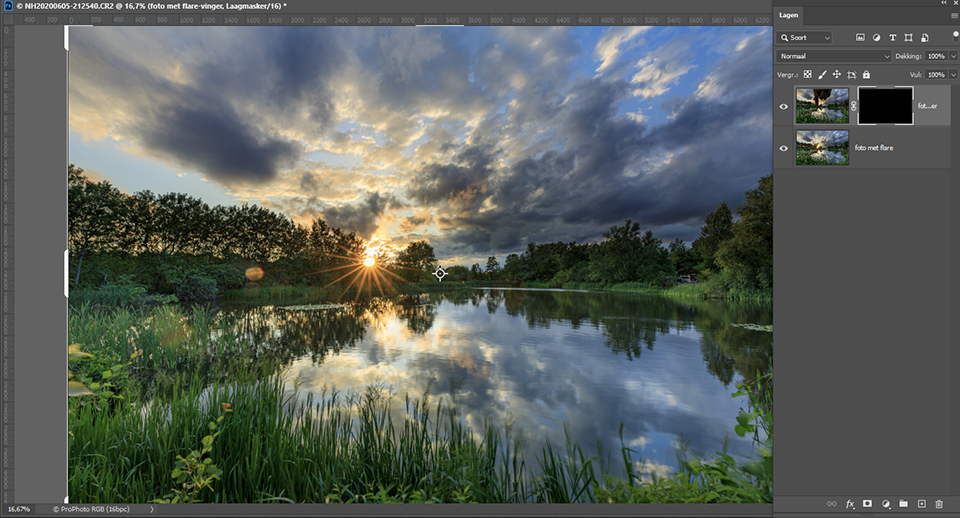
Step 3: Use the brush to remove the flare
Because of the black mask, the layer with the finger is not visible. So we see the underlying layer with the flare. By now painting over the flares in the black mask with a white brush, we make that part of the layer visible.
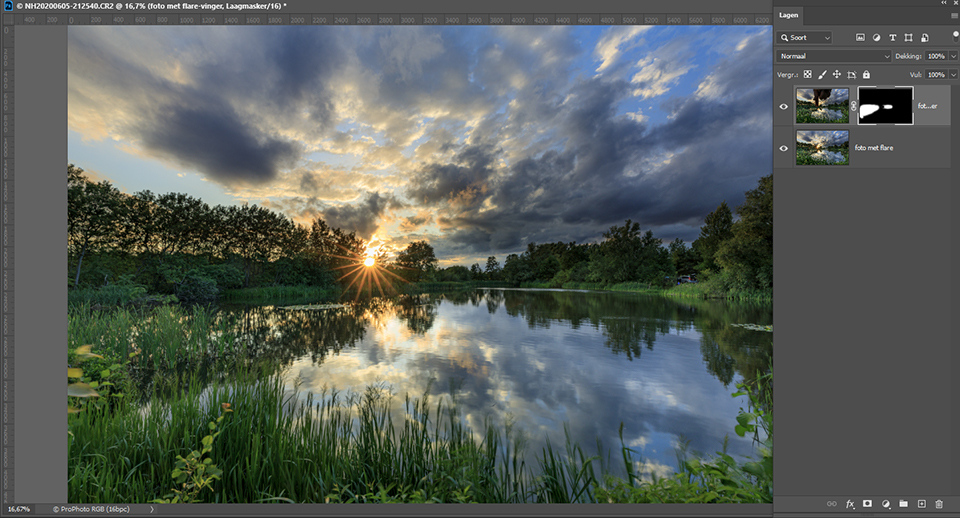
This makes only the part of the top layer where the flare appears visible. So we use only the part we need from the photo with the finger. The finger is not visible, and the flare has disappeared too.
If we enlarge the part with the flare, you can see how simple and effective the flare removal is. You can save and keep the photo with its layers, or merge the layers into a single layer using the key combination
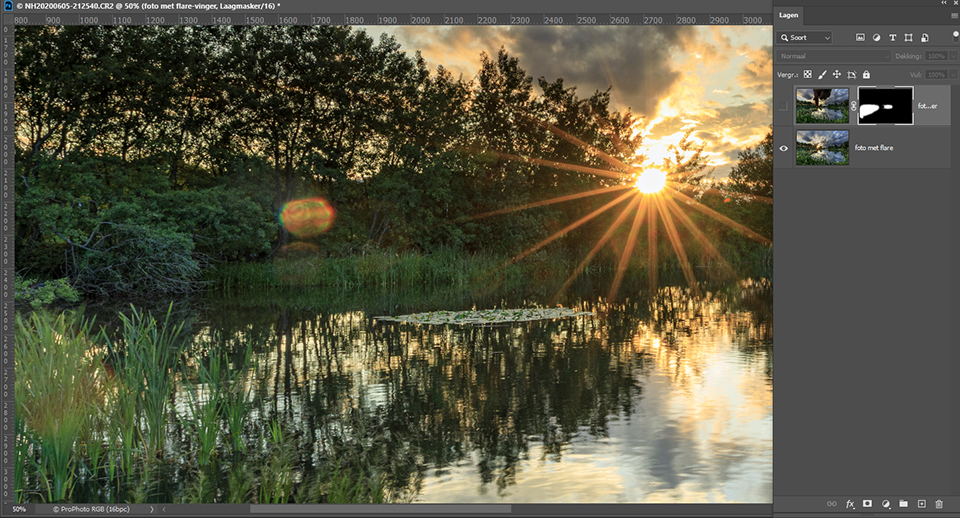
What if you have made an HDR?
For this example, I used photos taken with graduated filters. If you don't have or want to use those, you may need an HDR photo to capture the dynamic range of the scene.
A normal HDR merge in Photoshop, Lightroom or any HDR programme is not possible in this case. After all, the finger is in the way. But by using layers and masks, it is still possible to create an HDR and remove the finger at the same time.
I will explain this technique, combining multiple photos taken with an exposure bracket using layers and masks, in a future tutorial.
Finally
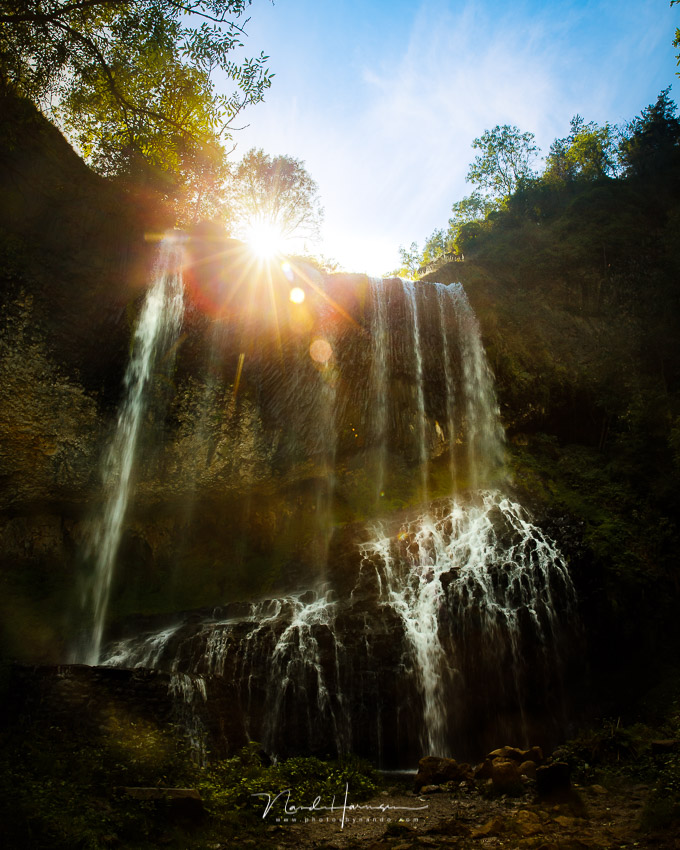
Are you curious about how the photo I showed at the beginning of the article turned out using this technique? I think the result is very successful. I deliberately didn't remove all the flares, but it is clear what a difference this technique can make.
About the author
Nando Harmsen has been photographing for more than 40 years. He specialises in wedding photography and landscape photography. Nando also gives talks, workshops, masterclasses and photo trips, and regularly reviews new and interesting equipment.
You might also like
-
 Got flare in your HDR photo? Remove it with your finger
by Nando Harmsen
-
 Photoshop tip: Using a clipping mask
by Nando Harmsen
-
 Photoshop tip: Use a copy of a merged layer
by Nando Harmsen
-
Create your own reusable photo frame in Photoshop
by Nando Harmsen
-
Photoshop tip: Keep your layer stack organised
by Nando Harmsen
-
 Replacing skies in Photoshop is getting easier
by Johan Elzenga
4 comments
-
 Paul Kahlert wrote on Tuesday 7 July 2020 at 23:02 | reply
Very useful technique! I’ve always been trying to work it away a bit in Photoshop, but this is much better.
Translated from Dutch.
Thanks, Paul Kahlert -

-

-


Have your say
Please note: Articles older than a week can only be commented on by signed-in visitors.Would you still like to comment? sign in or create a free account.
Become a better photographer every week
A practical photography tip in your inbox every week.
39,027 photography enthusiasts already receive the tips! More about the weekly mail. Or keep up to date via  Facebook.

Elja Trum
Photofacts; everything to do with photography!
Would you like to take better photos and keep up with what is happening in photography? Photofacts publishes articles that teach you something about photography — from a product announcement to a practical shooting tip or a look at a website. Photofacts covers photography every day and is a hobby project of Elja Trum's that got out of hand. The articles are written by a team of volunteer authors. If you would enjoy writing one or more articles for Photofacts, do get in touch.More about PhotofactsPhotofacts is made possible in part by
