

Got flare in your HDR photo? Remove it with your finger
Saturday 30 July 2022, 15:15 by Nando Harmsen | 4,610 views | 2 commentsThis article was translated from Dutch with the help of AI. Read the original.
You use HDR techniques when the dynamic range of your landscape is too wide to capture in a single photo. But this often means there is a bright light source in your image, such as the sun. That can cause flare.
By taking this into account while photographing, you can easily remove the flare later.
For an HDR shot, you take an exposure bracket. I always use five exposures with a one-stop difference in exposure between each shot.
This often captures enough dynamic range in your photo series. Unfortunately, sunlight often causes distracting flare.
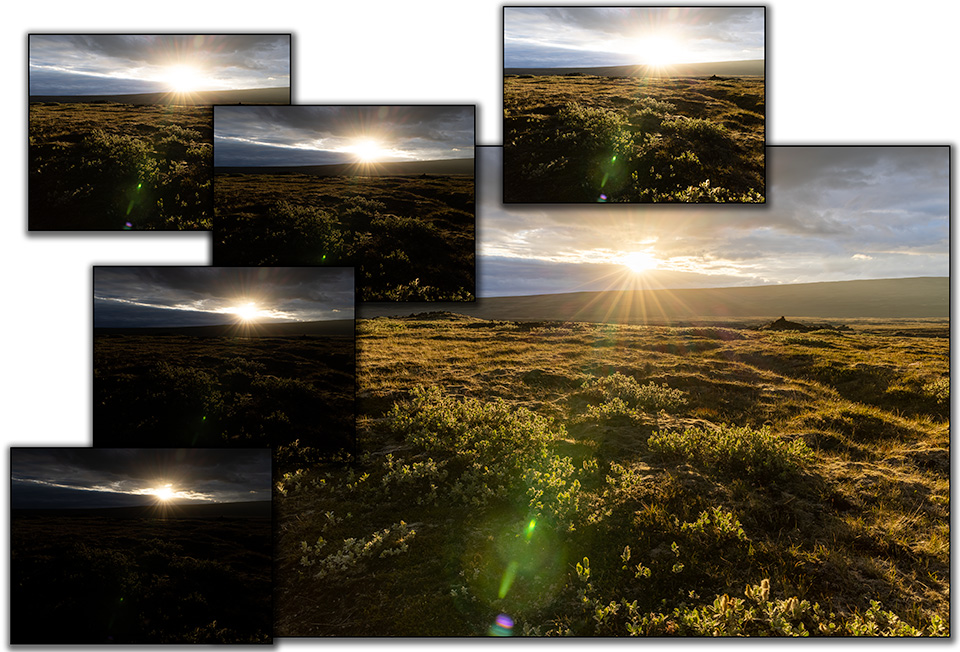
Removing flare is easy in post-processing if it is not too large. But sometimes flare can take on very troublesome shapes and become so dominant that it is almost impossible to remove. The photo I took in Iceland is a good example of this.
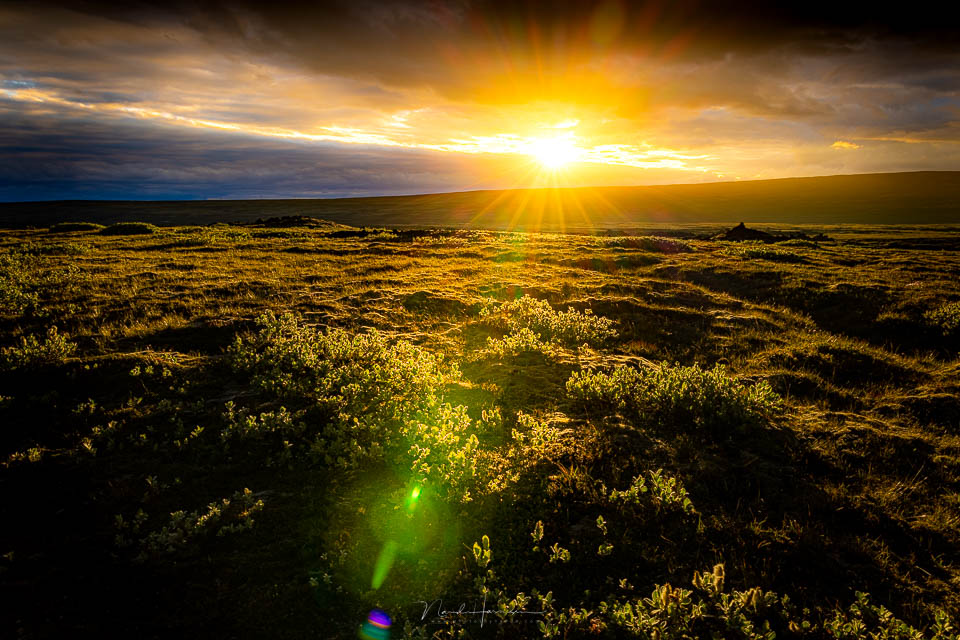
So check the photos you have just taken while you are still on location to see if you can spot any flare. If you see one in the image, take another exposure bracket, but make sure you block the sun with a finger or hand. Because the light source is no longer shining into your lens, the flare disappears.
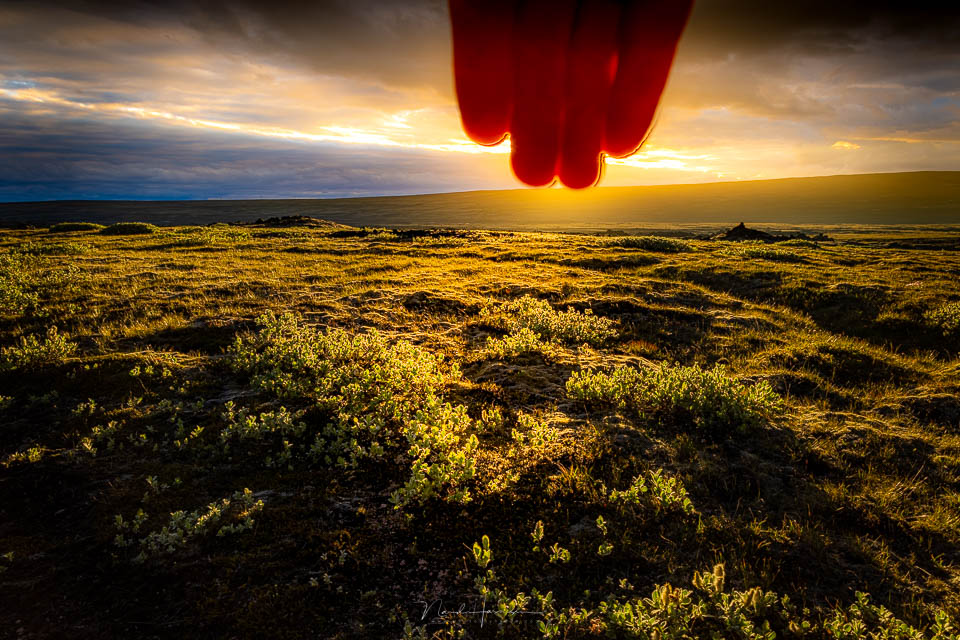
It is important that the exposures in your bracket remain the same, and that you do not move the camera between the two exposure brackets. A tripod is therefore essential. The technique also only works with a wide-angle lens.
You now have two exposure brackets, one with flare and the other with your hand in the frame. Merge them separately into an HDR shot and edit both in exactly the same way, entirely according to your own preferences.
Then open both photos as layers on top of each other in Photoshop or a programme such as Affinity Photo.
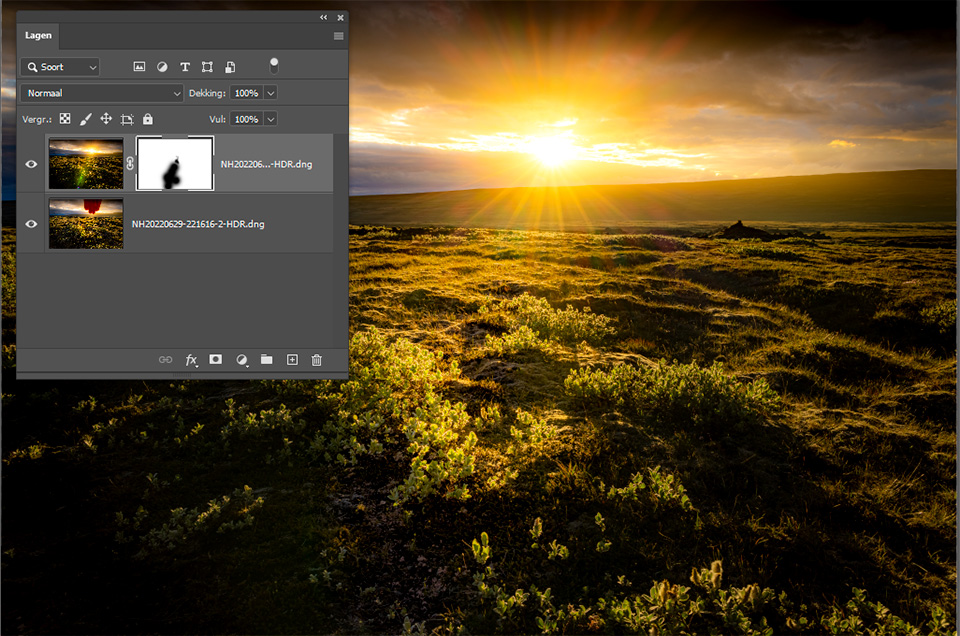
You can now easily use a mask to mask the hand out of the photo without flare. Or mask the flare out of the photo without the hand, whichever is easiest. This gives you a great final result without troublesome flare.
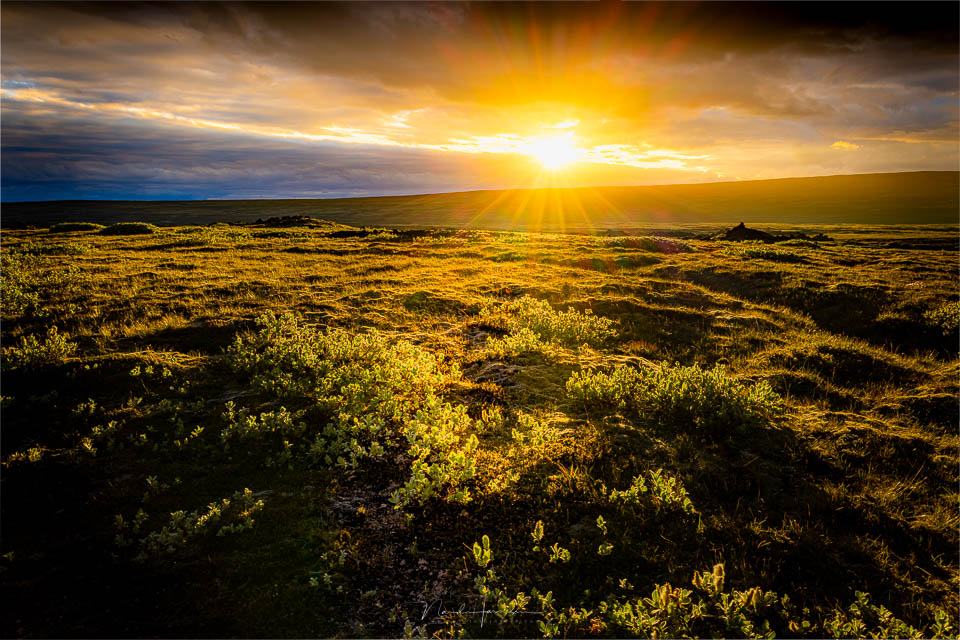
It is important with this technique to spot and prepare for this on location. Afterwards, this is of course no longer possible.
But also remember that flare can sometimes look good and add atmosphere to a photo. So later, when you are back home, decide which image you like best: with or without flare.
About the author
Nando Harmsen has been photographing for more than 40 years. He specialises in wedding photography and landscape photography. Nando also gives talks, workshops, masterclasses and photo trips, and regularly reviews new and interesting equipment.
You might also like
-
 Review: HDR and Dynamic Range Course
by Martin van Rooij
-
 Edit an HDR like a normal photo
by Nando Harmsen
-
 Exposure bracketing without a tripod
by Nando Harmsen
-
 Programme your camera for HDR
by Nando Harmsen
-
 HDR: What do you mean?
by Rob IJsselstein
-
 An HDR photo is just a photo
by Nando Harmsen
2 comments
-
 RAWShooter wrote on Tuesday 2 August 2022 at 10:36 | reply
You can easily remove most flares afterwards, as in this example too. A bit of cloning takes less time than making a bracketed exposure on the spot. I myself first take a look at where the flare is before I start bracketing.
Translated from Dutch. -

 Nando
wrote on Wednesday 3 August 2022 at 15:01
| reply
Nando
wrote on Wednesday 3 August 2022 at 15:01
| reply
@RAWShooter:
Translated from Dutch.
For accurate cloning, this kind of detailed photo takes more time than you think. Unless you spend a lot of time on it, you see it right away, especially the color deviations that are present alongside the obvious flare.
In the 10 seconds I need for an extra exposure bracket (5 photos ranging from 1/200 to 1/13 sec, plus a 2-second self-timer) , together with the minute used for editing and masking, you haven't cloned this, and certainly not with the same result.
Have your say
Please note: Articles older than a week can only be commented on by signed-in visitors.Would you still like to comment? sign in or create a free account.
Become a better photographer every week
A practical photography tip in your inbox every week.
39,079 photography enthusiasts already receive the tips! More about the weekly mail. Or keep up to date via  Facebook.

Elja Trum
Photofacts; everything to do with photography!
Would you like to take better photos and keep up with what is happening in photography? Photofacts publishes articles that teach you something about photography — from a product announcement to a practical shooting tip or a look at a website. Photofacts covers photography every day and is a hobby project of Elja Trum's that got out of hand. The articles are written by a team of volunteer authors. If you would enjoy writing one or more articles for Photofacts, do get in touch.More about PhotofactsPhotofacts is made possible in part by
