

Learn to film better with your iPhone
Saturday 29 April 2017, 20:02 by Michelle Peeters | 8,339 views | 2 commentsThis article was translated from Dutch with the help of AI. Read the original.
Michiel van de Kamp works for the website Terello.nl. He recently interviewed a filmmaker about how to film better with an iPhone.
Imagine you are on holiday and want to make beautiful, professional videos of all the places you are discovering. You can of course do this with a professional video camera, but not everyone has one.
Fortunately, the new iPhone models come with a high-quality camera that lets you make beautiful, professional videos.
Of course, the quality is not as good as that of a professional camera. But quality is not the most important aspect. A well-known filmmaker, Chase Jarvis, once said: 'the best camera is the one you have with you'. In many cases, that is your iPhone.
But despite the high quality of the iPhone camera, these beautiful images do not appear by themselves. You need to know what the right settings are, how to focus properly and how to frame the subject of your film well.
To help you produce professional iPhone videos, Michiel asked the talented videographer Gerbert Floor from Inbeeldmetfloor and Zout Water for advice.
Gerbert already has a lot of experience producing videos, so he is the ideal person to teach us how to get the best results when filming with your iPhone camera.
1. Composition
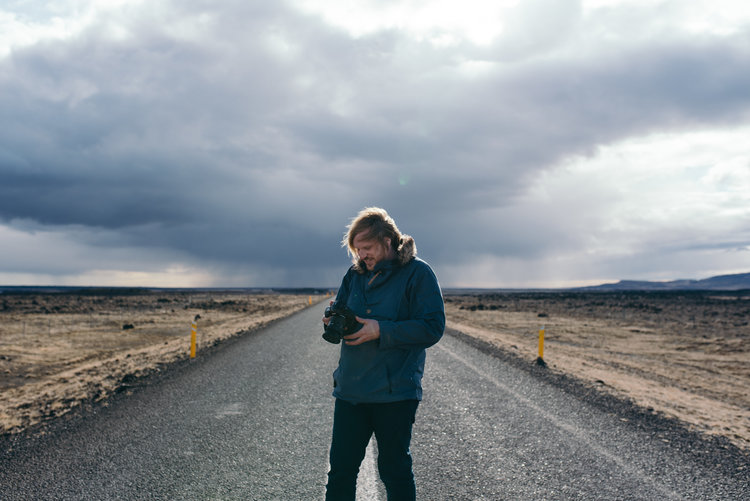
According to Gerbert, determining the composition of the image is very important. When filming, you naturally want to show the subject of your video as well as possible. That is why, just as with a professional camera, you need to know which features the iPhone has that you can use for this.
That is why it is important not to move along with the subject while filming. Try to keep your iPhone as steady as possible, using a tripod or various objects. This creates a calm image and ensures that you do not get strange jolts in your footage.
A good tripod for this is the Gorillapod, which you can put down anywhere and attach to things.
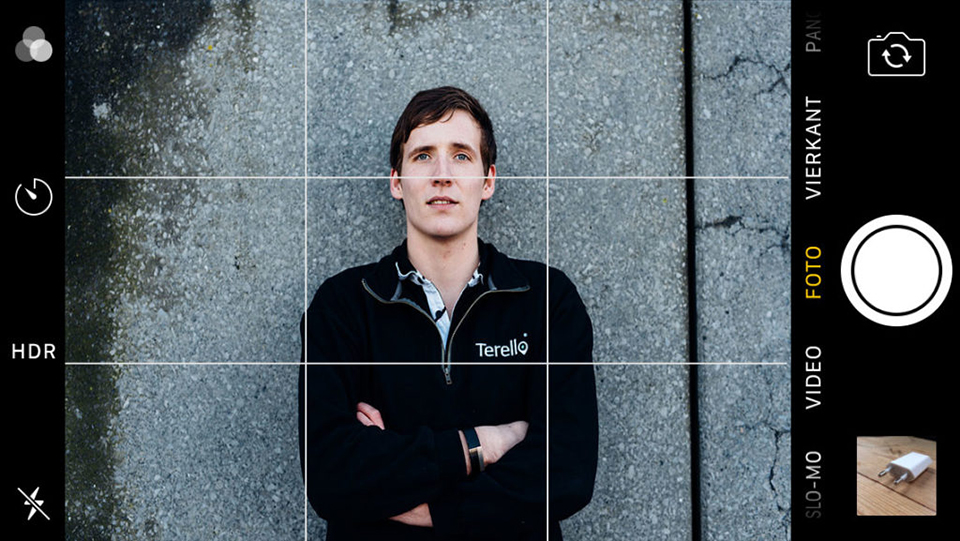
The grid on your camera can help you frame the subject, whether that is a person or an object. As the name suggests, this helps you place your subject within a frame in the image, allowing you to determine the composition.
The grid function is not available in the video mode of your camera, so you need to switch between the photo and video functions to determine your composition. It may also be that you have not set up the grid function yet.
You can do this by scrolling to Settings > Photos & Camera and enabling the Grid function there.
Each type of video you record requires a different frame. For example, if you are filming someone who is looking straight into the camera, it is recommended that you set the camera so that the person is in the middle frame and the top grid line is at eye level. It is important that you always film in landscape mode!
Filming is also mainly about experimenting. You can explore what you like yourself and try out many different styles. For example, try placing the subject at the edge of the frame.
Or film your subject with lots of space around it. In the film world, this is referred to as negative space. This is not always a problem, and it can even look very good, but varying between close-ups, medium shots and wide shots is a good idea.
IMPORTANT RULE:
One of the most important rules to remember is: do not zoom with your iPhone. Apart from the new iPhone 7 Plus, all models have a digital zoom function. This is useful in some ways, but it also causes the quality of your image to deteriorate.
So always try to move the iPhone and tripod closer to the subject to get a better image
2. Focus
Once you have framed the subject properly, it is important to focus the image. It would be very frustrating to discover later during editing that the image is out of focus.
Because the iPhone often focuses on a subject itself, using Auto Focus, and continues to do so while filming, it is important to enable AE/AF lock.
This function disables Auto Focus and ensures that the iPhone camera keeps focusing on the subject you want. It also prevents the iPhone from automatically adjusting the exposure, or Auto Exposure, so the exposure you have set remains unchanged.
3. Light
You can adjust the exposure settings entirely yourself, but when setting up your composition it is also important to consider exactly how you are going to light the subject.
You can adjust the settings, but this does reduce the quality of the footage, so it is a good idea to use natural light sources.
In the photo below, you can see that the photographer has used the light coming through the window, meaning that only one side of the face is lit. This quickly creates a playful and atmospheric image, because you are using the light creatively.

4. Sound
Many people underestimate the importance of high-quality sound when making a video. A clear voice recorded with a good microphone can help viewers become immersed in the story of your video much more quickly.
Audio recorded with the iPhone microphone is often of poor quality because it sounds rather tinny and crackly. This has the opposite effect and distracts attention from the story.
Investing in a microphone is therefore certainly not an unnecessary luxury. You can choose between a microphone that is well suited to interviews and one that mainly records ambient sound. The RØDE Smartlav+ is a very good microphone for recording interviews. It is a lavalier microphone that you can attach to your jacket or jumper, making it barely visible in the image.
Would you rather buy a microphone that is more suitable for recording ambient sound, such as at a concert? Then the Zoom iQ7 is a better choice, as it has a greater range than the Røde microphone.
5. Post-processing
There are many different post-processing apps available for your iPhone, but they are not recommended. Apart from all the functions you miss, you will spend much longer on it and it is often difficult to judge the final result properly on your iPhone's small screen.
A programme such as iMovie is of course a cheap solution, but if you plan to shoot professional videos more often, buying Final Cut Pro or Adobe Premiere Pro is certainly recommended. It costs a bit, but ultimately these programmes have many useful functions that will help you edit all kinds of beautiful videos.
Professional camera versus iPhone
Ultimately, the quality of your iPhone is of course lower than that of a professional camera. You have far fewer options and less room to set up your image as you would like. But as you can learn from the tips above, you can do much more with your iPhone than you might initially think.
As long as you have a good story, a good setting with plenty of light and an interesting subject to film, you can make a video that appeals to people. For example, take a look at the film that was shot entirely with an iPhone 5: Tangerine. An app was used for this, Filmic Pro, which you can download from the App Store for 9.99 euro.
This can also be seen in the YouTube video below, in which a professional filmmaker shows the difference between a RED camera, the crème de la crème of cameras, and an iPhone 7 Plus. This shows that your iPhone is certainly good enough for making professional videos, as long as you know how to record and edit them.
Dropped your iPhone in water?
Just imagine: you have made some beautiful footage, but while filming that beautiful sunrise, you drop your iPhone into the water. All your footage is lost in an instant.
That is incredibly frustrating, of course, so how can you get all that beautiful footage back? Terello has a solution. They will come to the place where you are within 24 hours and fix your iPhone there within half an hour.
About the author
Michelle Peeters is fotografe en oprichter van DeuxBleus Fotografie. Michelle herkent het bijzondere in het gewone en het gewone in het bijzondere. Ze heeft zich nooit willen specialiseren en is daardoor van alle markten thuis.
You might also like
-
 The joy of shooting with a roll of film
by Elja Trum
-
 Documentary review: Step into the World of Lars van de Goor
by Michelle Peeters
-
 Review: Pictar grip for the iPhone
by Michelle Peeters
-
 iPhone 11 Pro versus 100-megapixel medium-format camera
by Michelle Peeters
-
 Photographing a wedding with only an iPhone 7
by Bas Uijlings
-
 Printing Colour Film in the Black-and-White Darkroom
by Erik van Rosmalen
2 comments
-
 Bert wrote on Wednesday 3 May 2017 at 01:22 | reply
What does an iPhone 7 cost? What does a film camera cost?
Translated from Dutch.
What do you edit the films with? All applications run on an Apple computer. And 4K, what do you edit that with? Oh! Even a powerful Quad has trouble with it. The Apple applications are also very expensive. So for an iPhone user it costs a lot of money to make a few little films. Think before you start. -
 guest wrote on Wednesday 3 May 2017 at 13:27 | reply
Watch out, an Apple-hater in da house.
Translated from Dutch.
Have your say
Please note: Articles older than a week can only be commented on by signed-in visitors.Would you still like to comment? sign in or create a free account.
Become a better photographer every week
A practical photography tip in your inbox every week.
38,766 photography enthusiasts already receive the tips! More about the weekly mail. Or keep up to date via  Facebook.

Elja Trum
Photofacts; everything to do with photography!
Would you like to take better photos and keep up with what is happening in photography? Photofacts publishes articles that teach you something about photography — from a product announcement to a practical shooting tip or a look at a website. Photofacts covers photography every day and is a hobby project of Elja Trum's that got out of hand. The articles are written by a team of volunteer authors. If you would enjoy writing one or more articles for Photofacts, do get in touch.More about PhotofactsPhotofacts is made possible in part by
