

4 tips for using Lightroom in your selection process
Monday 15 May 2017, 21:42 by Elvira Smit | 11,516 views | 20 commentsThis article was translated from Dutch with the help of AI. Read the original.
There is no single recipe for the best workflow. But it does help to see how others do it. By now, I have 'stolen' quite a few tricks from other photographers.
So here is a look behind the scenes at my workflow: below you can see how I worked after photographing the marathon in Rotterdam.
The selection process actually starts while you are taking photographs, because you cannot photograph everything (although, in the future, perhaps you can). But for convenience, I will start with a camera full of photographs.
When I get home, I import them straight into Lightroom. There are plenty of photographers who make a sport of putting this off for as long as possible, but I cannot do that.
The point of putting it off is that your emotions get in the way much less when you look at the photographs (much) later. I try to avoid that in a different way. More on that later.
1. I organise my photographs in Lightroom
When I started using Lightroom, the prevailing opinion was that it was best to create a separate catalogue for each year. Otherwise, the catalogue would become 'too heavy' and Lightroom would consequently get slower and slower.
So I did that properly until 2015, when I read that Lightroom had improved significantly, and that computers had too.
Since then, I have put everything in one catalogue, but it is organised. Each year has a separate folder. When importing photographs, I place them in a folder named after the month number and the name of the event.
That way, everything is automatically in order in Lightroom. And on my computer. I do not do this for thematic photographs where the date does not matter to me, such as the museum visits folder. It contains my own stock photographs, which I use for my blog posts.
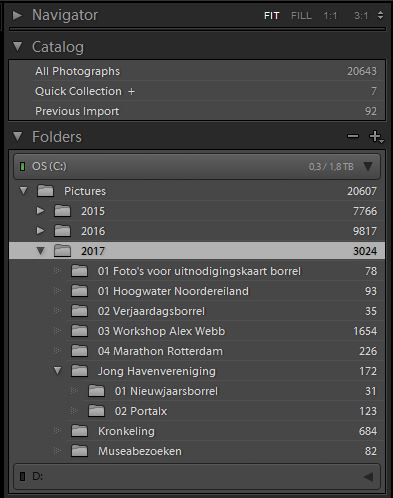
As you can see, that one catalogue now contains more than 20,000 photographs. But I do not notice any slowdown (although that will probably also be down to the quality of my desktop computer).
Right, the 226 photographs of the Rotterdam marathon have been imported. Now what?
2. I do the first review straight after importing
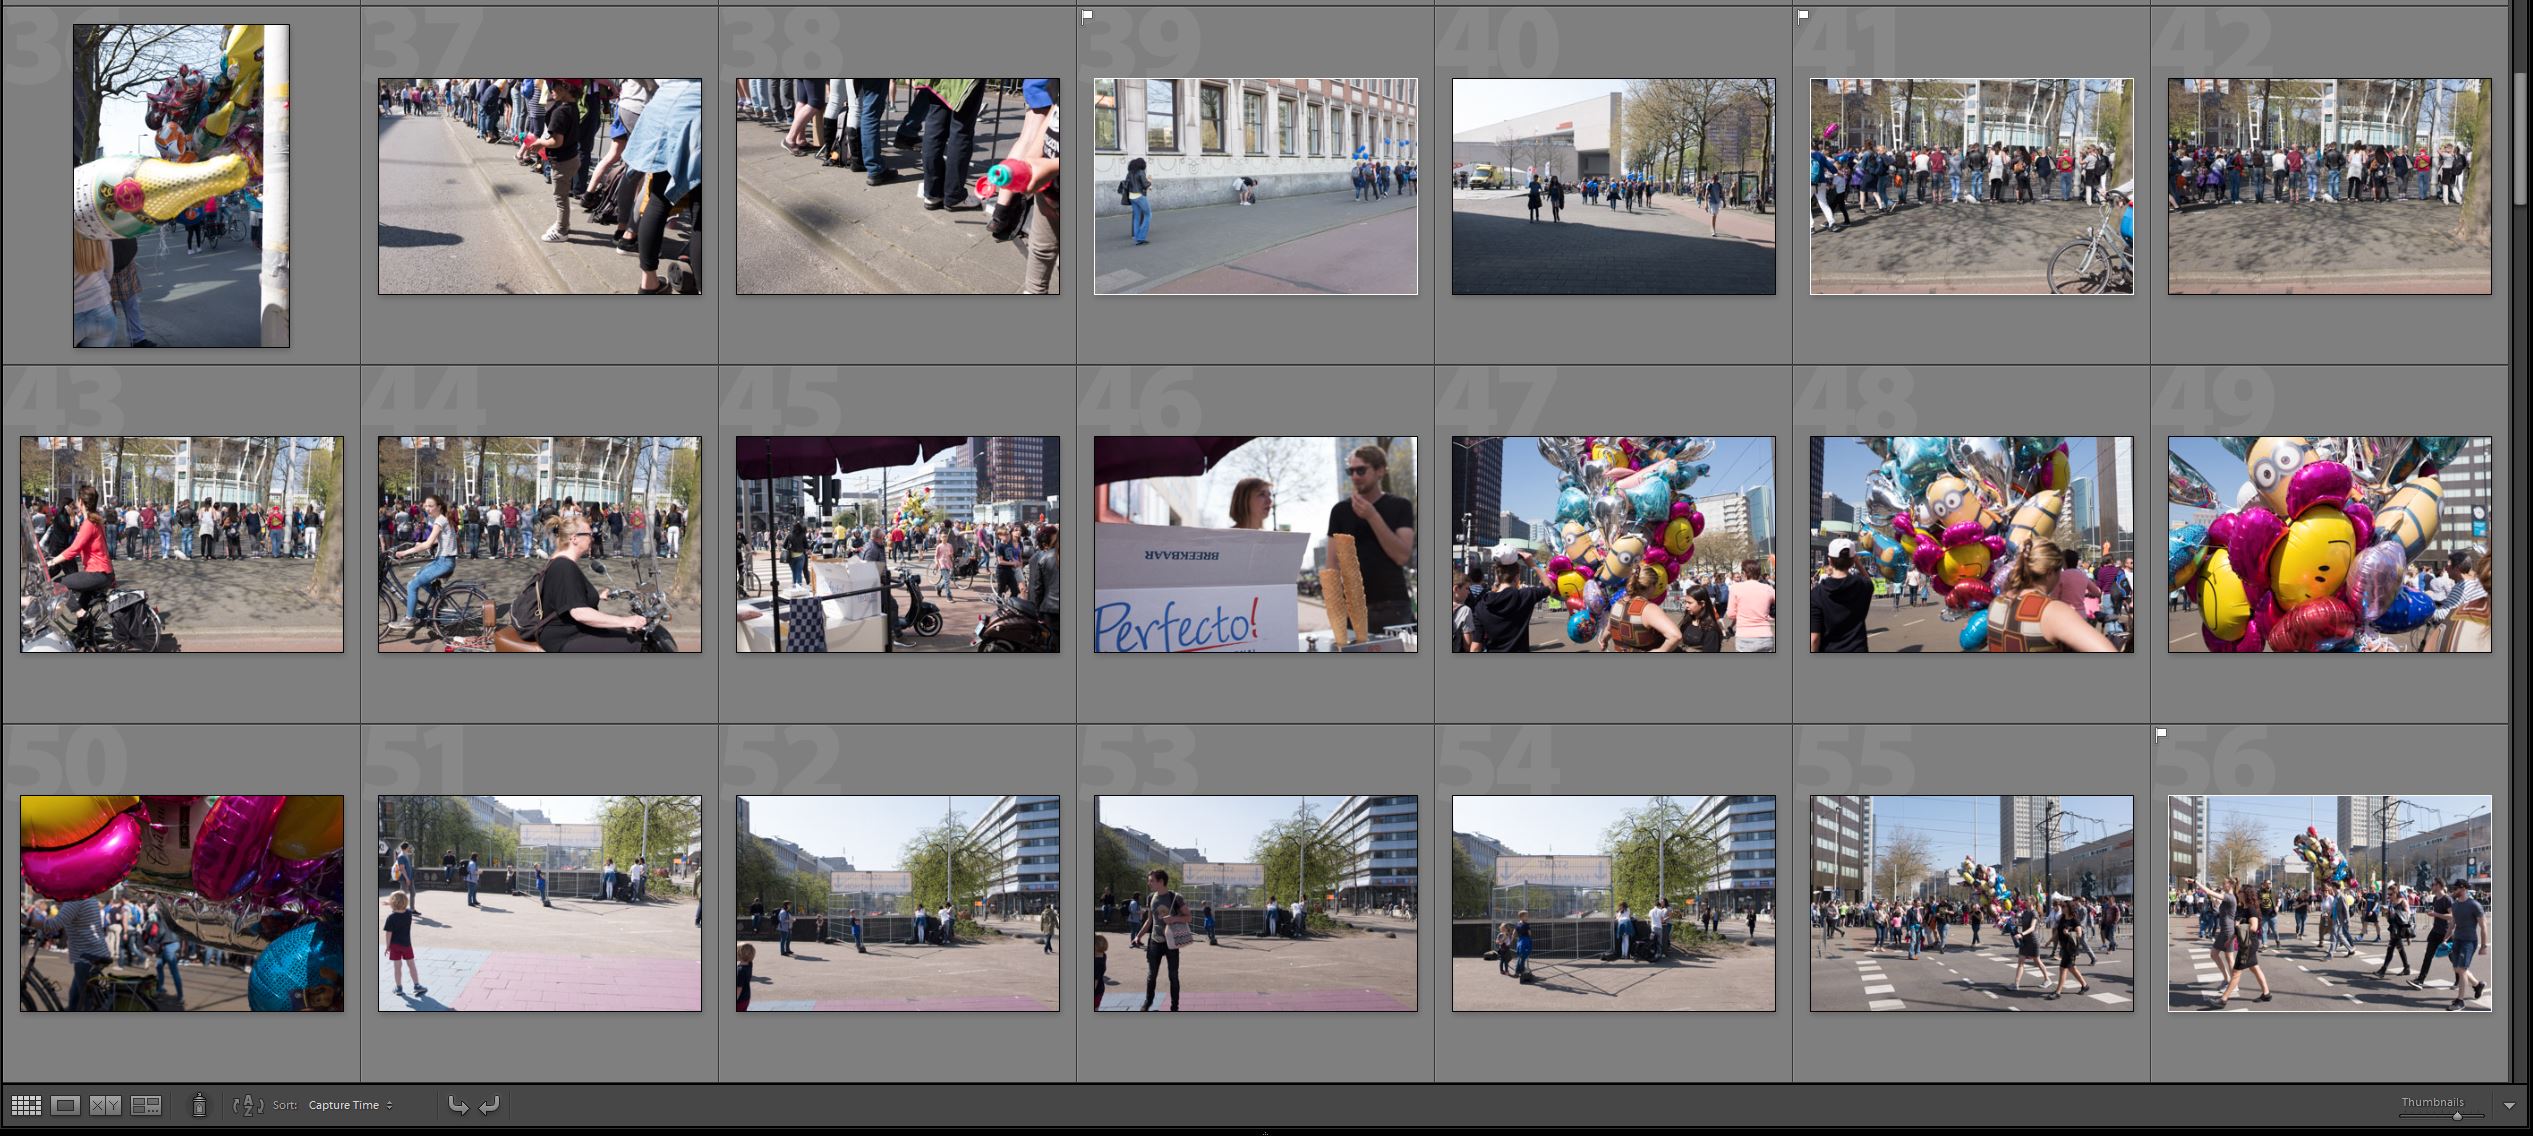
This is the most intuitive part. I go through the photographs one by one on a large screen. For each photograph, I choose just one word from these three: yes, maybe or no.
For a yes or maybe, I press P, and the photograph gets a flag. I also give those flagged photographs a light edit. I always shoot in RAW because that preserves all the available information. But the slightly flat photographs always need a bit more character.
For me, that often involves no more than adjusting the contrast, blacks and highlights a little.
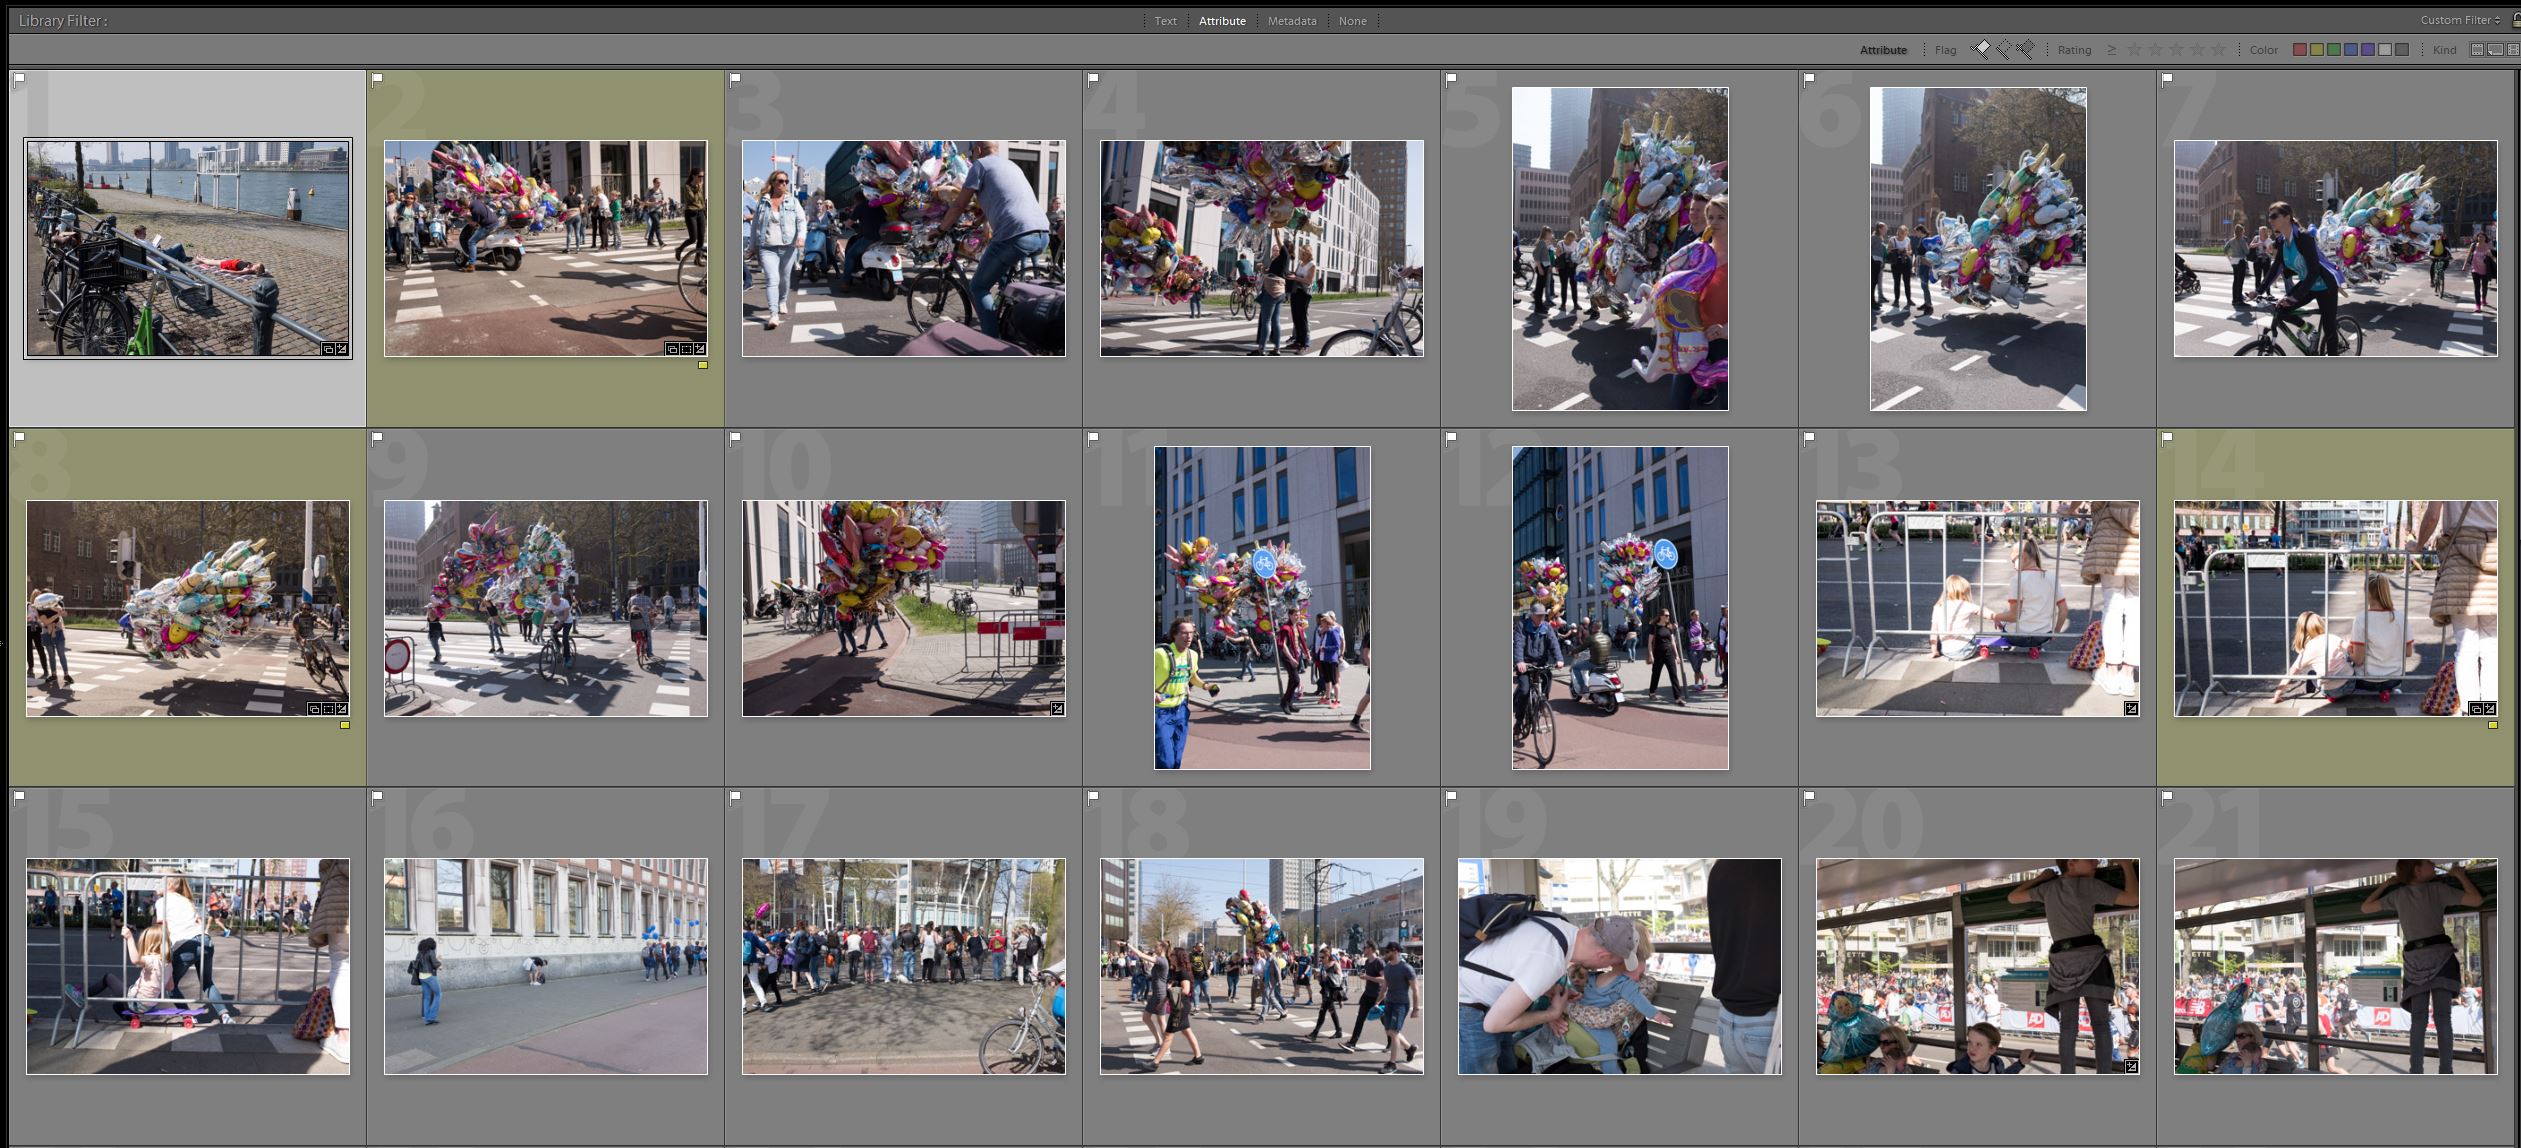
Below you can see part of the result of this first selection. The flags can be seen in the top left of the photograph. In Lightroom, you can also filter by this, so that you only see the flagged photographs.
A few days later, I go through those flagged photographs again. I deliberately let the photographs rest to make sure I do not confuse my emotions with the quality of the photograph. Street photographer Gary Winogrand once put it more eloquently:
'Photographers mistake the emotion they feel while taking the photo as a judgment that the photograph is good'.
Anyway, after a few days I look again. The photographs I still like at that point are given a colour. In this case, yellow.
3. I puzzle over the order in Collections (Lightroom)
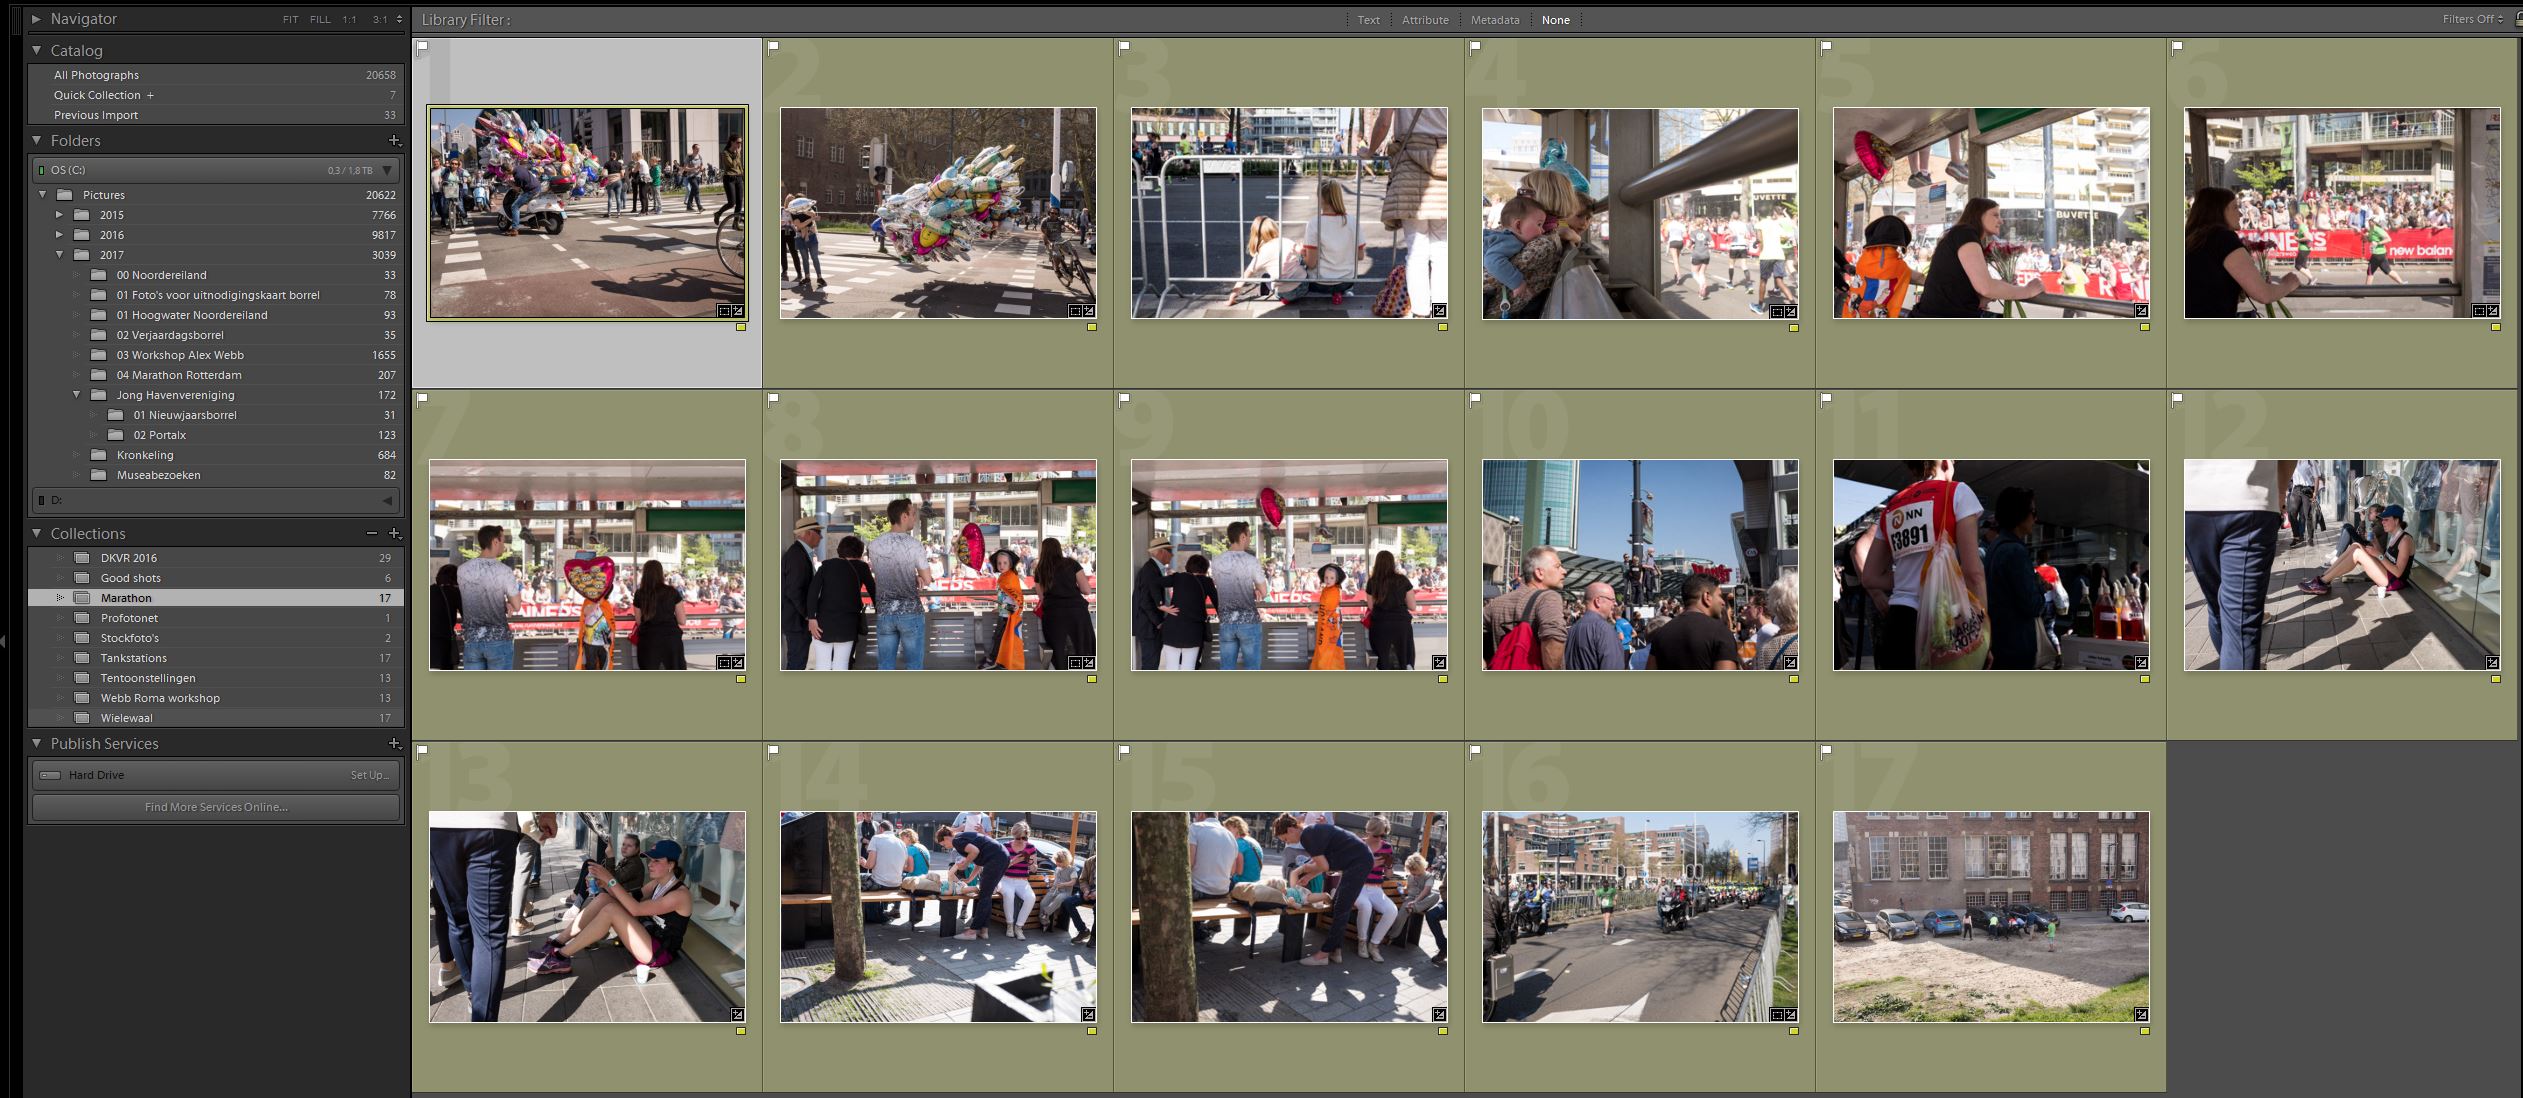
I put all the yellow-marked photographs in a new folder under 'Collections'. Why? Because they are all neatly together there, and because you can endlessly change the order. You cannot do that in the Library in Lightroom.
Your best series are also clearly grouped together this way. I have also created a folder called good shots. From now on, I put all the photographs I have taken that I like but that do not fit anywhere else in it. A sort of inspiration folder.
4. I print the best photographs
A day or a few days later, I do the same thing once again. Sometimes I change my mind again at that point. I print the provisional final result.
Not on an advanced photo printer or at a print shop. No, I am committing sacrilege, because I usually just use A4 paper and print the whole lot on a standard colour printer (!).
Why?
I kept being too lazy to send my files to a print shop. I forgot, and the whole selection process came to a halt every time. I thought that was a shame, so out of sheer necessity I started printing the lot on a standard office printer.
I found that this is actually perfectly fine at this stage. What matters is whether the photograph has the power to tell a story, and that almost never depends on the quality of the print. That is how I get around my own laziness.
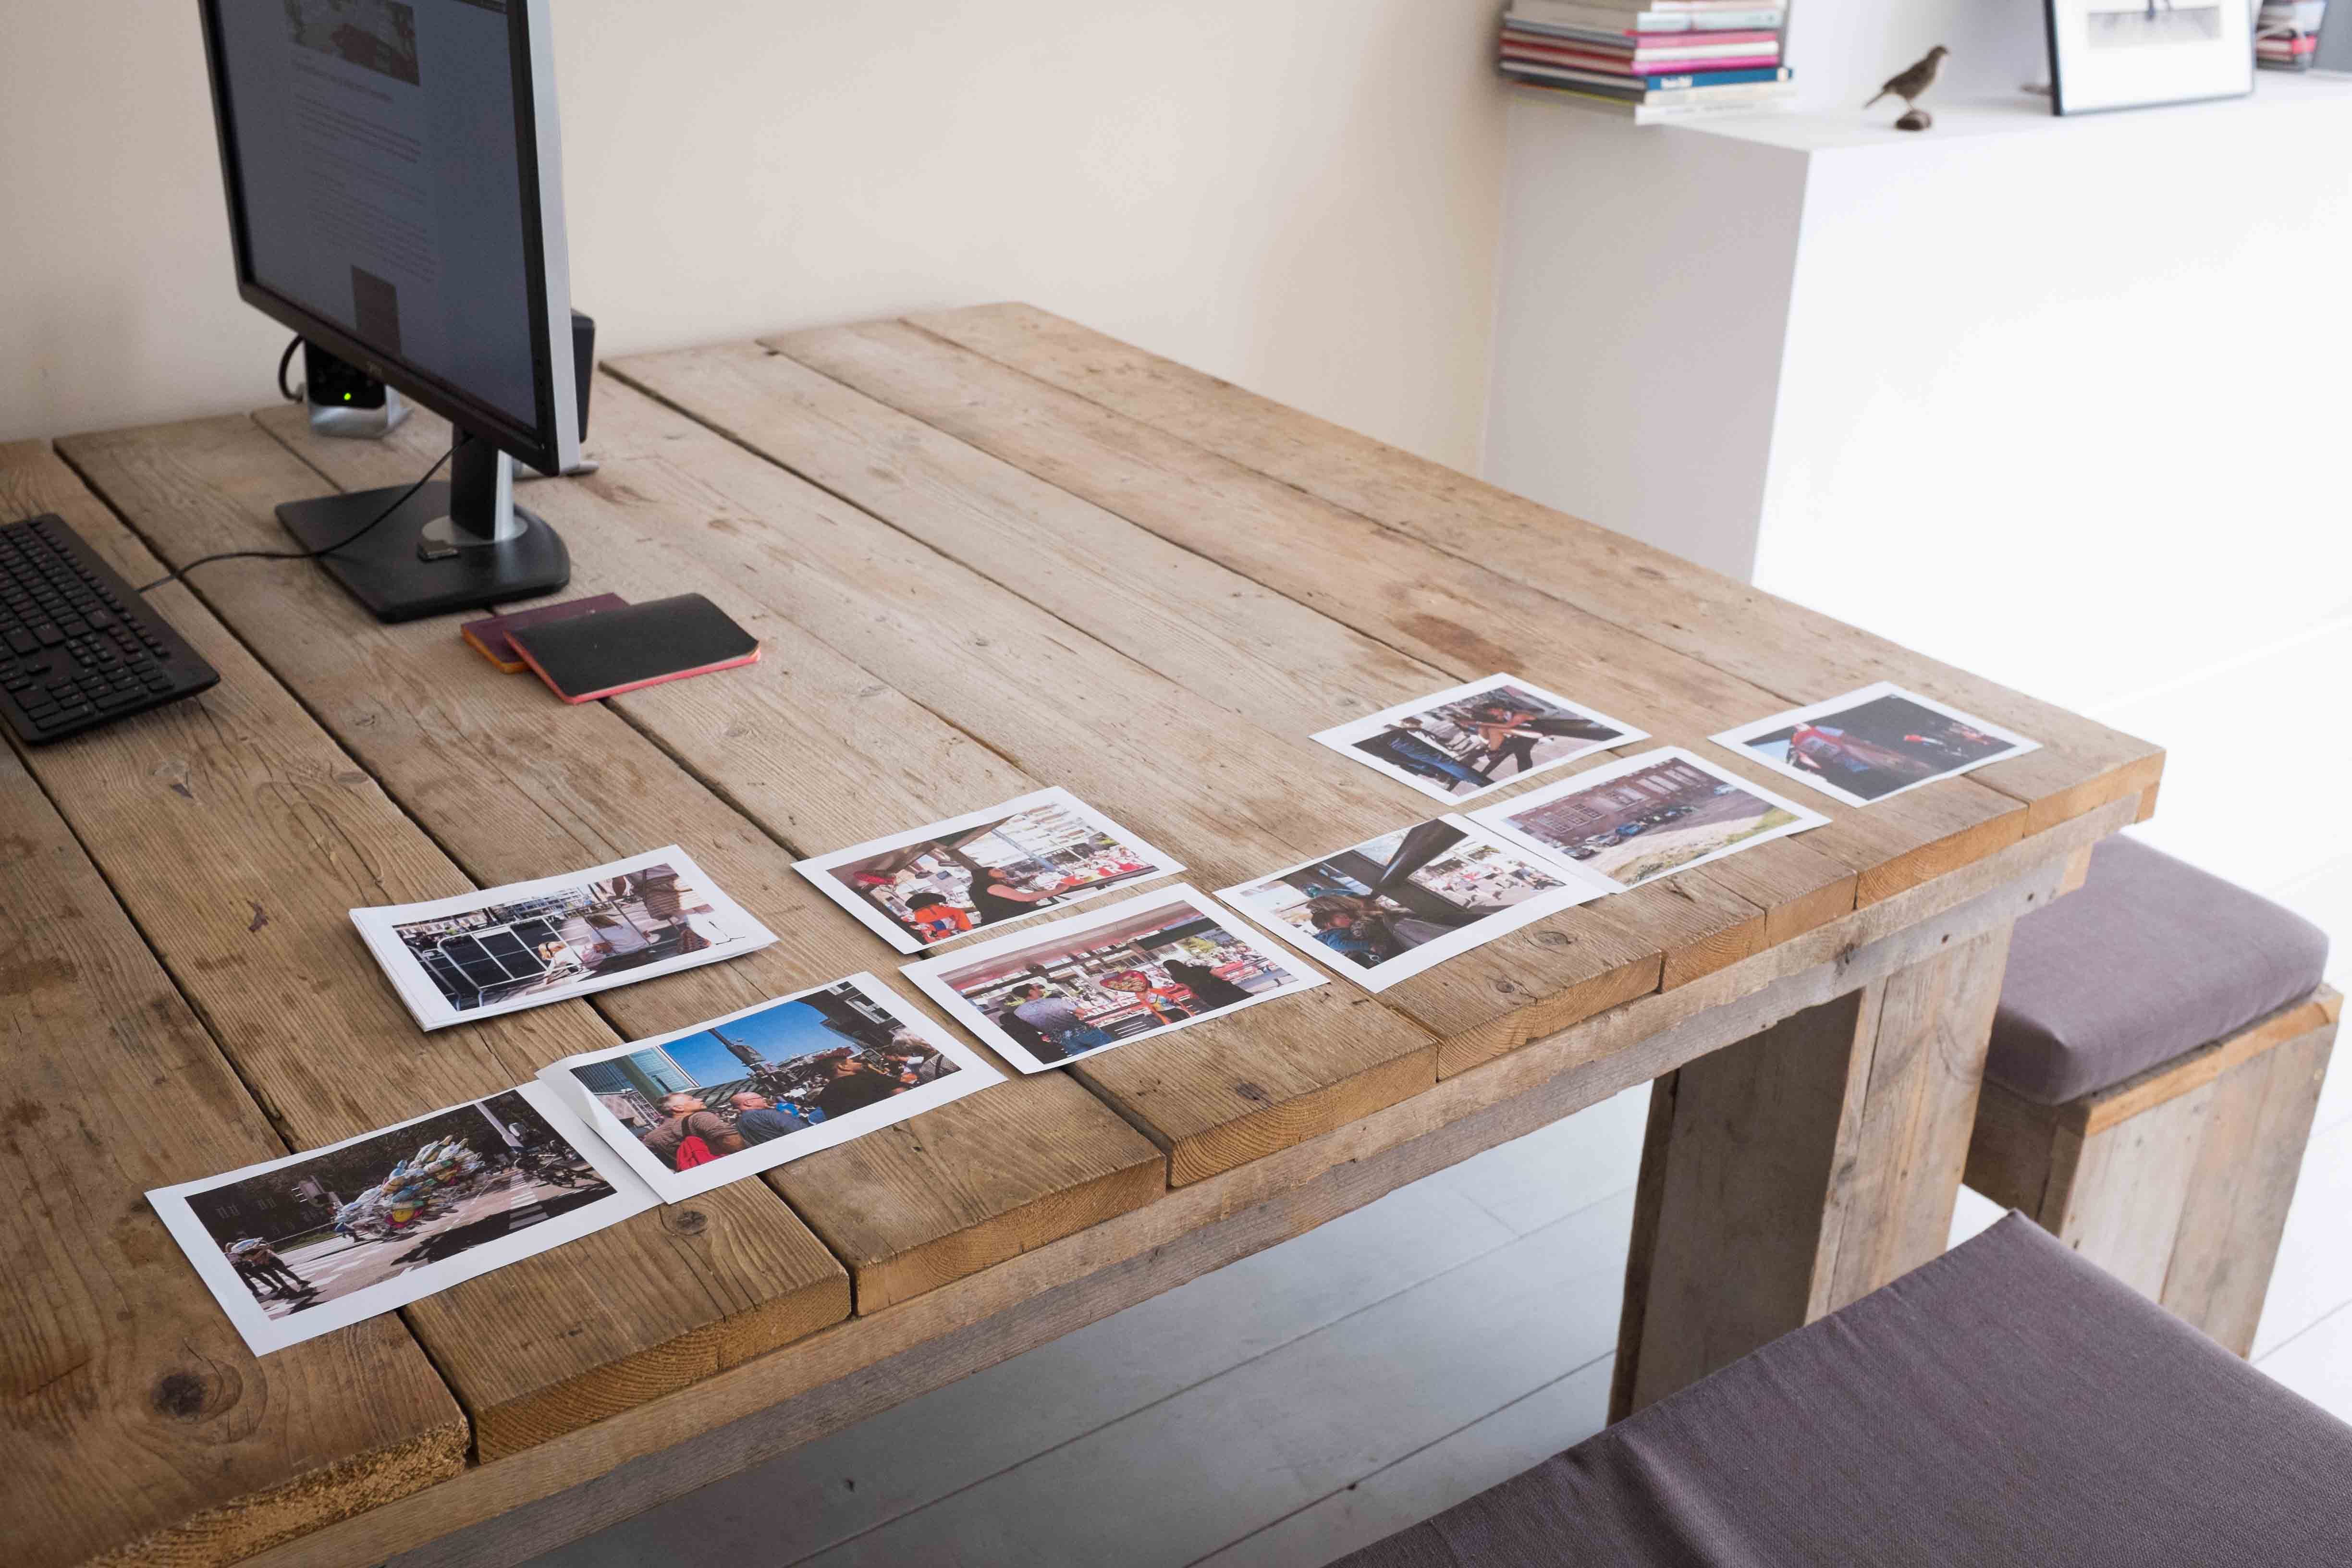
I then put the photographs on my dining table. I keep looking at them as I walk past. After a week, I know whether one or more photographs have potential. Usually, I get bored with my own images sooner than that.
A nice side effect is that, because they are lying out in the open on the dining table, they become an amusing conversation topic when people visit. Everyone is happy to have their say. And I like that, because it also sharpens my eye.
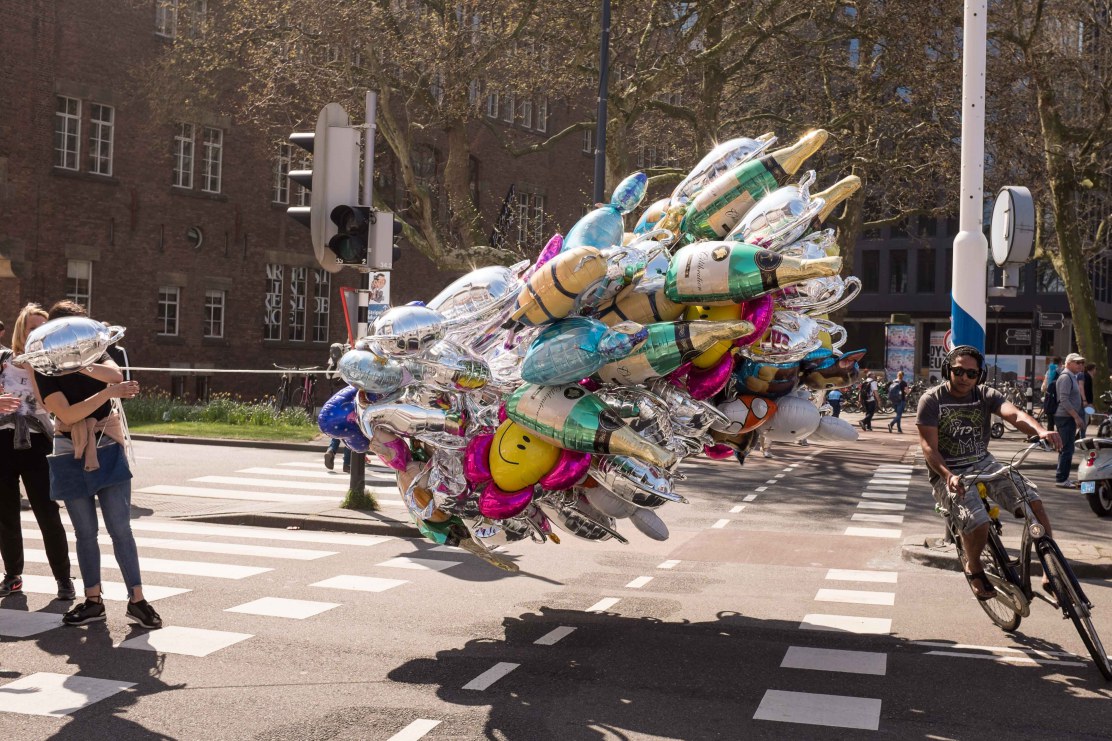
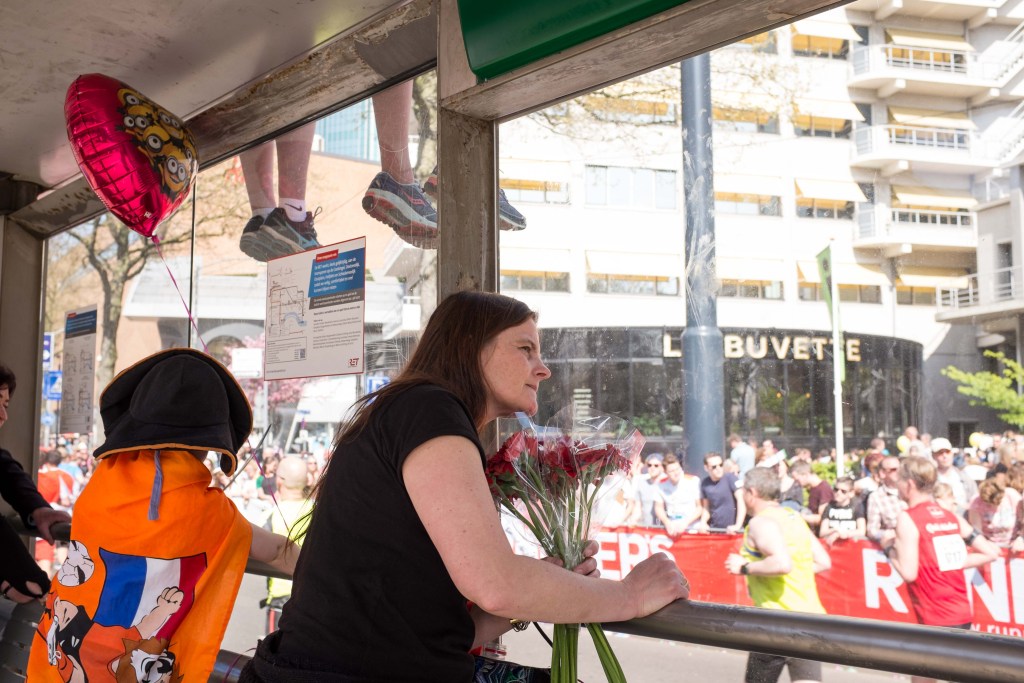
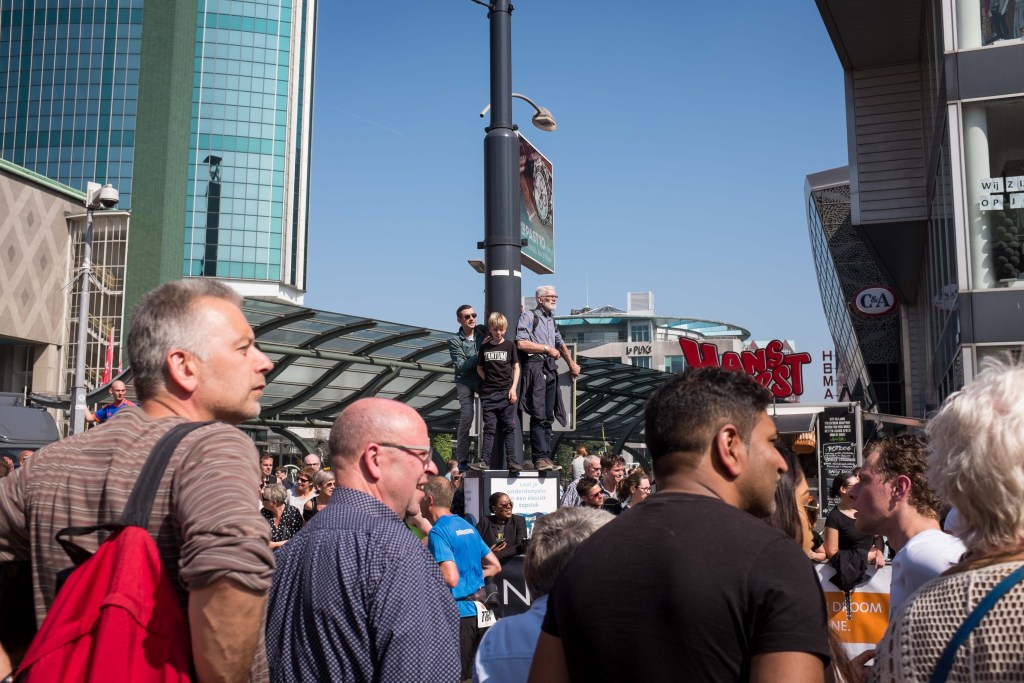
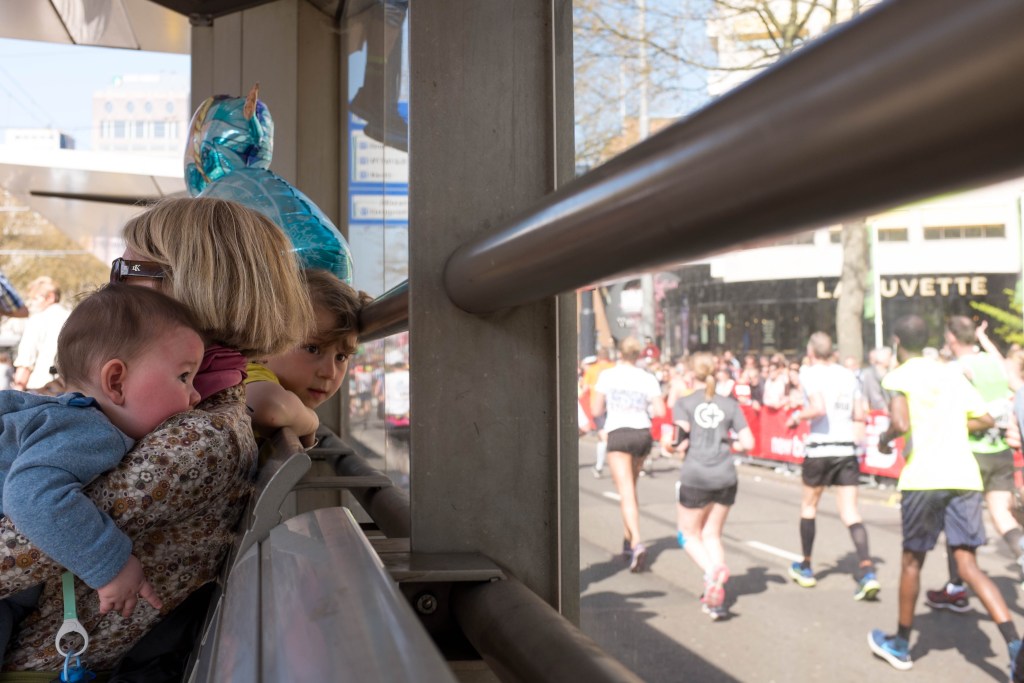
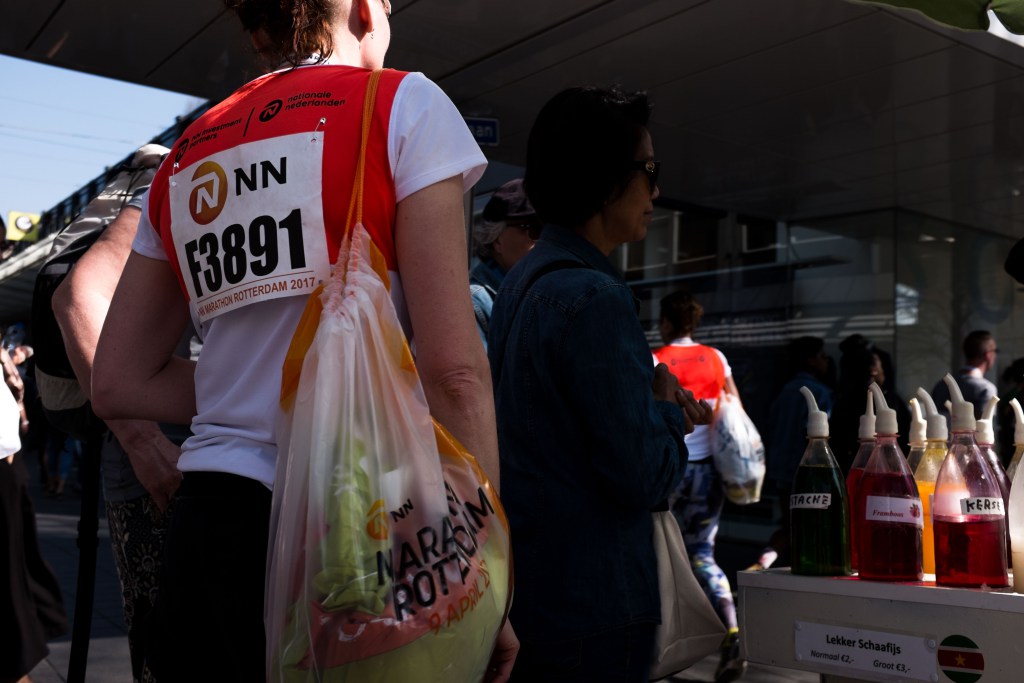
All that looking eventually leads to a series. In this case, not a very good series, but still, a series. About the events on the sidelines during the Rotterdam marathon. I think going through the entire selection process is more important than the result. Because the more often you do it, the better you get.
And what do I do with the rest of my photographs?
I keep them all on my computer. Partly out of laziness, but also because I do not like actually deleting photographs.
Once a year, I look through all the photographs I have taken again. Very occasionally, there turns out to be a little gem among them that I did not see before. And then I am glad I did not delete it.
Are you looking for street photography tips?
You can also find them on my own blog.
Your workflow
What is your workflow for selecting photographs?
Let me know in the comments!
About the author
Ik heb een eigen fotografieblog, Kronkeling. Daar schrijf ik om de week twee artikelen. Over hoe je je blik kunt scherpen, je creativiteit kunt aanwakkeren, en over fotografen die mij inspireren. Geen technische zaken, wél over hoe je leert kijken. En dat blijkt nog een hele klus. Een mooi startpunt zijn de Kronkeltips, die vind je hier.
You might also like
-
 Review: Luminar 3 with library feature
by Michelle Peeters
-
 My 10-step Lightroom Classic workflow
by Nando Harmsen
-
 8 Lightroom tips for landscape photography
by Michelle Peeters
-
 10 Lightroom tips you should know!
by Michelle Peeters
-
 What are Lightroom plug-ins and what can you do with them?
by Dick Holtman
-
 Which is better to use? Lightroom or Photoshop?
by Nando Harmsen
20 comments
-
 guest wrote on Monday 15 May 2017 at 22:16 | reply
amazing, I’m going to try that too!!!
Translated from Dutch. -

 Elvira Smit
wrote on Monday 15 May 2017 at 22:39
| reply
@guest: Nice to hear, good luck!
Translated from Dutch. -
 ErikvanRosmalen
wrote on Tuesday 16 May 2017 at 08:28
| reply
I do it roughly this way too. Do you happen to have any experience with PhotoMechanic as well? As a selection tool alongside/before you move on to Lightroom? I’ve heard a lot of good things about it, that it can save quite a bit of time.
Translated from Dutch. -
Marco wrote on Tuesday 16 May 2017 at 09:32 | reply
Photo Mechanic is widely used by sports photographers.
Translated from Dutch. -
Elvira Smit
wrote on Tuesday 16 May 2017 at 09:50
| reply
Hi Erik, I'm not familiar with PhotoMecanic but I'll definitely take a look at what it is and whether I can use it. @Marco: I can imagine that sports photographers have a great need to be able to select quickly (given the large number of photos they usually take).
Translated from Dutch. -
 Damien Franscoise
wrote on Tuesday 16 May 2017 at 11:13
| reply
I work as a wedding photographer and always make my selections in Photomecanic. This program uses the built-in jpeg from a raw file for displaying it. This makes the program super fast at displaying your photo sharply, and lets you choose without delay whether you want to keep a photo or throw it away.
Translated from Dutch. -
 Luc Vancamp wrote on Tuesday 16 May 2017 at 13:31 | reply
I haven't printed that yet, but this is necessary. a photo in 'real life' is different from on the screen and indeed, you keep looking at it in your home environment, so that the emotions from during or just after fade away.
Translated from Dutch. -
ErikvanRosmalen
wrote on Tuesday 16 May 2017 at 14:21
| reply
@Damien: I indeed hear many wedding photographers talking about it in particular. I am still quite curious whether and how it works, although in general I have fewer large batches of selections to process. And it's yet another extra program alongside your workflow. But it does indeed seem to save a lot of time.
Translated from Dutch. -
Damien Franscoise
wrote on Tuesday 16 May 2017 at 16:00
| reply
@ErikvanRosmalen: that's right, many wedding photographers use the program because of the large number of files we work with and from which a selection has to be made quickly and efficiently. As an example: I came back from my last wedding with 3600 photos and that ultimately has to be reduced to about 500. For those kinds of situations Photomechanic is really fantastic, its speed can't be beaten and when you have to go through so many photos, every second per photo is a big gain.
Translated from Dutch. -
 Rob wrote on Tuesday 16 May 2017 at 16:30 | reply
Hi Elvira,
Translated from Dutch.
I use LR CC and create a catalog for each assignment / project. This keeps the catalog nice and small and easy to manage. I also select using the options yes, no, maybe. After flagging Yes, I gather all the selected photos for post-processing. The photos that are finished get the green color label. Then I can filter all the green photos and export them as jpg and subsequently share them or something.
The exported photos I save in a separate folder with the same name as the catalog. -
 Huub Keulers
wrote on Tuesday 16 May 2017 at 16:42
| reply
Beautiful and pleasantly readable article, Elvira. Nice to read and educational. I use the combination of Photo Mechanic and Lightroom myself. Photo Mechanic for reviewing and selecting my best photos, which I subsequently import into Lightroom. Photo Mechanic is namely quite strong at loading and selecting images. Many sports photographers therefore use the mix of Photo Mechanic and Lightroom.
Translated from Dutch. -
Elvira Smit
wrote on Tuesday 16 May 2017 at 16:45
| reply
@LucvanKamp: that's right, on a screen the result is much lighter than when you print a photo. Indeed important to also really see that difference and thus print your photos.
Translated from Dutch.
@Rob: Good addition. I don't work with assignments or large projects myself, but I can imagine that if you do, it's very pleasant to work in a separate catalog.
@ Huubkeulers: Thanks for your compliment! And nice that I get to learn something this way too, I had never heard of Photomechanic at all. I'll definitely look into it after all those recommendations! -
 Arida Winands wrote on Tuesday 16 May 2017 at 16:48 | reply
Thanks,going to try this 'I still haven't found a good way so far!!!
Translated from Dutch. -
 Gerard wrote on Tuesday 16 May 2017 at 19:28 | reply
I shoot in RAW.
Translated from Dutch.
When I get home I download the photos into a folder, give it a name and start selecting.
I start the FOLDER name with the name of the event and the date, e.g. Cityrun 2017-05-23.
I immediately throw away everything that doesn't meet my requirements. I do that again the next day or so.
Then I import the photos into LR, edit them in LR, PSE and NIK and save them in a new folder in the same folder as where the RAW files are and with the same name, but with JPEG added.
After the photo number I also add the number of pixels on the long side, e.g. 5888-1250.jpeg. Sometimes I make two versions of one photo, a print version, e.g. 3500 pixels, and a web version, long side e.g. 1400 pixels.
Regards,
Gerard -
 John wrote on Tuesday 16 May 2017 at 21:05 | reply
My way of selecting is by using the rating system that Lightroom also has as a feature, instead of flags and colors. If I don't like it, I give it a 1, then I know the photo has been reviewed. The doubtful cases get a 3, better ones a 4 and the best photos a 5. Here too, I let them rest for a while so I can judge them again if they have a 3 or higher. While reviewing, I correct the exposure if necessary. Eventually, the photos with a rating of four and five are included in a photobook or prints. I then want the photos with a rating of five to really stand out in my photobook.
Translated from Dutch. -
 Chris Oomes wrote on Tuesday 16 May 2017 at 22:18 | reply
Nice blog. I do exactly the same, but not with Lightroom. And... I often force myself to print two from each 'roll of film'; a landscape, and a portrait. I slide those into two little frames in the kitchen. And indeed, nice conversation material at home or when someone comes over : )
Translated from Dutch. -
 Diny Bakkes-Kruithof wrote on Wednesday 17 May 2017 at 15:19 | reply
Good idea, I'll give that a try too.
Translated from Dutch.
I now first select my photos in Photoshop's RAW program. I select 20 photos at a time and then check whether they are sharp and also somewhat whether I like the photo itself.
After that I go to Bridge and select the photos that look a lot alike and see which one I like best, I put these in a separate folder and then edit them. -
guest wrote on Wednesday 17 May 2017 at 17:33 | reply
Thanks. This is something I always struggle with. I always wonder whether I’m actually being effective ^_^"
Translated from Dutch.
My process is as follows:
1) I import my photos and try to skip the genuinely failed photos right away.
2) All newly imported photos get a red label. I have a smart collection with all photos with red labels. This way I’m always confronted with photos that are still 'outstanding'.
3) I start flagging: I reject meaningless and blurry photos and the rest gets a flag.
4) All flagged photos now get the color yellow. Here too I have a separate smart collection for this.
5) Now I start assigning stars. Everything that adds nothing to 'the' story gets 1 star. These are often the remnants of choices from equivalent photos (think burst mode). 2 and 3 stars are for photos that are okay and good. 4 and 5 stars are (candidate) portfolio material and therefore actually transcend the theme itself.
6) All photos with two or more stars get the color green, with their own collection once again.
7) I edit all the photos, but I often also edit photos with 3 stars or more additionally in Photoshop.
8) In general, I now export the photos. Depending on the size of my selection, I sometimes limit my export to photos with 3 stars and up. The last example was during Feyenoord's championship celebration: 200 photos, 96 with two stars or more, 25 with three stars (two of which had four stars). -
 Yosh
wrote on Wednesday 17 May 2017 at 17:34
| reply
Thanks. This is something I always struggle with. I always wonder whether I'm being effective ^_^"
Translated from Dutch.
My process is as follows:
1) I import my photos and try to skip the really failed photos right away.
2) All newly imported photos get a red label. I have a smart collection with all photos with red labels. This way I am always confronted with photos that are still 'outstanding'.
3) I start flagging: I reject meaningless and blurry photos and the rest gets a flag.
4) All flagged photos now get the color yellow. Here too I have a separate smart collection for this.
5) Now I start assigning stars. Everything that doesn't add anything to 'the' story gets 1 star. Often these are the leftovers from choosing between equivalent photos (think burst mode). 2 and 3 stars are for photos that are okay and good. 4 and 5 stars are (candidate) portfolio material and therefore actually transcend the theme itself.
6) All photos with two or more stars get the color green, with their own collection once again.
7) I edit all the photos, but I often also edit photos with 3 stars or more extra in Photoshop.
8) In general I now export the photos. Depending on the size of my selection, I sometimes limit my export to photos with 3 stars and higher. The last example was during Feyenoord's celebration: 200 photos, 96 with two stars or more, 25 with three stars (two of which had four stars). -
 Fabienne wrote on Monday 4 December 2017 at 15:57
| reply
I still haven't found a system that 'suits me'...
Translated from Dutch.
So many ways....I can't see the wood for the trees anymore!
Fabienne
Have your say
Please note: Articles older than a week can only be commented on by signed-in visitors.Would you still like to comment? sign in or create a free account.
Become a better photographer every week
A practical photography tip in your inbox every week.
38,764 photography enthusiasts already receive the tips! More about the weekly mail. Or keep up to date via  Facebook.

Elja Trum
Photofacts; everything to do with photography!
Would you like to take better photos and keep up with what is happening in photography? Photofacts publishes articles that teach you something about photography — from a product announcement to a practical shooting tip or a look at a website. Photofacts covers photography every day and is a hobby project of Elja Trum's that got out of hand. The articles are written by a team of volunteer authors. If you would enjoy writing one or more articles for Photofacts, do get in touch.More about PhotofactsPhotofacts is made possible in part by
