

My 10-step Lightroom Classic workflow
Monday 22 January 2024, 16:32 by Nando Harmsen | 8,866 views | 7 commentsThis article was translated from Dutch with the help of AI. Read the original.
Managing thousands of photos can lead to chaos. I know this from experience. You need to find structure in the way you deal with all those photos. I use Lightroom Classic for this, and I think I have found a good way of doing it. I explain how I do it in 10 steps.
First, a few things to explain. I shoot raw, and I import my photos via Lightroom Classic onto an external hard drive. Just as I keep my Lightroom Classic catalogue on a separate SSD. This way, I always know where my photos are, and where my Lightroom catalogue is. You can read more about this in this article.
The ten steps I follow are as follows.
- Import photos
- Add folder to collection(s)
- Add keywords
- Assign flags using the P (pick) and X (rejected) keyboard shortcuts
- Assign star ratings, first 1 star, then 2 stars
- Edit the 2-star selection
- Make the final selection with 3 stars and, if necessary, 4 stars
- Export the final selection to JPEG in the format you need
- Delete the JPEGs after use
- When everything is ready, remove the rejected photos from the hard drive
1. Importing
The photos are stored in a logical folder structure based on date. The format is YYYYMMDD, so everything is in neat chronological order. You could add a piece of text, such as a location, event or another subject, but I don't do that myself.
I do this importing via Lightroom, using an import preset so it always happens in the same way. That is important. Read more about it in this article, with a useful video.
2. Collections
I place photos in collections. This can be based on a theme, subject or any other way you like. The advantage of collections is that you can place a photo in multiple collections. Think of collections for sport, landscapes, portraits and so on.
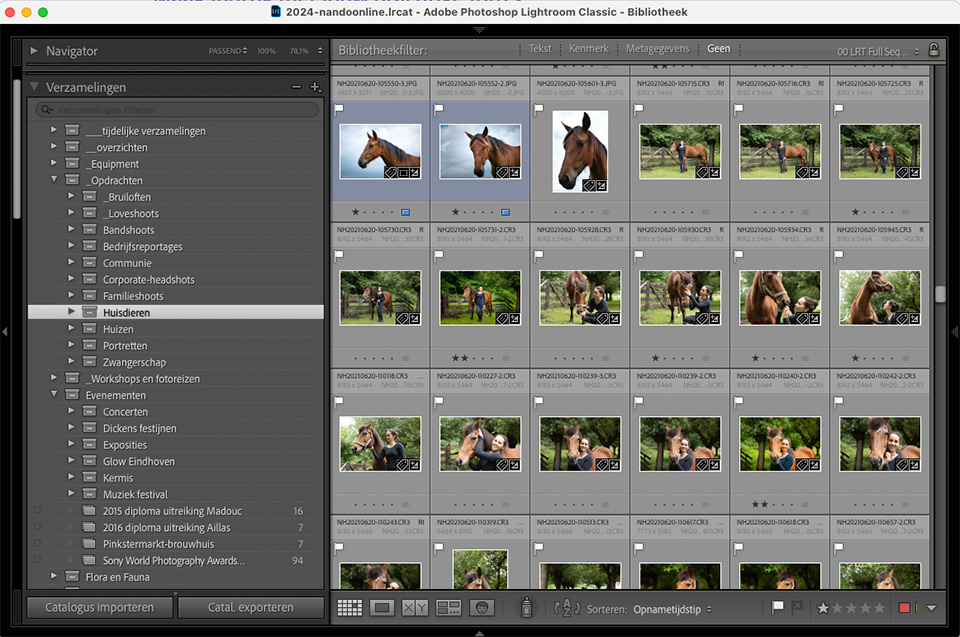
You can create collection sets to divide your collections into groups. It is possible to create smart collections based on keywords, which are added in the next step.
3. Adding keywords
Adding keywords is important. You can add very general keywords during import. I add the specific keywords manually in this step. Also read my article about adding keywords, with a video about it.
4. Making the first selection with flags
I make the first selection with flags. The white flag [P] is for a good photo, and the black flag [X] is for a rejected photo.
I do this quickly, but not too accurately. If I am unsure about a photo, it gets a white flag. Only genuinely bad photos, or duplicate photos, get a black flag.
5. Making the second selection with stars
I use a filter to show only the photos with a white flag. I then make a second selection using a star rating. I give one star to photos that I think are good. You can do this very quickly using the numbers 1 to 5. No star is number 0.
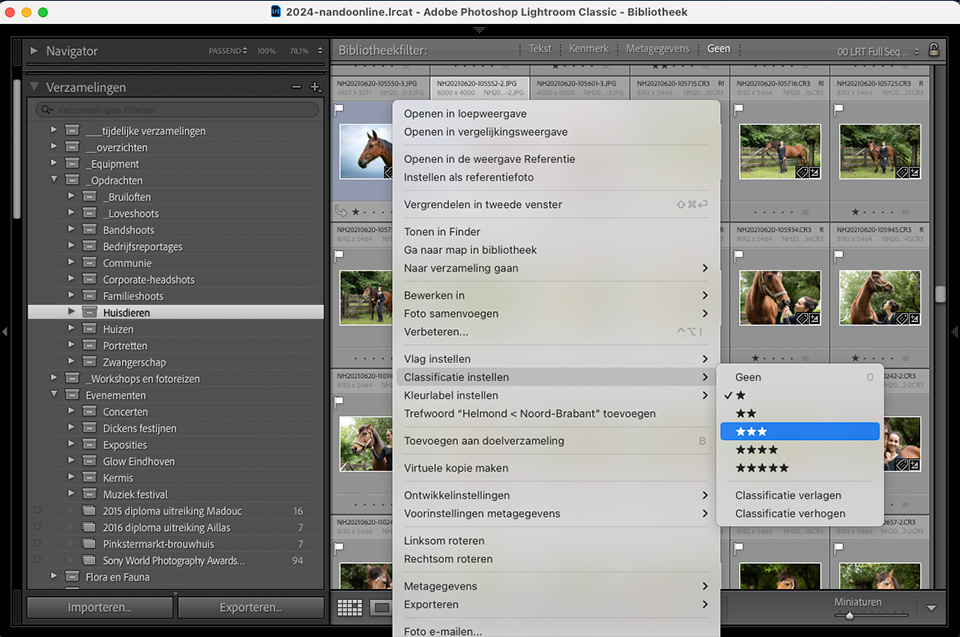
I can expand my filter so that I only see photos with a white flag and one star. I then make another selection by giving a second star to the photos I want to edit. If I am unsure, I can always go back one step, or even two steps. Usually, this is not necessary.
6. Editing the selection
I create a filter that shows only photos with a white flag and two stars. I edit all of those photos. First, I make a global edit that I can copy to the other photos if necessary. Then I straighten each photo, create the right crop and apply local edits.
I previously wrote an article explaining the workflow for editing in Lightroom Classic. You can look at that article again if you want to know more about it.
7. Making the final selection with stars
You can now make a final selection. Which photo is suitable for publication, delivery to a client or other purposes? Those photos get a third star.
You can assign a fourth star to photos that stand out. These are the photos that would fit in a portfolio. Then you are done.
8. Exporting to JPEG when needed
I only export a photo as a JPEG when it needs to be used. Otherwise, I don't. I choose the right resolution and format, and export to a temporary folder on the computer's internal SSD.
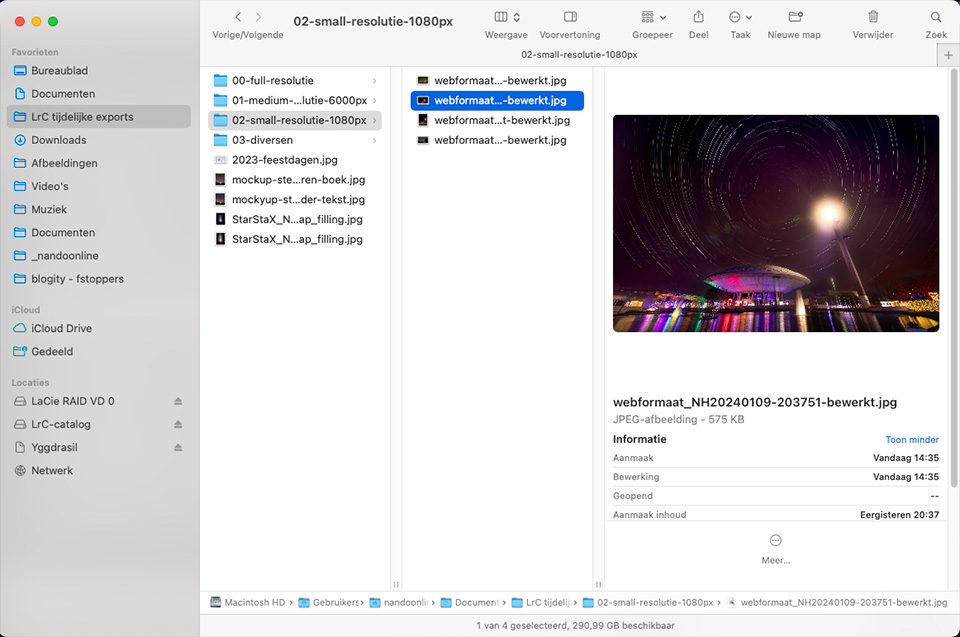
You can do this, for example, with the final selection from step 7. After exporting, the JPEG files are ready for their intended purpose. For example, for delivery to a client, use in an album, social media or a website.
9. Deleting JPEGs after use
Have you used the JPEG photos I exported for the purpose I needed them for? Then I delete the JPEGs again. I no longer need them.
Do I need another JPEG in the future? Then I can easily find it in Lightroom Classic using collections, filters and keywords. I export it again in the format I need at that moment.
10. Deleting rejected photos
Have all the photos been selected, edited and used for their intended purpose? Then you can delete the rejected photos. They were the failures, so you will never use them again anyway.
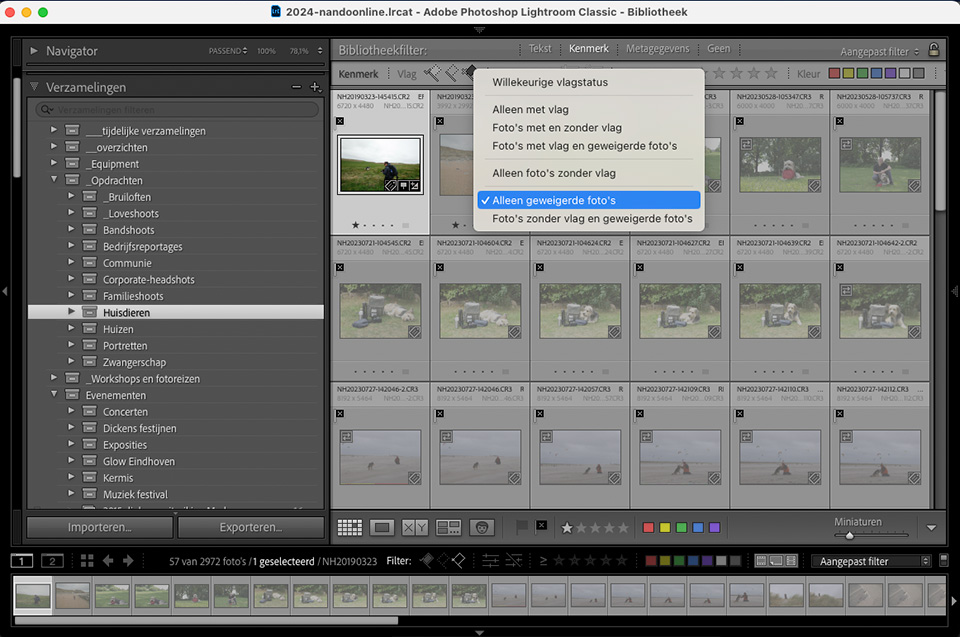
You could also consider deleting photos that have a white flag but have not been given a star rating. But that is a choice you have to make yourself.
My way does not have to be your way
This is my way of working. Of course, it is not the only possible way. It is important to find your own workflow, one that works perfectly for you. Explaining my approach might give you ideas or solutions. Make use of them.
Leave a comment to let me know whether this explanation has been useful to you. I would also like to hear whether you work differently and, if so, how. That is always useful for readers, and for me too.
About the author
Nando Harmsen has been photographing for more than 40 years. He specialises in wedding photography and landscape photography. Nando also gives talks, workshops, masterclasses and photo trips, and regularly reviews new and interesting equipment.
You might also like
-
 How do you get started with Lightroom Classic?
by Nando Harmsen
-
 5 Tips for Managing Photos in Lightroom Classic (and Other Software)
by Nando Harmsen
-
 Taking your photo catalogue to another application
by Nando Harmsen
-
 What is the Comments tab in Lightroom Classic for?
by Nando Harmsen
-
 Automate your Lightroom Classic imports
by Nando Harmsen
-
 Using Lightroom Without a Catalogue
by Nando Harmsen
7 comments
-

 foxhusky
wrote on Tuesday 23 January 2024 at 10:29
| reply
foxhusky
wrote on Tuesday 23 January 2024 at 10:29
| reply
Good representation of your workflow. I work about the same way, with a few small differences.
Translated from Dutch.
When importing by date, I immediately make a first selection. I quickly look at every photo during that step before actually importing. If the photo failed or is a duplicate, I untick the box for that photo and it will not be imported. That saves space on the drive and makes selecting afterwards faster and easier.
Besides 'keywords', as step 3b I also always add the correct GPS codes via the Maps module (I work with the English version, so I don't know exactly what it's called in the Dutch version). My camera doesn't have GPS, so I do that manually myself in LrC.
I also use 'collections', but usually smart collections based on the keywords. Those collections then fill up automatically, which is very convenient.
When selecting, I always use the flags and sometimes color labels or 5 stars. -
 Nando
wrote on Tuesday 23 January 2024 at 13:51
| reply
Nando
wrote on Tuesday 23 January 2024 at 13:51
| reply
Thanks for sharing.
Translated from Dutch.
Smart collections are indeed useful. I personally still don't use them enough. You're prompting me to start using them more.
GPS data is indeed something that doesn't come up in this story. That's a good addition. Thank you. -
 Donald Willemsen wrote on Tuesday 23 January 2024 at 11:40 | reply
Besides working with collections, you can also work with a folder structure in Lightroom. This can then be implemented in the folder structure of Windows Explorer or Apple Finder on your computer/NAS's (external) drive. If you do that via Lightroom, the photos won't get lost. If you adjust your folder structure in Explorer/Finder, Lightroom can no longer find them. Hence, always work from Lightroom. Just take a look via this link: https://youtu.be/Nuybe10dcew?si=t_KrH0TpXSvjL477
Translated from Dutch. -
Nando
wrote on Tuesday 23 January 2024 at 13:54
| reply
A good folder structure is important. But don't underestimate collections. With folders alone, you can't put a photo together in different places without physically copying it. With collections, you can do that unlimitedly.
Translated from Dutch. -
Donald Willemsen wrote on Tuesday 23 January 2024 at 14:08 | reply
#Nando, indeed. I will take this comment to heart. Thank you for that.
Translated from Dutch. -
 Ruurd van Dijk wrote on Tuesday 23 January 2024 at 16:09 | reply
Great!! You describe my workflow exactly... Except for Collections, perhaps. I use those more 'Ad Hoc', for example to keep together the photos I'm selecting for an annual calendar. For categorizing my photos, I can manage with keywords, in a convenient hierarchy, for now. But one doesn't exclude the other, after all a photo can be in as many collections as you want. I also import into folders by date (but in a YYYYMMDD structure, one folder per day, in a parent month folder, which in turn is in a year folder. That gives me the most flexibility with my backups and archiving. For categorizing the photos I have Lightroom and therefore don't need a physical folder structure for that, but for archiving I do!)
Translated from Dutch. -
 jeepee wrote on Tuesday 23 January 2024 at 21:27
| reply
jeepee wrote on Tuesday 23 January 2024 at 21:27
| reply
I think that approach with stars is really good! I also first put a flag or cross and then try to add a star rating, but thinking about whether something costs 1 or 2 or more (I'm rather stingy) takes more thinking time than giving the better ones 1 star and then going through them again. I'm going to try it.
Translated from Dutch.
I also automatically adjust the file name when importing and put the date before the original name, so 20240123_DSC1234.NEF for example. This is because my camera numbers up to 9999 and then starts again at 0001. This way you never have 2 photos with the same name (unless you take 10000 shots in one day and you can also organize files via your operating system. By the way, I create folders per year 2020s/2024 and then logical folder names for me for a group of files (and keywords). In addition, I use active backup for business on my Synology to immediately make a backup (and I only erase the memory card once I have processed the set)
Have your say
Please note: Articles older than a week can only be commented on by signed-in visitors.Would you still like to comment? sign in or create a free account.
Become a better photographer every week
A practical photography tip in your inbox every week.
39,024 photography enthusiasts already receive the tips! More about the weekly mail. Or keep up to date via  Facebook.

Elja Trum
Photofacts; everything to do with photography!
Would you like to take better photos and keep up with what is happening in photography? Photofacts publishes articles that teach you something about photography — from a product announcement to a practical shooting tip or a look at a website. Photofacts covers photography every day and is a hobby project of Elja Trum's that got out of hand. The articles are written by a team of volunteer authors. If you would enjoy writing one or more articles for Photofacts, do get in touch.More about PhotofactsPhotofacts is made possible in part by
