

Photographing through a glass ball
Tuesday 20 March 2018, 22:22 by Yljas Roeper | 17,735 views | 10 commentsThis article was translated from Dutch with the help of AI. Read the original.
At the end of January, I attended a talk by ISOO at Centrum voor Fotografie voor de IJmond by Rob Doolaard about photographing through a glass ball. Always looking for new inspiration, I bought a glass ball that same evening and took my first steps on a new path.
Docu 'A different perspective'
During the talk, Rob Doolaard explained that photographing through a glass ball had become especially popular because of the documentary 'A different perspective' by Nikon photographer Andrius Aleksandravičius.
Rob then showed what he makes with a glass ball and what his workshop participants make. Inspiring, but I soon discovered that buying a glass ball alone is not enough.
The world upside down
The main characteristic of photographing through a glass ball is that you turn the world upside down. You then have the choice of leaving the photo as it is, or rotating it 180 degrees.
Depending on your choice, either the subject in the ball or the surroundings will be upside down. You can of course play with this, although it becomes clear later that this upside-down world can also be avoided.
Holding the ball
In many photos Rob showed, he or someone else was holding the ball. In the first case, he generally held the ball with one hand because he also had to operate the camera. If someone else held the ball, it could be held with both hands.
When holding the ball with one hand, a particularly nice effect appeared when the ball rested on the fingertips or flat hand, after which the photo was rotated 180 degrees.
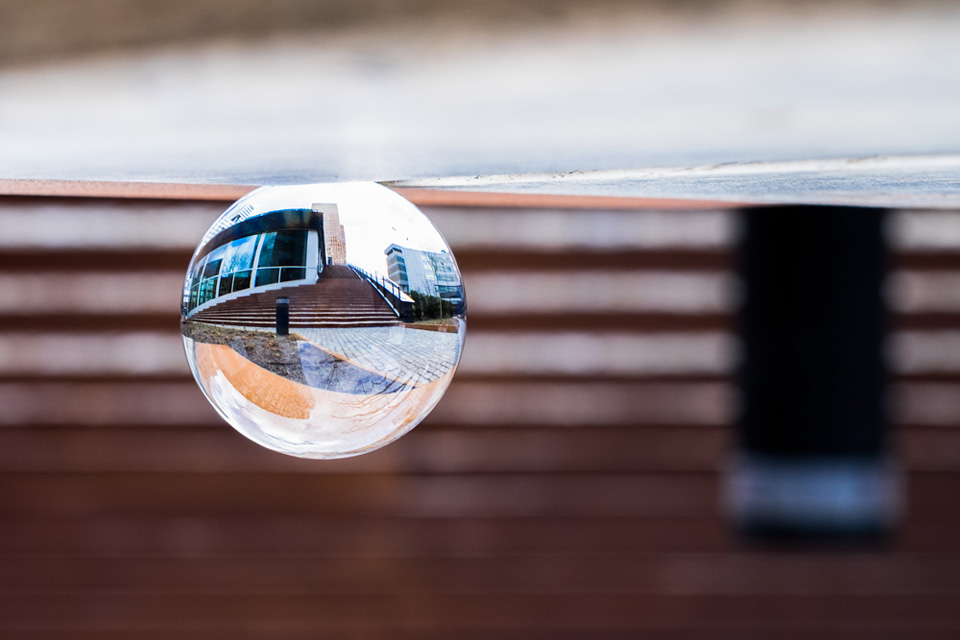
This made the ball look as if it were floating, or even better, as if it had reached a ceiling after taking off. Surreal, then. When it was held with both hands, an effect was often created where the ball seemed to be trapped.
The ball placed on a random surface
Unfortunately, I used to bite my nails quite badly. My hands are therefore not exactly photogenic, and that is an understatement. Fortunately, when photographing through a ball, you do not always have to hold it.
You can also put it down. A glass stand was supplied with the ball for this purpose, but there are other solutions too, such as using an O-ring. I have not tried the latter yet. The glass stand has certainly proved its worth by now.
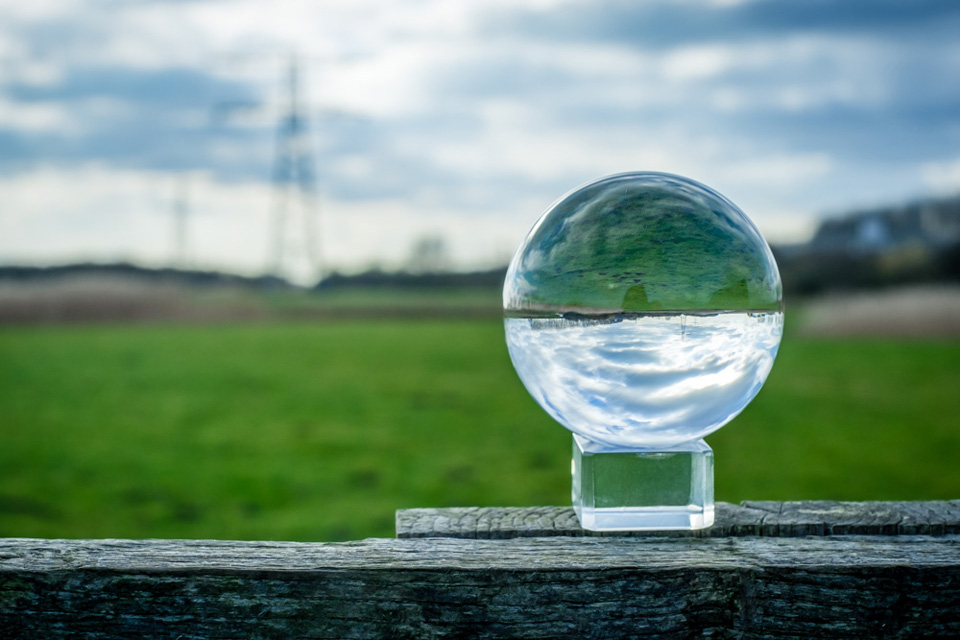
I took my first photos with the glass ball in the polder behind my house. Because I did not fancy lying in the mud, I placed the ball on a fence.
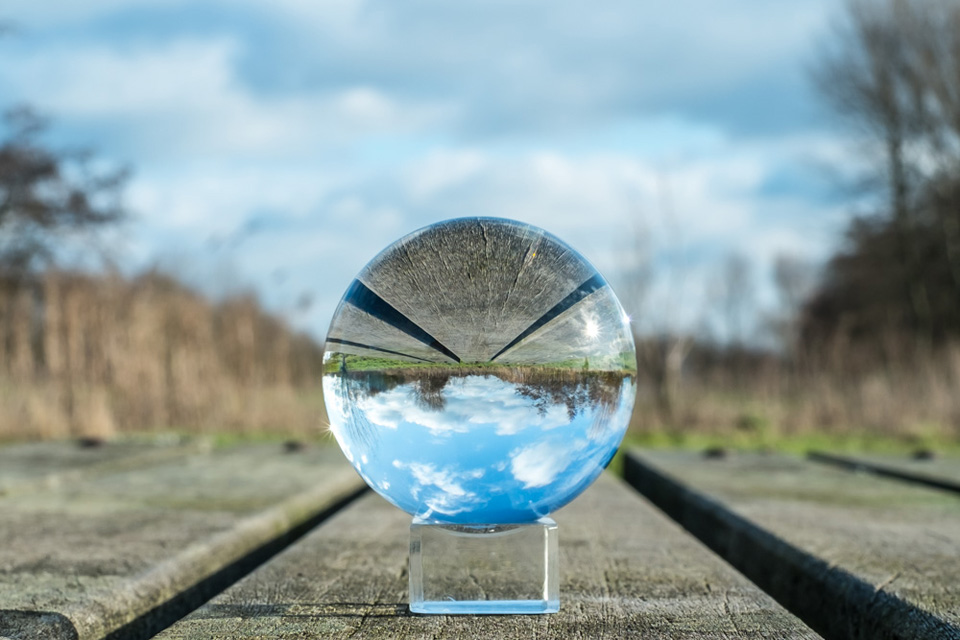
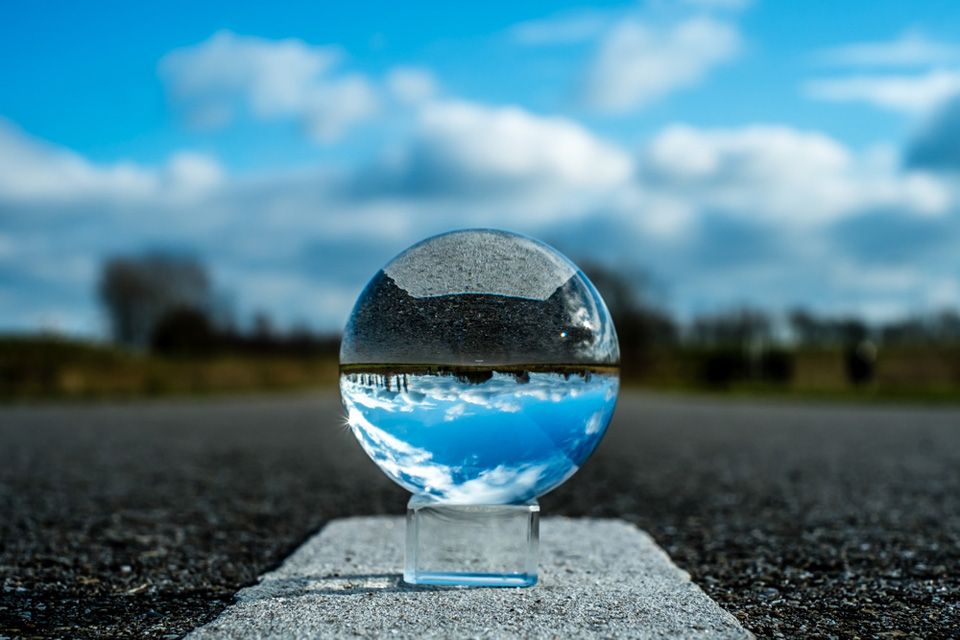
A little further on, I also used a weathered picnic table with a golf course in the background. Unfortunately, the rolling hills of this area are barely visible through the ball. Finally, I placed the ball on the broken line of a cycle path.
My first experiences
In all cases, the main purpose of this first series of photos was to gain experience. The creative or artistic effect was secondary. The main questions were how the focus point worked and whether I should focus manually or automatically in the first place.
I also wanted to know how each lens would respond, what sort of crop I could achieve and what effect the aperture would have on the background.
In terms of focus, photographing with a glass ball is generally no different from photographing without one. You choose your focus point and focus on the subject in the ball. Usually, that works fine.
However, if you want to be 100 per cent certain, manual focusing with the help of focus peaking works a little better in my case. You then know exactly where your focus point or area is.
The focusing distance of my lenses did disappoint me. I had to move further away than I wanted in order to focus, which made the ball appear smaller in the photo than expected.
In post-processing, I made crops in some cases that came closer to the image I had in mind initially. Not ideal, because you are simply throwing away image information.
Finally, the depth of field in the photos and the influence of the aperture were not particularly surprising. Because the ball was relatively close to the lens despite the focusing distance, the background quickly became blurred.
Opening up the aperture further naturally made it even more blurred. In such a case, you need to ask yourself how far you want to take this and whether you want to work with extremes.
Experimenting on the Zuidas
I always post my photos on my Facebook page. A comment from my nephew on the first series of photos prompted me to try photographing with the ball on the Zuidas in Amsterdam.
The first location, the former ING building known as 'Het Schip', did not offer what I was looking for. The tall buildings around NS Station Zuid, the WTC and the ABNAMRO skyscraper offered a little more perspective, although it still was not exactly what I was looking for.
The aim of photographing on the Zuidas was to do something with the skyscrapers and the glass ball. In the end, there were two photos I was happy with.
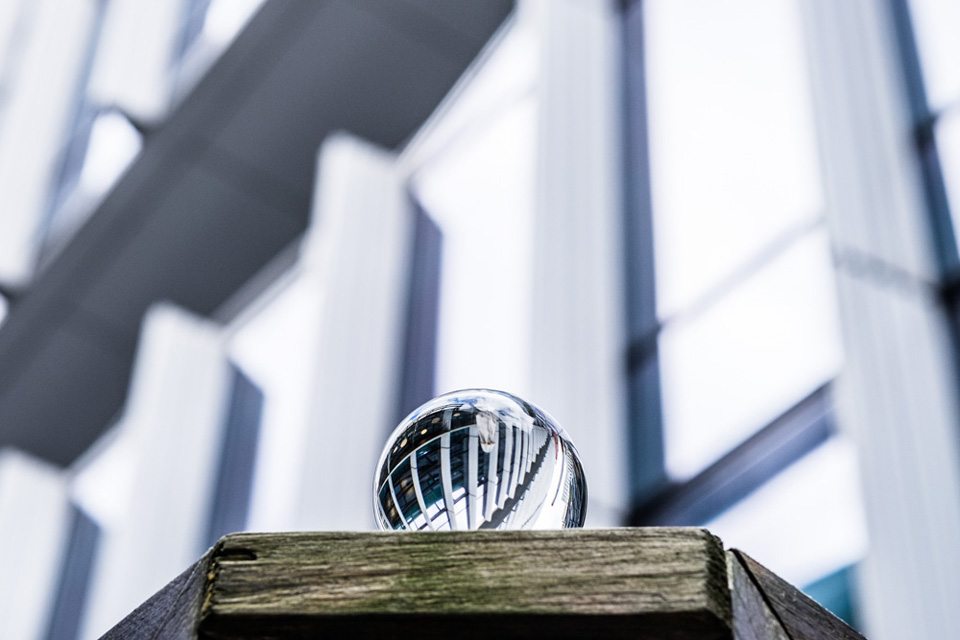
In the first, you look through the ball at an angle towards the skyscraper, and in the background you can see the aluminium frames around the glass panels.
For this, I placed the ball on a terrace railing and photographed the ball from slightly below at an angle. This also means that you can no longer see the glass foot supporting the ball.
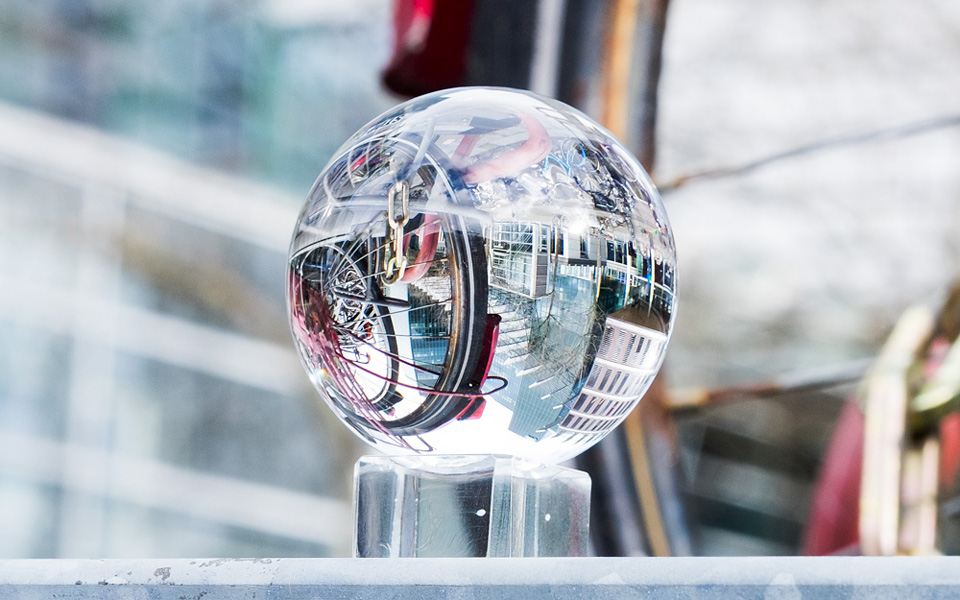
The second photo is one of those aforementioned crops from a larger scene, with a red bicycle in the bicycle shed prominently in view. The tall building behind it is visible in the ball. Because of the wide aperture, the outlines of the building in question are still visible in a bokeh-like setting.
An unexpected pleasure
Still not convinced of the possibilities for me, at one point I walked into the garden of the ABNAMRO skyscraper. There were some benches made from wooden beams set in rusty metal. A nice contrast.
I put the ball down and initially photographed some buildings in the background. I later rotated these photos 180 degrees in Lightroom, which I felt enhanced the photos.
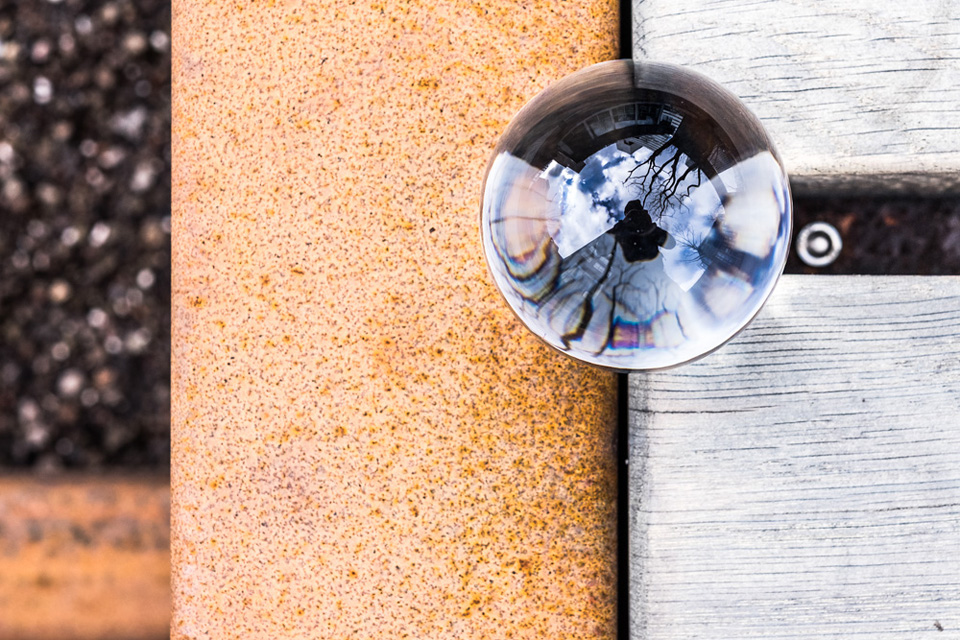
I photographed my last photos in the garden in question straight from above. The combination of the wood, the rusty metal, a blurred glimpse of the ground beside the bench and my own reflection in the blue, cloudy sky really appealed to me.
At home, I saw that it had indeed produced a very attractive contrasting image, and personally I think this is one of the best photos I have made with a glass ball so far.
New inspiration
The glass ball has not left my bag in recent weeks. It can give your photos a new or different dimension here and there, but it should not become a gimmick.
There are plans to use the glass ball further, but I will keep where and how to myself for now. I hope to be able to show some more spectacular images in a few months, perhaps ones that inspire others too.
About the author
Houdt zich onder de naam Ytos Photography bezig met diverse vormen van fotografie. Geeft lezingen over fotograferen in Marokko en flitsen en organiseert regelmatig fotoreizen naar Marokko. Post af en toe op Instagram, maar is vooral actief op Facebook.
You might also like
-
 The World Through a Glass Ball
by Laura van der Burgt
-
 Avoiding or removing reflections in glasses
by Michelle Peeters
-
 Review: 'Photoshop Masters' by Rob de Winter
by Huub Keulers
-
 Control reflections with a polarising filter
by Erik Nevels
-
 Portrait photography tip: use a window's reflection
by Elja Trum

10 comments
-

-

 Ytos
wrote on Wednesday 21 March 2018 at 21:12
| reply
Eens henk. Daarom heb ik bij de Zuidas al geprobeerd wat andere dingen te doen, zodat het blokje niet in beeld kwam of zelfs helemaal niet gebruikt hoefde te worden. Op een harde ondergrond moet de bol echter wel stabiel liggen en wil je krassen vermijden. Vandaar dat ik nu nog het blokje gebruikt heb. De door mij genoemde O-ringen had ik nog niet, maar inmiddels zitten die standaard bij de bol opgeborgen.
This comment was written in another language and has not been translated yet. -
 John wrote on Friday 23 March 2018 at 08:58 | reply
Mooi. Wat kost zo'n bol en waar kun je deze kopen?
This comment was written in another language and has not been translated yet. -
Ytos
wrote on Friday 23 March 2018 at 17:21
| reply
Rob Doolaard verkoopt zelf bollen via zijn site: http://www.dierenfotografie.nl/glazen-bol-te-koop.htm. De prijs is afhankelijk van de maat die je koopt. De starterskit bevat een bol van 6 cm, een microvezeldoekje en boekje met tips en trucs. Omdat ik de lezing heb bijgewoond, heb ik het boekje eerlijk gezegd niet meer doorgenomen.
This comment was written in another language and has not been translated yet.
Ik heb ze echter ook gezien op o.a. Marktplaats. Als je via Google zoekt, kom je ook enkele aanbieders van glazen bollen tegen. -
-
 Hans wrote on Tuesday 27 March 2018 at 15:48
| reply
Plaats aan de onderkant aan het blokje en eventueel aan de bovenkant van bijvoorbeeld een 4 x 4 stut een stukje klitte band dan kan je de 4x4 in de grond zetten en de bol dus hands free gebruiken.
This comment was written in another language and has not been translated yet. -
 Wim Stevenhagen
wrote on Tuesday 27 March 2018 at 19:37
| reply
Ik heb op dit moment 4 bolletjes, resp. 3,5 - 5 - 6 - 10cm. De grootste, van 10cm, geeft de mooiste resultaten, vooral met een wat grotere beeldhoek.
This comment was written in another language and has not been translated yet.
Wel met overleg want hij weegt bijna 1,5kg. dus weer iets extra's als bagage. De bal heb ik met zijn los voetje in een zelf gemaakt zacht tasje om elk mogelijk krasje te voorkomen.
Bij het fotograferen van Kastelen en gebouwen gaat hij bijna altijd mee. -
 anne wrote on Tuesday 27 March 2018 at 21:22
| reply
Waar haal je die O-ring ? Groetjes
This comment was written in another language and has not been translated yet. -
 PCfoto@de-moor.de wrote on Wednesday 28 March 2018 at 00:00
| reply
Leuk, een artikel over de glazen bol. Sinds enige maanden heb ik er ook twee, om er als amateur een beetje mee te stoeien, maar wel met goede weersomstandigheden. De opmerking over de scherpstelafstand los ik op met een bridge camera. De vraag over het verkrijgen van een "O"-ring, denk ik aan een 'doe het zelf' winkel op de afdeling sanitair. Grotere maten mogelijk bij een installatiebedrijf, of ze maken deze op maat met een beetje seconden lijm.
This comment was written in another language and has not been translated yet. -
Ytos
wrote on Saturday 31 March 2018 at 12:59
| reply
Dank voor alle reacties. O-ringen kun je inderdaad in een doe-het-zelf-zaak halen. Afhankelijk van de dikte werkt voor mijn bol (6cm) een ring met een doorsnede van zo'n 15mm.
This comment was written in another language and has not been translated yet.
Have your say
Please note: Articles older than a week can only be commented on by signed-in visitors.Would you still like to comment? sign in or create a free account.
Become a better photographer every week
A practical photography tip in your inbox every week.
38,886 photography enthusiasts already receive the tips! More about the weekly mail. Or keep up to date via  Facebook.

Elja Trum
Photofacts; everything to do with photography!
Would you like to take better photos and keep up with what is happening in photography? Photofacts publishes articles that teach you something about photography — from a product announcement to a practical shooting tip or a look at a website. Photofacts covers photography every day and is a hobby project of Elja Trum's that got out of hand. The articles are written by a team of volunteer authors. If you would enjoy writing one or more articles for Photofacts, do get in touch.More about PhotofactsPhotofacts is made possible in part by
