

Sharpness, where do you place it and how deep?
Monday 13 December 2021, 14:28 by Erik Nevels | 8,589 views | 6 commentsThis article was translated from Dutch with the help of AI. Read the original.
I enjoy taking macro photos. Nature offers me a wealth of subjects, both flora and fauna. Once I have found a subject and chosen the composition, I keep coming back to that one question: where and how deep do I want the sharpness?
Shallow depth of field
For macro photos, I mainly use my 90mm macro lens. The closer I get to the subject and the wider I open the aperture, the shallower the depth of field. It is a matter of millimetres, and it is rarely possible to have a subject sharp from front to back.
Sharpness versus a blurred background
I often prefer a diffuse background because it does not distract the viewer's attention from the subject of the photo. If the subject is sharp, that draws the viewer's attention instead.
If I want both, a sharp subject and a blurred background, things get difficult. For one, more sharpness, I need a small aperture opening, while for the other, a blurred background, I need a large one.
Having both in a photo is usually not possible unless your background is very far away. Photo stacking can offer a solution, but I will say more about that in one of my next blogs.
In this blog, I will tell you about the choices I made for sharpness and depth of field in the macro photos I took over the past few weeks.
Lots of depth of field
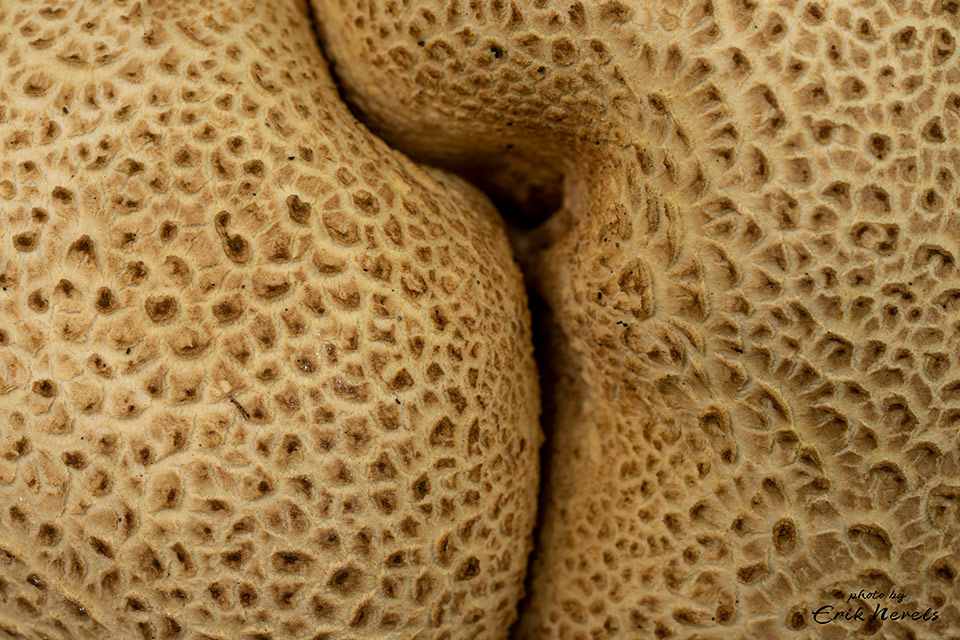
I usually walk straight past puffballs. But thanks to my photography buddy, who had already photographed this fine specimen a day earlier, I stop to take a look this time. It is fine because of its beautiful scale structure and the curved line where the two halves of the mushroom meet.
I can see the image I am going to make in front of me. The scale structure is beautiful and it needs to be sharp in the image. Blur would distract attention, and I want to avoid that. To achieve this sharpness, I photograph it straight from above and choose a small aperture.
f/14 turns out to be enough for the desired sharpness. Because the subject is not moving and I am working from a tripod, the shutter speed can be long and I choose ISO 100. The shutter speed of 1.3 sec does the rest and provides a good exposure.
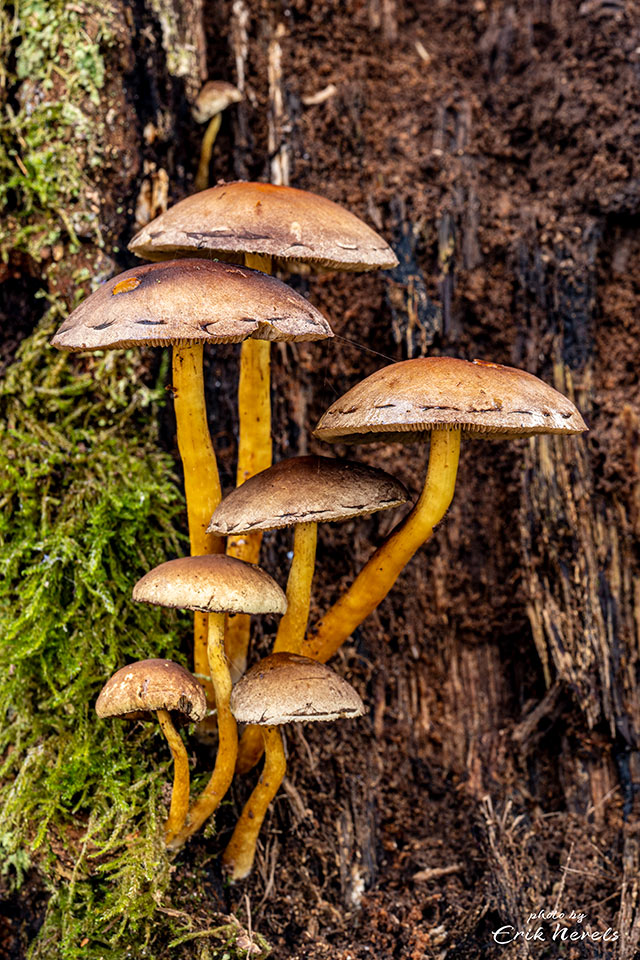
The same applies to the next photo. I want both the beautiful caps and the yellow stems of the mushrooms to be sharp. f/16 is needed to achieve that.
Because the background is directly behind the subject, it also comes out almost sharp in the photo. I think that is fine in this case. It makes clear that these sulphur tufts live on dead wood.
Little depth of field
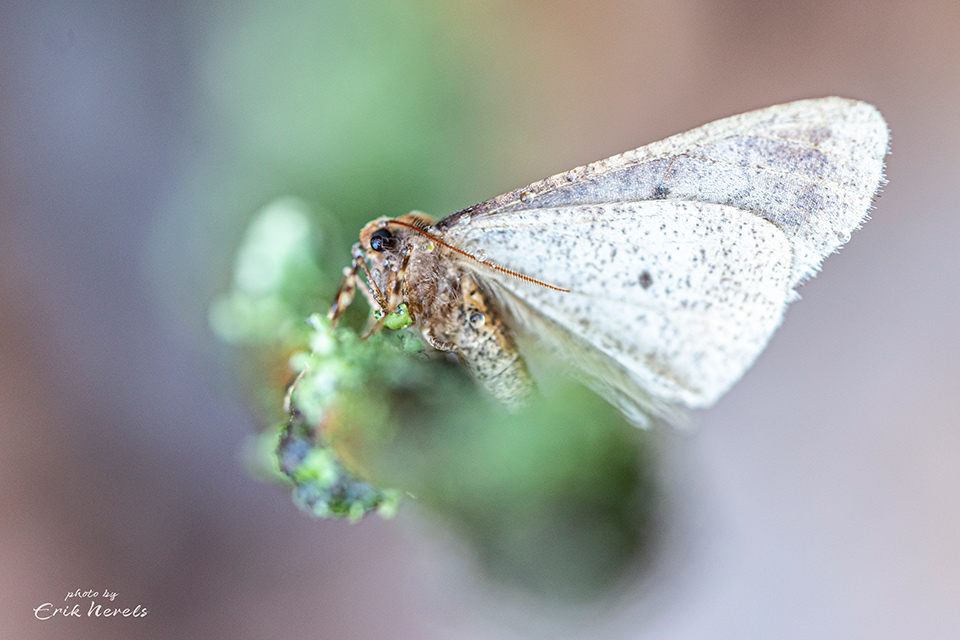
While looking for mushrooms, I suddenly see a large winter moth hanging from a twig. I look at the little creature from several angles.
While hesitating over the composition, I put the camera on the tripod and spend at least another 10 minutes choosing a viewpoint. Once I am happy with both the subject in the frame and the background, I can take care of the detailed settings.
First, I point the camera so that it is perpendicular to the body with the wings. Then I focus on the eye, checking whether the wings are sharp too.
Unfortunately, the perpendicular position turns out not to be quite perpendicular enough and needs adjusting. I gradually reduce the aperture to increase the depth of field, but this makes more and more detail visible in the foreground and background.
When I compare the different shots on the computer at home, I still choose the photo taken at aperture f/2.8, accepting less sharpness in the moth. The background, however, is the most diffuse, and that decides it.
600mm
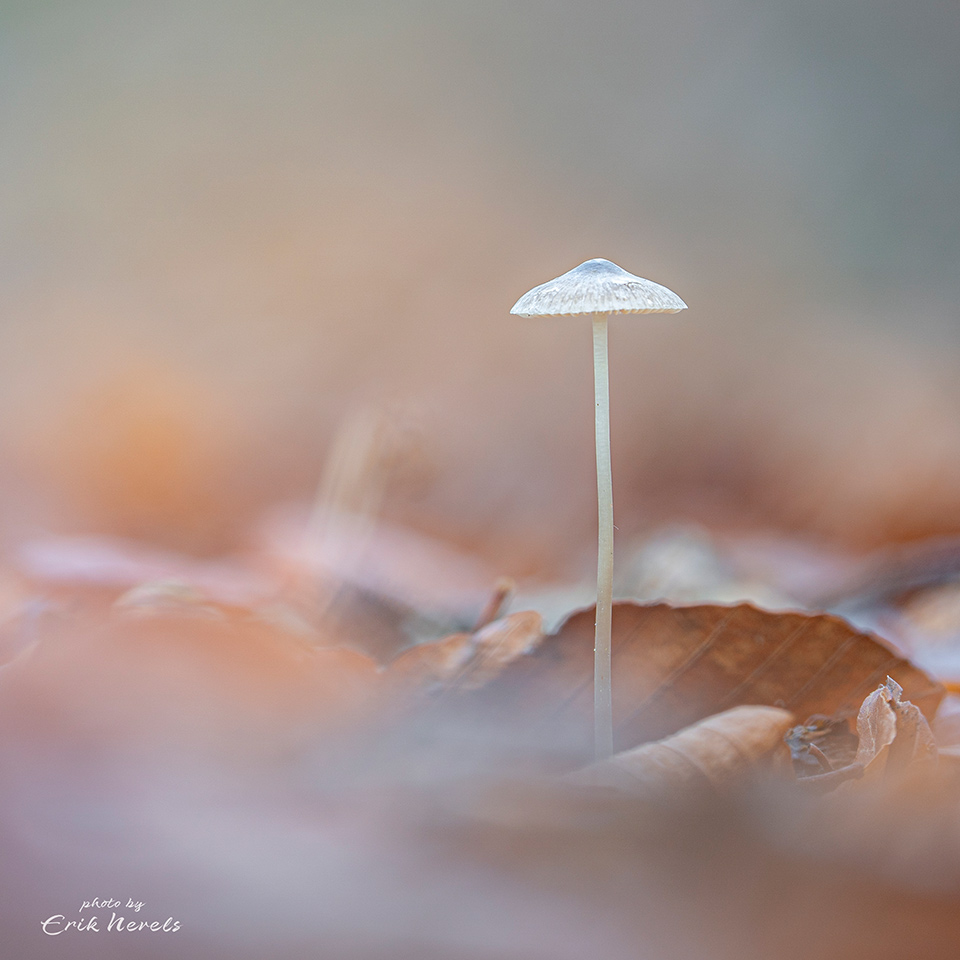
As I said, I often use my macro lens. In the case of this mycena mushroom, however, I wanted to make a comparison by photographing it with different lenses, starting with Sony's 200-600mm.
I place the camera and lens on a groundsheet on the ground. At 600mm, I have to keep a distance of 2.4 metres to be able to focus. I turn the focus ring all the way to the right and move backwards with the camera until the mushroom is sharp.
I cannot get any closer. I look at the image on the tilted screen and remove a few distracting leaves. I still move the camera a little to the left for a better background, which I keep diffuse with the widest aperture of f/6.3.
I repeat this process with the 70-300mm at 135mm and with my 90mm macro lens, each time using the widest possible aperture to keep the background diffuse.
I quickly make up my mind at home. I like the 600mm shot best. It is the only one where the entire mushroom is sharp, cap and stem, while the surroundings are still beautifully diffuse.
Where do I place the sharpness?
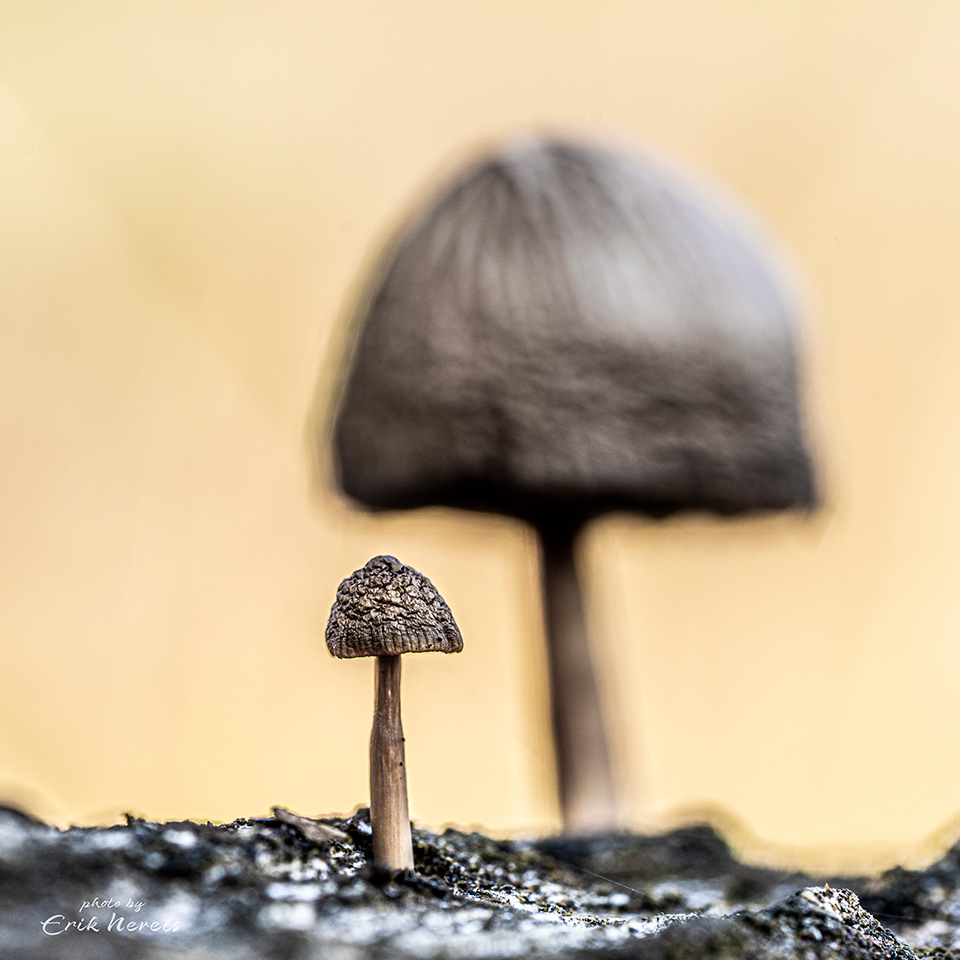
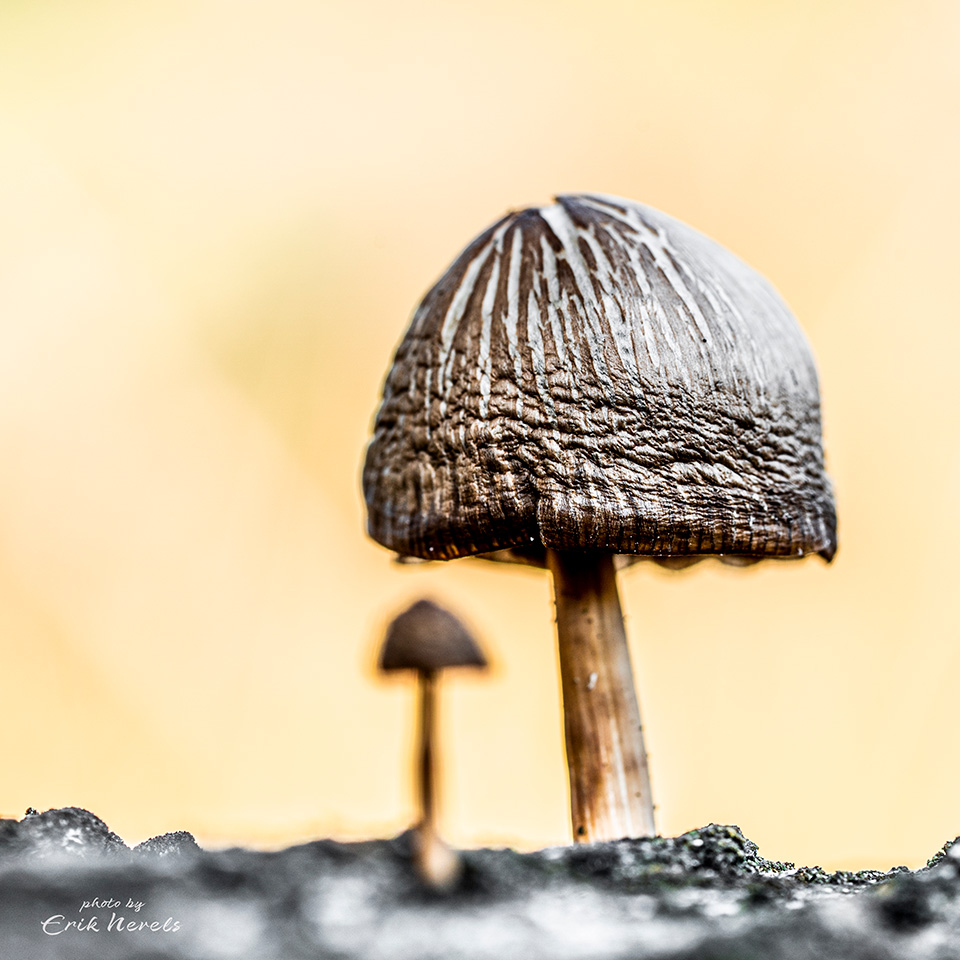
I walk straight past them, these David and Goliath mushrooms. I only see them on the way back to my bike. What a charming difference in size.
After initially photographing the mushrooms next to each other and, logically enough, failing to get the large cap completely sharp in the frame like the small one, I walk around the scene once more.
Suddenly I can see the image in front of me: 'Under mother's umbrella!'. David sharp in the frame beneath Goliath's cap, mother in this case, and a background that works brilliantly.
Once I have the image on the memory card, I realise that I can reverse the roles too. Goliath sharp and David blurred. No sooner said than done. Again, my preference is quickly clear when I am back at the computer at home. Which one do you prefer?
Almost unlimited choices.
Where and how deep do I want the sharpness? The choices are almost unlimited. That may sound strange because I have just explained how shallow the depth of field available to me is.
Still, with this blog I wanted to show that there is a lot to choose from. What do you think looks good? Experiment, vary things, be patient, and if you are still not happy when you are sitting at your computer after a day of photography, go back and take another close look at the subject.
About the author
Steeds weer boeiend en op zoek naar de essentie! Dat is wat fotograferen in de natuur voor mij is. Gefocust op het landschap of het onderwerp in diens omgeving tracht ik meer dan alleen te registreren. Een continue uitdaging waarvan ik elke keer volop geniet. Meer foto's? Volg mij op Instagram en/of kijk op mijn website
You might also like
-
 Mushrooms with bokeh
by Erik Nevels
-
 7 Tips for Macro Photography
by Mike Muizebelt
-
 Mushroom tip: try a wide-angle lens
by Nando Harmsen
-
 Mushrooms without a macro lens, plus a few extra tips
by Nando Harmsen
-
10 tips for photographing mushrooms
by Nando Harmsen
-
 Be careful when using sharp lenses
by Nando Harmsen
6 comments
-
 wim wrote on Tuesday 14 December 2021 at 12:22 | reply
Beautiful photography, compliments!
Translated from Dutch. -
 Anton Terwisscha van Scheltinga wrote on Tuesday 14 December 2021 at 13:40 | reply
Nice story and explanation. I do miss something, though, and that is the possibility of adding flash. I came up with something for that myself, so there is no more shadowing. I often use f/8 to f/11 (Sony A7 lll), 90mm macro (Sony), +5 diopter close-up lens (Marumi) and 2 flashes (Godox 485).
Translated from Dutch.
I don't take courses, because the best teacher is yourself by doing a lot. -
 Lauran wrote on Tuesday 14 December 2021 at 13:44 | reply
A nice article.
Translated from Dutch. -

 Erik wrote on Tuesday 14 December 2021 at 17:17
| reply
Erik wrote on Tuesday 14 December 2021 at 17:17
| reply
@Wim. Thanks for the compliments Wim! Always nice to receive them.
Translated from Dutch. -
Erik wrote on Tuesday 14 December 2021 at 17:23
| reply
@Anton. Nice that you think it’s a great blog! Using flash is indeed a good way to get rid of shadows.
Translated from Dutch. -
Erik wrote on Tuesday 14 December 2021 at 17:23
| reply
@Lauran. Thanks for your positive response!
Translated from Dutch.
Have your say
Please note: Articles older than a week can only be commented on by signed-in visitors.Would you still like to comment? sign in or create a free account.
Become a better photographer every week
A practical photography tip in your inbox every week.
38,981 photography enthusiasts already receive the tips! More about the weekly mail. Or keep up to date via  Facebook.

Elja Trum
Photofacts; everything to do with photography!
Would you like to take better photos and keep up with what is happening in photography? Photofacts publishes articles that teach you something about photography — from a product announcement to a practical shooting tip or a look at a website. Photofacts covers photography every day and is a hobby project of Elja Trum's that got out of hand. The articles are written by a team of volunteer authors. If you would enjoy writing one or more articles for Photofacts, do get in touch.More about PhotofactsPhotofacts is made possible in part by
