

My first step into the world of Pep Ventosa
Sunday 8 November 2026, 20:10 by Rob Zwart | 21 views | 0 commentsThis article was translated from Dutch with the help of AI. Read the original.
Inspired by the course by Liesbeth van Asselt at Photoshop Academy, I got started with Pep Ventosa's technique myself.
I had followed the course, which she explained clearly and well  , and of course I wanted to experience what happens when you apply this special way of photographing and editing images yourself. My idea was to create something like a Vincent van Gogh painting.
Choosing a subject and my "studio"
I chose a colourful bouquet of flowers on a table as my subject. Yes, in the living room again. That is my studio for now. Including all the backgrounds of walls, cupboards and chairs.
The start of this approach
Instead of photographing the bouquet from one viewpoint, I walked around it and took photos from different positions. This created a series of RAW images in which the bouquet appeared slightly different each time.
Photoshop
Then I started working in Photoshop. I placed the photos over each other as separate layers and adjusted the images where necessary using Ctrl+T. I then started experimenting with different blending modes, layer by layer.
I kept checking what a particular mode did to the colours, shapes and transparency, and then decided whether the result added anything to the whole.
No fixed plan
It was mainly a matter of trying things out and discovering what happened. All based on Liesbeth's tips.
So I did not have a clearly defined end result in mind beforehand. By assessing each layer separately and playing with the blending modes, the final image slowly began to take shape.
Backgrounds in my "studio"
There was also a practical challenge: there was a cupboard behind the bouquet that I could not remove properly from the photos. The different perspectives and the way the images overlapped helped make that distracting background less noticeable.
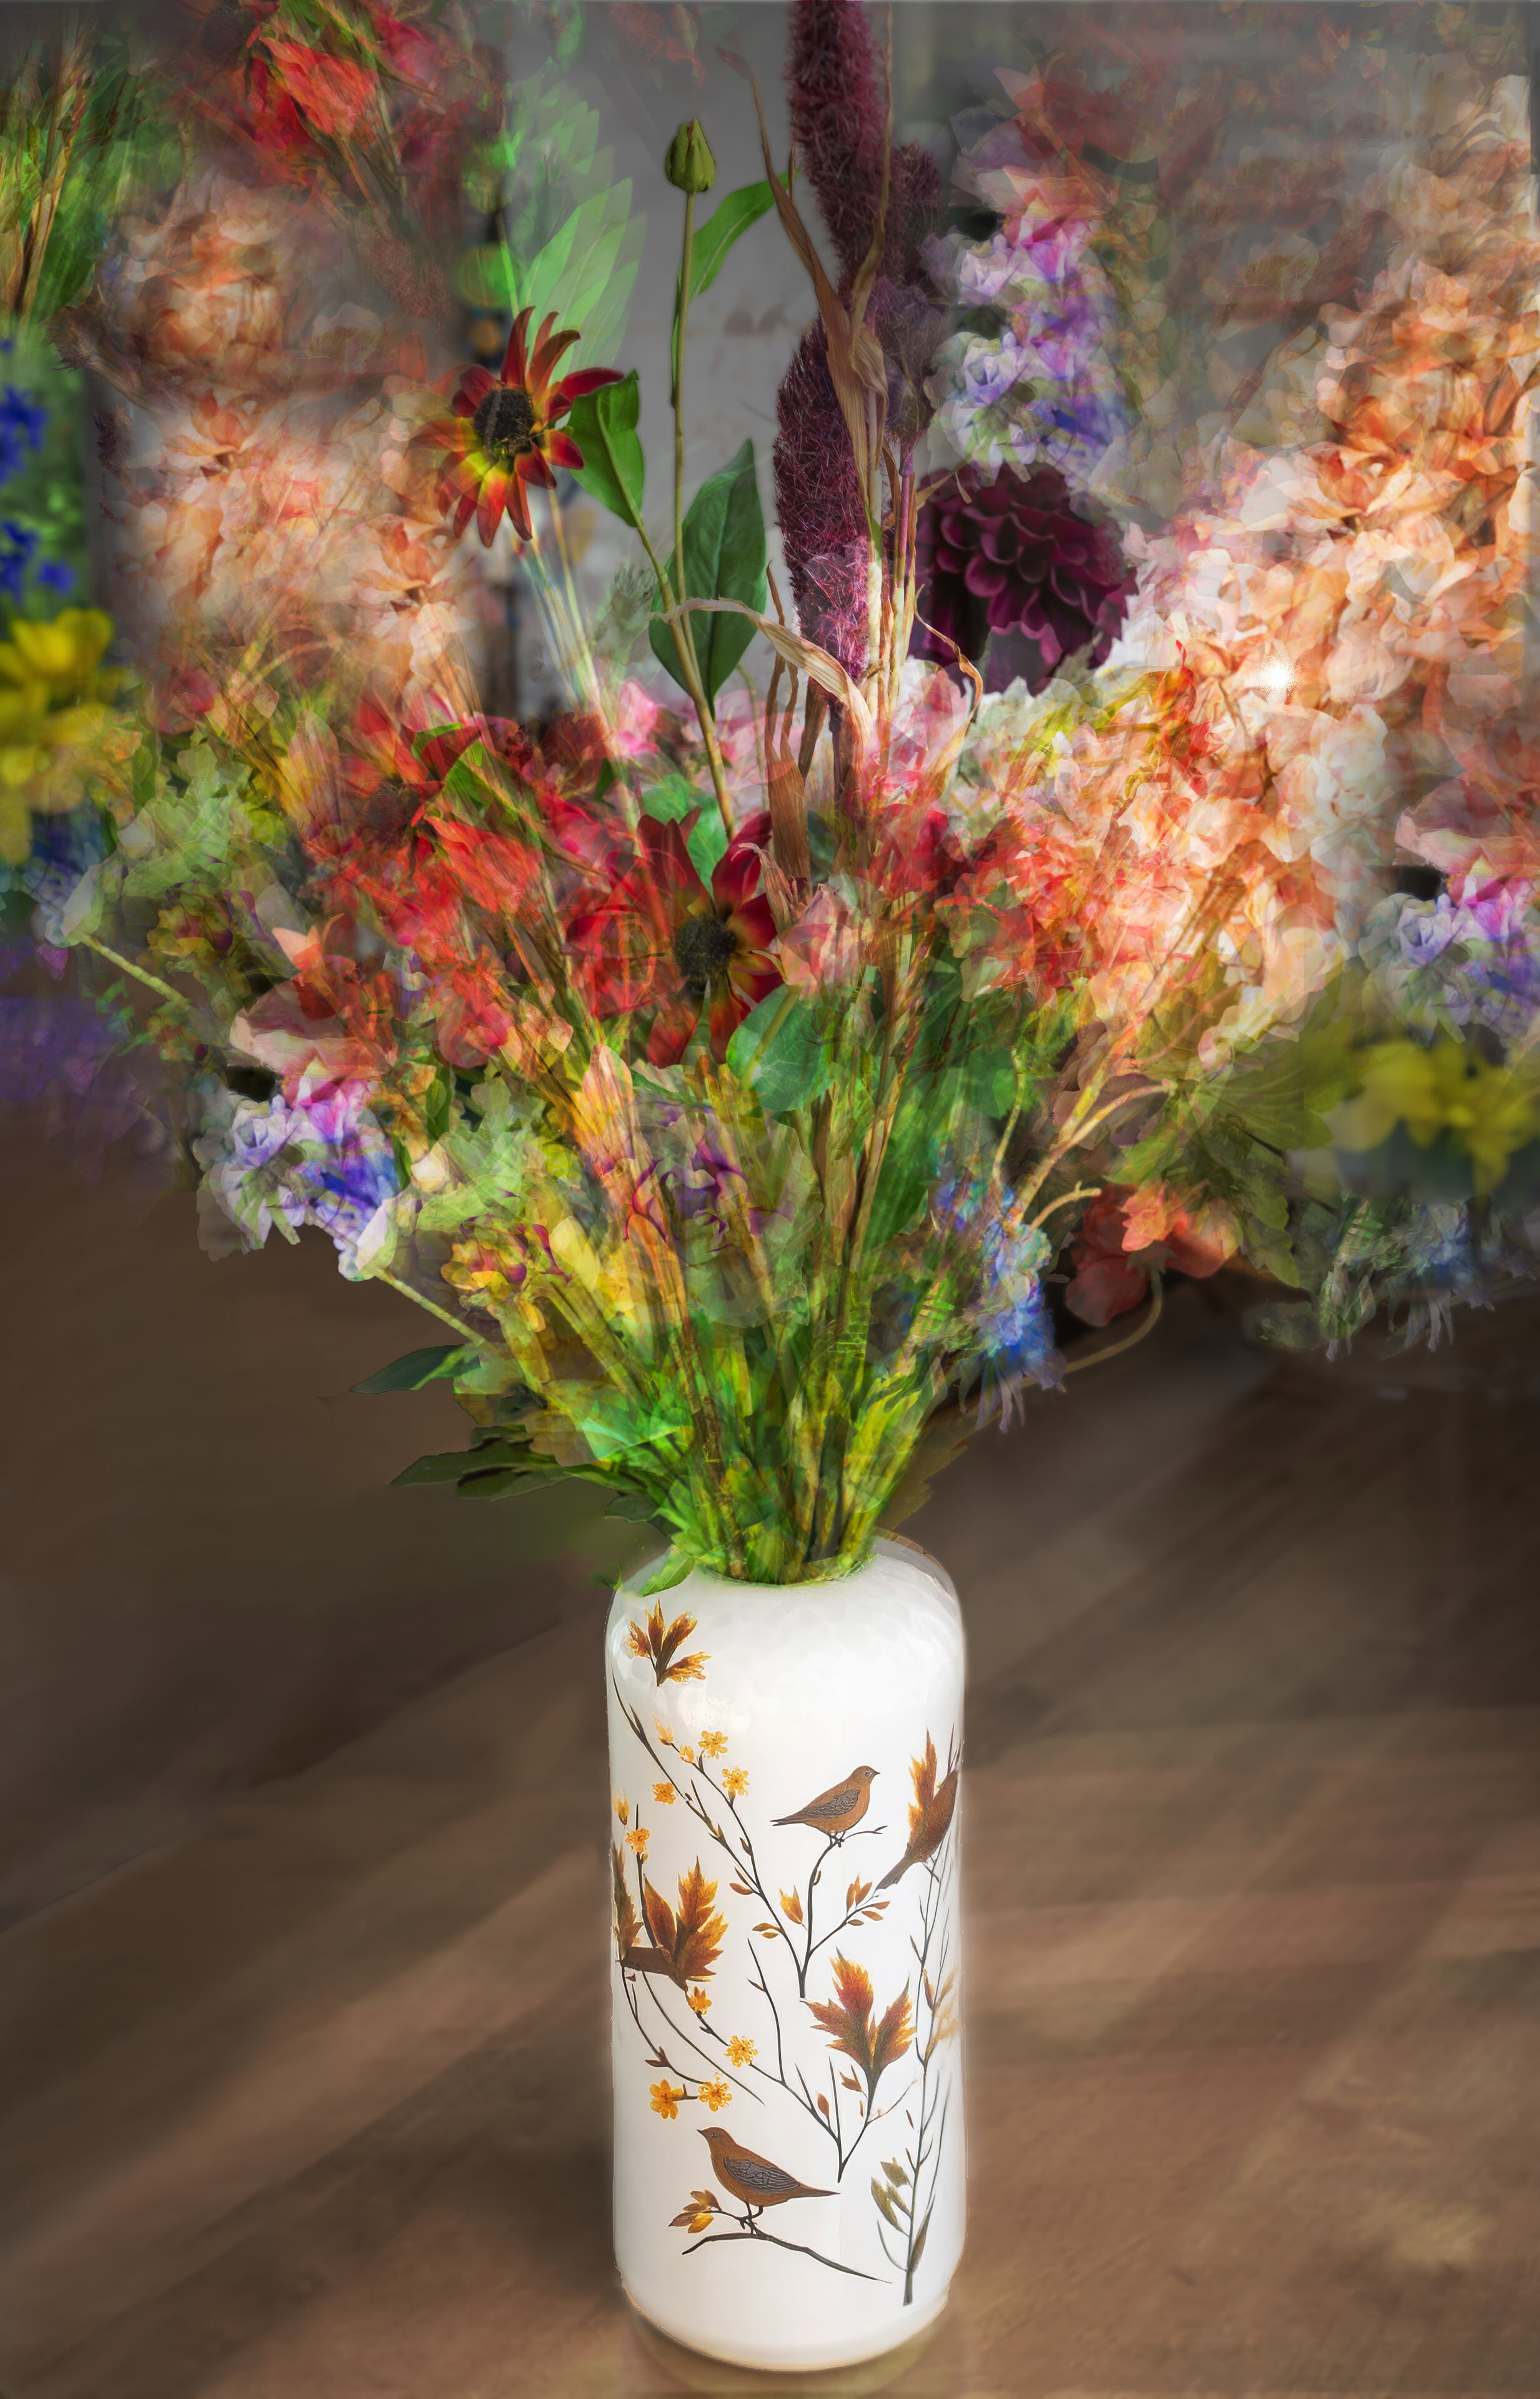
Pep ventosa flowers on table in living room - f/5.6, 1/60s, 800 ISO @ 35mm
The result is a colourful, layered image in which the flowers remain partly recognisable, while at the same time turning into an almost painterly composition. The vase forms a recognisable point of calm beneath the lively bouquet.
What I learned
With this experiment, I mainly experienced how many possibilities this technique offers. It starts with photographing from different viewpoints, but the final image only takes shape during editing.
Every layer affects the whole, and sometimes an unexpected combination produces the most interesting result. You can hardly resist doing it again. It has become my own creation.
This is my first attempt with Pep Ventosa's technique, inspired by Liesbeth's excellent course at Photoshop Academy. Thank you for that.
I enjoyed the challenge of putting the explanation from the course into practice myself, and I am curious to discover what possibilities I will find next time.
About the author
My motto is: being a bit good is not good enough. I try to learn something new every day so I can do it better next time.
You might also like
-
 Photographing Like Pep Ventosa
by Laura van der Burgt
-
 Have you ever heard of the Pep Ventosa technique?
by Nando Harmsen
-
 Inspiration for Multiple Exposures
by Nando Harmsen
-
 Review: The Photoshop Layers Book - Johan Elzenga
by Michelle Peeters
-
 Save a Photoshop file with layers
by Michelle Peeters
-
 Documentary review: Step into the World of Lars van de Goor
by Michelle Peeters
0 comments
Be the first to share what you think!
Become a better photographer every week
A practical photography tip in your inbox every week.
38,883 photography enthusiasts already receive the tips! More about the weekly mail. Or keep up to date via  Facebook.

Elja Trum
Photofacts; everything to do with photography!
Would you like to take better photos and keep up with what is happening in photography? Photofacts publishes articles that teach you something about photography — from a product announcement to a practical shooting tip or a look at a website. Photofacts covers photography every day and is a hobby project of Elja Trum's that got out of hand. The articles are written by a team of volunteer authors. If you would enjoy writing one or more articles for Photofacts, do get in touch.More about PhotofactsPhotofacts is made possible in part by
