

A Dreary Rainy Day in the Studio
Thursday 16 March 2017, 20:40 by Elja Trum | 8,270 views | 7 commentsThis article was translated from Dutch with the help of AI. Read the original.
When the weather is awful, you can always head into the studio to take some nice photos. But you can do it the other way round too, turning a beautiful day into a dreary one indoors. That can produce some lovely, atmospheric photos.
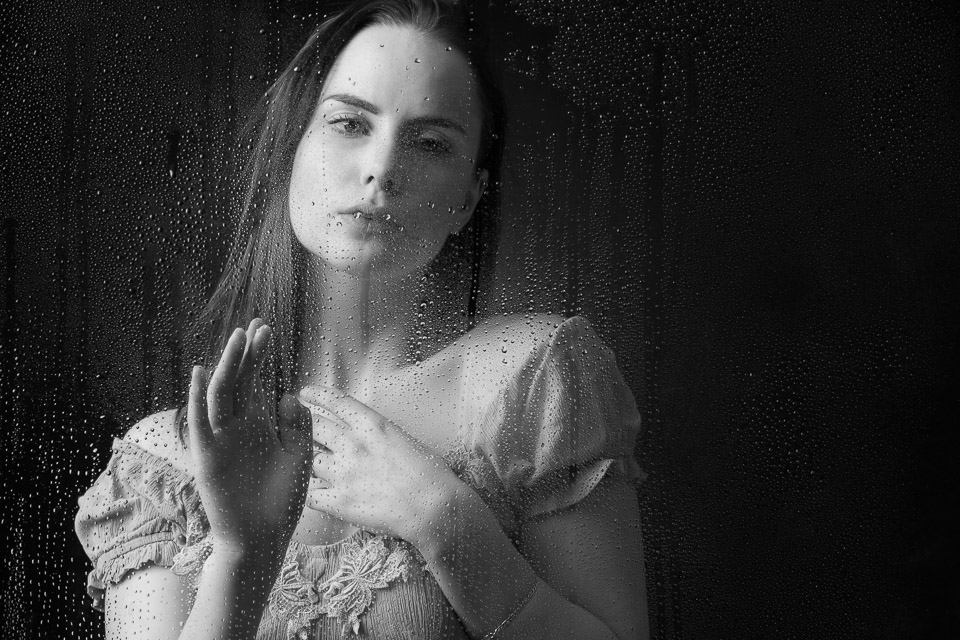
Together with model Danien, I got to work last Friday on a photo that gives the impression of someone looking outside through a window on a dreary day.
I used a large, clear sheet of plexiglass as the window. I already had a sheet of plexiglass in my studio, but if you don't have one yet, you may be able to find one at your local DIY shop. I ordered mine online some time ago.
I don't remember where, but a quick Google search led me to Kunstofplatenshop.nl, where you can order a sheet of plexiglass to size online. I would go for at least 3 mm thickness so that the sheet is sturdy enough to stand up.
The delivery costs aren't cheap, but if you order a large sheet, you probably don't want to carry it around yourself either. I think 80 by 80 centimetres should be enough for a shoot like this.
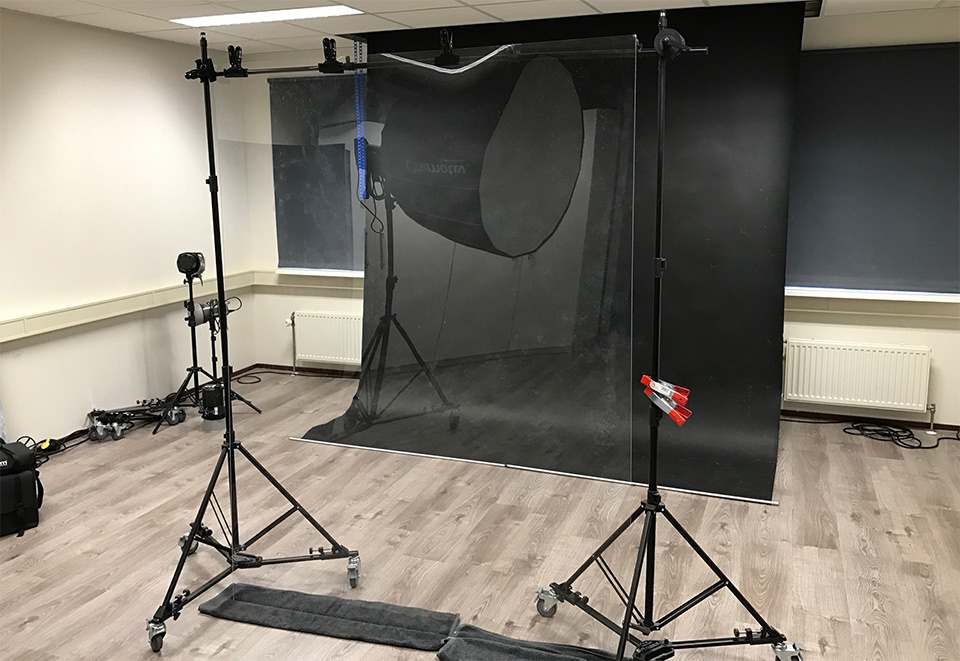
At the time, I think I went for 1.2 by 2 metres so that I could also lay the sheet on the floor and reflect a model in it. I haven't done that yet, though.
As you can see, I had already put towels underneath the sheet. Quite a lot of water runs off, of course, so this saves a lot of mess.
I sprayed the water onto the sheet with a spray bottle. This lets you control the amount easily. You can also vary the size of the drops by spraying from further away or closer up.
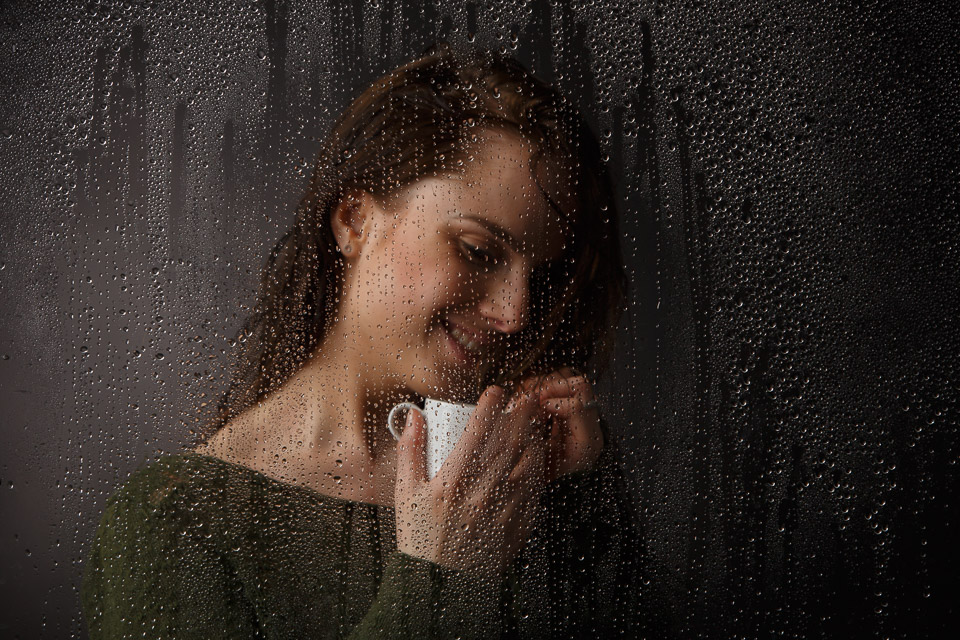
The main light in my photos comes from the Elinchrom Litemotiv Softbox. It gives a lovely soft light, and its round shape creates a nice round reflection in the eyes and water droplets.
I placed the softbox right next to the plexiglass sheet and at an angle from above. Most of the light came from the front, and therefore also fell on the drops, with a small amount coming from behind the sheet.
I aimed a flash with a grid at the black background. This stops everything from becoming pitch black, while leaving a slight difference in lighting that separates Danien's black hair from the background.
Once your lighting is right, it's mainly a matter of taking lots of photos. Pay some attention to where the drops are. It's often better to have few drops on and around the eye, so the viewer can make 'contact' with the subject in your photo.
Danien was also a pleasant model to work with here. She knew how to strike lots of nice poses. A model with some experience is usually easier to work with than someone without experience. You have to direct the latter more.
Inspiration
I got the idea for the shoot from a video by Gavin Hoey. In this video, he shows very well how you can carry out a similar photo session.
For the shoot, I also made a moodboard using Pinterest. Handy for yourself and for making it clear to your model what you have in mind. I found model Danien through a Facebook group for models, make-up artists and photographers.
About the author
Elja Trum is the founder of Photofacts and online photography course website Photofacts Academy. He has been writing about photography since 2006. Elja is also the author of (Dutch) books on composition, black-and-white photography, flash photography and portrait photography.
You might also like
-
 Photoshop: Add a reflection to a window
by Elja Trum
-
 5 Tips for Variety in the (Home) Studio
by Elja Trum
-
7 photography tips for rainy days
by Elja Trum
-
 Street photography tip: Go out when it rains
by Michiel Heijmans
-
 Long exposures in the rain
by Nando Harmsen

7 comments
-
 Luigi wrote on Friday 17 March 2017 at 09:21 | reply
Mmmm and yet it remains very clearly visible in your photos that they were taken in your studio. If you had taken that extra step in Photoshop as in the video, it would have looked a lot more realistic.
Translated from Dutch. -

-

 Michelle Peeters wrote on Friday 17 March 2017 at 10:57
| reply
I'm actually really curious how exactly you had positioned that large softbox so that the drops were also properly lit.
Translated from Dutch. -
 anneke wrote on Friday 17 March 2017 at 15:08 | reply
what a great idea! Thanks for the inspiration.
Translated from Dutch. -

-
 Gerda Noël wrote on Tuesday 21 March 2017 at 16:38 | reply
Did you then choose the budget lens, or is the other one better ?
Translated from Dutch.
greetings Gerda -

Have your say
Please note: Articles older than a week can only be commented on by signed-in visitors.Would you still like to comment? sign in or create a free account.
Become a better photographer every week
A practical photography tip in your inbox every week.
38,766 photography enthusiasts already receive the tips! More about the weekly mail. Or keep up to date via  Facebook.

Elja Trum
Photofacts; everything to do with photography!
Would you like to take better photos and keep up with what is happening in photography? Photofacts publishes articles that teach you something about photography — from a product announcement to a practical shooting tip or a look at a website. Photofacts covers photography every day and is a hobby project of Elja Trum's that got out of hand. The articles are written by a team of volunteer authors. If you would enjoy writing one or more articles for Photofacts, do get in touch.More about PhotofactsPhotofacts is made possible in part by
