

Photoshop: Add a reflection to a window
Saturday 25 March 2017, 14:41 by Elja Trum | 10,933 views | 5 commentsThis article was translated from Dutch with the help of AI. Read the original.
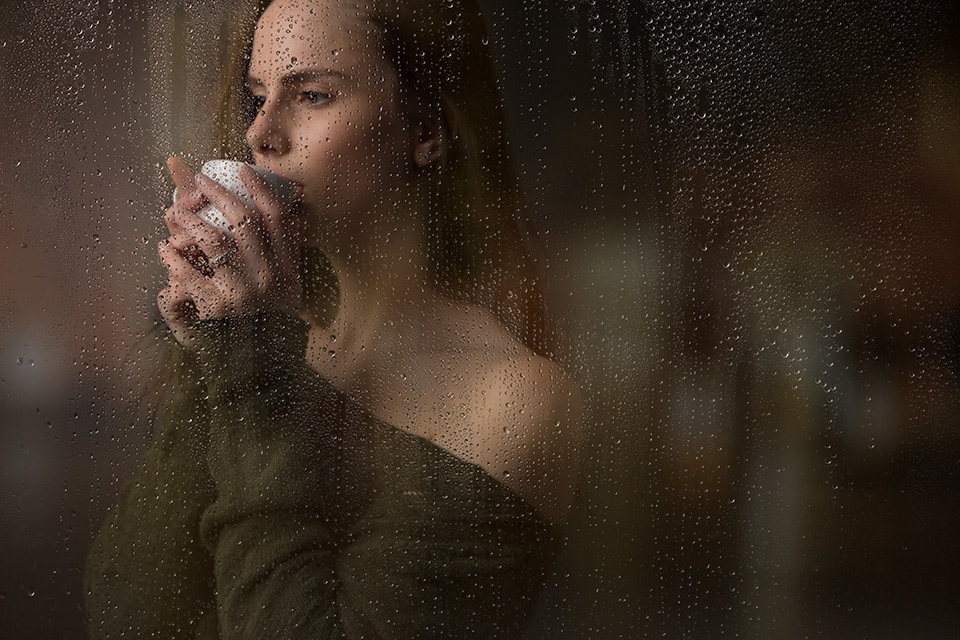
Last week I showed a few results from my rainy day photoshoot with model Danien. My inspiration for the shoot came from a video where they took things a step further by adding a reflection in Photoshop.
I have now done the same with a few of my photos, and it is a great addition.
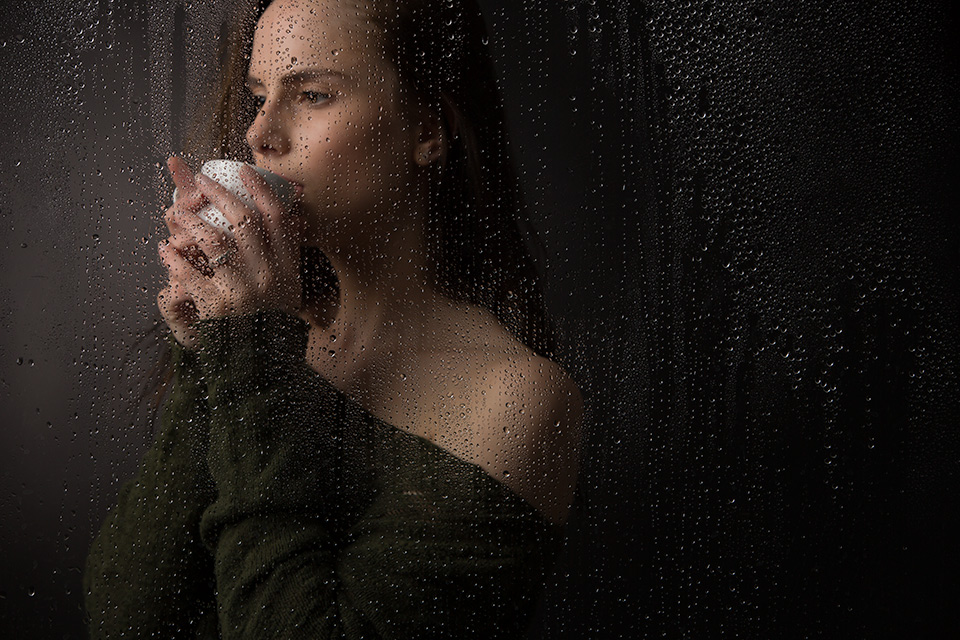
Adding a reflection like this is not difficult at all, it only takes a few steps in Photoshop.
Step 1: Find a reflection photo
To add a reflection to the glass, it is best to work with a photo that you use as the basis for the reflection. You can probably just use another photo from your archive. A street photo is a logical choice.
I chose a photo from an earlier shoot where I took photos in Nijmegen at night. I think a photo with reasonably varied light and dark areas gives a nice result.
What is in the photo is not even that important, because we are going to make it much more blurred later.
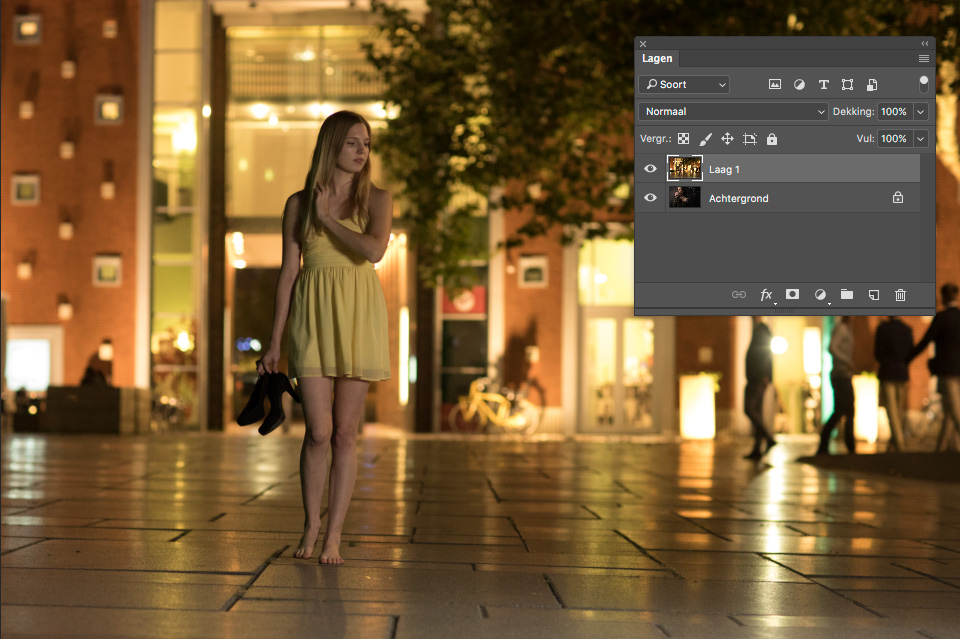
Open both the reflection photo and the photo to which you want to add the reflection in Photoshop, and copy the reflection photo as a new layer on top of the photo with the window where the reflection should appear. You can simply do this by copying and pasting (CTRL - C and CTRL - V).
Step 2: Change the layer mode
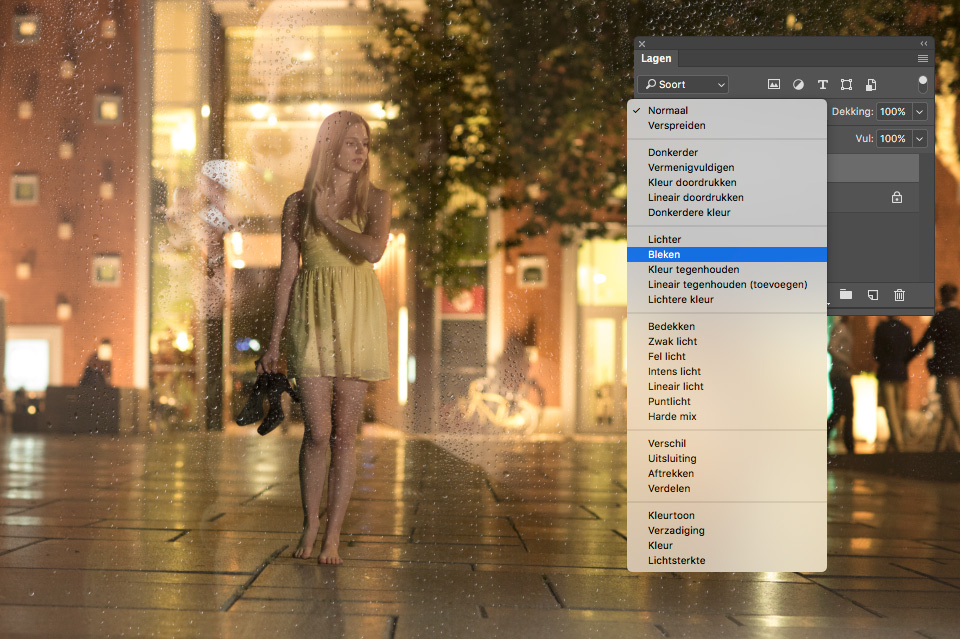
To bring back the underlying photo, the next step is to adjust the layer mode (layer blend mode) of the top layer. By default, it is set to 'normal', and in the Layers panel you can change this to 'screen' (screen).
Step 3: Reduce the effect
The effect is far too strong now, but fortunately we can easily tone it down. Set the opacity of the layer much lower. The amount can vary from photo to photo and of course also depends on your taste.
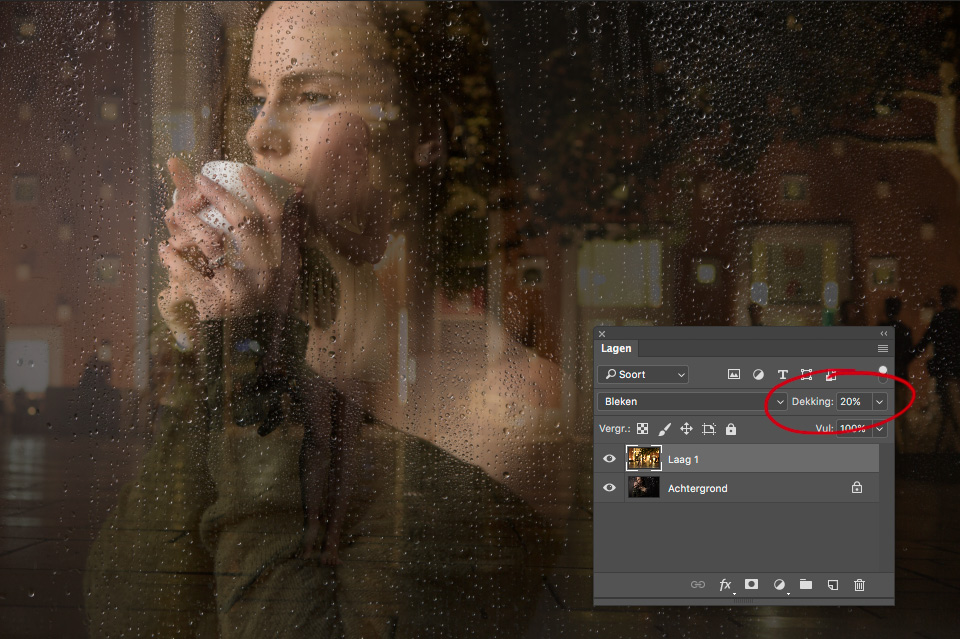
For this photo, I went with 20% opacity. If your reflection photo is larger than the underlying photo, this is also a good time to move the layer around so that the reflection is in a nice position in the photo.
Besides moving it, you can also flip it horizontally, for example, to get a different reflection. Still not happy? You can of course also use another photo as the reflection photo.
Step 4: Blur the reflection layer
Reflections are often not as sharp as the original, and they actually look even better when they are blurred patches. So we are going to blur the reflection photo quite heavily.
Go to 'Filter' -> 'Blur' in the menu at the top and choose 'Surface Blur'. You can use another type of blur as well, but this produces perfectly good results.
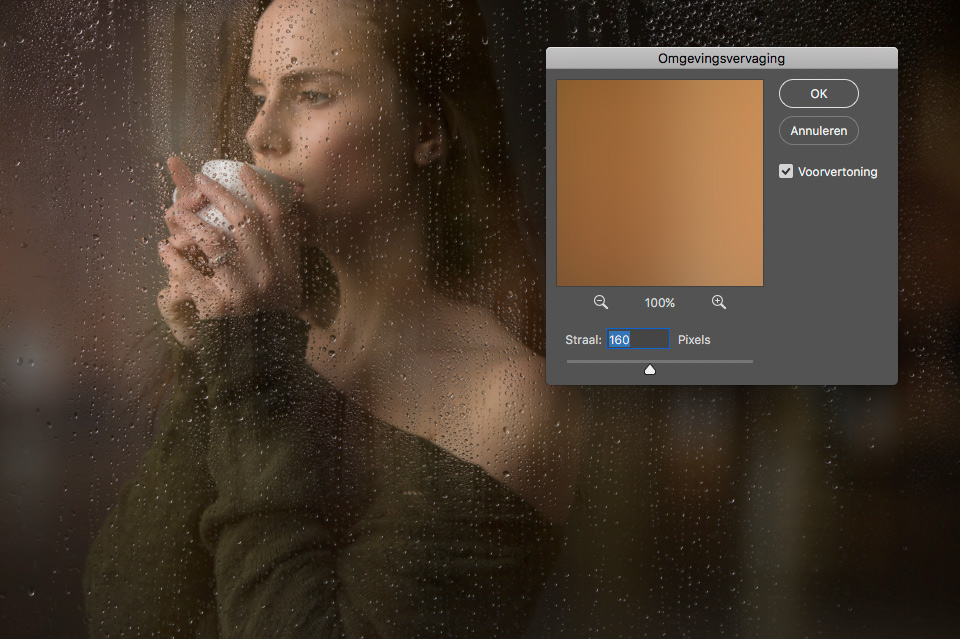
Choose a large radius so that the photo becomes properly blurred. Here I chose a radius of 160 pixels, but what you need also depends on the size of the photos you are working with.
You can see the result immediately, so it is easy to experiment and see what you like best.
Step 5: Mask the model
This last step is mainly a matter of taste. I thought the added reflection did not look equally good everywhere, especially on the model herself. You generally want to keep seeing her clearly.
Using a (large and soft) black brush, you can simply paint on the reflection photo to remove the reflection. You can also just reduce the reflection by making your brush less powerful (for example, press 5 to set the brush to 50% strength).
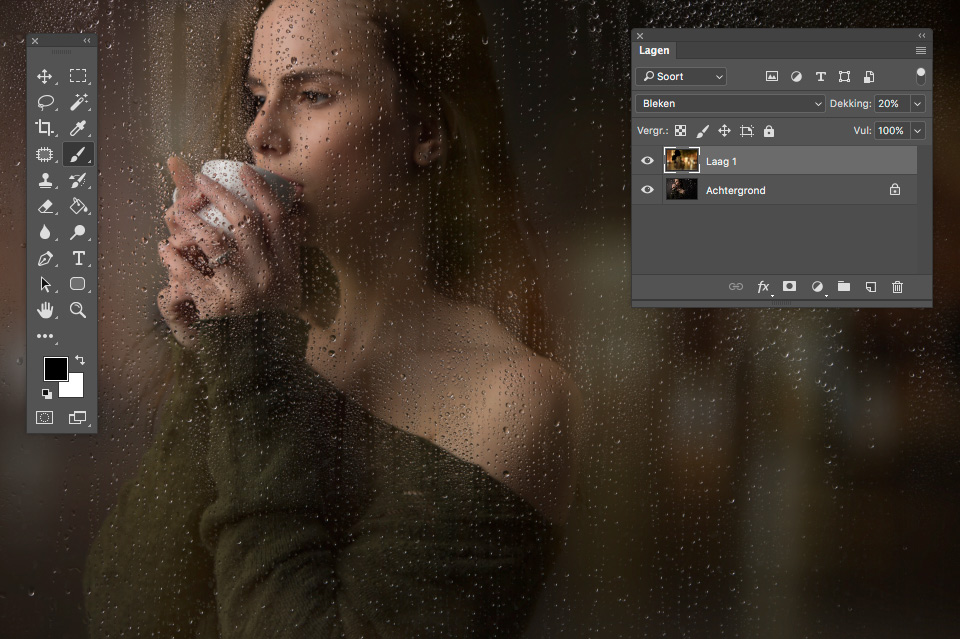
If you want to do this non-destructively, you can also use a layer mask on your reflection photo.
Try using different photos as reflection photos to create different results, and see which one you like best.
About the author
Elja Trum is the founder of Photofacts and online photography course website Photofacts Academy. He has been writing about photography since 2006. Elja is also the author of (Dutch) books on composition, black-and-white photography, flash photography and portrait photography.
You might also like
-
 A Dreary Rainy Day in the Studio
by Elja Trum
-
 7 photography tips for rainy days
by Elja Trum
-
 Street photography tip: Go out when it rains
by Michiel Heijmans
-
 Portrait photography tip: use a window's reflection
by Elja Trum
-
 Street photography tip: Reflections are everywhere, use them
by Michiel Heijmans
-
 Avoiding or removing reflections in glasses
by Michelle Peeters
5 comments
-
 Rick wrote on Sunday 26 March 2017 at 01:07 | reply
Personally, I think it adds a lot of value, clear explanation and a beautiful shot too!
Translated from Dutch. -

-

 Donald Willemsen
wrote on Tuesday 28 March 2017 at 22:43
| reply
Thanks for the clear explanation.
Translated from Dutch. -
 Chantal wrote on Wednesday 29 March 2017 at 20:03 | reply
thank you for the clear explanation with a beautiful result.
Translated from Dutch. -


Have your say
Please note: Articles older than a week can only be commented on by signed-in visitors.Would you still like to comment? sign in or create a free account.
Become a better photographer every week
A practical photography tip in your inbox every week.
38,766 photography enthusiasts already receive the tips! More about the weekly mail. Or keep up to date via  Facebook.

Elja Trum
Photofacts; everything to do with photography!
Would you like to take better photos and keep up with what is happening in photography? Photofacts publishes articles that teach you something about photography — from a product announcement to a practical shooting tip or a look at a website. Photofacts covers photography every day and is a hobby project of Elja Trum's that got out of hand. The articles are written by a team of volunteer authors. If you would enjoy writing one or more articles for Photofacts, do get in touch.More about PhotofactsPhotofacts is made possible in part by
