

Light from the Old Masters
Monday 24 January 2022, 20:02 by Frank Doorhof | 8,335 views | 7 commentsThis article was translated from Dutch with the help of AI. Read the original.
A question I often hear during workshops is how to gain control over light. And it really isn’t such a strange question.
Without exaggerating, I’d guess that most photographers let the light control them, but as a photographer you should actually control the light. So what causes this?
In the past, the photographer was roughly on a par with the village doctor, both true professionals and both working in a field the consumer knew absolutely nothing about. They also couldn’t possibly afford the equipment.
But (fortunately) things change.
Photography became increasingly accessible and Google is often your doctor these days... Okay, let’s focus on the photos. What I actually mean is that both professions were increasingly adopted by the masses as ‘professional’, while most of the knowledge came from the internet.
With the arrival of consumer cameras came the hobby photographer, of course, and naturally also model photography. But you probably understand that without that hugely expensive equipment, this was somewhat more limited.
Fortunately, the invention of the flash and the large softboxes came along. And believe it or not, a large light source used to be much easier to make than a focused light source, as expensive Fresnels were often used for that, taken straight from the film set.
A fun aside might be that when you watch a large proportion of the really old Hollywood films, you often see a very soft glow over the image in shots with the women. This is absent when the men are on screen.
Also pay close attention to how this is solved in scenes where two actors are shown in close-up. You could see this as the first form of Photoshop or retouching, even though it was done during the shooting process using special filters.
But of course, the consumer wanted things to be quick and good. You couldn’t check the back of the camera. Well, you could see which roll you had in it and how many shots you had left, but that was about it.
So you had to make sure everything was always right. A large light source is therefore ideal, as there is much less chance of mistakes. While the professional could use a Polaroid, light meter and darkroom techniques, the hobby photographer preferred prints and ‘knowing for sure’ that it was right.
And of course, hobby photographers become professionals and then stick with what they know works and what clients hire them for.
So a fantastic period of photography has effectively been forgotten by the general public.
Studios such as Harcourt still keep this alive, but they are unaffordable for many people. And if I’m completely honest... I don’t think the quality is as outstanding as that of the real masters, such as George Hurrell.
Don’t be mistaken when you look him up, though. He mainly shot with an 8/10 camera and the photos were HEAVILY edited. Just not in Photoshop, but in the darkroom. A true art form. But the result is literally beautiful and captures the essence of the person.
Now you might wonder, when looking at those photos, what on earth you would want with that dated look in modern times. And that’s exactly the point.
Even when you work with large softboxes, there are a huge number of options for how you use this light. Do you use the sides for extra soft light? Do you use flags to block the light? Do you use it close up or far away, et cetera.
When I started with model photography, I started in my own way. I’m a very theoretical person. Despite hating manuals and reading books, I do want to know how something works.
I don’t need to take it apart and repair it, but I simply want to know why something does what it does.
My first flash kit also came with a light meter straight away. I was even surprised that the flashes could be delivered from stock, while the light meter had a delivery time. In my mind, the light meter was for everyone, while flashes were personal to everyone, depending on budget, space, et cetera.
And with the light meter in hand, I got to work. First with a model, but soon she was replaced by a mannequin. At least that stayed completely still.
I tried every modifier I had. What if I do this? What if I do that? And so on.
It soon became clear, for example, that the grid for my softbox did absolutely nothing. The holes were not only much too large, the whole system was simply far too thin, meaning the light still blasted through the grid as if there was nothing in front of it. You then wonder how this can be on the market.
But I also ran into problems.
And those problems are actually the tips section of this article.
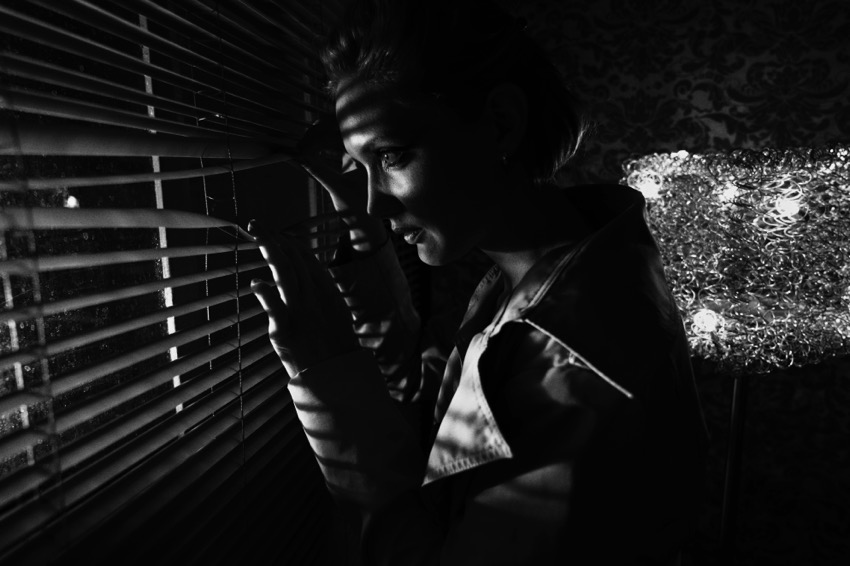
How many of you have tried photographing a model behind blinds or other objects, with a clear shadow effect on the model? I’m guessing that for most of you it went just as it did for me.
The shadows were there, but I absolutely didn’t see a shadow on the model as I wanted. And then George Hurrell suddenly comes to mind, and of course you start wondering how it was possible for them to do it back then, but not now?
There must be something.
And fortunately, it’s very easy to explain.
If we look back at the use of flags, which used to be found in practically every studio, they were not only used to remove light, but also to literally shape the light in terms of its shadow.
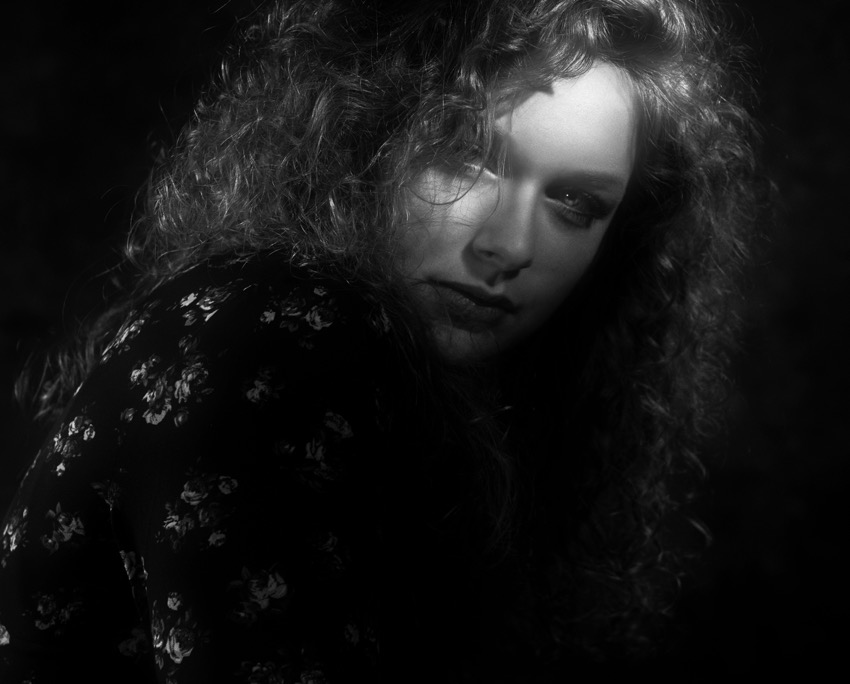
In this photo, you can clearly see that a flag has been used, but there is still a lovely soft transition in the shadows.
The way the flag behaves is as follows:
Place the flag close to the model and the shadow edge becomes sharper. Place it closer to the light source and the shadow edge becomes softer.
So if we place the blinds close to the model and the light far away then... Exactly.
If we change the distance of the flag between the model and the light source, we have complete control over how the shadow falls across the model, and this translates directly to our blinds.
In the next photo, you can clearly see the lines running across the model’s face. I did this by placing the model almost directly behind a pattern and placing the light 3-4 metres away.
This is exactly how the first photo with the blinds was made, too. The question will immediately arise, ‘but won’t the light blast through the entire studio?’ Yes, it will. So we need to do something about that.
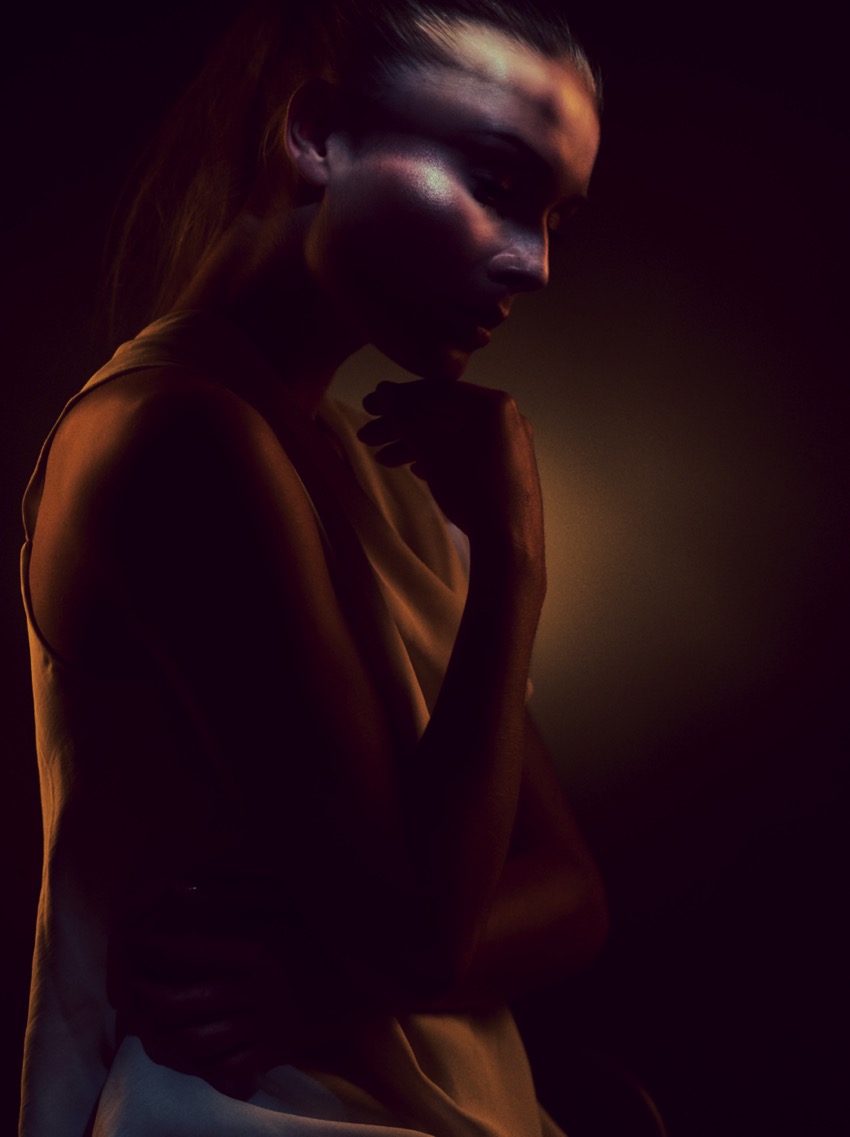
At the beginning of the article, I talked about grids, remember? These are a kind of honeycomb that you place in front of your modifier. They are available for softboxes, reflectors, et cetera.
You can put a grid in front of almost anything that gives off light. Grids are also available in different thicknesses, sometimes literally in thickness, but often simply with smaller spaces. The end result is that the beam of light from the flash becomes smaller and more focussed.
So do you want to place a flash far away and light only one metre? Then you need a grid with small spaces. Do you want to place the same flash very close and light one metre? Then you probably don’t need a grid, or a grid with very large spaces.
Do you want to place a flash on the other side of the studio and light one metre? Then you really need very small spaces in the grid. This is also why you should always buy a set of grids in different thicknesses.
Grids are usually also used for the familiar round effect on the background.
.jpeg "Fer Vriesman")
Personally, I also think it looks great as a direct light source on the model, but bear in mind that the shadows will become very hard.
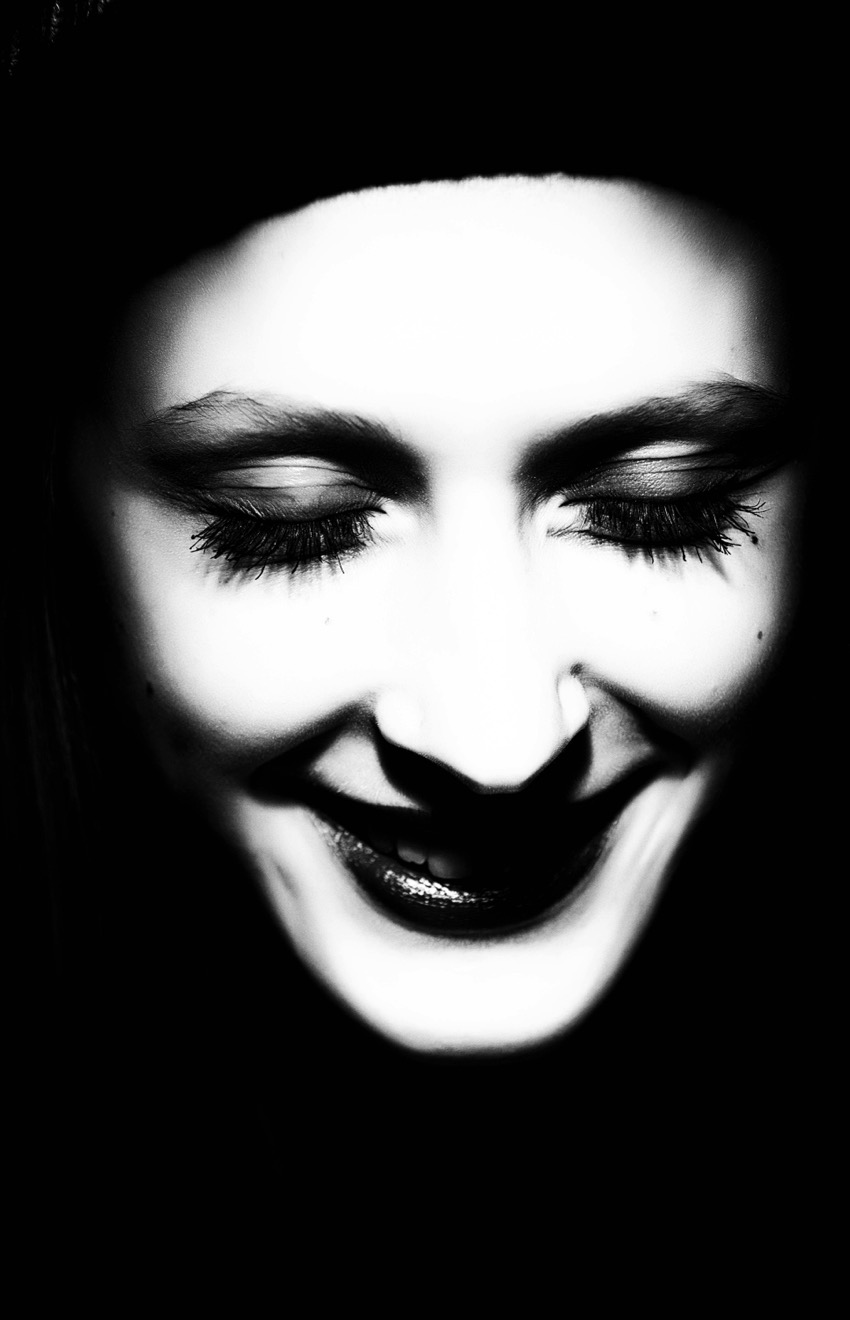
By looking at the old masters, we can see techniques that we have actually forgotten today, or that are quickly dismissed with, ‘that must be Photoshop’.
By studying those old masters, you can learn a great deal as a photographer about lighting techniques, but above all about control.
Over the years, I have made various series that rely heavily on the old masters in terms of lighting, and that could almost be described as copies of that style rather than as my own style.
But if you look at the following photos now, I think you will immediately make the connection with those old-fashioned techniques. By mixing them with modern styling, colour, et cetera, they become something of my own again.
Because never forget one thing. It may have been shot in the past, but light still works in exactly the same way, so you can still use those techniques.
.jpeg "Claudia")
Inspired by film noir. Very hard, direct light and a dark coat. Through the pose and lighting, you almost no longer get the idea that this was simply shot in the studio.
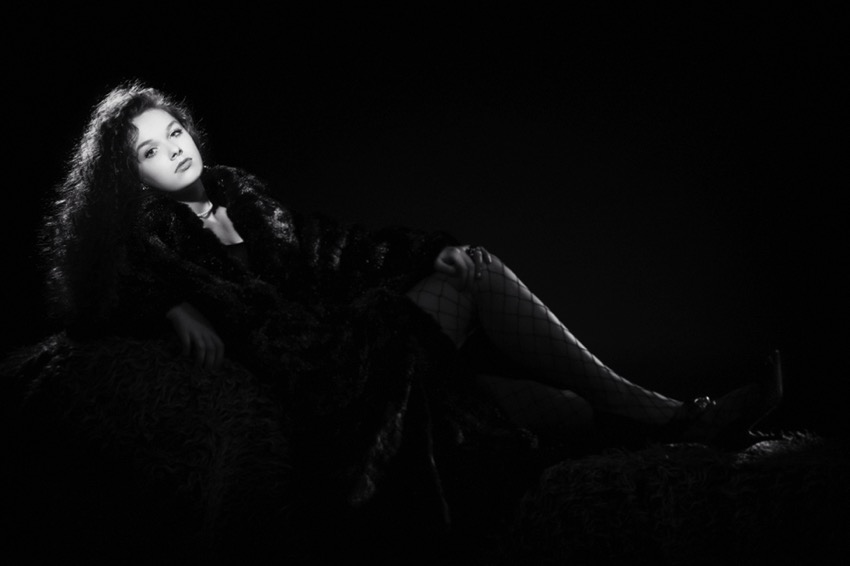
Directly ‘borrowed’ from George Hurrell, still a fantastic style for glamour in my opinion, and very challenging to light.
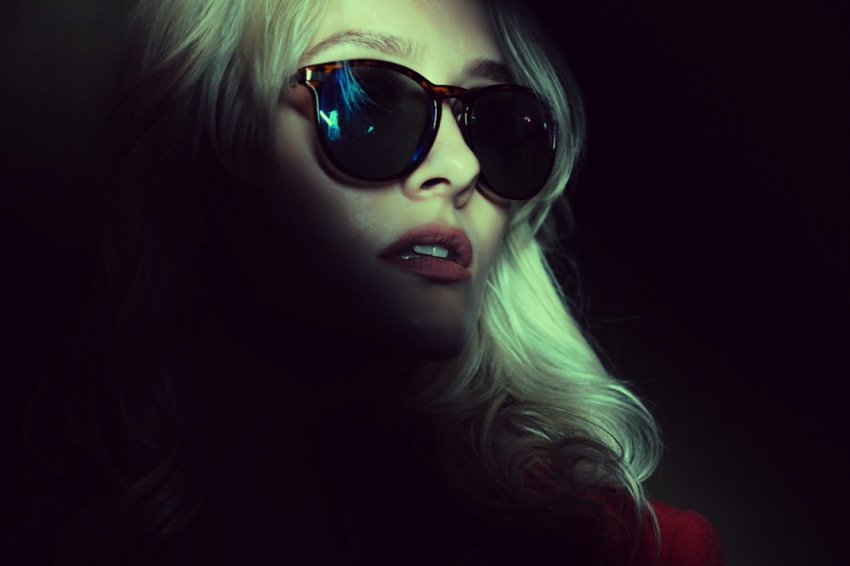
Working with barndoors on an LED tube, or using flags, gives you a huge range of possibilities as a photographer.
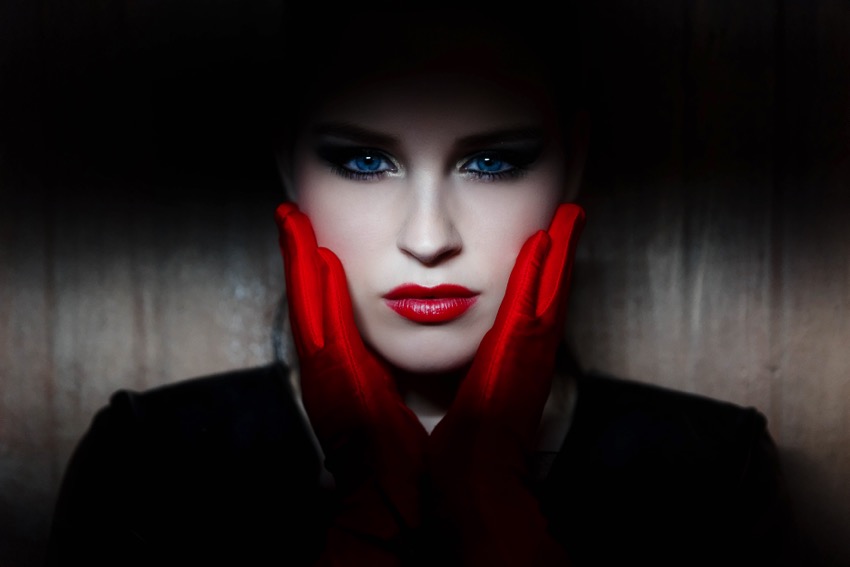
Use the barndoors with high-contrast colours and it jumps off the screen.
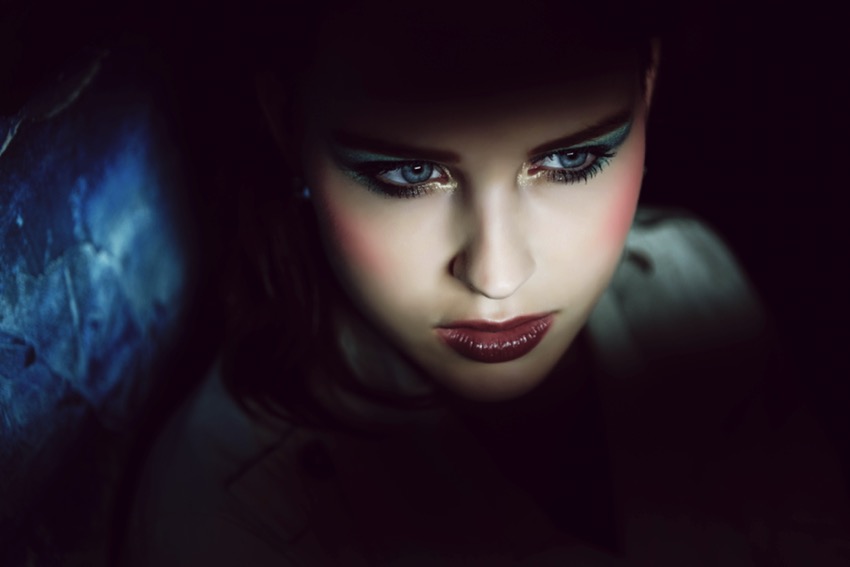
But it also works extremely well for making a model’s eyes really stand out.
But sometimes, of course, you want to light more than just the eyes or the face. This is one of the reasons I’m such a huge fan of the striplight with grid. You can control the light extremely well with this and still light a substantial area. Personally, I usually use strips between 1 and 1.30 metres long.
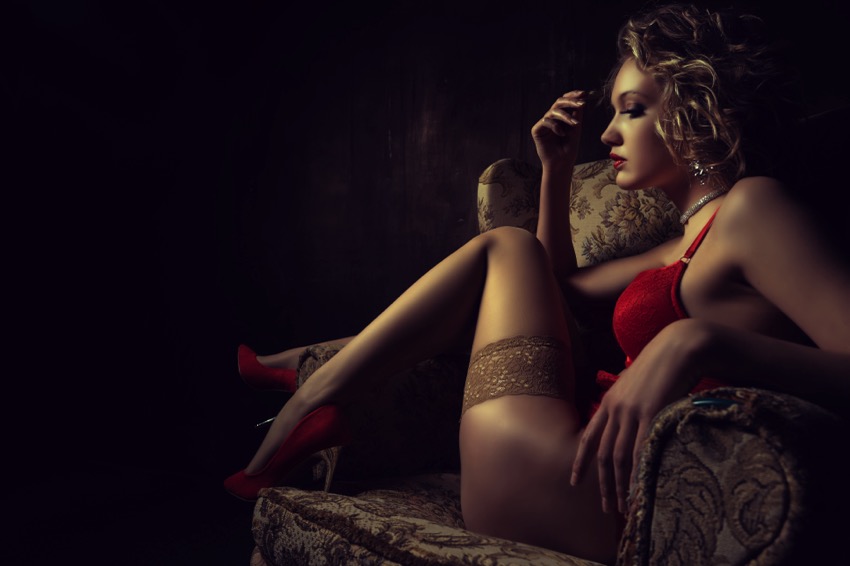
Personally, I still think this is an extremely beautiful type of glamour lighting. Also for, for example, body scapes.
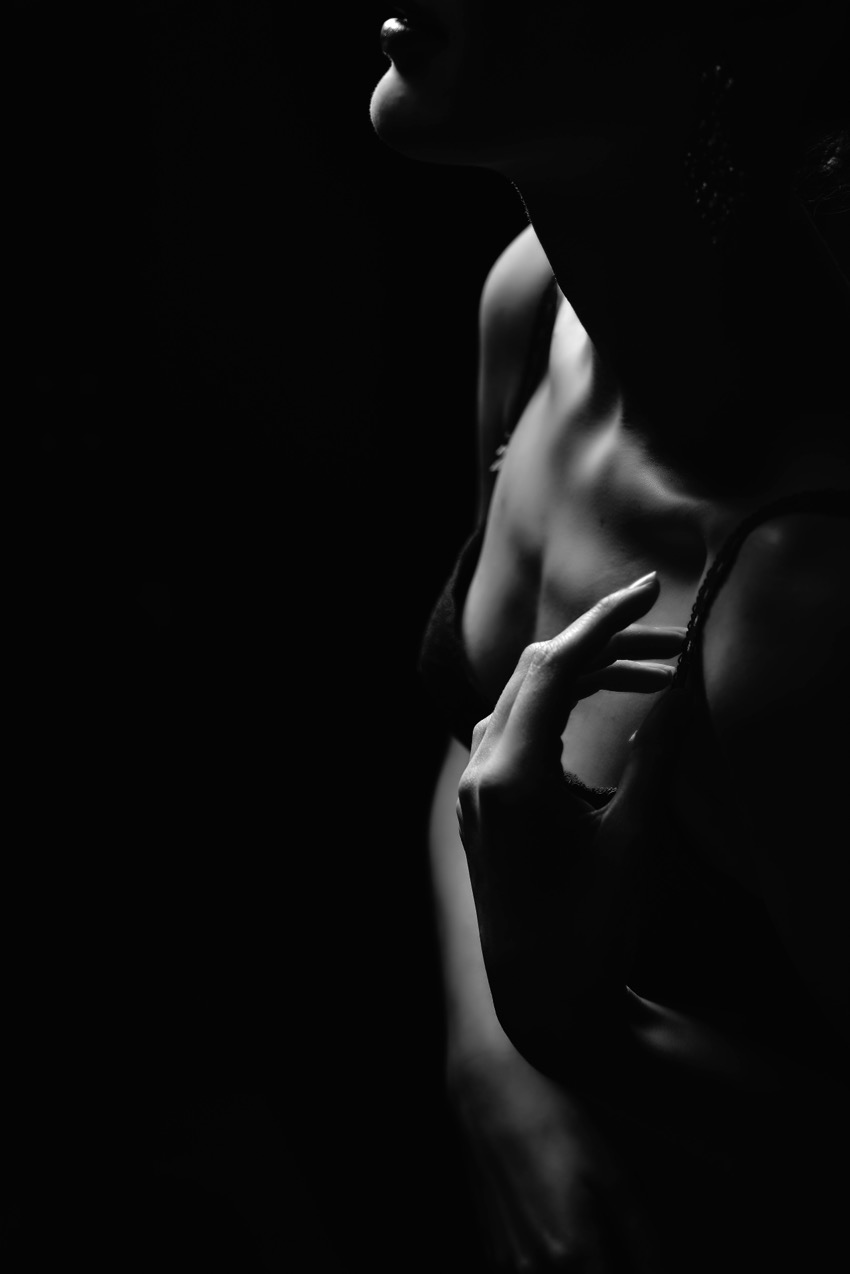
But I usually work with harder sources for this style. As mentioned earlier, do bear in mind that shadows can come across extremely hard, so good foundation and paying attention to where the shadows fall, especially around the nose, can prevent disappointment.
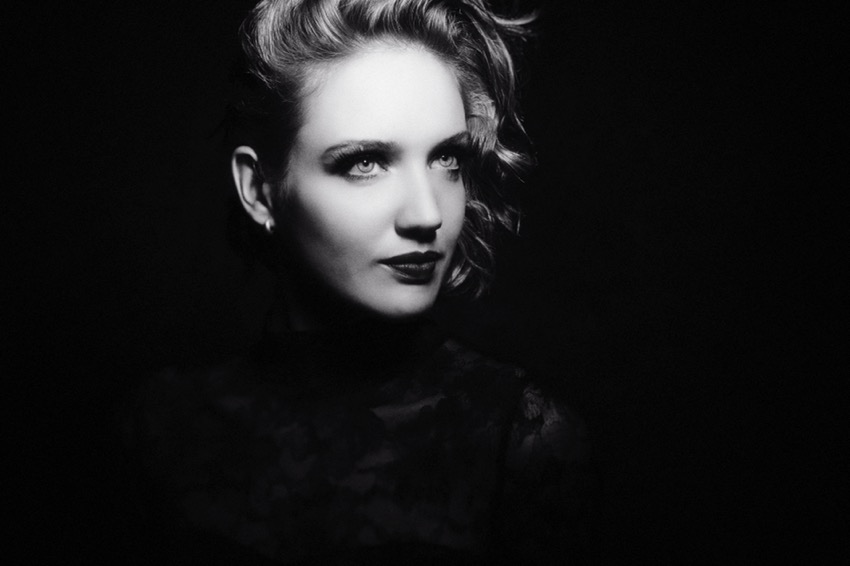
You can also play around with the light position, such as the more frontal position on the face shown above, or of course the familiar Rembrandt setup.
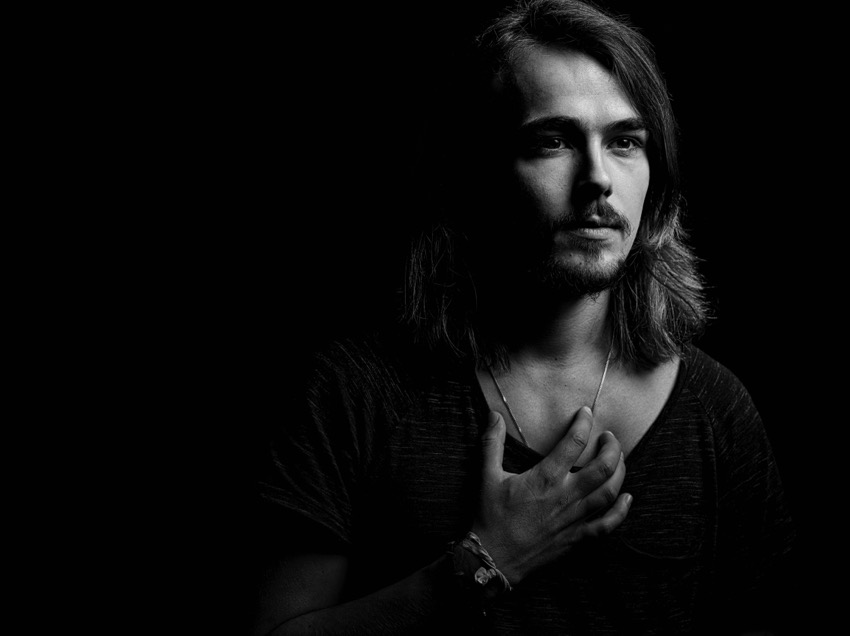
And eventually, of course, you start combining things.
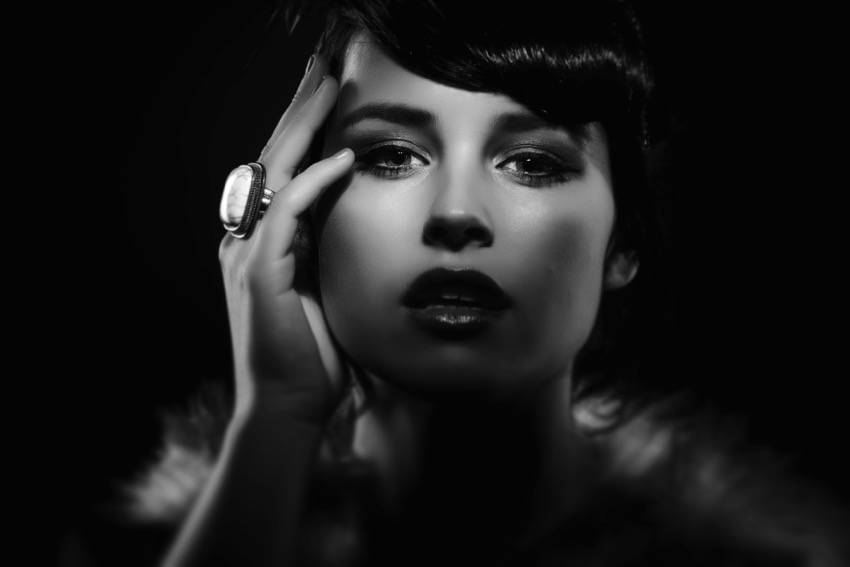
Soft light with some areas more shielded using flags. This gives us a light pattern on the face, and the ring strengthens the photo for me.
But by using flags, you can also shield parts of the light, making it easier to include a small light source such as a lighter in the photo, although you also need to leave your shutter open slightly longer for this, of course.
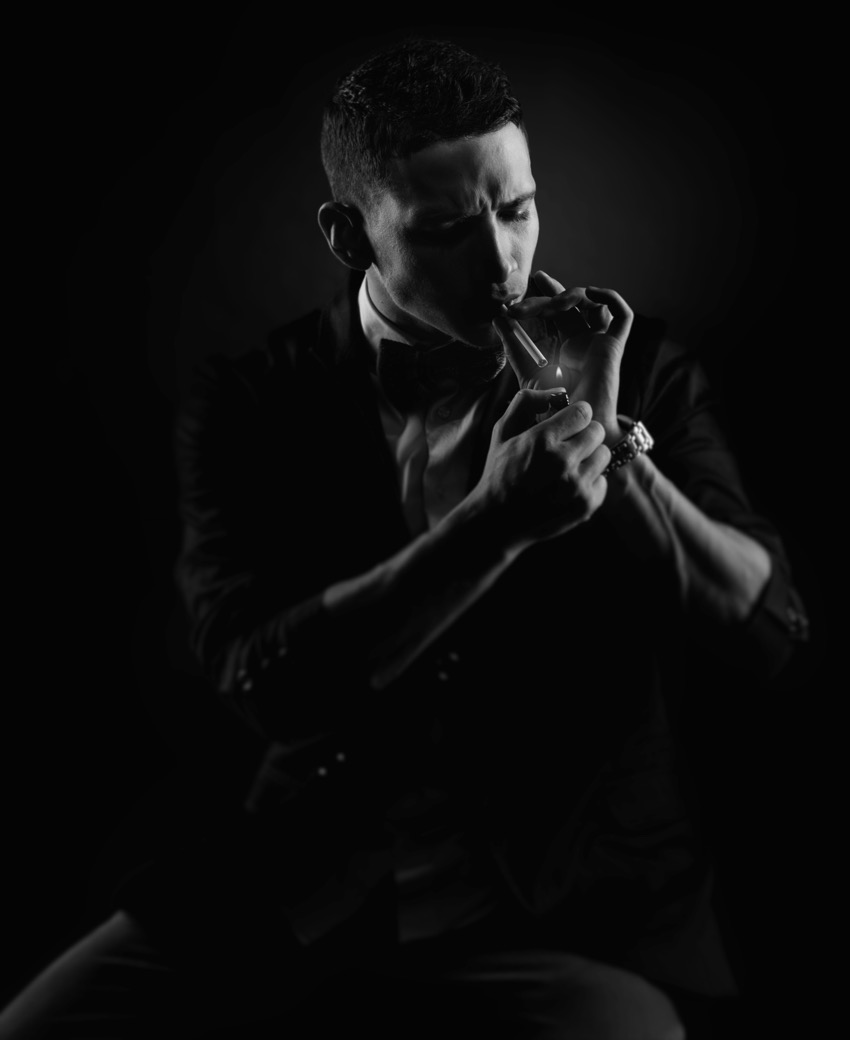
You can also use the technique with flags with patterns. They don’t have to be blinds. In one of the workshops, we once spent the entire day working with a single accessory, a simple room divider.
It’s surprising to see how many different ways you can use something like that. One of the photos fits this article quite well. Here, we use it as a pattern on the wall. The light source is therefore far away and is controlled by a grid and two large flags that shielded the light further.
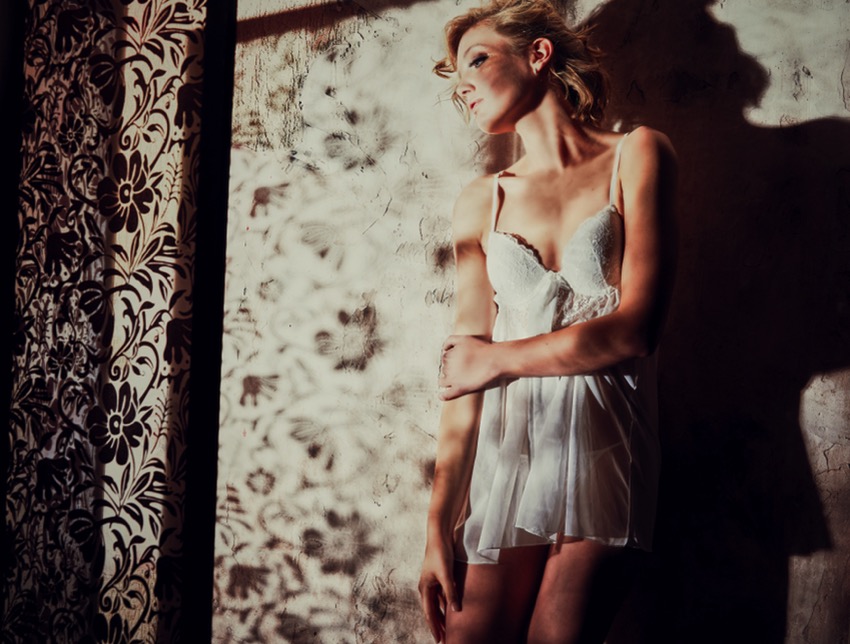
So put those large softboxes away in the cupboard for a week and force yourself to use only reflectors with grids, nothing else.
At first, you’ll be shocked by the hard shadows, but believe me, eventually you’ll get them under control. And when you switch back to softboxes without grids, you’ll soon notice that you have much more control over your light, but above all... that softboxes are actually rather boring.
About the author
Frank Doorhof blogt dagelijks in het Engels op zijn website en geeft wekelijks workshops model fotografie in zijn studio in Emmeloord, maar ook op locatie in binnen en buitenland. Van beginners tot gevorderde, iedereen kan bij Frank terecht. Ook voor specifieke 1 op 1 workshops, of maatwerk voor groepen.
You might also like
-
 5 Tips for Variety in the (Home) Studio
by Elja Trum
-
 Review: 'Photoshop Masters' by Rob de Winter
by Huub Keulers
-
 A workshop must not be an escape from your own uncertainty
by Michiel Heijmans
-
 Switching to the Mac Studio or not? Part 1
by Nando Harmsen
-
Switching to the Mac Studio or not? Part 2
by Nando Harmsen
-
 Impressive underwater photographs by George Karbus
by Michelle Peeters
7 comments
-
 Robert wrote on Tuesday 25 January 2022 at 12:36 | reply
Measuring is knowing Frank. And balancing front, side and backlighting. But who still does that. Lots of shooting and ' saving'
Translated from Dutch.
with an editing program.
Photo-shooting regards Robert -

 frank doorhof
wrote on Tuesday 25 January 2022 at 13:12
| reply
frank doorhof
wrote on Tuesday 25 January 2022 at 13:12
| reply
Absolutely true
Translated from Dutch.
And sometimes a light meter is indeed difficult to use but in 99% of cases it at least gives you the right basis
You can do without one but it becomes so much more work -
 Dies Groot wrote on Tuesday 25 January 2022 at 13:19
| reply
Dies Groot wrote on Tuesday 25 January 2022 at 13:19
| reply
Enjoyed your great article Frank, compliments!
Translated from Dutch.
If you want to enjoy more, also watch a 57-minute documentary about George Hurrell where you see him at work up to the age of 88, among other things in his studio. After almost every session of moving his lamps around for a very long time to model light and shadow, he ultimately makes just one (!) photograph with his 8x10 camera and then exclaims: Another masterpiece!
Wonderful. -
frank doorhof
wrote on Tuesday 25 January 2022 at 14:32
| reply
George Hurrell is fantastic and should be known by everyone.
Translated from Dutch.
I regularly give course participants the assignment to buy a Polaroid and shoot only with that camera for a week, using max 2 cassettes.
You quickly notice how often you actually take photos that you could make much better with a few small adjustments (once you realise that every photo costs money).
It took me from 200-300 photos in a session to barely 50. And many more keepers -
 Pater wrote on Tuesday 25 January 2022 at 17:12 | reply
...Meh. The piece doesn't grab me. Millions of books have already been written and YouTube is drowning in them.
Translated from Dutch. -
 André wrote on Tuesday 25 January 2022 at 19:53 | reply
What I would really appreciate is seeing the lighting setups and the light ratios between the sources for a few photos as well. That makes it easier to get started with it yourself and then vary things a bit. I usually prepare the setup (with a mannequin and a light meter) but often I still end up spending quite some time fine-tuning everything because with a real model it works just a little differently after all. It would be nice to see how you (FD) prepare this in practice with a setup of flashes and then fine-tune it for a few of the photos shown - with a diagram of the setup and a short video.
Translated from Dutch. -
frank doorhof
wrote on Tuesday 25 January 2022 at 22:11
| reply
Hi
Translated from Dutch.
I don't have a setup photo for every photo. Besides, with this kind of work it's often just a matter of turning the light slightly and the result is completely different
But who knows, maybe it will be easier to see soon
Have your say
Please note: Articles older than a week can only be commented on by signed-in visitors.Would you still like to comment? sign in or create a free account.
Become a better photographer every week
A practical photography tip in your inbox every week.
39,024 photography enthusiasts already receive the tips! More about the weekly mail. Or keep up to date via  Facebook.

Elja Trum
Photofacts; everything to do with photography!
Would you like to take better photos and keep up with what is happening in photography? Photofacts publishes articles that teach you something about photography — from a product announcement to a practical shooting tip or a look at a website. Photofacts covers photography every day and is a hobby project of Elja Trum's that got out of hand. The articles are written by a team of volunteer authors. If you would enjoy writing one or more articles for Photofacts, do get in touch.More about PhotofactsPhotofacts is made possible in part by
