

Review: Aurora HDR 2019
Friday 12 October 2018, 11:44 by Michelle Peeters | 11,908 views | 2 commentsThis article was translated from Dutch with the help of AI. Read the original.
You can edit HDR photos with various software packages. One option is Aurora HDR from Skylum. It lets you create stunning HDR images very easily and in no time at all. We tried it out for you.
High Dynamic Range
HDR, or High Dynamic Range photography, is a technique that has existed for decades, but only really began to take off around 2005. HDR involves combining photos taken at different exposures.
Often using a technique known as bracketing. The aim is to create a single image with very bright areas (without overexposed parts) and very dark areas that retain detail.
Over the past few years, the software needed for this has become more powerful, cheaper and much easier to use. With just a few clicks, anyone can create beautiful HDR images.
Aurora HDR 2019
Aurora HDR 2019 has been the latest addition to this category since 12 September this year.
It was developed by Skylum (formerly Macphun) and is a programme aimed at casual users who want a fun creative outlet while also meeting the demands of professionals who earn their living designing beautiful photographic works.
If you want a single programme that can handle all your HDR needs, regardless of your skill level, Aurora HDR 2019 could be the right tool for you.
What is HDR photography, exactly?
HDR photography is about getting the best of both worlds when taking photos. Especially with photos of static subjects such as architecture or landscapes.
When you take a photo with very bright areas, such as a sunrise or sunset, you can expose for the highlights (that is, the lightest areas in the photo). This then results in the dark areas becoming very dark or even underexposed (without any detail).
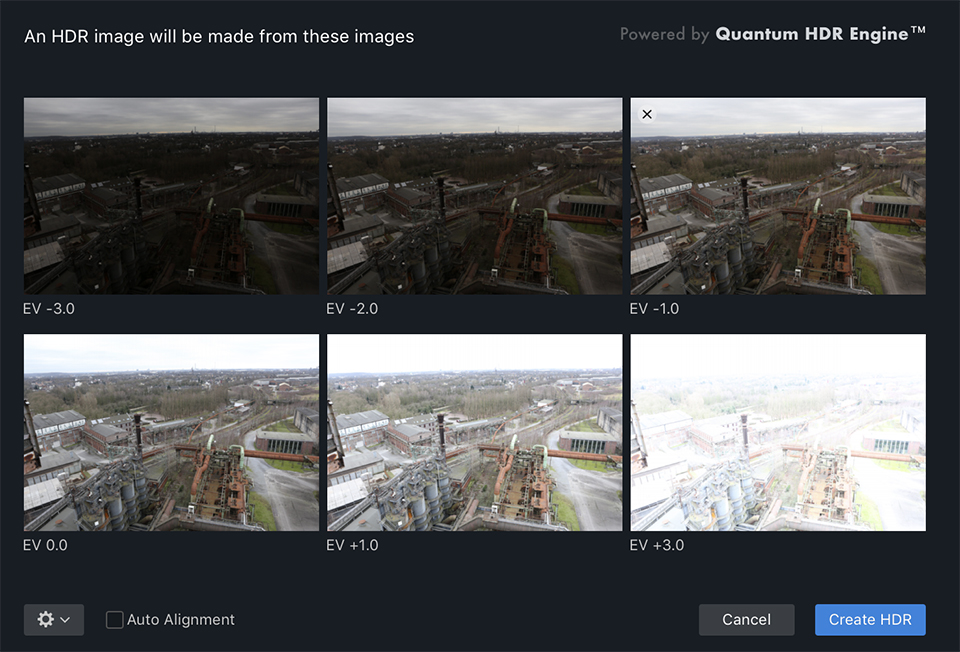
Alternatively, you can choose to expose for the shadows (that is, the dark areas), with the result that the bright areas become extra bright or even overexposed. HDR photos are created by taking multiple exposures, usually three or more, of the same scene: one underexposed, one correctly exposed and one overexposed.
You can then use software such as Lightroom or Photoshop to combine all the images into a single photo with detail in both the highlights and shadows.
Aurora HDR is different
Compared with other offerings on the market, Aurora HDR's strength lies in its simplicity. It is much easier to use and just as capable as other HDR applications, while also being very competitively priced.
Unlike Adobe applications, for example, it is available as a one-off purchase rather than a monthly subscription. When you open the programme, you see one large button that lets you load one image or multiple exposures of the same image. That is really all you need to do to get started.
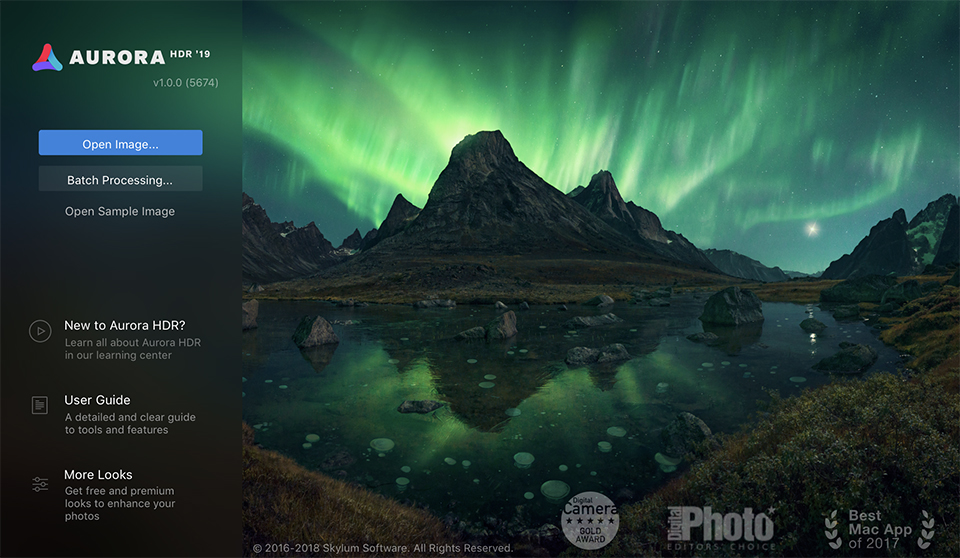
If you dig a little deeper, you will find two additional options: Batch processing and loading sample images.
The first is useful if you want to quickly apply specific HDR processes and presets to lots of images. Although this can be useful when working through multiple images, it is not recommended for beginners.
What's new in Aurora HDR 2019
Whether you are a beginner or advanced user, many of the changes in the 2019 version will significantly improve your workflow. The programme had already been rewritten, with improvements such as increased speed, better RAW image processing and a more user-friendly interface in mind.
The newest version also introduces the AI-powered Quantum HDR Engine, a new tone-mapping algorithm that uses neural networks to create highly realistic and immersive high dynamic range photos quickly and efficiently.
The programme provides very powerful HDR editing, seamless merging and competitive pricing.
Aurora HDR 2019 also brings HDR Smart Structure for realistic, artefact-free structure, LUT Mapping, new looks instead of presets, and much more.
The 2018 version already included a History panel showing all the edits you had made to an image, much like the same option in programmes such as Lightroom.
It also already included a lens correction tool and a large number of other small but noticeable adjustments, while retaining the foundation of powerful yet user-friendly HDR tools for both professionals and beginners.
Skylum clearly shows that it is genuinely committed to developing its apps. It is clear that Skylum will not let its customers down easily and will continue developing its software.
They have been making software for more than a decade, and it is good to see this commitment to continuous improvement from their developers. It is one of the reasons why I enjoy using their software so much.
Other features in Aurora HDR include:
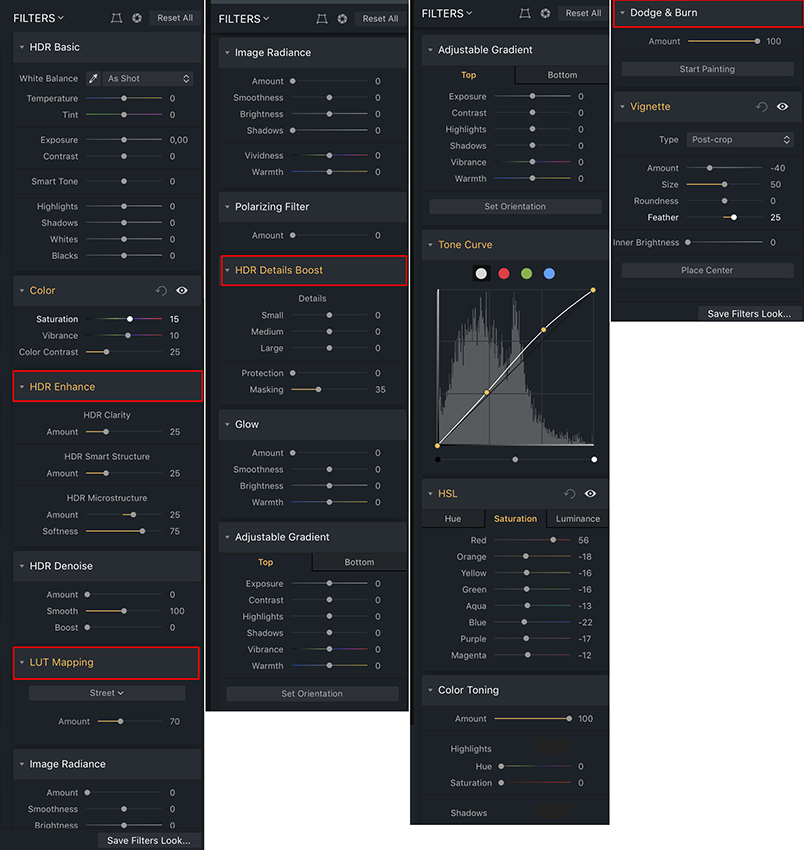
* A transformation tool
* Dodge & Burn filter
* Flipping and/or rotating images
* HDR Details Boost Tool
* New tone-mapping engine for more natural starting results
* HDR Enhancer
* Improved HDR structure
* Additional blend modes
Getting started with Aurora HDR
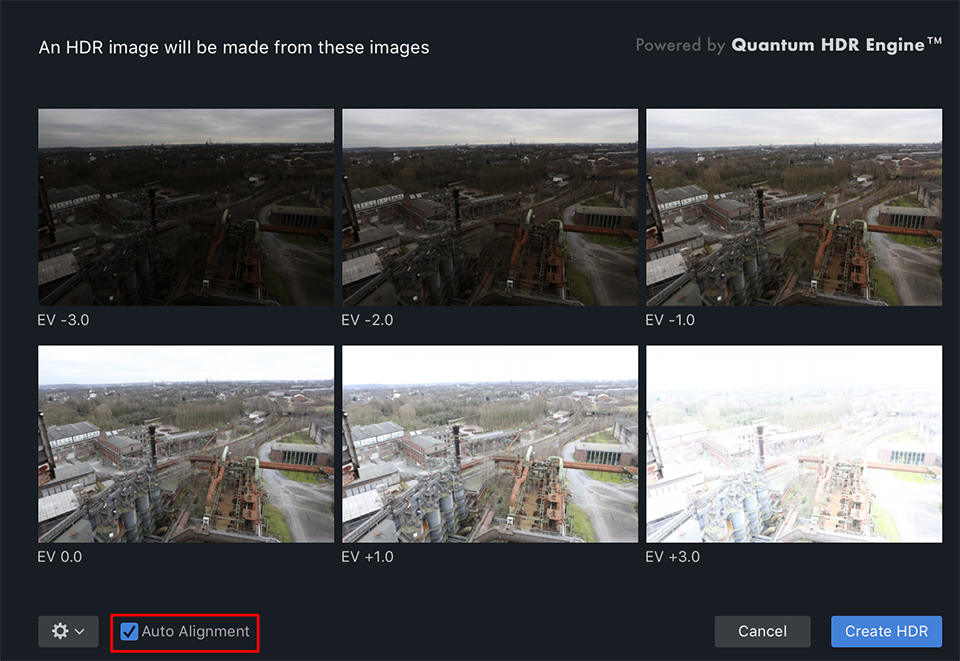
If you are not yet familiar with HDR processing and do not know where to start, click Load sample files and you are already on the right track.
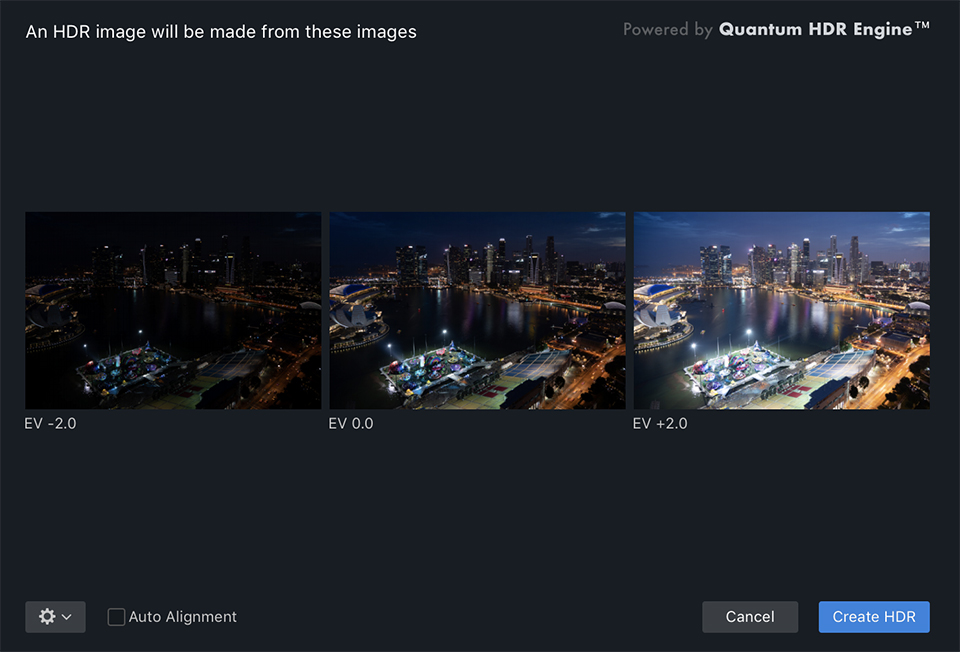
The programme displays thumbnail previews of three separate images: one underexposed by two stops, one correctly exposed and one overexposed by two stops.
When the programme combines all three, you essentially get one HDR photo that you can then adjust and edit as you wish using numerous controls, filters and effects.
When using your own JPEGs instead of the sample images, you get a similar process, with Aurora HDR loading thumbnails of your images before you confirm that you want to continue merging them.
Using a tripod is, of course, ideal for taking perfectly aligned photos. Even so, the horizon lines or other elements within the image are sometimes slightly misaligned.
Click the Alignment button to have the programme correct this automatically. Additional settings offer options such as removing chromatic aberration and moving objects that changed position between each exposure.
Fortunately, Aurora also works with RAW files. You can work with one correctly exposed RAW file or use multiple RAW files with different exposures to give yourself even more room to experiment when creating your HDR images.
The 2019 version has an improved RAW engine, resulting in improved colour reproduction and accuracy. Very welcome!
First impressions
Once your images have been loaded into the main interface, generating an HDR image can be as simple or as complex as you want it to be.
The interface seems overwhelming at first, but after a few minutes you will feel at home. The non-destructive nature of the editing means you do not have to be afraid of experimenting with the different presets, sliders and options without being able to ruin anything.
Workflow
Aurora HDR is designed to be fast, efficient, flexible and familiar. The sliders on the right for adjusting parameters such as white balance, exposure, brightness and sharpness are reminiscent of those in Lightroom.
Aurora HDR offers many of the same options. I find it more efficient to start with a preset and then edit from there. Just as you would click a preset such as Aged Photo, Bleach Bypass or Antique Black and White in Lightroom.
Using these presets in Lightroom simply applies predetermined values to various sliders, such as saturation, grain, clarity and colour. You can then change as much as you like.
Aurora HDR works in exactly the same way. Choosing a preset does nothing more than change the values of the Tools sliders on the right of the screen, which you can then modify as you see fit.
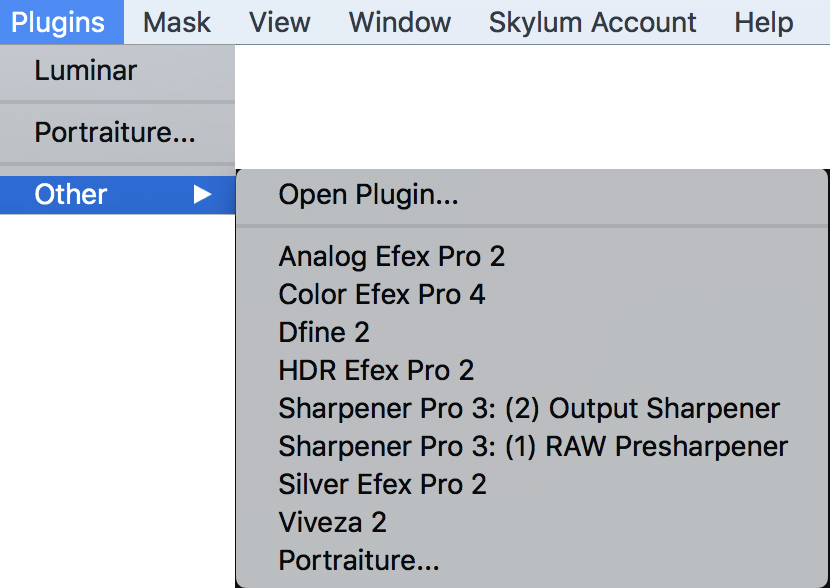
Aurora works nicely with most other image editors on the market, including Lightroom and Photoshop. You can easily use it as a plug-in, which means you can do all your normal work in Lightroom, quickly send an image to Aurora HDR for additional editing and save it straight back into Lightroom when you are finished.
Aurora HDR presets
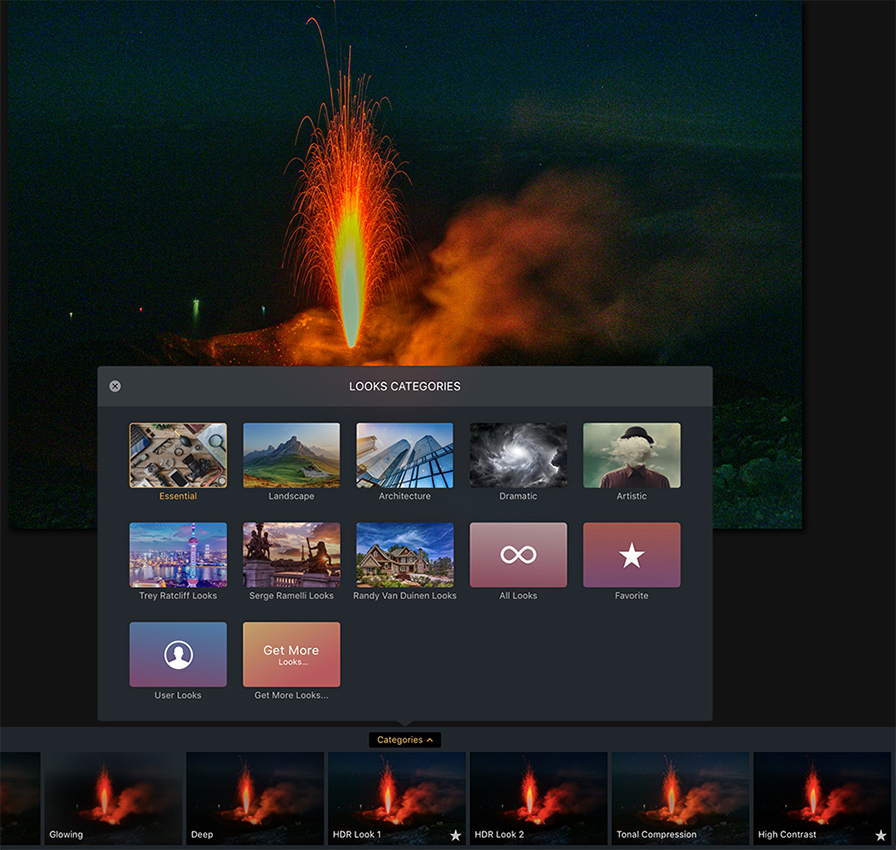
If you have ever used Instagram photo filters, you will feel right at home in Aurora HDR. In a way, you can see the programme as an extremely powerful version of that fairly simple app for sharing photos on social media.
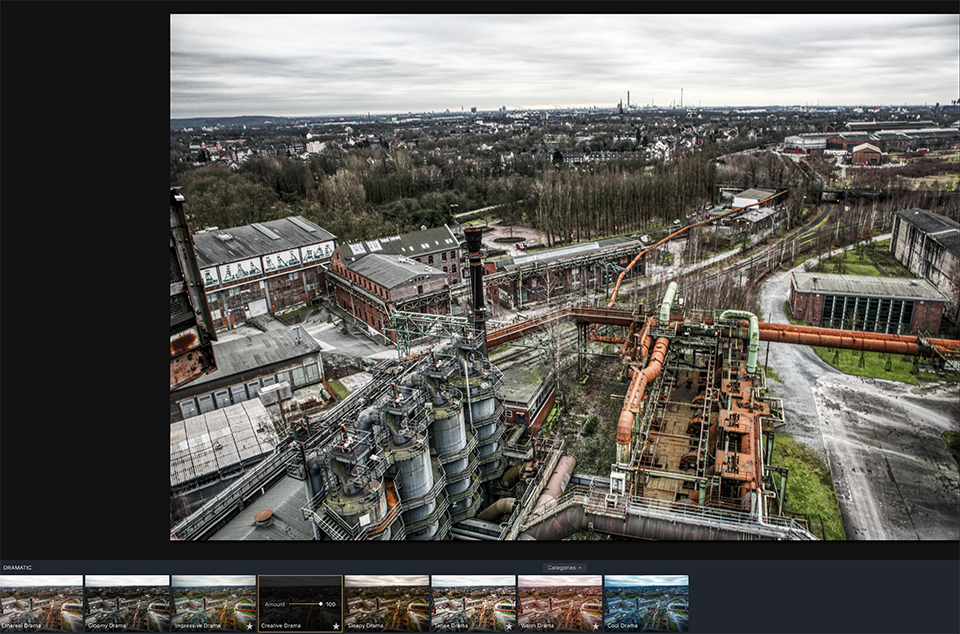
Once your photos are loaded, you can click a preset (which always shows a small preview of what your final image will look like) and then save your photo without any extra work or hassle.
The presets are even divided into categories such as Basic, Dramatic and Landscape, and some were designed with input from professional photographers such as Trey Ratcliff, Captain Kimo and Serge Ramelli.
It is fun to use Aurora HDR's presets, although some are a little too over the top for my taste.
If you wish, you can take it a step further and create your own custom presets that can also be applied to any HDR image.
This has been useful on several occasions when I wanted to combine options from a few existing presets, adjust the values of a preset or simply create my own preset from scratch.
Simple interface
On the right of the interface is a list of all the different tools Aurora HDR uses to control the parameters of your image.
Some of them, such as Colour, Tone Curve and HSL, will immediately be familiar if you have used Lightroom, Photoshop or other image editors, as they contain the same standard sliders you would expect.
When you click a preset at the bottom of the screen, the names of the tools used by that preset are highlighted in orange, which I found very useful during the editing process.
Because I immediately knew which values had been changed, I could use that as a starting point for my own experiments.
Before and after mode
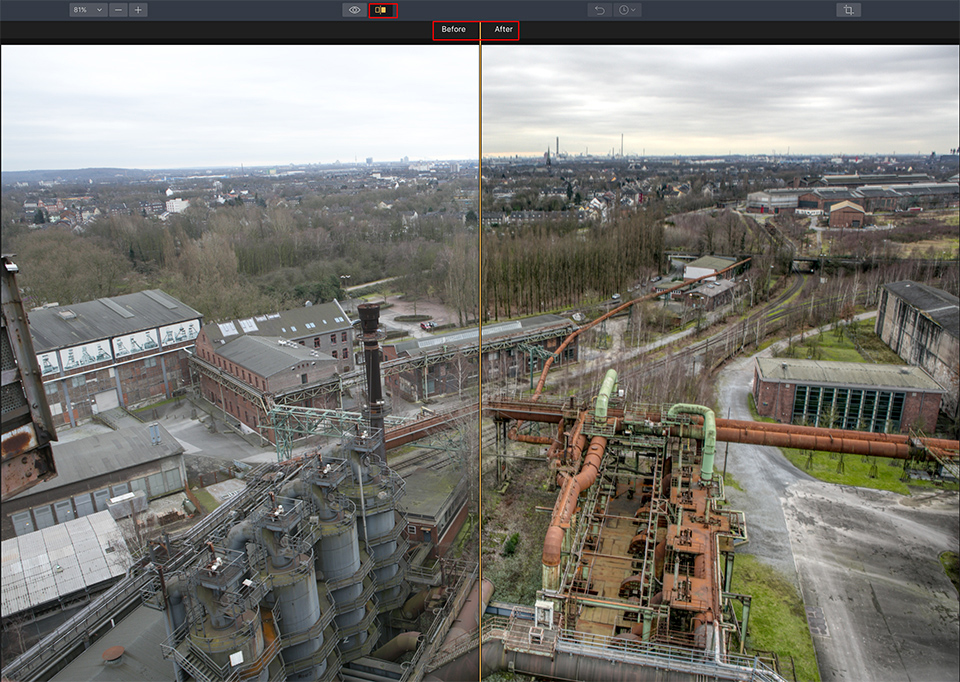
While editing your photo, either through presets or by changing the values in individual tool sliders, you can easily see how your work is progressing using Before and after mode.
When you click this option, you see a vertical bar that you can slide back and forth to view the original image on one side and your changes on the other. You can also hold down the key to quickly see the full original. When you release the key, you return to the current version with your edits.
Aurora makes the whole process of creating and editing an HDR image extremely simple and easy to understand.
Professional features
Once you dig deeper into Aurora HDR 2018, you will find tools that appeal even to highly demanding artists who want precise control over their creations.
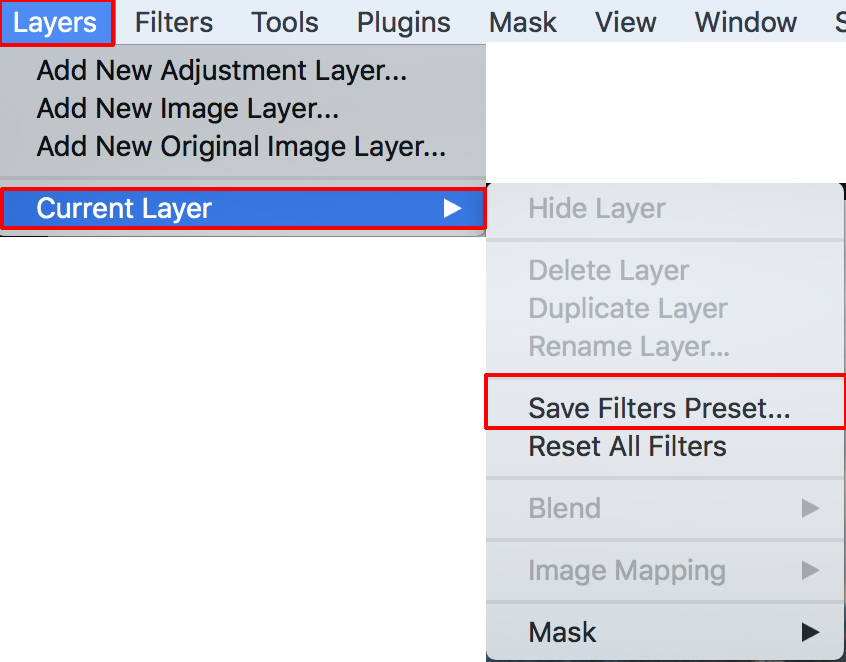
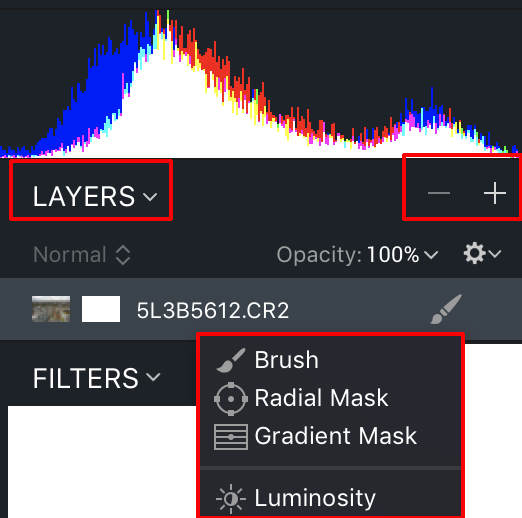
A collection of edits, such as applying a preset and then adjusting additional Tool sliders, can be saved as a layer, after which additional layers can be added on top, similar to Photoshop.
Masks
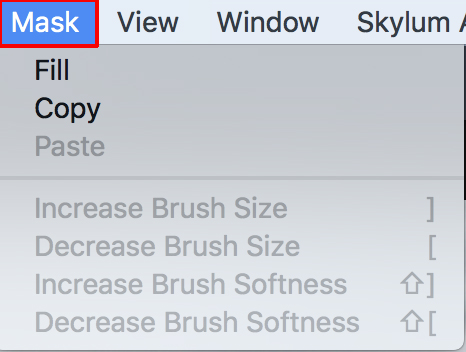
You can also use masks on layers. You can even apply them with a brush tool. Very useful if you want to apply a preset or series of edits to just one part of an image.
If you want to be very specific with your editing, you can even apply masks based on ten discrete brightness levels (luminosity mask), meaning that your adjustments are only applied to the brightest or darkest parts of the image.
Layer masks can also be applied as radial or linear gradients, which can be very useful depending on the type of HDR image you are creating.
And just as in Photoshop or other image editors, your changes are non-destructive, so you can return to any previous editing state at any time.
You can also return to your edits if you save your file in the original Aurora HDR format before exporting it to JPG, TIFF or another file type.
Blend modes
You can now also change the blend mode of layers. For example, you can apply it to a layer that selectively darkens very bright areas. It works using the new Dodge and Burn tool, the old darkroom techniques.
Batch processing
A final strength of Aurora HDR is the ability to quickly apply presets and other defined values to a whole series of images at once.
This saves you a huge amount of time if you have dozens or even hundreds of photos that you want to edit at the same time, using the programme's built-in presets or your own custom presets.
Of course, this method does not give you the kind of fine-grained control you would get by editing each HDR image individually, but the trade-off may be worthwhile when it comes to the total time saved if you have a large number of images.
Conclusion
I am very impressed by the simplicity of the interface and the enormous depth of the HDR tools I have seen. Skylum has clearly invested a great deal of time in creating and refining Aurora HDR to appeal to both demanding professionals and curious hobbyists.
It is a phenomenal piece of software that does not require a subscription and will serve HDR photographers very well. The only minor drawback is that it is a little slow when applying some presets and manipulating certain sliders.
But that was a small problem in an otherwise brilliant programme.
Aurora HDR 2019 may cause some frustration because it does not have features such as Dehaze and Red-eye removal that you may be used to in other image-editing programmes. But Skylum does not claim to be an all-in-one editing programme.
If you work with HDR photography, Aurora HDR will serve you very well.
About the author
Michelle Peeters is fotografe en oprichter van DeuxBleus Fotografie. Michelle herkent het bijzondere in het gewone en het gewone in het bijzondere. Ze heeft zich nooit willen specialiseren en is daardoor van alle markten thuis.
You might also like
-
 Aperty for portrait photography by Skylum
by Nando Harmsen
-
 Luminar NEO gets a new update
by Nando Harmsen
-
 Skylum launches Luminar NEO
by Nando Harmsen
-
 Creating an HDR photo with movement in the frame
by Nando Harmsen
-
 Review: Skylum's AI Sky Enhancer filter
by Michelle Peeters
-
 Review: HDR and Dynamic Range Course
by Martin van Rooij
2 comments
-

 Bart wrote on Wednesday 17 October 2018 at 13:27
| reply
thanks for your clear review. saves me a lot of research with this guide
Translated from Dutch. -
 Harold Boschitsch wrote on Wednesday 17 October 2018 at 20:42 | reply
Nice description, it makes me want to give it a try sometime.
Translated from Dutch.
Have your say
Please note: Articles older than a week can only be commented on by signed-in visitors.Would you still like to comment? sign in or create a free account.
Become a better photographer every week
A practical photography tip in your inbox every week.
38,900 photography enthusiasts already receive the tips! More about the weekly mail. Or keep up to date via  Facebook.

Elja Trum
Photofacts; everything to do with photography!
Would you like to take better photos and keep up with what is happening in photography? Photofacts publishes articles that teach you something about photography — from a product announcement to a practical shooting tip or a look at a website. Photofacts covers photography every day and is a hobby project of Elja Trum's that got out of hand. The articles are written by a team of volunteer authors. If you would enjoy writing one or more articles for Photofacts, do get in touch.More about PhotofactsPhotofacts is made possible in part by
