

How can you avoid and reduce noise in your photos?
Monday 7 February 2022, 16:32 by Huub Keulers | 18,415 views | 19 commentsThis article was translated from Dutch with the help of AI. Read the original.
We have all seen it in our photos: noise that sometimes makes our photos look ugly. But how can you prevent this noise? And when it cannot be avoided, how can you reduce noise in photos?
In this article, I will briefly explain how to prevent or remove noise.
What is noise?
Noise is essentially a disturbance of light sensitivity. The disturbance shows black or coloured pixels that should not be there. Every camera has noise reduction. However, there is a distinction between two types of noise.
With colour noise, coloured pixels appear among the correct pixels. Luminance noise is a milder form, where the pixels appear in different shades of grey.
What causes noise?
Noise is introduced when you take a photo with a long exposure time or use a high ISO setting on your camera.
But what counts as a high ISO setting? That depends on your camera model, but these days most cameras start to produce noise around ISO 1600 or 3200.
Compare it to turning up the bass on your sound system. With lots of bass, the sound will distort and the sound quality will get worse.
Does this mean you should never use long shutter speeds or go above ISO 100? No, of course not. Sometimes you have to, or even want to, use long shutter speeds or increase the ISO.
Landscape photographers, event photographers, corporate photographers and sports photographers sometimes shoot in low light, which requires a long shutter speed and/or a high ISO.
At the same time, there are simple ways to prevent too much noise in your photos.
Five ways to reduce noise
Below, I share five methods for minimising noise while taking photos. Not every method applies to every situation, so it is worth knowing them all and carefully choosing the right method for your specific situation.
1. Shoot at lower ISO settings
Yes, we are starting with the most obvious method. But photographers often push their ISO too high, too quickly, which leads to poor image quality.
If your camera is three years old or newer, its high-ISO quality should be perfectly good. You should not see too much noise appearing in your images, even up to ISO 3200.
However, a lot of noise can still become visible at higher ISO values, such as ISO 6400, ISO 12800 and beyond.
So do not increase your ISO unnecessarily. Instead, consider your exposure and realise that shooting at a high ISO will produce more noise in your photos.
Increase your ISO when necessary, but consider other options before choosing, for example, ISO 12800:
• Open your aperture to the lens's widest opening, for example f/2.8;
• If you are shooting in low light, use a tripod and lengthen your shutter speed;
• If you want to take a portrait, for example, use a flash.
Each of these strategies helps you get a nice, clear exposure without unnecessarily increasing the ISO.
If your shots are still too dark, you will of course need to increase the ISO. I recommend taking some test shots to find out what your camera's ISO capabilities are and at what point the ISO settings really reduce image quality.
For years, I shot with a Canon 5D mark I and knew that anything above ISO 1,000 was really difficult to use. Noise at ISO 1,000 and above was difficult to remove. And when I did manage to remove it successfully, the entire image looked like a watercolour painting 'thanks to' the noise reduction process.
So I worked within my limitations. These days, there are much better solutions for reducing and removing noise. In the latter category, the software programme 'Topaz DeNoise Ai' is one of the best solutions.
2. Shoot in RAW format
Does the idea of shooting in RAW intimidate you? It should not. RAW is a great way to get the most out of your images, so make sure you use it.
However, you do not always have to shoot RAW. But when you notice that you have less light available, definitely switch to RAW.
Why is this so important? Jpegs come with compression, a process in which noise is 'baked into' your images. This makes removing noise on your computer afterwards very difficult.
3. Get the exposure right
Brightening an exposure that is too dark makes noise more visible. That is why it is essential to get your exposure right from the start.
When you are taking photos, I strongly recommend checking your camera's screen, including the histogram, to make sure that your exposure is correct.
And do not be afraid to take several photos with different exposures, especially when dealing with a difficult scene. Better safe than sorry!
The higher your ISO, the less forgiving your photo is. In other words, if you use a high ISO value, you had better get the exposure right, because brightening an underexposed, high-ISO photo will result in an image with lots of noise.
This is called 'Expose To The Right' (ETTR): expose towards the right-hand side of your histogram. Of course, do not overexpose either. Although overexposure will not cause noise problems, it will wipe out details in the highlights, which is never a good thing.
4. Be careful with long shutter speeds
Long shutter speeds often produce images with lots of noise. The camera sensor will heat up and cause unwanted noise. Do not let this stop you from using long shutter speeds.
You could even consider taking a series of long exposures and then checking each file for noise on your computer.
Once you have determined your camera's limitations, make sure that you do not set the shutter speed longer than your camera can handle. The main point here is to know the limits of your equipment and shoot within those limits.
5. Use in-camera noise reduction
Most cameras offer a function called long exposure noise reduction. If you shoot in jpg format and take long exposures, it is a good idea to turn this on.
Why?
Well, as discussed above, photos with a long exposure time are particularly susceptible to noise. A long exposure noise reduction option is designed to counter this problem.
Your camera then takes a second exposure and uses the noise profile of this second image to reduce noise in the first photo.
However, long exposure noise reduction has a serious drawback: it takes time, usually as long as the original exposure.
So if you use a shutter speed of 30 seconds, the camera needs an extra 30 seconds to remove the noise. And if you shoot for an hour, you need another hour to reduce the noise, which is a very long wait!
So yes, it can be impractical if you are taking 10-minute exposures. But for medium-length long exposures, it is often worth using.
Reducing noise in Lightroom or Adobe Camera Raw
Even with the best techniques, you will still get noise in your photos, at least occasionally. That is where post-processing techniques for noise reduction come in.
Below is my recommended workflow with Lightroom Classic or Adobe Camera Raw. Keep in mind that you can use similar methods in other programmes, such as the previously mentioned 'Topaz DeNoise Ai'.

Step 1: Open your image and view it at 100 per cent
Start by opening your image in Lightroom or Photoshop. Keep in mind that RAW images opened in Photoshop first pass through Adobe Camera Raw (ACR).
Also keep in mind that the controls in Adobe Camera Raw and Lightroom are identical, so although the screenshots below were taken in Lightroom, the instructions also apply to ACR users.
I recommend viewing your image full-screen and then zooming in to 100 per cent. The aim is to look for noise. After all, not all images need noise reduction.
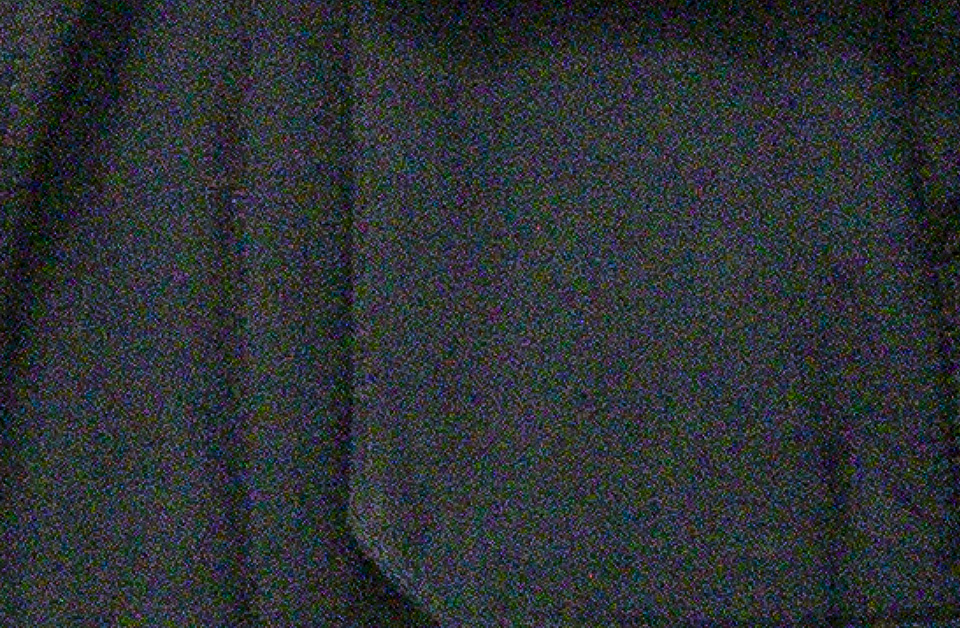
Step 2: Adjust the Luminance slider
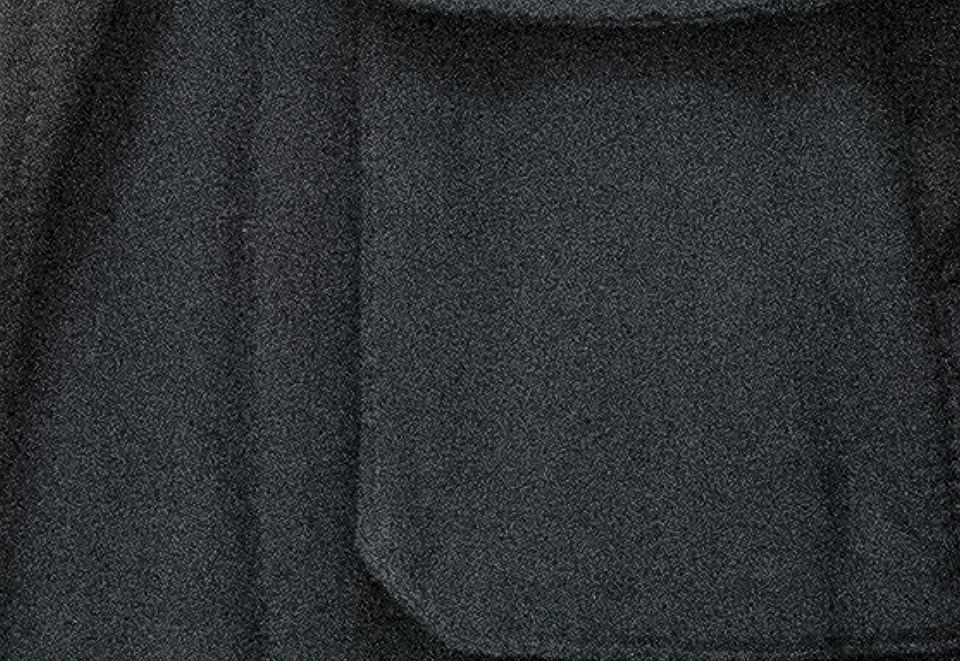
Under the 'Detail' tab, you will find the 'Noise Reduction' option. The 'Luminance' slider reduces luminance noise, that is, noise caused by overexposed or underexposed pixels.
A great many high-ISO images suffer from excessive luminance noise. So zoom in to 100 per cent and then increase the 'Luminance' slider until the noise starts to disappear.
Do not go too far, though.
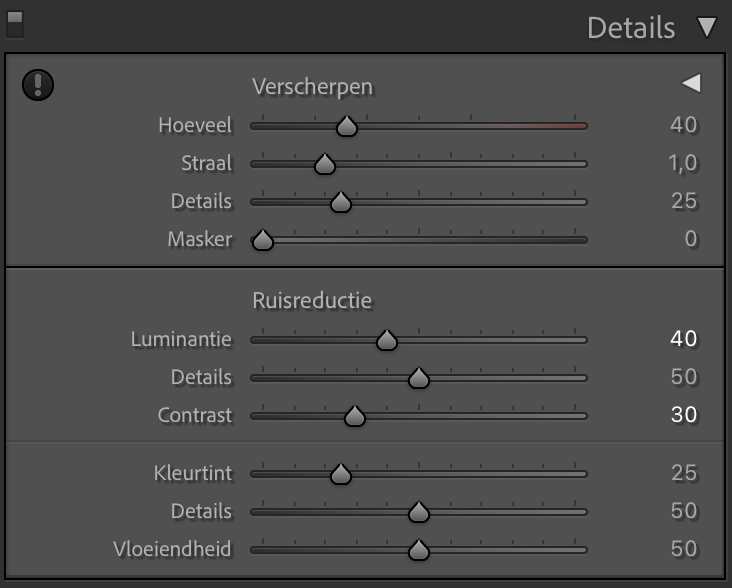
Step 3: Refine your result with the 'Detail' and 'Contrast' sliders
The 'Detail' and 'Contrast' sliders control the amount of detail and contrast retained in your photos after luminance noise reduction.
You can see that noise reduction 'smooths out' noisy pixels, which automatically reduces detail and contrast. But by increasing these sliders, moving them to the right, you retain more detail and contrast.
As you would expect, however, the sliders have a drawback:
When you increase the values, you also reduce the strength of the noise reduction. So while you get a sharper image, you also see more noise again.
Step 4: Adjust the colour slider
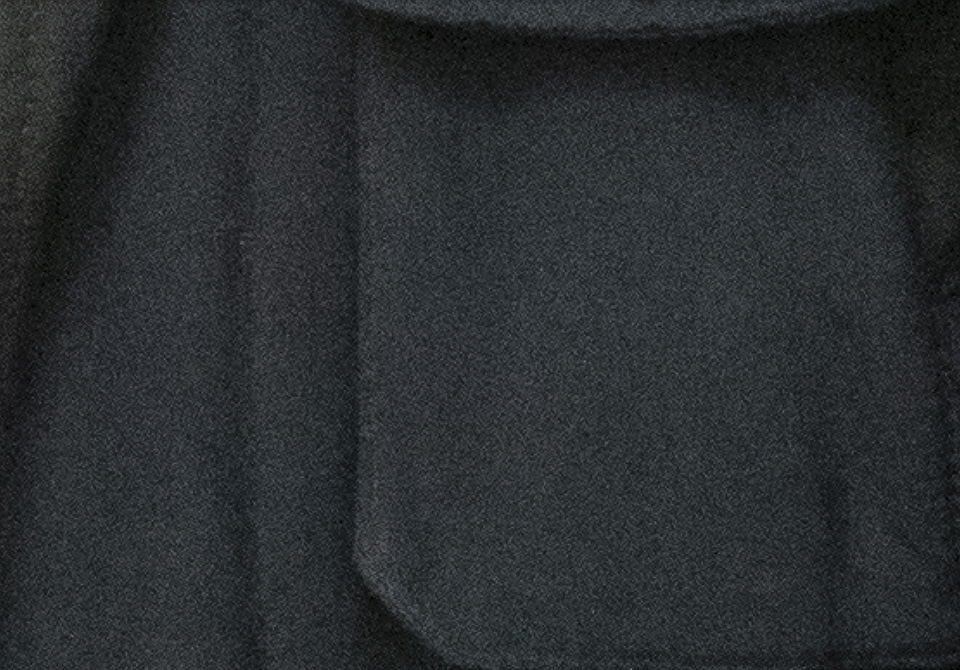
The 'Colour' slider reduces colour noise, the second type of noise found in your photos, often in underexposed shadow areas. So increase the 'Colour' slider and zoom in to 100 per cent to see the effects.
Step 5: Refine your result with the 'Detail' and 'Smoothness' sliders
As with luminance noise reduction above, you can further adjust your photo with the 'Detail' and 'Smoothness' sliders.
Do you want more detail in your photo? Then increase the 'Detail' slider, moving it to the right. Higher values protect thin, detailed colour edges, but can also result in colour speckles. Lower values remove colour speckles, but can lead to colour bleeding.
Do you want to keep colours nice and even? Increase the 'Smoothness' slider. And you are done!
A final note on noise reduction
Although I wish I could give you standard, one-size-fits-all noise reduction settings, that is simply not how it works. Every photo is different, so you have to check each adjustment until you get the result you want.
I tend to increase 'Luminance' and 'Colour' to around 50, and then work from there. I move each option up and down and pay close attention to how it affects the photo while zoomed in to 100 per cent.
After each adjustment, I then zoom out to see what effect it has on the overall image. And when I am happy with an adjustment, I move on to the next slider. Is the process a little laborious? Certainly. But if you do it properly, you will eliminate the ugliest noise in almost every photo.
Practice is important here too, so try this on as many images as possible. Before long, you will be able to predict the effect of each change.

Conclusion
Now that you have read this article, you know that avoiding and reducing noise does not have to be too complicated. Just follow the steps I have given you and your images will improve.
Now it is your turn: Do you have any other tips for reducing and removing noise? Share your thoughts in the comments below.
About the author
Huub Keulers is een enthousiasmerende veelzijdige freelance fotograaf woonachtig in Elsloo (Li). Hij is gespecialiseerd in sport-, bedrijfs-, straat-, honden en portretfotografie. Daarnaast is Huub auteur van diverse educatieve fotografieboeken en verzorgt hij allerlei fotoworkshops, masterclasses en lezingen.
You might also like
-
 Which is better? Stacking or noise reduction?
by Nando Harmsen
-
 New update for Lightroom Classic enables AI noise reduction
by Nando Harmsen
-
 Night photography tip: long exposure noise reduction
by Nando Harmsen
-
 Removing noise? Use it in moderation
by Nando Harmsen
-
 Presets in Lightroom Classic
by Nando Harmsen

19 comments
-
 Paul Lefevere wrote on Tuesday 8 February 2022 at 11:18 | reply
Thanks for this article.
Translated from Dutch.
Until now I have limited myself solely to "Sharpening -> Amount" and "Noise Reduction -> Luminance". Mainly because I always try to avoid noise when taking the photo, but also because I have never taken the time to properly test the other sliders. Photos with too much noise usually move to the trash. With this weather, ideal for trying out the "first aid in case of accidents" more thoroughly. -
 Donald Willemsen wrote on Tuesday 8 February 2022 at 11:52 | reply
A good article about reducing/preventing noise (do note the language errors). In my experience ( I always photograph in RAW with the EOS 70D and 80D) is that I have the most trouble with luminance noise. I can often reduce/remove that relatively easily via Lr or ARC. That works well, but has the disadvantage that it blurs the photo. That is also not the intention. So you have to be careful with the sliders. Sometimes it is better to le ave a bit of luminance noise in order to retain the sharpness.
Translated from Dutch.
I read the article with great interest and was able to learn something from it. That is ultimately what it is about for me. -
 guest wrote on Tuesday 8 February 2022 at 11:55 | reply
Thank you for this information.
Translated from Dutch.
I bought a Sony A7R4 2 months ago.
This one is known for being noise-friendly.
If I take a photo at ISO 650 and zoom in to 100%, I still see quite a lot of noise.
Do you have any idea what could be causing that?
Thanks in advance -
 johan wrote on Tuesday 8 February 2022 at 12:16 | reply
A quick question: does noise reduction in the camera also work on the Raw files you create or only on Jpegs ?
Translated from Dutch. -
 Clasien Geestman wrote on Tuesday 8 February 2022 at 16:08 | reply
@ Johan. Noise reduction also works on RAWs.
Translated from Dutch.
Whether noise reduction works, you can notice well.
If you take a photo with a shutter speed of, for example, 6 seconds, the camera needs just as many seconds for noise reduction after the final click of the shutter before you can use the camera again. -

 Huub Keulers
wrote on Tuesday 8 February 2022 at 22:28
| reply
Huub Keulers
wrote on Tuesday 8 February 2022 at 22:28
| reply
@Paul. Thank you for your comment Paul. Good luck and have fun at your first aid
Translated from Dutch.
-
Huub Keulers
wrote on Tuesday 8 February 2022 at 22:31
| reply
@Donald. Thanks for your comment. That's indeed right, it's always a balance between noise reduction and sharpness. Personally, I also prefer to leave a little more noise in the photo and retain good sharpness.
Translated from Dutch.
ps. I hadn't noticed there were some language errors in it. I'll look into it. -
Huub Keulers
wrote on Tuesday 8 February 2022 at 22:34
| reply
@Guest. Unfortunately, I am not familiar with the Sony A7R4 for the correct camera settings. I think it is always a good idea to expose your photos to the right side of your Histogram ETTR). That way you will notice less noise, which is usually found in the dark parts of your photo.
Translated from Dutch. -
 Jean-Pierre wrote on Wednesday 9 February 2022 at 09:29 | reply
does in-camera noise reduction also work on the RAW's you make or only on Jpeg ?
Translated from Dutch.
Answer: RAW is not a picture, only the raw information from the sensor. So if you convert it into a picture in the RAW converter, you have to handle the noise reduction yourself. With JPEG the camera already does that, if you have set that... -
Jean-Pierre wrote on Wednesday 9 February 2022 at 09:32 | reply
If you shoot RAW, the camera always shows an (edited) RAW=JPEG on the back, noise reduction does apply to that. Not to the RAW information itself...
Translated from Dutch. -
 Freek wrote on Wednesday 9 February 2022 at 09:51
| reply
Freek wrote on Wednesday 9 February 2022 at 09:51
| reply
Good article. Personally, in dark situations I don't think in terms of ISO but try to use the slowest shutter speed for the situation and the best (widest?) aperture. The optimal ISO then follows automatically. Too low an ISO causes more trouble when adjusting and boosting the exposure than a somewhat higher ISO.
Translated from Dutch.
Also a question: I once read that working with 1/1 ISO steps is better and that sometimes a higher ISO gives less noise than a lower one in the same situation (ISO 800 better than 640)? What do you think, Huub?
Regards, Freek -
 Luc Vancamp wrote on Wednesday 9 February 2022 at 14:05 | reply
Take two or more identical photos on a tripod. Noise will manifest itself on different pixels in both (or multiple) photos. Then via PS ... I vaguely remember something about it from Nando earlier on Photofacts.
Translated from Dutch. -
Huub Keulers
wrote on Thursday 10 February 2022 at 09:29
| reply
@Freek, good addition Freek. That a higher ISO value (even if it's from 640 to 800) gives less noise seems very unlikely to me for exactly the same situation, framing and lighting conditions Freek. Also that increasing ISO in 1/1 increments. I don't know the phenomenon but if you ever come across the article again, I would be very interested. Thanks for your interesting question. I'll look into it.
Translated from Dutch. -
 Maurice wrote on Thursday 10 February 2022 at 15:22 | reply
Interesting article but indeed, removing noise always comes at the expense of sharpness and contrast. Personally, I think that every digital photo contains noise that becomes more visible (and bothersome) with long exposure times and/or high ISO. Digital means that (almost) every pixel has a compromise value and therefore exhibits a certain error that translates into noise. That is how it is with digitizing sound, so I assume that it also applies to digitizing light.
Translated from Dutch. -
 Peter van Dinther wrote on Thursday 10 February 2022 at 17:06 | reply
I can recommend Topaz Denoise AI to everyone, awesome!
Translated from Dutch. -
Huub Keulers
wrote on Thursday 10 February 2022 at 18:08
| reply
@Peter. I also use Topaz DeNoise myself. In my opinion, an excellent solution for reducing noise without hardly sacrificing any sharpness.
Translated from Dutch. -
Peter van Dinther wrote on Thursday 10 February 2022 at 19:56 | reply
@Huub. I also get fabulous results with Topaz Sharpen AI. But that falls somewhat outside this scope. Otherwise good article Huub!
Translated from Dutch. -
 Willem-Jan wrote on Friday 11 February 2022 at 16:16 | reply
@Freek: what the article doesn't address is that there are different types of sensors that actually require a different approach. You can find more information about this if you read a bit more about iso-invariant ('iso-less') sensors that many cameras nowadays have. These are sensors that are calibrated to a certain base iso value (brands such as Sony and Fuji, and I believe certain Nikon models also use this type of sensor).
Translated from Dutch.
For example, I have a certain camera model myself that has a sensor calibrated to iso 200. That is therefore actually the 'best' value for me to use, as this will produce the cleanest image. It goes a bit far to give the complicated technical explanation for this, but it comes down to the fact that the sensor basically always shoots with a light sensitivity of iso 200; if I set the iso value higher, then the light signal is amplified during image processing. So in effect, you are underexposing with that.
If I set the iso value lower than iso 200, then I am actually overexposing a little through the settings being used. That is then corrected again, but in itself it does not produce a cleaner image. And it gives a somewhat greater risk of overexposed areas, it is somewhat less favorable for the dynamic range. That is why this lowered iso value is not included in the standard settings. So the lowest possible iso value is not always better! It may be that you consciously want to use this at some point (and you can, it is there for a reason), but then apparently it is better to start from a difference of one full stop and not an intermediate value - apparently this can turn out to be even somewhat less favorable in terms of dynamic range according to the experts. I am not sure whether the same applies to an increased iso value (that it would be more favorable in this respect to count in full stops relative to the base iso value), I have not come across that yet.
With an iso-invariant sensor, underexposing a photo at a low iso value in RAW does not produce any additional noise when the light signal is amplified afterwards compared to using a higher iso value. So you can underexpose and brighten the photo afterwards and in principle that does not produce more noise than setting the iso value higher in the camera (counting the same number of stops). The advantage of that can be that with an image with somewhat more contrast, you only need to brighten the dark areas and do not need to amplify the light across the entire image (as does happen with a high iso value).
An iso-invariant sensor is not necessarily better than a traditional sensor in itself. But you can handle it differently. For example, with traditional Canon sensors it is actually more favorable to use a higher iso value instead of underexposing at a low iso value. The underexposure then produces more noise than the iso value itself.
Noise is a complicated phenomenon. The iso value is not the only factor involved, the quality of the light also plays a role. Poor light (little light/stray light) also reveals irregularities (light particles can differ from each other in brightness). Proper exposure through shutter speed and aperture are the best methods to prevent noise. In principle, you only use a higher iso value when there is too little light, so in effect the increased iso value is not only a cause of noise but also a consequence of less than optimal light. -
 Peter wrote on Sunday 13 February 2022 at 16:51 | reply
Point 2 of the ways to prevent noise is not necessarily true. If you photograph in JPG, you don't have more noise in your photos than in the RAW file. On the contrary, in JPG you can use your camera's noise reduction if necessary - the software in the camera is tailored for this and will actually reduce the noise in a way that fits the camera's sensor exactly. You can't always say that about a general editing program.
Translated from Dutch.
The RAW file shows the raw data of the photo, so it isn't a photo yet and in principle you can therefore also see all possible imperfections in it, incl all possible noise.
Noise is/are irregularities in the light in the photo. In JPG you don't 'bake' it in any more than it already is in the RAW file. The fact that a JPG is already a developed photo doesn't mean that it's completely ready-made and that you 'can't do anything more with it' as is often said. You can still edit a JPG quite well, only the leeway is somewhat smaller than with a RAW file. You can also perform noise correction perfectly well on a JPG.
I regularly photograph in JPG myself and am not afraid to do so (do expose properly, though, it is somewhat less forgiving). It is astonishing how much information is still in it, and generally you really can't see in the end result that the photo was made in JPG. So I don't notice any aggravated noise in JPG either (quite the opposite). Unfortunately, there are still many misunderstandings about JPGs going around.
However, I would recommend to anyone who often photographs in JPG to set the noise reduction in the camera lower. Many cameras are made in Asia, where people generally prefer somewhat more 'smoothed-over' photos. The default noise reduction can therefore sometimes be a bit too aggressive, and you can lose detail as a result. It is better to correct any noise yourself a bit further afterwards. You can do that quite easily in a program like Lightroom.
Have your say
Please note: Articles older than a week can only be commented on by signed-in visitors.Would you still like to comment? sign in or create a free account.
Become a better photographer every week
A practical photography tip in your inbox every week.
39,024 photography enthusiasts already receive the tips! More about the weekly mail. Or keep up to date via  Facebook.

Elja Trum
Photofacts; everything to do with photography!
Would you like to take better photos and keep up with what is happening in photography? Photofacts publishes articles that teach you something about photography — from a product announcement to a practical shooting tip or a look at a website. Photofacts covers photography every day and is a hobby project of Elja Trum's that got out of hand. The articles are written by a team of volunteer authors. If you would enjoy writing one or more articles for Photofacts, do get in touch.More about PhotofactsPhotofacts is made possible in part by
