

Flash photography: this is what you need to know
Monday 21 February 2022, 20:10 by Huub Keulers | 15,016 views | 4 commentsThis article was translated from Dutch with the help of AI. Read the original.
If you understand the basic principles of working with a flash, flash photography will hold few secrets for you. With practice, you can use your flash with confidence.
The principle of using flash is the same whether you use a small reportage flash or a more powerful studio flash.
You will undoubtedly recognise this
As soon as you start using flash, you will encounter certain problems. You will probably recognise the points below.
Overexposed or underexposed photo
You mainly see this when the flash power or your camera's aperture is not set correctly. Or when the distance between your flash and your model is too great or too small.
Cast shadow in the background
When your model is standing too close to a wall or another object, overly direct and hard light causes a hard shadow in the background.
Hotspots
When the flash power is locally so high that it causes shiny reflections, often on your model's forehead and jawline.
Unusual colours
If daylight or flash light bounces back from a lawn, coloured wall or ceiling, a colour cast can appear on your model. Setting the white balance incorrectly can also cause a colour cast.
The whole portrait is not evenly lit
You mainly see this problem with full body portraits, and it is caused by your flash losing light too quickly. Often the surface of your softbox is too small, you have chosen the wrong diffuser or your flash power is too low.
When should you use flash?
Whether or not you should use a flash mainly depends on the available lighting conditions and the result you want. So you can use flash when there is too much, too hard or too little light.
Backlighting
Photographing against the sun will leave your model underexposed. With directed flash light, you can brighten your model.
Too hard light
Hard light creates ugly, hard shadows. Especially under the eyes, nose and chin. With a flash and softbox, you can soften the ugly hard shadows.
Too little light
This goes without saying, of course. Without a flash, you would have to use high ISO values. With a flash, you can work with much lower ISO values.
Ugly background
Sometimes you are at a location with an ugly or busy background. By applying the 'Night To Day' technique, you can make the ugly background less visible. This technique is explained further on in this article.
Freezing movement
Your flash fires a beam of light for a very short time, 1/20,000 sec. This short beam of light ensures that the movement of a subject or person is shown as 'frozen'.
Mix of movement and frozen motion
The technique of using your camera and flash makes it possible to combine movement with sharp elements. 'Dragging the Shutter' is a method for creating these more creative photos.
With this technique, you use a slower shutter speed, for example 1/8th of a second. This makes your photos more dynamic. Especially photos of parties and events, but also of various sports. This technique is explained further on in this article.
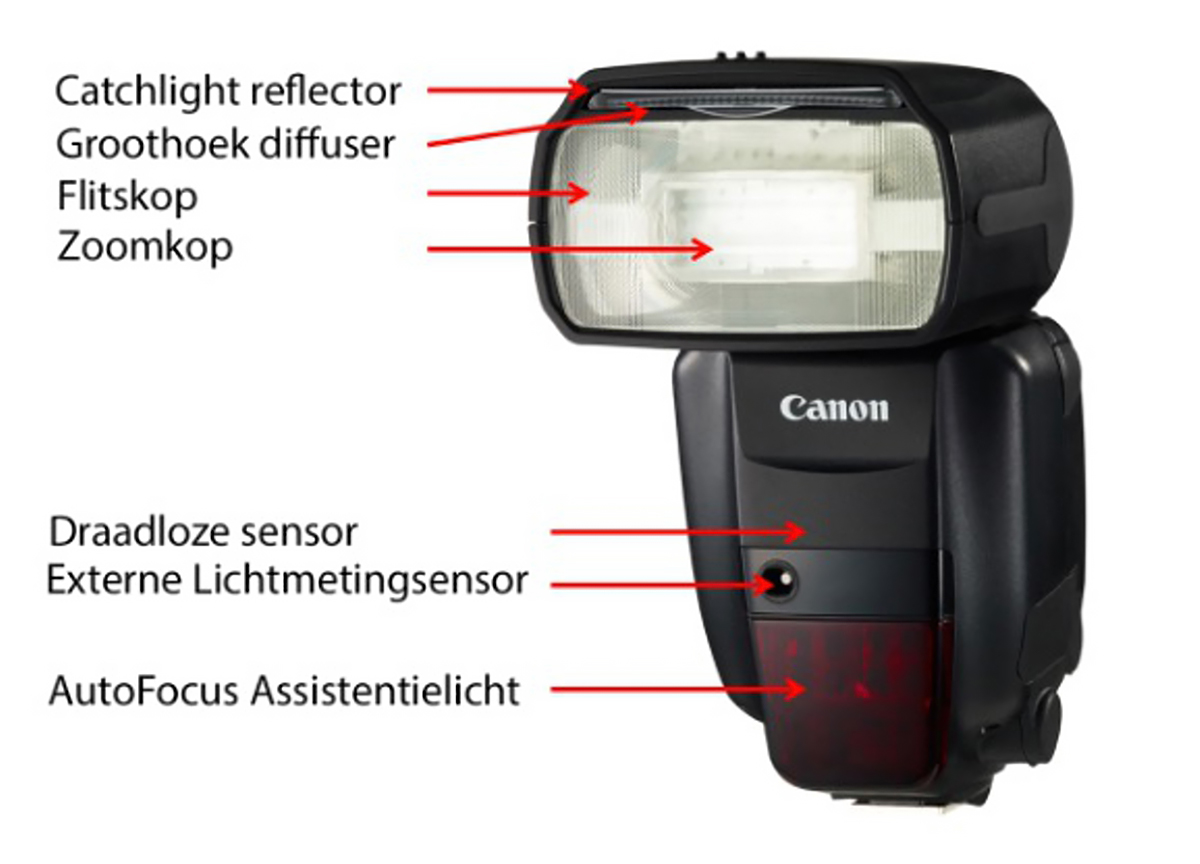
The zoom head
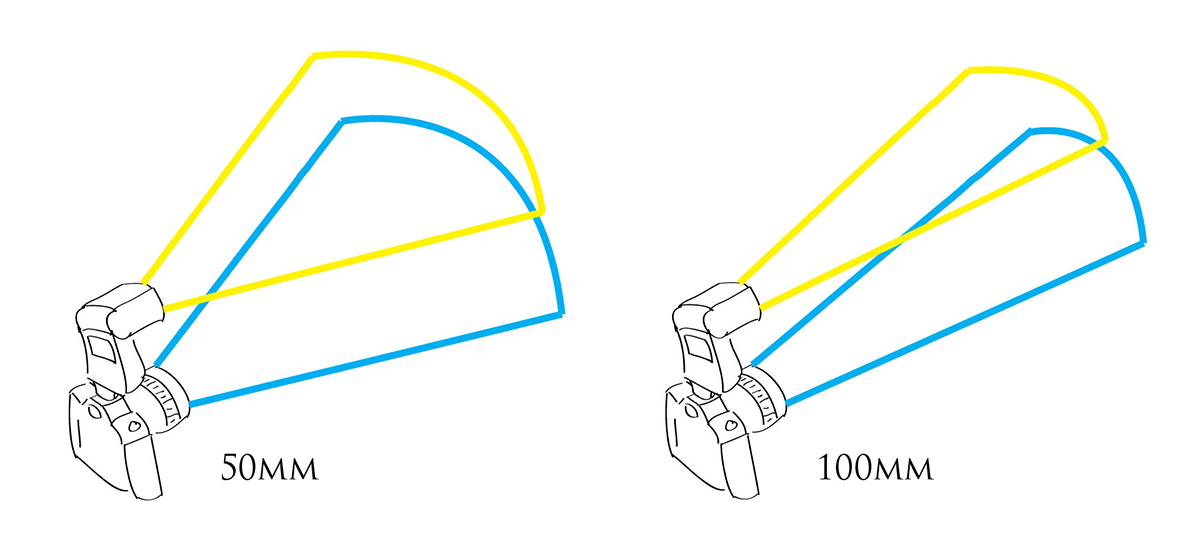
Inside your flash head is a zoom head that determines the width of your light beam. It is adjusted automatically to match the focal length of your lens OR you can set it manually. This allows you to decide which part of your photo should be lit by the flash light.
With slightly more expensive flashes, you can adjust this between 24 and 200mm. With cheaper flashes, it is often between 24 and 105mm.
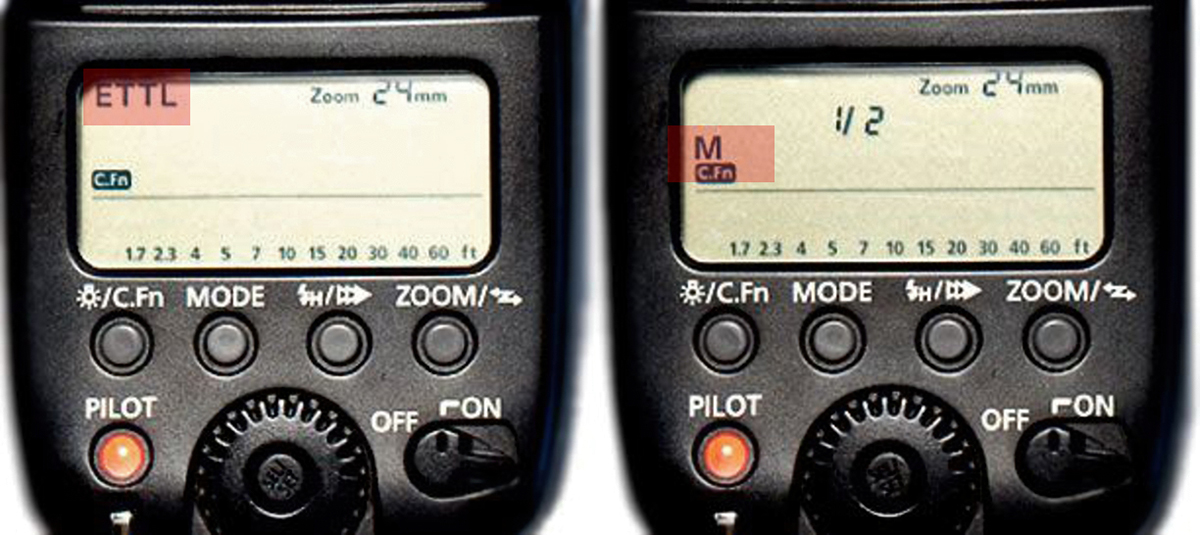
TTL or manual flash
Your flash has two flash modes, and choosing which one to use and when is actually quite simple:
eTTL
Use eTTL if the distance between your flash and your model changes regularly. Think, for example, of an event, reception or sports. In most cases, your flash will be mounted on your camera in these situations. This method also works well if you bounce the flash indirectly off a wall or ceiling.
Manual
If the distance between your flash and your model does not change, or hardly changes, you can set the power of your flash to Manual. The major advantage is that you have more control over your exposure. With this setting, your flash will usually be detached from your camera and mounted on a tripod.
The principle of using flash
When using flash, you are actually making a double exposure: a second exposure on top of your ambient light, the main light. You need to adjust these two exposures separately.
You control the ambient light with your shutter speed. The flash only emits light for such a short time that the shutter has no influence on it.
You control the amount of flash light on the flash itself, by increasing or decreasing it or adjusting it manually. This has no effect on the ambient light.
The art of taking a good flash photo is finding the right balance between the ambient light and the flash light.
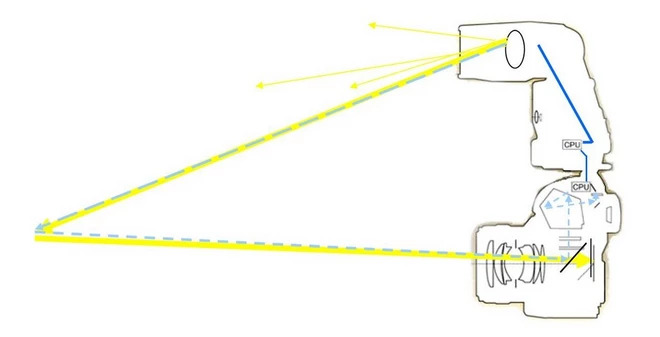
The way the camera and flash calculate the required amount of light in eTTL mode is clever:
Step 1
The shutter button is pressed halfway, and the ambient light is measured;
Step 2
The shutter button is pressed fully: a pre-flash is fired and the reflected light received by your camera is measured;
Step 3
The ambient light and reflected light are compared, and the flash strength is determined and set;
Step 4
The camera mirror, only in SLR cameras, rises and the first shutter curtain opens;
Step 5
The main flash is fired;
Step 6
The second shutter curtain closes and the camera mirror drops back down, only in SLR cameras.
The effect of shutter speed, aperture and ISO
Shutter speed, aperture and ISO work slightly differently in flash photography than you are used to.
Your aperture opening
The aperture determines how much flash light reaches your camera sensor, and therefore your model. More flash light reaches your camera sensor at f/4 than at f/5.6. In other words, your model is darker at f/5.6 than at f/4. You therefore control the amount of flash light on your model partly with your aperture.
The shutter speed
The shutter speed determines how much ambient light reaches your camera sensor. The faster your shutter speed, the less of your background will be visible in the photo. You therefore control how your background is lit partly with your shutter speed.
Light sensitivity (ISO)
Light sensitivity determines how much ambient light reaches your camera sensor. The higher your ISO value, the more of your background will be visible in the photo. So you also control how your background is lit with your ISO value.
The effect of the distance between the flash and your model
When you increase the distance between your flash and your model, the amount of flash light falling on your model decreases. That is only logical. However, this amount of light does not decrease evenly with distance, but quadratically.
In other words: if you double the distance, a quarter of the original strength remains. Fortunately, you do not have to perform these calculations yourself.
That is, if you set the flash to automatic (e)TTL mode. This provides communication between your camera and your flash and automatically performs light measurements.
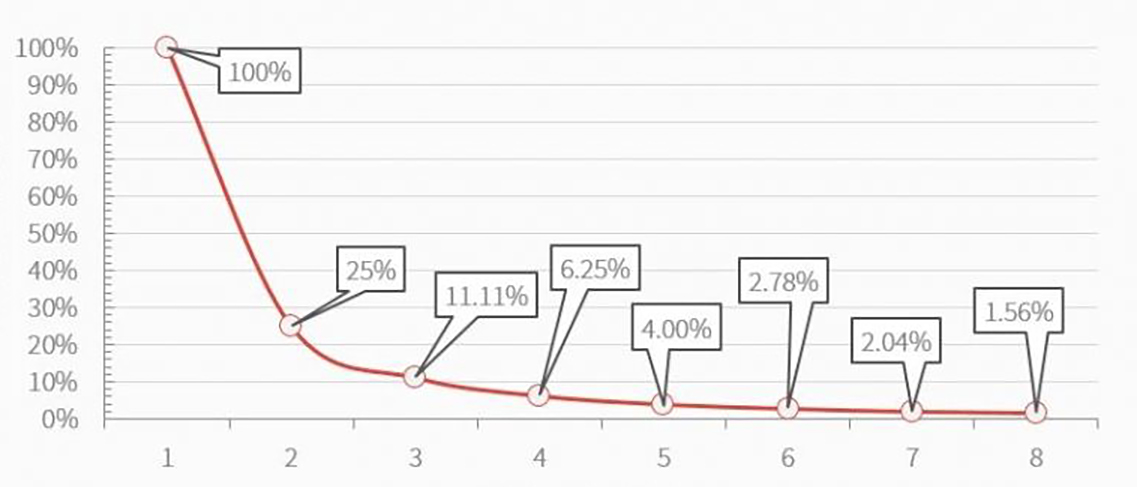
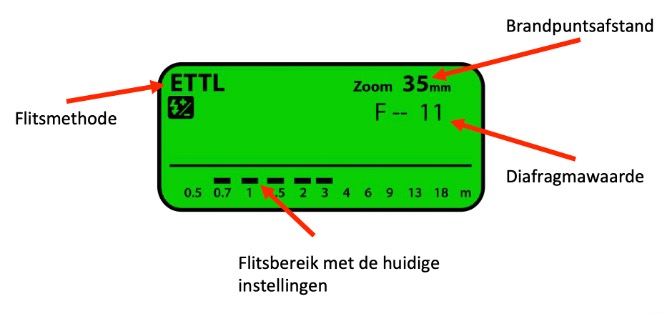
It is also a fact that your flash light becomes harder as you increase the distance between the flash and the model. This may seem strange at first.
However, this has to do with the size of your light source in relation to your model. The further your flash is from your model, the smaller the light source will be. And the smaller the light source, the harder the light.
Compare it with a small torch. Its light is very hard. Or with the sun, which is very far from the earth. So it is a relatively small light source compared with the earth, with the result that the sunlight is very hard.
That is why you often see the softbox with flash placed relatively close to the model. This makes the softbox relatively large, with the result that the flash light will be soft.
Another consequence of placing a softbox close to the model is that the light behind the model will decrease very quickly. This is called a lot of light fall-off. As a result, relatively little flash light will fall on your background, making it appear darker.
You can change the flash distance and flash power by adjusting the following values on your flash or transmitter:
- ISO;
- Focal length;
- Aperture
About the author
Huub Keulers is een enthousiasmerende veelzijdige freelance fotograaf woonachtig in Elsloo (Li). Hij is gespecialiseerd in sport-, bedrijfs-, straat-, honden en portretfotografie. Daarnaast is Huub auteur van diverse educatieve fotografieboeken en verzorgt hij allerlei fotoworkshops, masterclasses en lezingen.
You might also like
-
 Getting started with photography
by Jerry van Es
-
 Stuck at Home and Back to Basics
by Lorette Janssen
-
 Is this Canon's best-kept secret?
by Huub Keulers
-
 The basics of photography in 10 minutes
by Elja Trum
-
 10 Tips for Beginner Photographers
by Elja Trum
4 comments
-
 Han wrote on Tuesday 22 February 2022 at 22:37 | reply
I let the flash do the work. 800 asa F 8 indirect flash
Translated from Dutch.
Easy and reliable. SB 900 -
 guest wrote on Tuesday 22 February 2022 at 22:40 | reply
Very nicely and clearly explained, and I'm sure this is just the tip of the iceberg.
Translated from Dutch.
But thanks for the understandable explanation, I'm definitely going to do something with this. -
 Alois wrote on Wednesday 23 February 2022 at 09:22 | reply
Why is the guide number (GN) of a flash not discussed - for beginners?
Translated from Dutch.
Simply but not explained in too much detail ...
Every flash model (built-in - , pop-up or hot-shoe flash) has its own guide number.
The guide number is a measure of the light output delivered by a flash.
For a good exposure - starting from ISO 100 - the guide number is equal to the product of the chosen aperture value multiplied by the distance between flash & subject.
If you increase your ISO value, the flash range (distance) increases by 1.4 with each ISO stop (obviously not indefinitely) -

 Huub Keulers
wrote on Wednesday 23 February 2022 at 09:52
| reply
Huub Keulers
wrote on Wednesday 23 February 2022 at 09:52
| reply
Thanks for your response. You are absolutely right. There are of course more aspects you have to deal with in flash photography, but to understand flash photography a bit better, the basics are always important. Thanks for your compliment
Translated from Dutch.
Have your say
Please note: Articles older than a week can only be commented on by signed-in visitors.Would you still like to comment? sign in or create a free account.
Become a better photographer every week
A practical photography tip in your inbox every week.
39,024 photography enthusiasts already receive the tips! More about the weekly mail. Or keep up to date via  Facebook.

Elja Trum
Photofacts; everything to do with photography!
Would you like to take better photos and keep up with what is happening in photography? Photofacts publishes articles that teach you something about photography — from a product announcement to a practical shooting tip or a look at a website. Photofacts covers photography every day and is a hobby project of Elja Trum's that got out of hand. The articles are written by a team of volunteer authors. If you would enjoy writing one or more articles for Photofacts, do get in touch.More about PhotofactsPhotofacts is made possible in part by
