

The Light Meter, How Do You Read It?
Saturday 14 September 2024, 16:32 by Frank Doorhof | 4,833 views | 15 commentsThis article was translated from Dutch with the help of AI. Read the original.
A light meter is a tool for measuring your light. Some photographers think it is something from the past. Others do not 'need' one.
And some people never use one. I am a big fan of using a light meter. In this article, I explain why and how to read a light meter.
Light meters are cool
Let's start with a bold statement: I know that for many people, light meters are not the first thing they think of when they start with photography.
But that is not right. I could say that it is one of the most important parts of your kit.
Why is the light meter so important?
First of all, we need to realise that as humans we only see three colours. We call these colours the primary colours, Red, Green and Blue.
We also have secondary colours, Cyan, Magenta and Yellow. All colours are connected through the blackbody curve (white points for colour temperature) and determine the colour space.
So how do they determine the colour space, you may ask?
A good question, actually. All colours within the colour space have three coordinates, x, y and Y. Hue, Saturation and Luminance.
If we want accurate colours in our photographs, I think it is clear that we need to make sure the colours are captured as accurately as possible when taking the photograph.
We have two tools that work together for this. The first is the colorchecker (I will write another post about that in the coming days) and the light meter.
The colorchecker is used to calibrate the colours in your RAW converter, but to get the colours (x,y) right, we also need to get the Y right, and that is where the light meter comes in.
It is actually super easy
Sometimes I feel a bit like the light meter helpdesk, with all the questions about using light meters. And most problems are caused by not understanding the meter, so let's dive in.
Let's make one thing clear first. It really is super easy.
Let's take a look at the display.
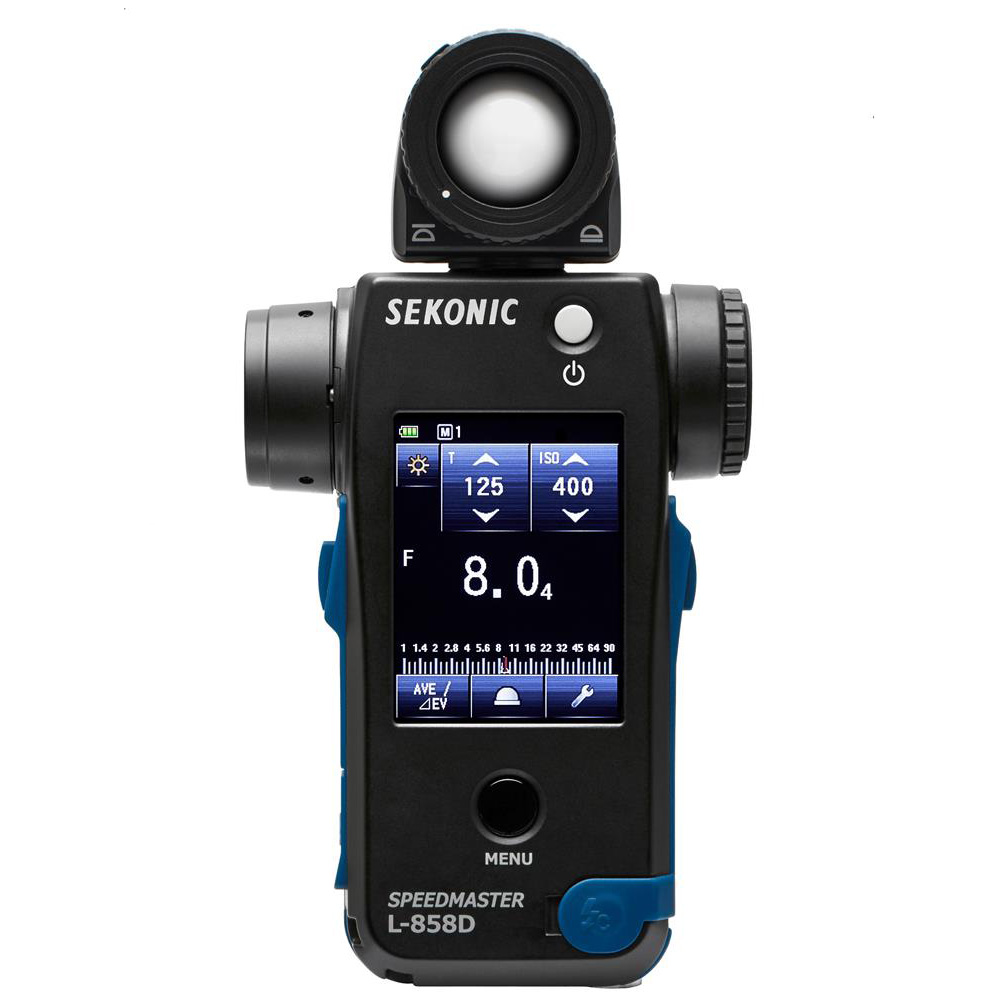
And this is where things often go wrong. Many people will now set the camera to f/8 at ISO 400 with a shutter speed of 1/125. And... Well, the images are overexposed. So how is that possible when using a light meter?
Well, because there is one extra number that is really important, and that is the small 4.
It is all in the details
When we look at our camera, you probably know that you can change your aperture in 1/3 stops. On most flashes, you will find one of two options, also in 1/3 or even 1/10 clicks. But do not confuse the two with the aperture on your camera.
The settings on your flashes have nothing to do with what you see on the meter. It is simply the output power, and there are also settings such as 2.8, 4.0 or 5.6 that are there simply because... Well, because those values exist.
So how do we go about it?
When your meter shows f/8.0 (4), this means that the meter is showing f/8 and 4/10ths. If you have flashes that can be adjusted in 1/10 increments, you can simply lower them by four clicks and you will probably read f/8.0 afterwards (if you have good flashes).
If your flashes can be adjusted in 1/3 stops, we need to improvise a little. Lower the flashes by one click and the meter should now show f/8.0 (1). Now it is a matter of moving the light a few centimetres further away and it will show f/8.0
Now I have to be honest, for 1/10 I do not really move my lights, but if you really need to be very precise, it works brilliantly.
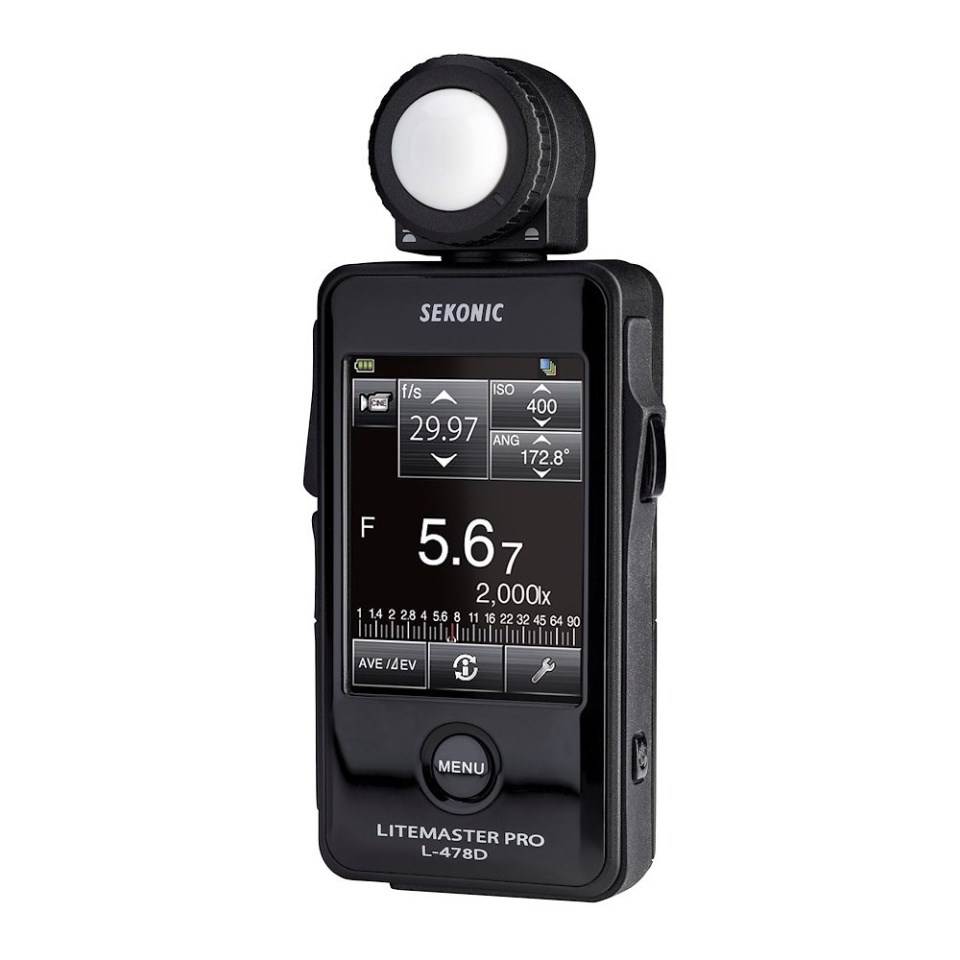
Let's give it a try!
Here we see f/5.6 (7)
We have a few options:
1. We can go down 7 clicks on a flash with 1/10 adjustments and get f/5.6.
2. We can go up 3 clicks on a flash with 1/10 adjustments and get f/8.0
1. We can go down 2 clicks on a flash that works in 1/3 adjustments and move the light slightly for f/5.6.
2. We can go up one click on the flash and end up at f/8.0
1. Set the camera to f/8.0 and lower your aperture by one click for f/7.1.
2. Set the camera to f/8.0 and increase your ISO by 1 click (ISO is also set in 1/3 stops on most cameras)
The great thing is that once you know how to read the light meter, you can change settings very quickly. Do you have problems calculating settings such as ISO, shutter speed and the relationship between the aperture?
Do not worry, when using a meter, you can simply change one setting and the other settings will change.
In other words, if you have misjudged the exposure and get a reading of 1/125, ISO 400, f/8.0, and you need a faster shutter speed, you can simply change the shutter speed, ISO and aperture until you see the settings that will work. You do not even need to take a new reading.
Are light meters only for flashes?
So is a light meter only useful when using flashes? No, absolutely not. A light meter can be used in different configurations, just like your camera.
You can use it to determine your aperture or shutter speed and, of course, to play with your ISO. It is like the 'Swiss pocketknife' for every situation
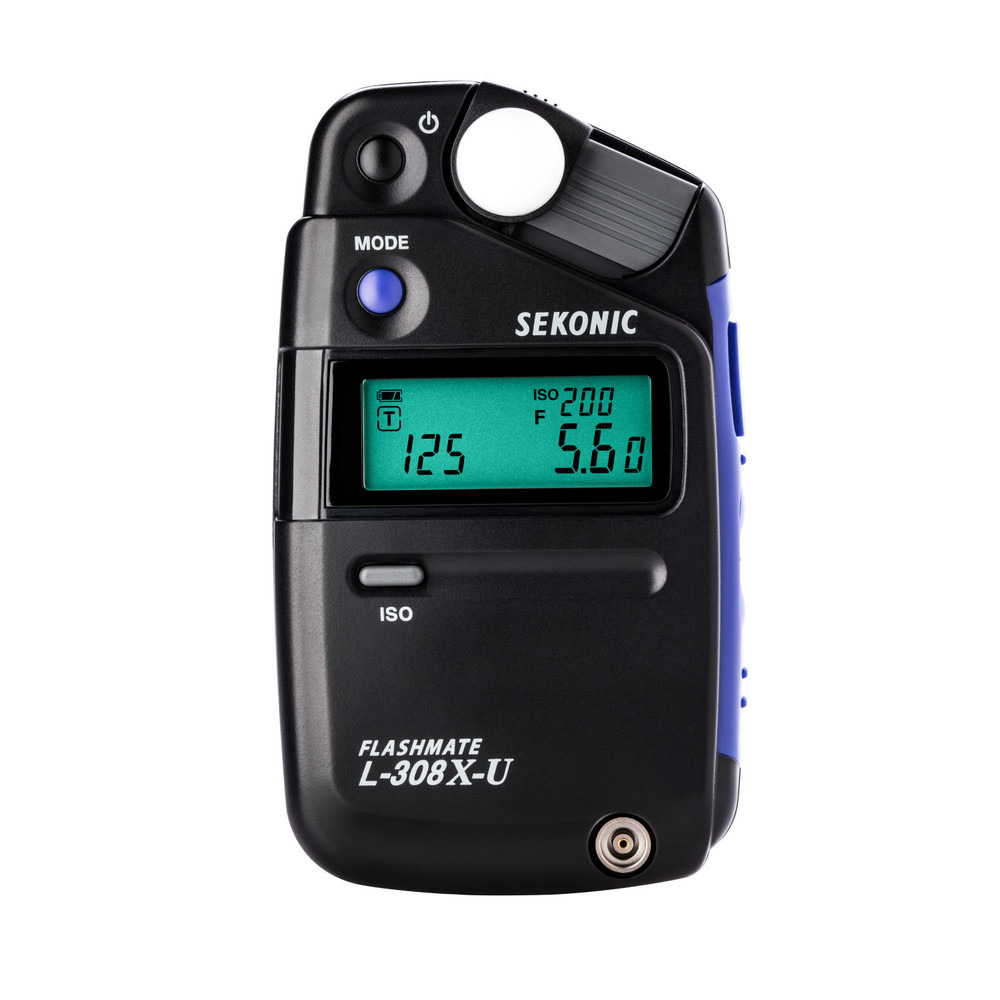
OK, I am sold, which light meter should I buy?
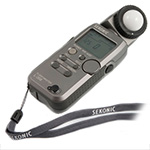
It is no secret that I love the Sekonic brand, but in essence you can also buy another brand. First, make sure that your light meter is compatible with flash. Very old meters often are not.
Also make sure that you decide whether you need an incident meter or want both types (reflective and incident).
Incident versus reflective
When we look at the difference between the two, the easiest way is to compare the reflective meter with how your camera works. It gives you the value for 18-12% grey.
To use this, meters often have extra attachments (spot meters), or on the more expensive models the spot meter is built in.
Personally, I would strongly recommend buying a meter such as the Sekonic 758 or 858 with a very narrow spot meter built in, around 1 percent is ideal for most people.
You can also buy attachments for some other meters, as mentioned, but I do not want to fiddle with attachments that can get lost, so the 758/858 would be my choice if you also want to be able to take reflective readings.
But do you need it?
That is a good question. The main meter we use light meters for is the incident light meter. This means that you hold the meter in front of the part you want to illuminate correctly, and the meter gives you the correct value.
Now you might say... why would I ever use a reflective meter if I only get 18 percent grey from it?
GREAT question! We often use reflective metering to make white backgrounds 100 percent white, rather than 98 or 110 percent. This prevents light loss and shows all the detail in clothing and hair that you would lose if you 'overexposed' the background too much.
Or we make sure that certain areas are 100% black. But you can also calculate the fall-off of the light.
Now I have to be honest. I mostly used the reflective meter outdoors, to calculate the output of my flashes for creating day-to-night images, adding fill light and everything in between. But with modern cameras, there is a very cool trick for this.
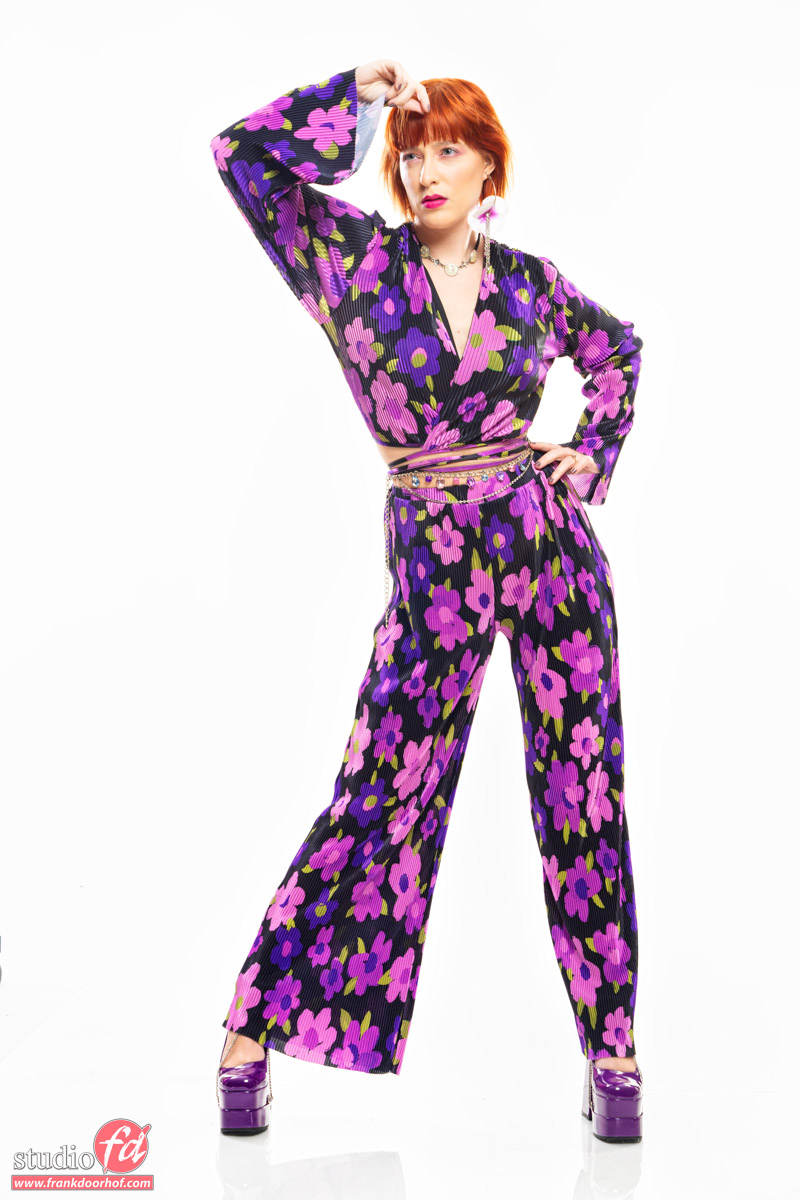
Is the EVF a replacement for the light meter?
Yes, you read that right, the electronic viewfinder (EVF) can replace the 'reflective' meter. But only in certain circumstances. For example, when you are on location and want to create a great day-to-night effect.
Simply set the electronic viewfinder to emulation mode and set the shutter speed wherever you want. Start playing with the aperture and ISO and just look through the viewfinder. Let's say you love f/8, 1/125 and ISO 100.
Now all you need to do is set your flash to f/8.0, for which you still need an incident meter (to do it quickly and correctly).
How to read a light meter, conclusionReading a light meter is super simple once you understand the extra numbers and how they work with your camera and flash.
The benefits are immense: you can work much faster, visualise and set up location shoots within seconds, and amaze your client by taking the photograph straight away, something you see less and less, instead of constantly trying.
If you look on Marktplaats, you can probably find plenty of meters, but if you want to buy new, something I do recommend with precision instruments, I would look at the Sekonic range, such as the Sekonic 858 (my meter) or the Sekonic 758. But the Sekonic 358 is good too.
These are examples of the meters I have owned over the years, but they also have some really good alternatives such as the 508, 308x, 478, and so on.
Visit Sekonic.com for more information about the different types.
About the author
Frank Doorhof blogt dagelijks in het Engels op zijn website en geeft wekelijks workshops model fotografie in zijn studio in Emmeloord, maar ook op locatie in binnen en buitenland. Van beginners tot gevorderde, iedereen kan bij Frank terecht. Ook voor specifieke 1 op 1 workshops, of maatwerk voor groepen.
You might also like
-
 Different Metering Methods Don't Make Better Photos
by Nando Harmsen
-
 Flash photography tip: Consider a flash meter
by Elja Trum
-
 Street photography tip: Create beautiful silhouettes with spot metering
by Michiel Heijmans
-
 Learn How the Exposure Meter Behaves
by Nando Harmsen
-
 How necessary is a flash meter?
by Elja Trum
15 comments
-
 Donald Willemsen wrote on Saturday 14 September 2024 at 21:32 | reply
It must be me, but I don't understand a damn thing of the whole story.
Translated from Dutch.
I myself have a Sekonic flash(light) meter and know how to use it.
Unfortunately Frank, I can't make head or tail of your story. For you, those light meters are a piece of cake. Could it also be due to the way you write the story?
I would really like to understand it so I can also benefit from it in my own studio. -

 frank doorhof
wrote on Saturday 14 September 2024 at 23:02
| reply
frank doorhof
wrote on Saturday 14 September 2024 at 23:02
| reply
It's a shame that the article doesn't come across well to you. I'm trying to be as complete as possible.
Translated from Dutch.
What is the part you don't understand ? -
Donald Willemsen wrote on Tuesday 17 September 2024 at 09:22 | reply
Frank, I will start with a quote.
Translated from Dutch.
Quote: 'First of all, we must realize that as humans we only see three colors. We call these colors the primary colors, Red, Green and Blue.
We also have secondary colors, Cyan, Magenta and Yellow. All colors are connected via the blackbody curve (white points for color temperature) and determine the color space.'
A light meter with light and no colors. Colors are measured with the color meter.
You talk about a blackbody Curver. What is that? Show that with an illustration.
'Emulation mode'. That word does not appear in the menu of my R7. I don't know what you are talking about.
My studio flashes can be adjusted continuously from 1 to 1/2, 1/4, 1/8 or 1/16 and everything in between.
My light meter is a Sekonic L308 as in the illustration in your article.
An extensive studio flash course at Photofacts Academy might help. -

-
frank doorhof
wrote on Tuesday 17 September 2024 at 14:43
| reply
No problem.
Translated from Dutch.
The reason colours are mentioned only briefly is to explain the part about brightness. The coordinates within the colour space consist of the 3 coordinates mentioned, x,y and Y per colour
Or rather Hue, Saturation and Luminance.
That is why the light meter is essential for getting the colours right, the part about the colour space and black body curve belongs with the part about the colour checker that follows.
Emulation mode is on the EVF
This may have a different name on cameras, but it is the setting that makes the camera provide an emulation of the settings, in the studio this must be turned off (otherwise the image remains black) and outside I would turn it on (WYSIWYG)
Most flashes such as those mentioned in the article can be adjusted in 1/10th and 1/3rd steps. As you describe it, your flash would therefore fall under 1/3rd, there will probably be 2 steps between each setting, which makes it 1/3rd :D
Hopefully that makes it a bit clearer. -
 Hans van Sterkenburg wrote on Tuesday 17 September 2024 at 19:34 | reply
Dear Frank, your explanation, for which thanks, is a fascinating whole of unfathomable concepts. My mental framework is too narrowly sized and too wondrously constructed to take in the material. Which does not prevent me from expressing my appreciation and admiration for your expertise.
Translated from Dutch.
Regards,
Hans, -
frank doorhof
wrote on Tuesday 17 September 2024 at 20:09
| reply
Hans, which part can I help you with that you don't understand?
Translated from Dutch. -
 Martin Smit
wrote on Tuesday 17 September 2024 at 20:14
| reply
Martin Smit
wrote on Tuesday 17 September 2024 at 20:14
| reply
Dear Frank. I bought the seconic 858 to also be able to measure HSS flash, when using the Godox AD series. I can't get any meaningful readings. Do you perhaps have experience with that? Apart from that, I'm very happy with a light meter for flash light, I should have started that much earlier
Translated from Dutch. -
frank doorhof
wrote on Tuesday 17 September 2024 at 22:30
| reply
Hi martin
Translated from Dutch.
What are the settings on the camera and what goes wrong in terms of values ?
Hss metering is possible but I do advise using the camera and flash on M for stable results. -
 André Kremer wrote on Wednesday 18 September 2024 at 11:04 | reply
A question with an introduction: at a model shoot I set up the flashes and adjust the power with a light meter. The first shot is then of a gray card that I have the model hold, possibly a few shots to, for example, light the legs evenly as well. My question: don't you use a gray card?
Translated from Dutch. -
frank doorhof
wrote on Wednesday 18 September 2024 at 11:34
| reply
@andre
Translated from Dutch.
I shoot a colorchecker with which I can create both the color balance and color profile.
A gray card is perfect for the white balance, the colorchecker goes just one step further. -
 Mars wrote on Wednesday 18 September 2024 at 12:59 | reply
just a detail: green is a secondary color (yellow with blue)
Translated from Dutch.
Yellow is a primary color.
I still have to read the epistle, but initially I don't understand anything about a light meter; it measures and says e.g. aperture should be 11. But I don't want to take a photo at all at f11, but with e.g. f4. -
frank doorhof
wrote on Wednesday 18 September 2024 at 13:32
| reply
@mars
Translated from Dutch.
Red, green and blue are the primary colors
Cyan, magenta and yellow the secondary ones. Just look up a rec709 color triangle.
Also when we look at our eyes, screens and e.g. the channels in Photoshop
I think you confused the terms additive and subtractive colors.
About your comment on F4
That is precisely why you use the meter, because how else can you quickly and accurately get your flash to F4 so if you meter F11, you set the flash 3 stops lower. With the meter, this can be done quickly and accurately in any situation, before you have taken your photo -

-
Donald Willemsen wrote on Wednesday 18 September 2024 at 13:52 | reply
Nando, I totally agree with that. I have a light meter, but I don't know how to use it optimally yet. Autumn and winter are coming. Time to get back to doing some studio photography. Bringing out a light meter course right then would be great
Translated from Dutch.

Have your say
Please note: Articles older than a week can only be commented on by signed-in visitors.Would you still like to comment? sign in or create a free account.
Become a better photographer every week
A practical photography tip in your inbox every week.
39,024 photography enthusiasts already receive the tips! More about the weekly mail. Or keep up to date via  Facebook.

Elja Trum
Photofacts; everything to do with photography!
Would you like to take better photos and keep up with what is happening in photography? Photofacts publishes articles that teach you something about photography — from a product announcement to a practical shooting tip or a look at a website. Photofacts covers photography every day and is a hobby project of Elja Trum's that got out of hand. The articles are written by a team of volunteer authors. If you would enjoy writing one or more articles for Photofacts, do get in touch.More about PhotofactsPhotofacts is made possible in part by
