

How to create depth and contrast in your portrait photography, with or without lens flare
Sunday 29 September 2024, 16:32 by Frank Doorhof | 2,844 views | 1 commentThis article was translated from Dutch with the help of AI. Read the original.
If we really want to create depth and you still often shoot straight from the front, we need to change the direction of our light.
Today we'll look at one way to brighten the darker side and create some really cool effects with the familiar Rembrandt lighting.
Depth
We all know the term 'three-dimensional'. This often means that a photo seems to come right off the screen.
You can often achieve this effect by adding more contrast to the photo. Not with the contrast slider, but in the light.
We often do this by moving the light more towards the sides, for example. Think of the familiar Rembrandt lighting, which I think is one of the best-known setups when it comes to a 3D look.
You achieve this effect by placing the light to the side, almost behind the model. The downside of this lighting is that the background often becomes very dark. This can sometimes work beautifully, but sometimes you simply want to be able to see the background a little better too.
For me, the background should at least be lit a little better than the dark side of the face. This means there is some separation between the model and the background.
Making everything black or barely visible can sometimes look good. But usually you're left with an image that doesn't feel right because your model is literally swallowed up by the background.
Accent versus flare, or perhaps both?
You can see the Rembrandt lighting below, and like many photographers, this was one of my favourite lighting setups as soon as I started photography.
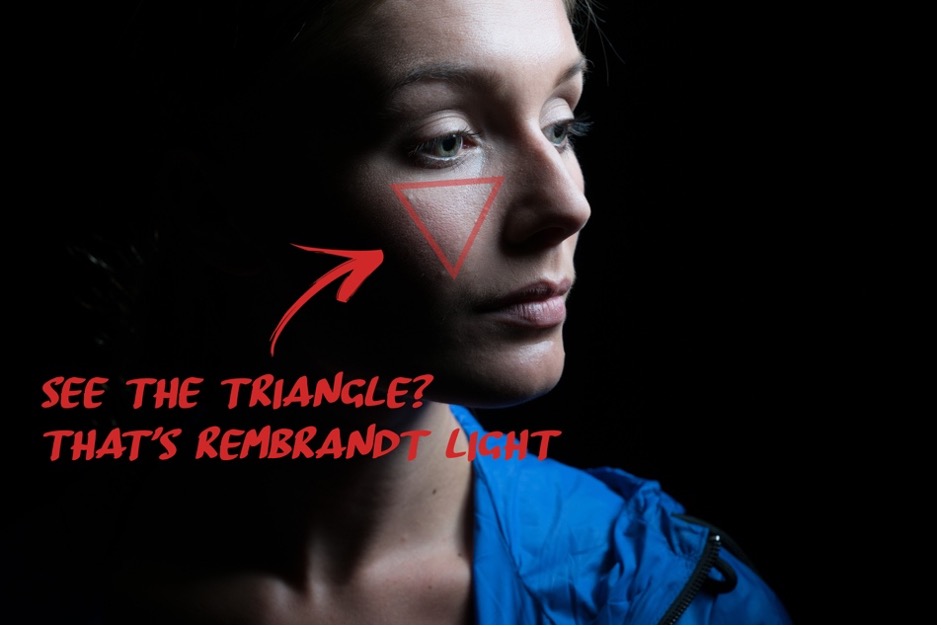
But somehow I never liked the dark part of the face. The easiest solution is, of course, to use a reflector. But that only works if it gets enough light to bounce back.
Because I usually use my flashes fairly close to the model, not much light falls on the reflector, so not enough is bounced back towards the model. Add to that the fact that I often use grids and a slightly higher angle, and a reflector is often not ideal.
Inverse square law
This is, of course, due to the inverse square law. It dictates that light falls off over distance. This means that if you place your flashes very close to the model, the light will become less bright very quickly, so it won't have enough 'power' left to reflect back onto the face as well.
If you move the light further away, this effect becomes less pronounced, but you also lose a lot of contrast in the image.
Solution
I usually solve this by using an extra light source on the shadow side. You can choose to place it behind your model and simply light the side, opening up the shadows.
But as you can see here, I also light the background at the same time and add an accent to the model. All with one accent flash.
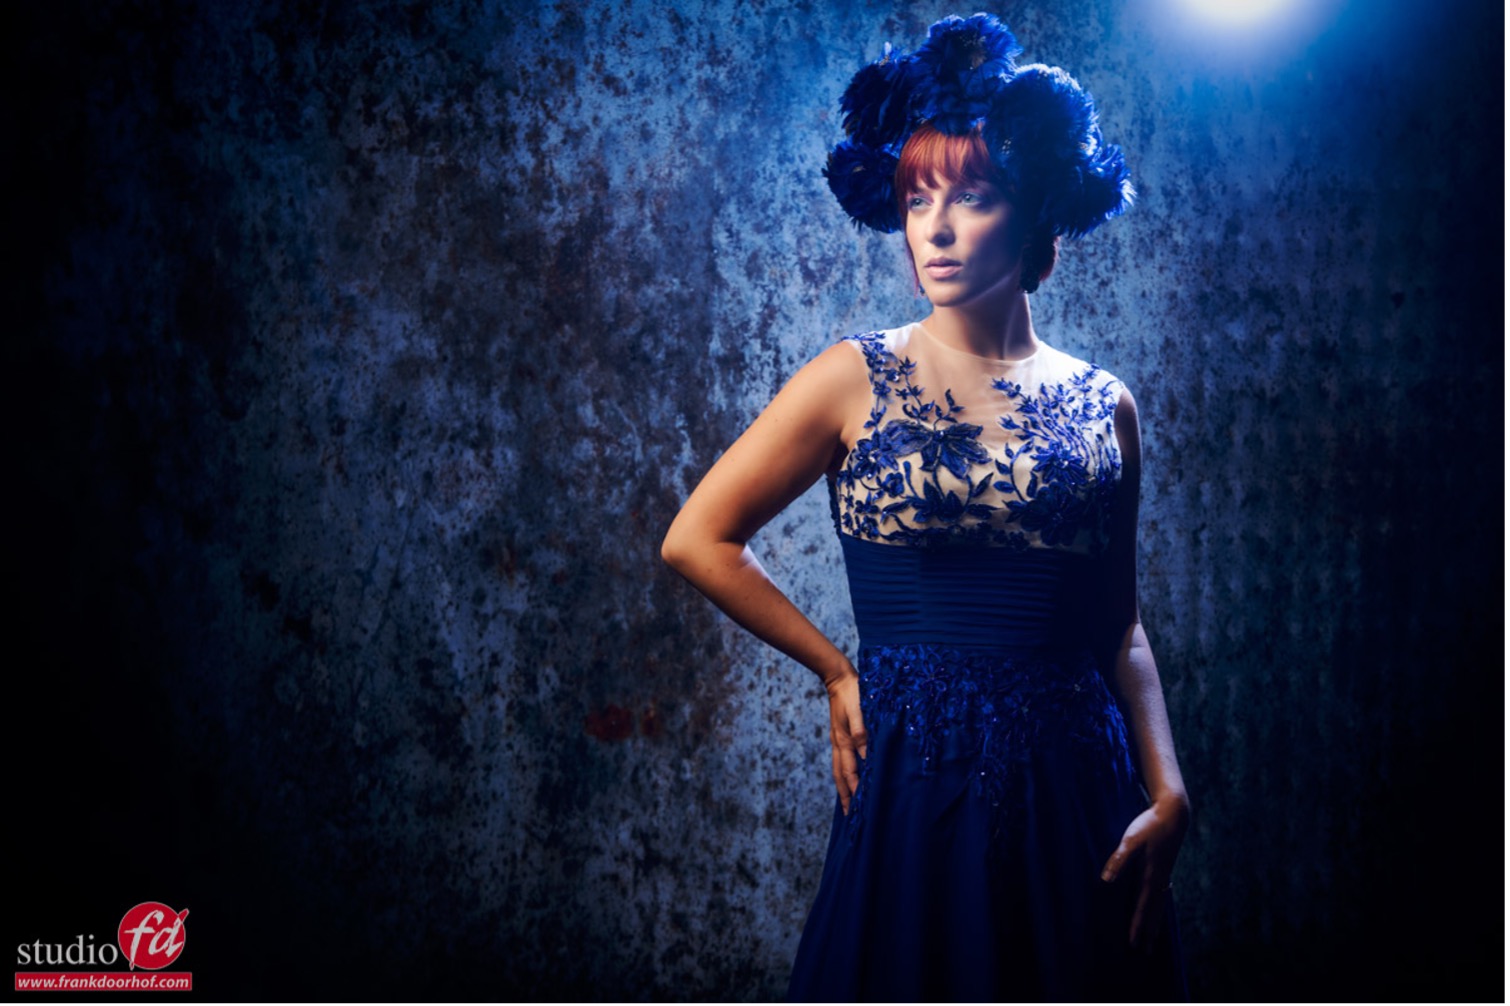
You can also choose to move it slightly further back to light only the jawline. This already works like sunshine, but let's raise the bar and look at why I can light both the background and the model with one flash.
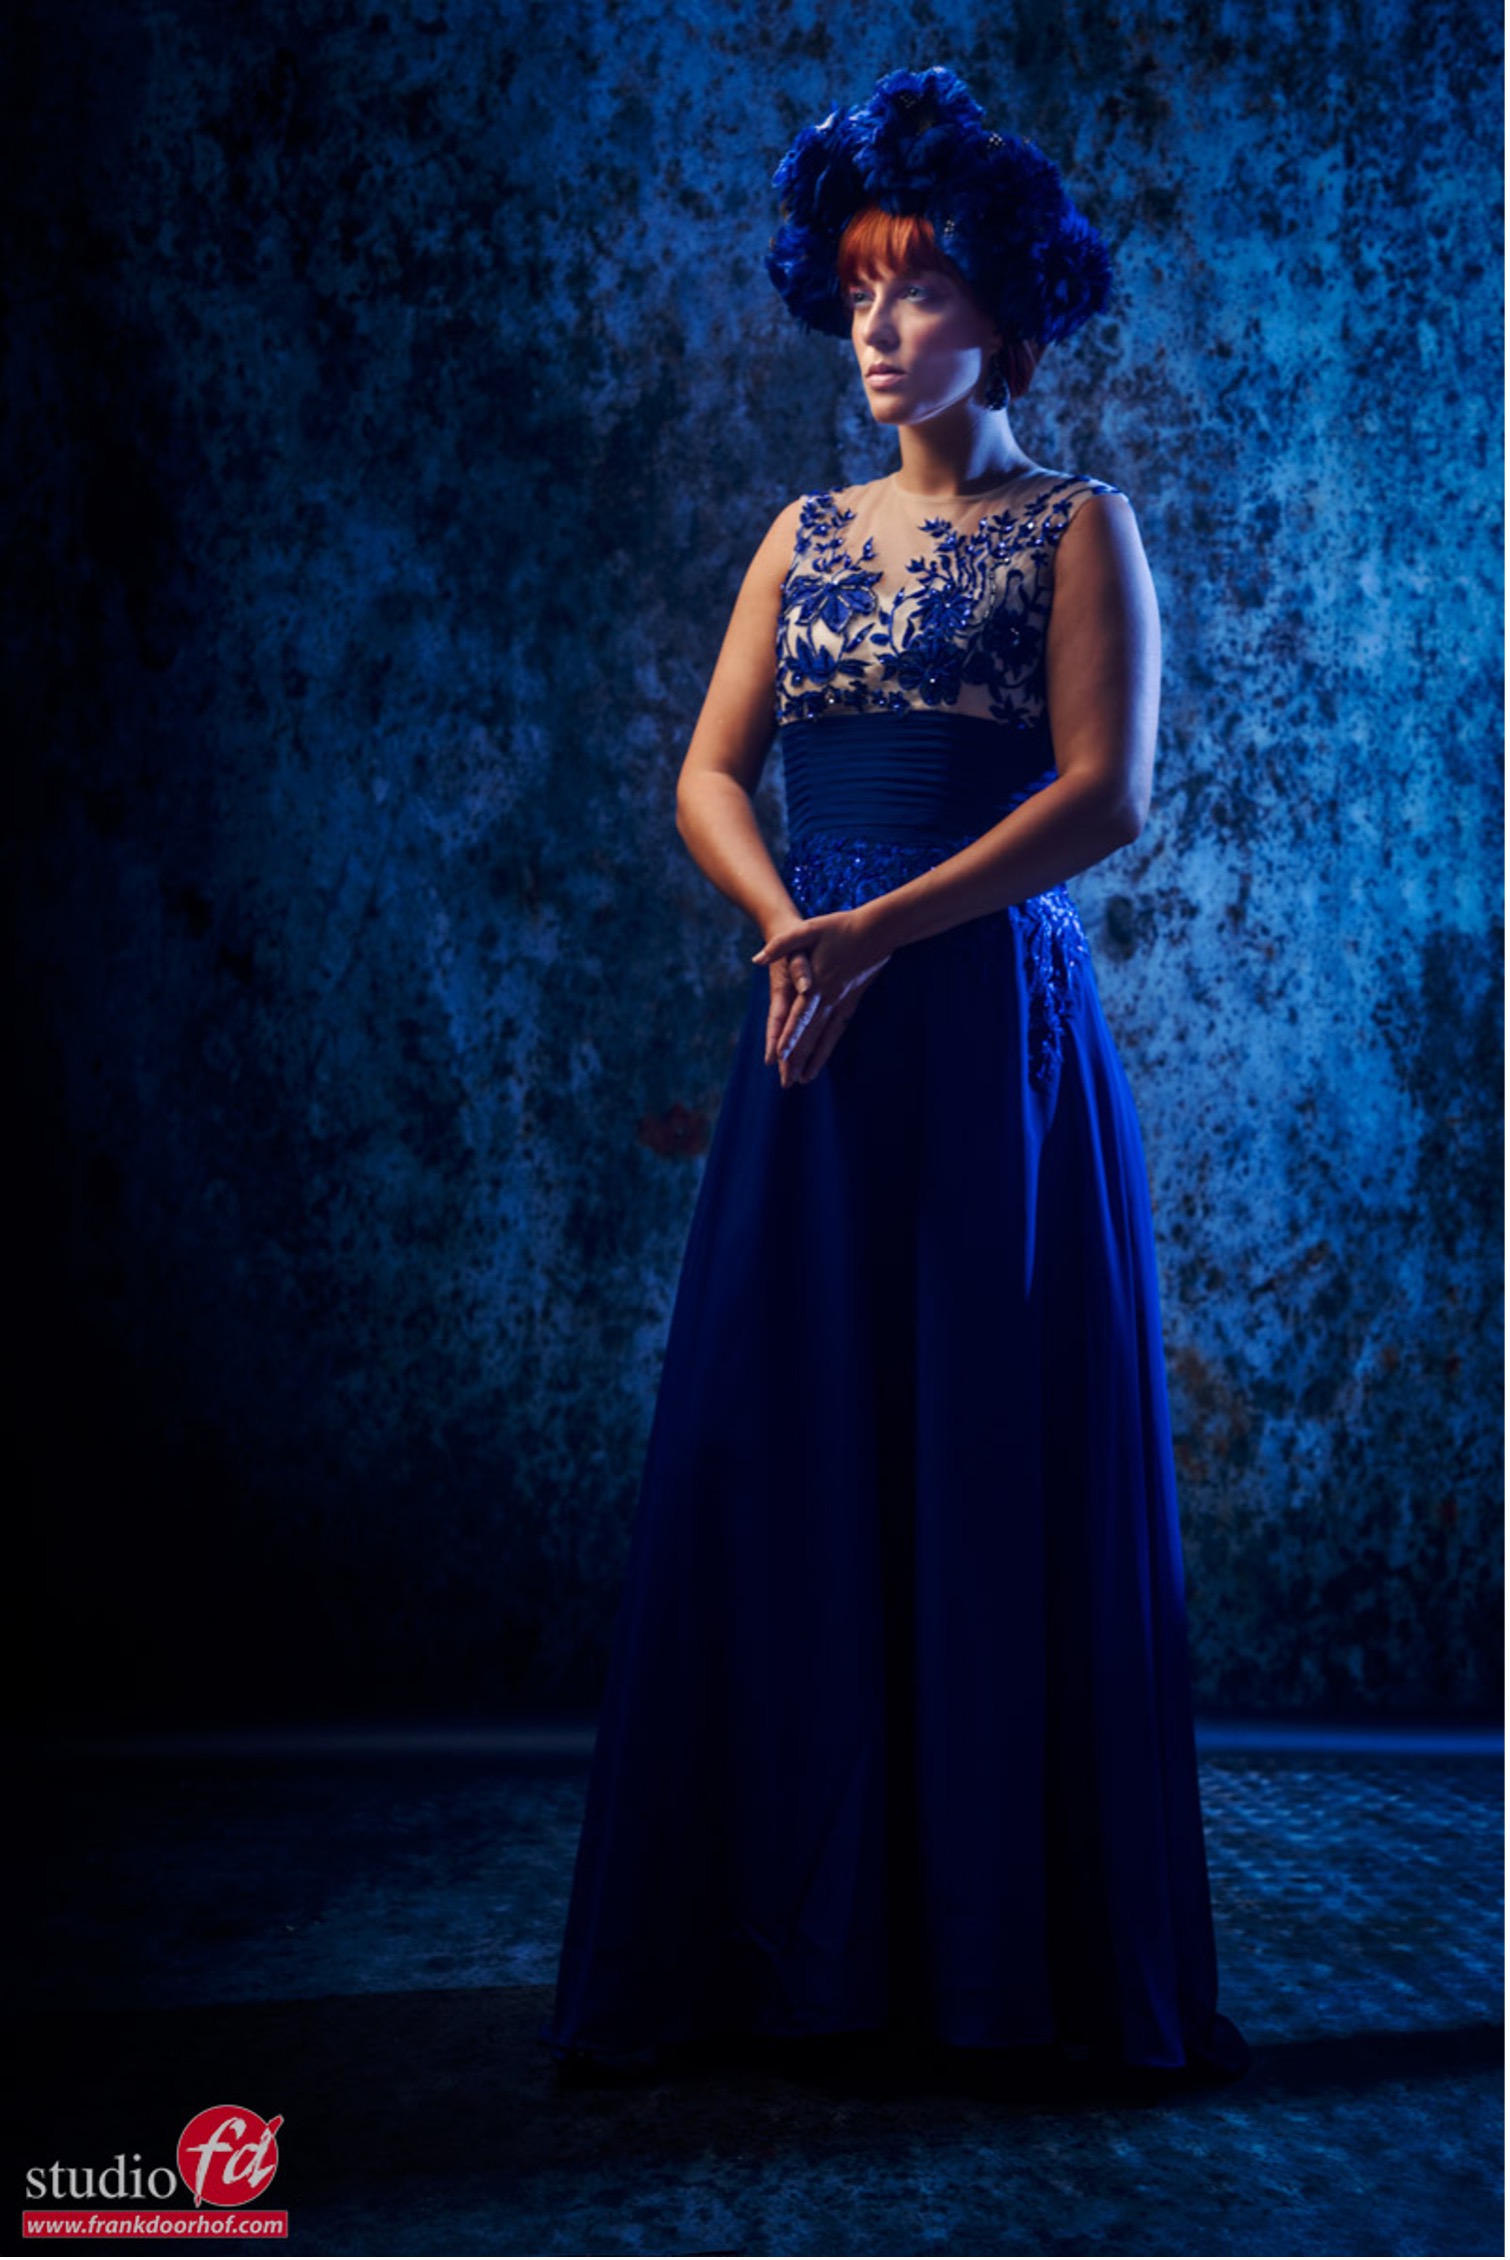
The trick lies in the omnidirectional dome attached to the accent light. By using a light source with a more diffuse light source.
In the following photos, I use Rogue's omnidirectional dome. This is a lovely small dome from the magnetic system, which is particularly suitable for lighting a larger area, but is also perfect for use as an accent light with a very attractive lens flare.
The positioning of a dome may seem very easy, and if you look at it, you might think that too: 'just put it down somewhere, it lights all around anyway'. But with this type of light source, feathering is especially fantastic.
Feathering
Feathering is the English term and means something like spreading off or allowing light to fall off. For almost all light sources, the light quality is somewhat hard when you look at the centre. The further you move towards the sides, the lower the light intensity becomes, but the light also becomes softer.
A light source such as an omnidirectional dome is ideal for this. You can direct a lot of light towards the camera for a lens flare, while still keeping just enough for the model's jawline with beautifully soft light.
By tilting the dome slightly in the first photo and having the light come from above, I could light both the jawline and the background. As a bonus, because it was higher up, it also created an accent line across the hair.
The dome is, so to speak, between the model and the background, and by tilting it I determine how much light goes in each direction. A sort of ratio, but one that can be adjusted very precisely.
The dome is fantastic for using at the sides, but also experiment with other light sources. The sides of the light are the secret ingredient in countless photos.
Here you can see a few photos where I let quite a lot of light fall on the lens, without overexposing the model. It is possible to do this with softboxes, but a dome is simply perfect for this.
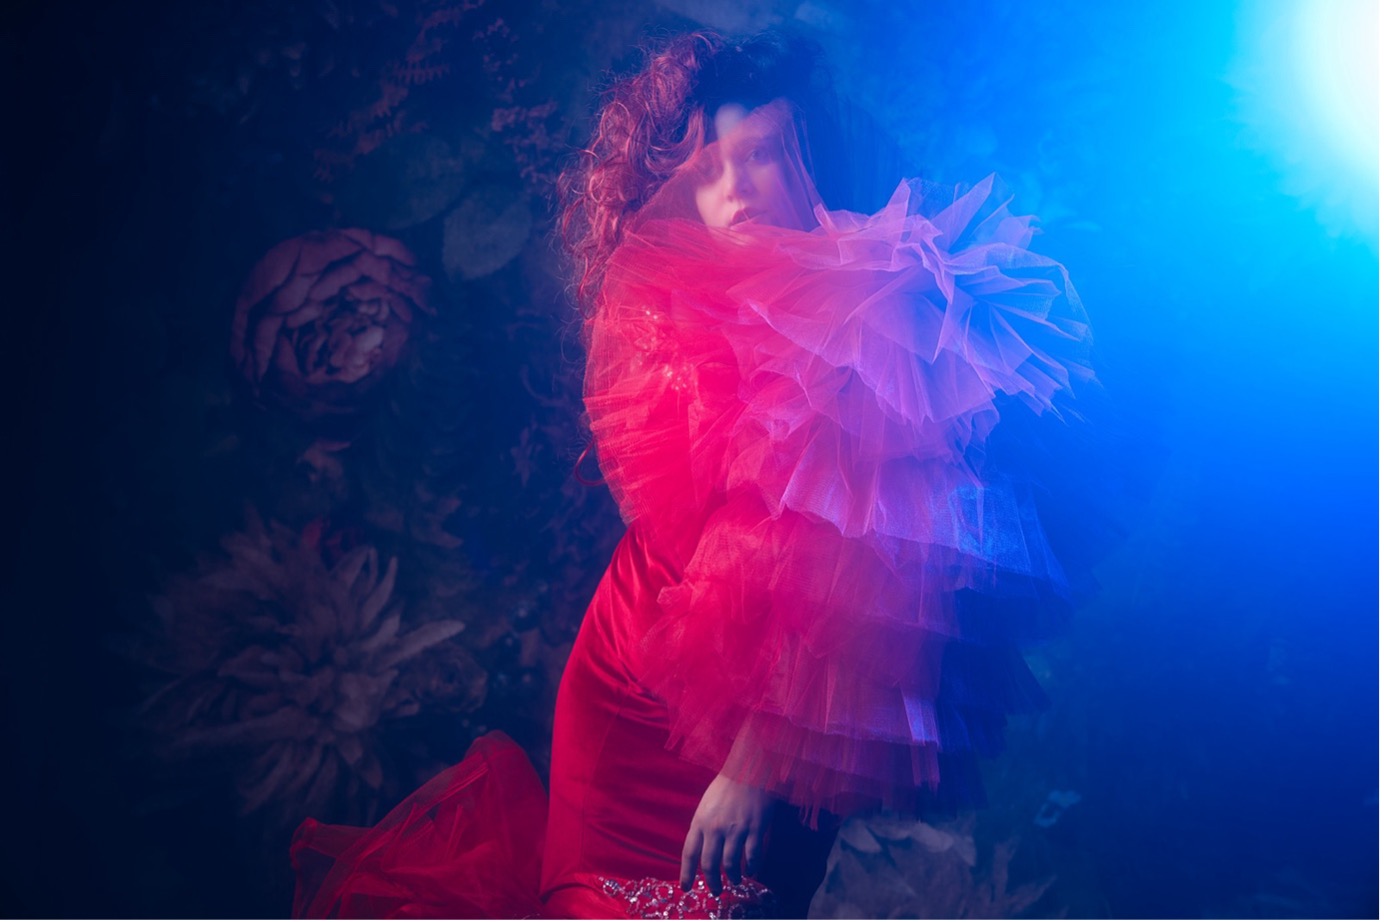
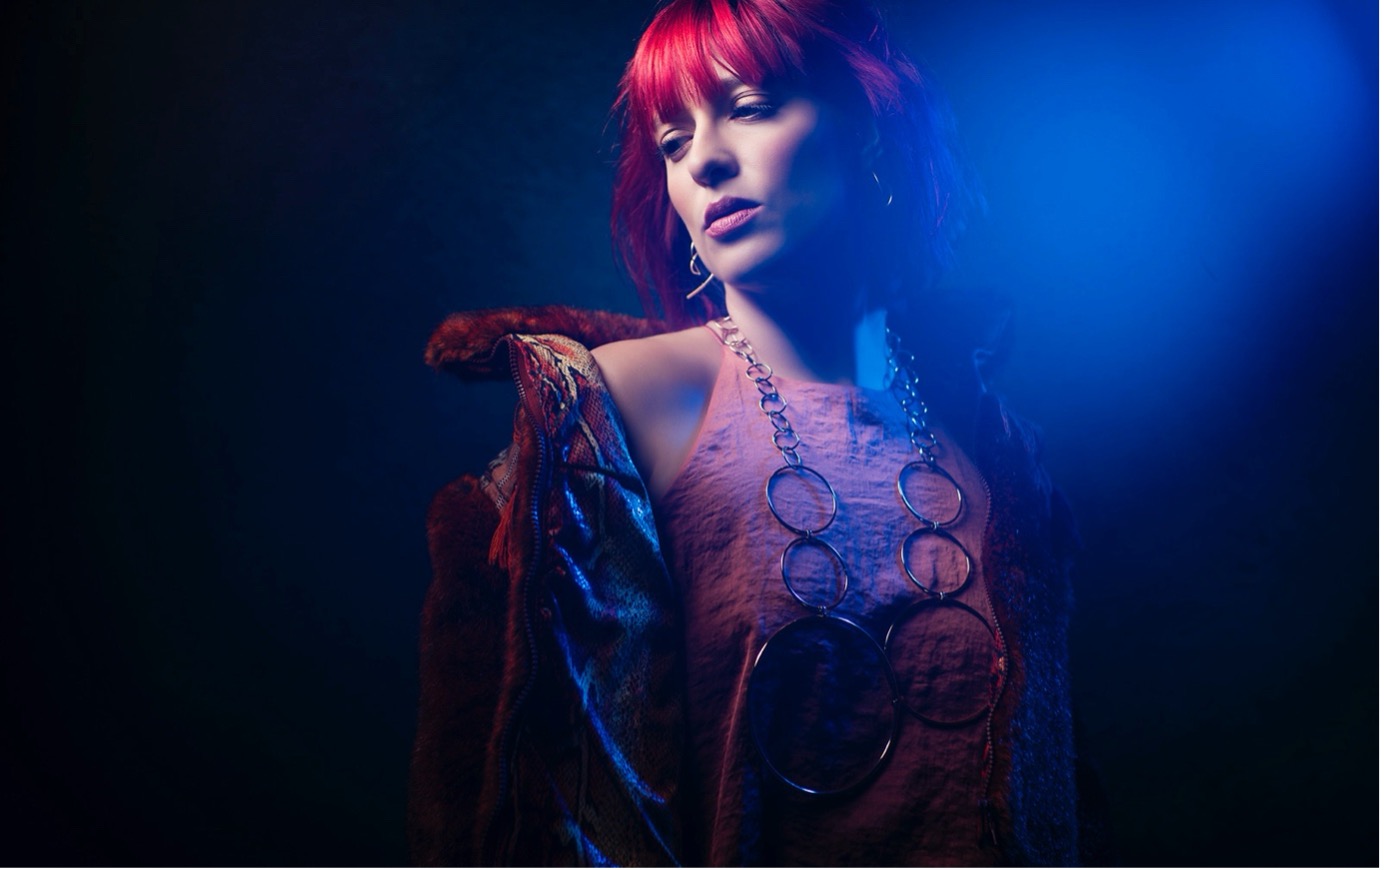
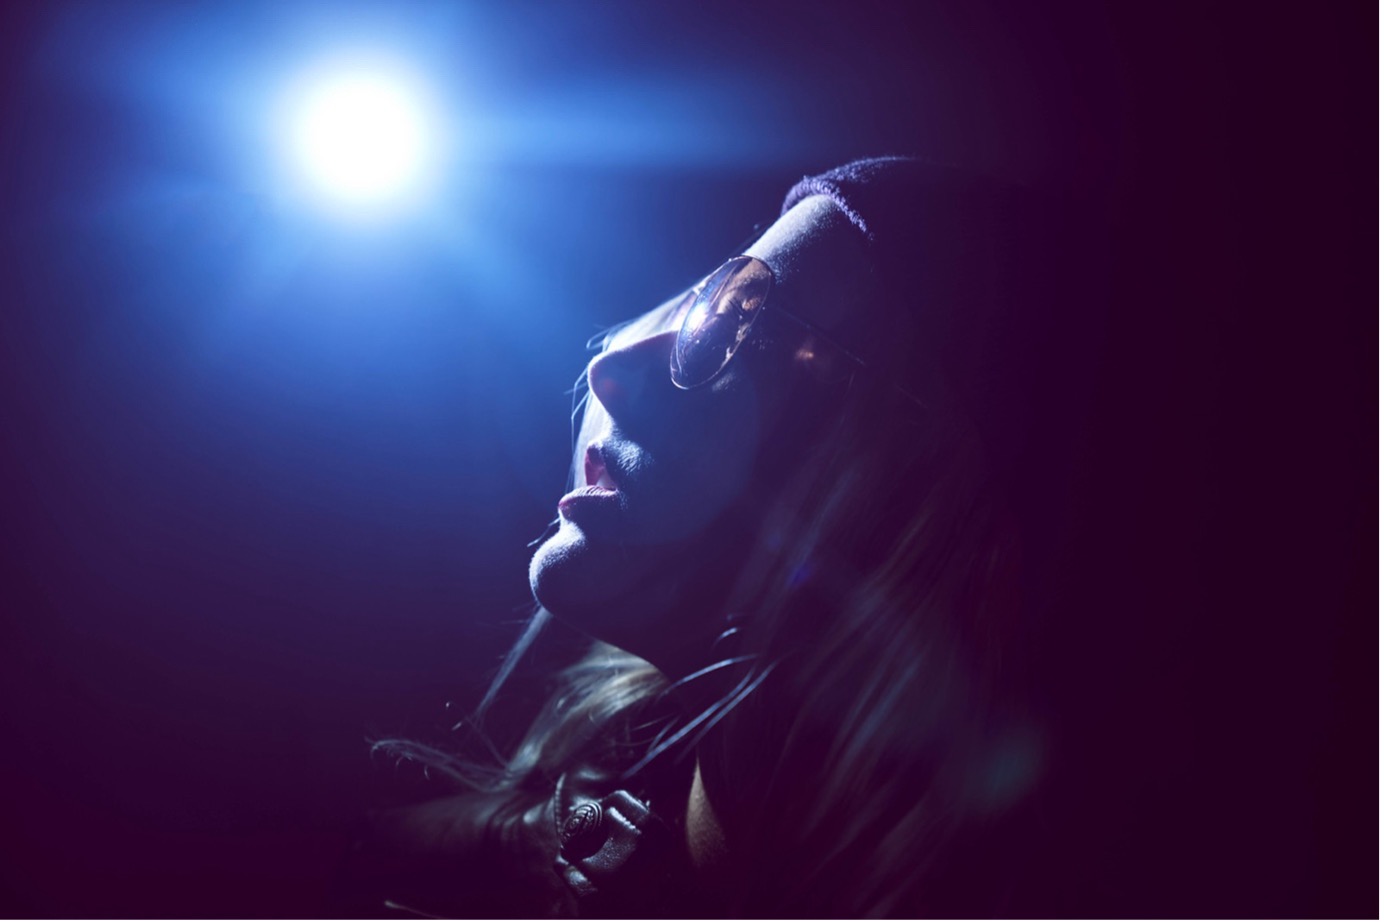
If you're not happy with your lens flares, try some older M42 lenses. You can use these on most cameras with an adapter ring.
Or, if you want to go all out, you can choose a Techart or FotoDiox adaptor that turns manual lenses into autofocus lenses, and it works brilliantly. The downside is that, as far as I know, they are only available for Sony.
If you want to use your own lenses, you'll find that modern lenses use coatings that strongly reduce lens flares, or make them harsher.
You can solve this by using a filter on the lens, for example. I use the K&F concept black diffusion myself. It has virtually no effect when you aren't using backlighting, but as soon as it catches light directly, it greatly increases the lens flare and gives the skin a beautiful glow.
Video about creating depth
Okay, because pictures say more than words, let's look at lots of images one after another, which we call video
About the author
Frank Doorhof blogt dagelijks in het Engels op zijn website en geeft wekelijks workshops model fotografie in zijn studio in Emmeloord, maar ook op locatie in binnen en buitenland. Van beginners tot gevorderde, iedereen kan bij Frank terecht. Ook voor specifieke 1 op 1 workshops, of maatwerk voor groepen.
You might also like
-
 Colour manipulation; Creating unusual skies with a colour gel
by Frank Doorhof
-
 Colour manipulation, working with colour and gels
by Frank Doorhof
-
 The power of accent lighting
by Frank Doorhof
-
 Playing with black and white contrast in Lightroom Classic
by Nando Harmsen
-
 Got flare in your HDR photo? Remove it with your finger
by Nando Harmsen
-
 The three directions of light
by Nando Harmsen
1 comment
-
 Nico Bruin wrote on Saturday 5 October 2024 at 10:08 | reply
Frank,
Translated from Dutch.
Another clear explanation. Thanks again.
Have your say
Please note: Articles older than a week can only be commented on by signed-in visitors.Would you still like to comment? sign in or create a free account.
Become a better photographer every week
A practical photography tip in your inbox every week.
39,079 photography enthusiasts already receive the tips! More about the weekly mail. Or keep up to date via  Facebook.

Elja Trum
Photofacts; everything to do with photography!
Would you like to take better photos and keep up with what is happening in photography? Photofacts publishes articles that teach you something about photography — from a product announcement to a practical shooting tip or a look at a website. Photofacts covers photography every day and is a hobby project of Elja Trum's that got out of hand. The articles are written by a team of volunteer authors. If you would enjoy writing one or more articles for Photofacts, do get in touch.More about PhotofactsPhotofacts is made possible in part by
