

4 Lightroom Classic Tips for Experienced Users
Monday 7 June 2021, 23:46 by Elja Trum | 6,418 views | 3 commentsThis article was translated from Dutch with the help of AI. Read the original.
Sometimes you have known something for years, yet there are still useful features you have never used. When you watch someone else, you sometimes discover features you did not know existed. In this article, 4 useful tips for working with Lightroom Classic.
1. Fine adjustments to sliders
If there is one thing you do a lot in Lightroom, it is dragging the sliders. Sometimes it can be difficult to make a fine adjustment with your mouse or tablet. Fortunately, there is a handy trick for this.
While hovering your mouse over a slider, press the up or down arrow on your keyboard. This makes a tiny adjustment. The exact value naturally depends on the slider's value. For exposure, for example, it is 0.1 EV.
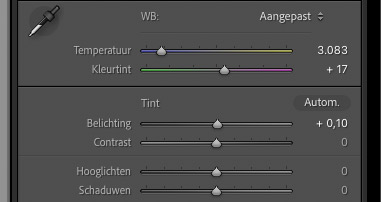
Would you rather make larger changes? Use the Shift key together with the arrow keys. The step for exposure is then 0.33 EV.
2. Quickly reset the Adjustment Brush
I regularly use an Adjustment Brush to quickly make an adjustment to part of an image. Lightroom remembers the settings from the last time you used the Adjustment Brush each time you start a new brush.
That is often useful, but quite regularly you simply want to set everything back to zero so you can start a new adjustment with a clean slate.
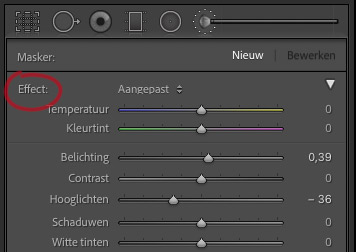
Simply double-click the word 'Effect:' at the top of the panel. This resets all the Adjustment Brush settings. It saves you a lot of unnecessary dragging.
3. Use keyboard shortcuts
Lightroom works much faster when you use keyboard shortcuts. There are a huge number of them, and you obviously cannot learn them all by heart. So look up the shortcuts for actions you perform often.
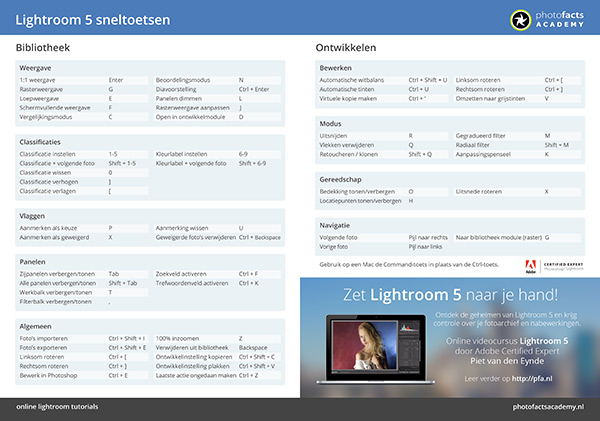
I also have a handy cheat sheet for you to get started quickly with keyboard shortcuts. It still says Lightroom 5, but the shortcuts have not changed and still work in the current version.
» Download: Lightroom Classic keyboard shortcuts
4. Quickly enable automatic masking
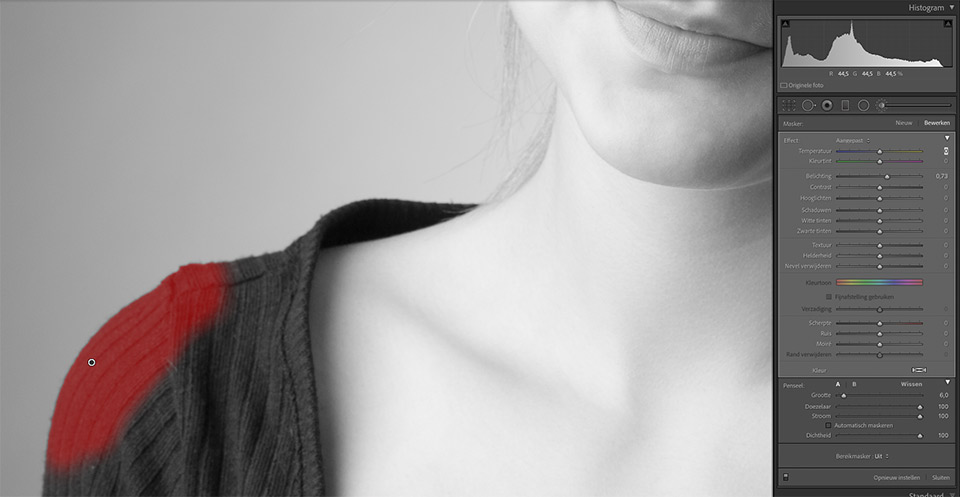
When you are working with the Adjustment Brush, you often want to switch quickly between 'Auto Mask' and regular masking. This just involves changing a tick box, so it seems simple enough.
The only thing is that you first have to return to the relevant panel. A quicker way is simply to hold down CTRL or Command. This automatically switches your Adjustment Brush to 'Auto Mask' mode.
About the author
Elja Trum is the founder of Photofacts and online photography course website Photofacts Academy. He has been writing about photography since 2006. Elja is also the author of (Dutch) books on composition, black-and-white photography, flash photography and portrait photography.
You might also like
-
 Speed up Lightroom Classic by reinstalling it
by Elja Trum
-
 5 tips to work faster in Lightroom Classic
by Thijs Schouten
-
 Presets in Lightroom Classic
by Nando Harmsen
-
 What is the Comments tab in Lightroom Classic for?
by Nando Harmsen
-
 5 Tips for Managing Photos in Lightroom Classic (and Other Software)
by Nando Harmsen

3 comments
-
 Stefaan wrote on Tuesday 8 June 2021 at 10:55 | reply
Sooo happy with tip 2!
Translated from Dutch. -
 Bart Telling wrote on Tuesday 8 June 2021 at 19:20 | reply
Tip 1 is particularly useful. I didn't know that. Thanks
Translated from Dutch. -
 Paul Lefevere wrote on Thursday 10 June 2021 at 10:50 | reply
Variation on tip 1 "While hovering your mouse over a slider, press the up or down arrow on your keyboard."
Translated from Dutch.
If your mouse has a scroll wheel, you can also click on the slider, and use the wheel to move the slider.
Have your say
Please note: Articles older than a week can only be commented on by signed-in visitors.Would you still like to comment? sign in or create a free account.
Become a better photographer every week
A practical photography tip in your inbox every week.
39,077 photography enthusiasts already receive the tips! More about the weekly mail. Or keep up to date via  Facebook.

Elja Trum
Photofacts; everything to do with photography!
Would you like to take better photos and keep up with what is happening in photography? Photofacts publishes articles that teach you something about photography — from a product announcement to a practical shooting tip or a look at a website. Photofacts covers photography every day and is a hobby project of Elja Trum's that got out of hand. The articles are written by a team of volunteer authors. If you would enjoy writing one or more articles for Photofacts, do get in touch.More about PhotofactsPhotofacts is made possible in part by
