

Review: Case Air Wireless Tethering
Friday 17 March 2017, 23:32 by Michelle Peeters | 9,774 views | 5 commentsThis article was translated from Dutch with the help of AI. Read the original.
The Case Air Wireless tethering system creates a Wi-Fi connection with your camera from a smartphone, tablet or computer. You can also download photos straight away. You use the downloadable Case Remote software or smartphone app.
With Case Air, you can set a large number of camera settings from the application, such as focus points, bracketing, aperture, shutter speed and much more.
You can also fully control the camera remotely from the software or app. On your computer screen, you can check and set the focus using LiveView.
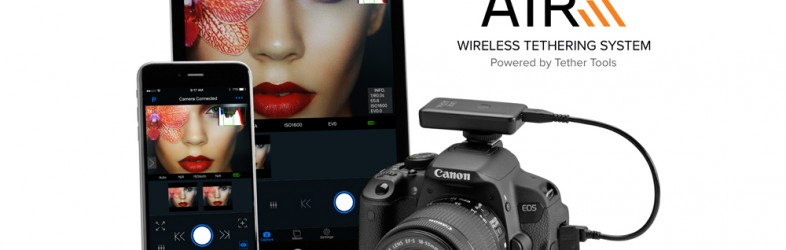
'Tethering in wireless communication is the ability to connect a device without an internet connection, such as a desktop, notebook, laptop or tablet, to a mobile device, such as a mobile phone or PDA, with mobile internet, to provide the device without an internet connection with access to the internet.'
Source: Wikipedia
For a list of supported cameras, you can visit the Case Air Tether Tools website: tethertools and/or caseremote.
I had the opportunity to test the Case Air Wireless tethering system. These are my findings:
Test equipment used:
1. Apple iMac with MacOS Sierra 10.12.3 + CASERemote version 2.410
2. iPhone 7 with iOS 10.2.1 + Case Remote app 3.1.0
3. Canon 5D Mark II + Case Air Remote DSLR Controller
4. Canon 5D Mark III + Case Air Remote DSLR Controller
1. Test with both Canon 5D cameras on Apple iMac
The test with both Canon cameras went almost exactly the same. I will therefore not discuss them separately. It is important to study the controller's instructions beforehand.
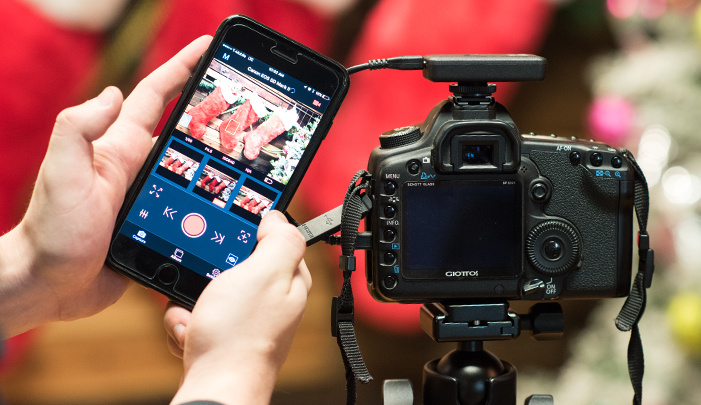
Installing the software and connecting
Install the software on the iMac. Then connect the DSLR Controller to the camera with one of the supplied cables.
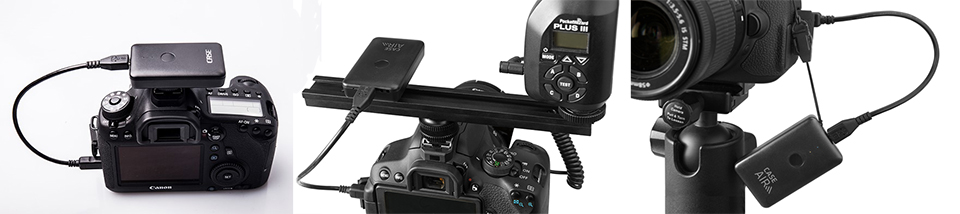
You can slide the controller into the camera's hot shoe. The disadvantage is that you cannot use a flash trigger or external flash at that point.
There is an accessory available to solve this: the Rapid Mount Accessory Extension Bar 8" (200mm). But of course, you can also simply hang the Controller from your tripod using the supplied cord.
Dedicated Wi-Fi connection
Make sure Wi-Fi is active on the iMac. Start the software, turn on the camera and connect to the dedicated network called: CASE_Raeeb9d. The corresponding password can be found on the sticker on the DSLR Controller.
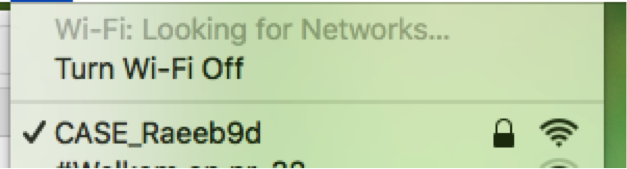
Disadvantage: setting up this dedicated Wi-Fi connection disconnects your Wi-Fi connection to the internet. The settings options seem to be exactly the same for the Canon 5D Mark II and III.
This version of the iMac software cannot distinguish between the two memory cards in the Canon 5D Mark III.
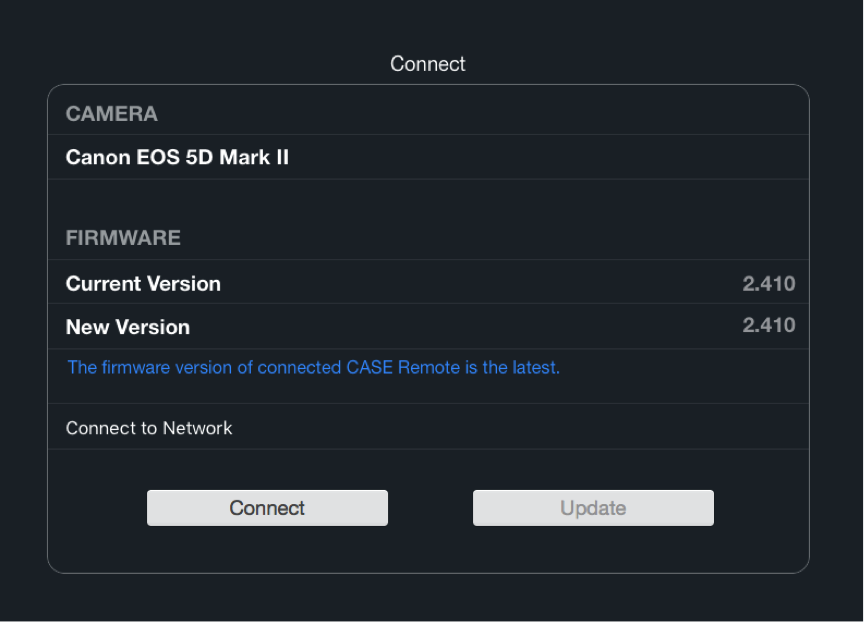
Click the 'Connect' button to connect to the camera.
You then have three choices:
- Capture mode. In this mode, you can set a large number of camera settings and capture photos. A setting you make here immediately appears on your camera as well. Conversely, every setting you make on your camera is also immediately visible on this screen.
- Photos mode: Here you can see the photos you have captured through the software. Photos you take with the camera itself also appear here. Note: if you delete a photo here, it immediately disappears from the memory card in the camera as well! If you have selected full RAW, the transfer can take as long as twenty seconds. If you want to save the photos somewhere else on disk, you can set this in the software's Settings mode. You can also view the EXIF information of your photos here.
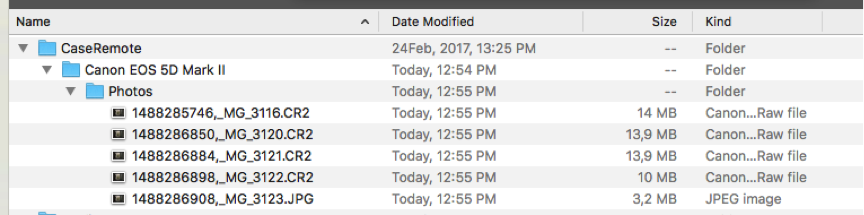
- Settings mode: On this screen, you can specify, among other things, that you want to save your photos to a location of your choice on disk. When saving your photos to disk, the original file name is changed. There is no way to influence this. I see this as a major disadvantage.
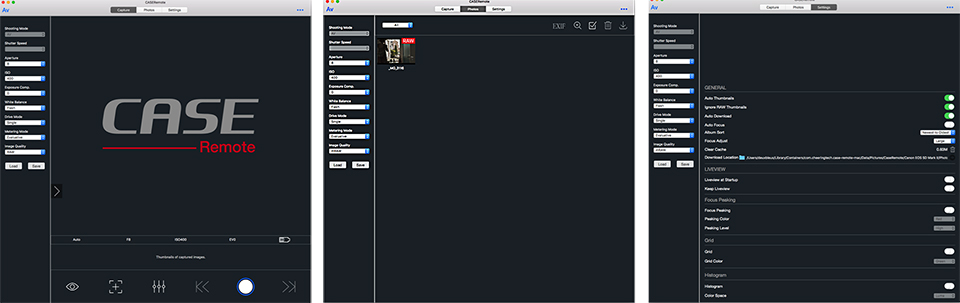
It is possible to view and change all your camera settings from your computer. The other way around, from camera to computer, does not always work, and settings changed on the camera do not reach the computer.
And besides that, although I think this goes without saying, it is not possible to perform all physical actions from the computer, such as turning the camera on and off or turning the top dial to change the camera from, for example, Av to Tv.
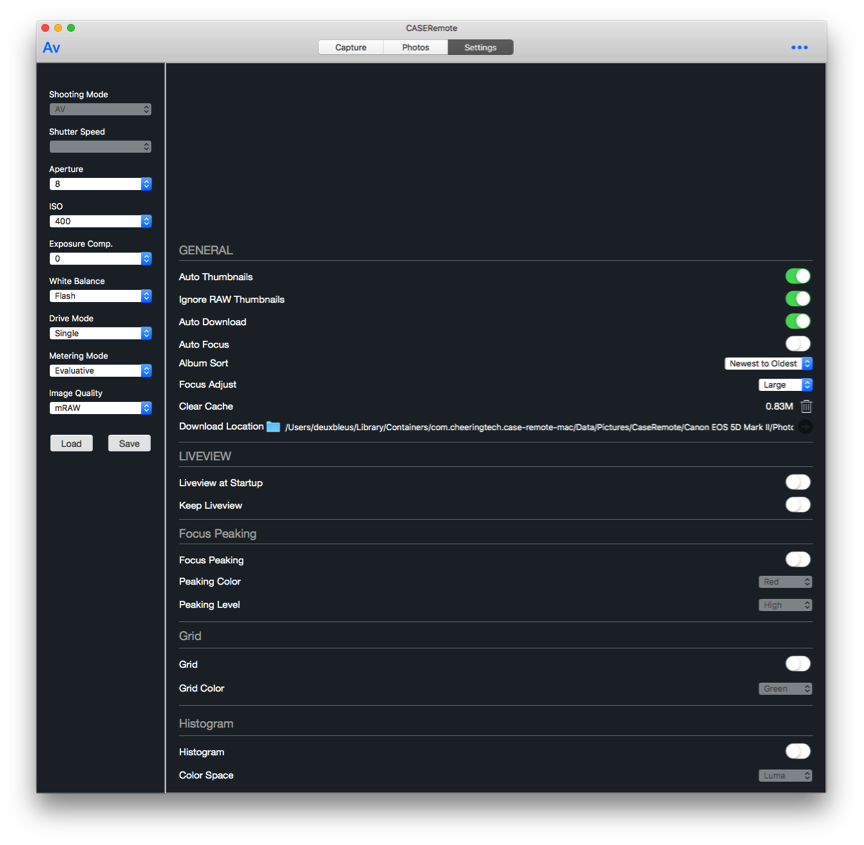
Until you turn the control dial on top of the camera and, for example, change the camera from Av to M(anual). The changed aperture, shutter speed, white balance, metering modes and so on suddenly appear correctly on the computer as well.
Several times, the app suddenly stopped saving photos to disk, while communication with the camera continued. The only solution was to close and restart the app. Perhaps a bug in the software?
On both cameras, you can view and test the LiveView option remotely. You can focus on the LiveView image with the mouse.
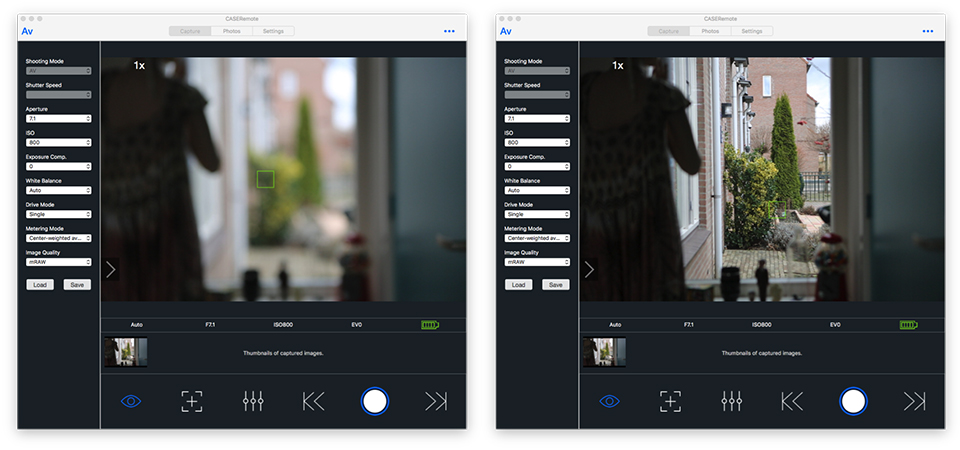
There is no option in the software to disconnect from the camera if you want to work with another camera. Closing and restarting the app is the only solution.
2. Test with iPhone 7 and Canon EOS 5D Mark III + Case Remote app 3.1.0
The first step is again to establish a Wi-Fi connection between the iPhone and the DSLR Controller. Since my iPhone uses the same iCloud features as the iMac, no password is requested. The iPhone receives it automatically from my iCloud settings.
As soon as you start the Case Air Remote app and turn on the camera, the app establishes a connection with the camera.
However, I keep getting the 'No Camera' message, even though I can see that there is a connection in the app. The message does not disappear automatically, only after clicking Cancel.
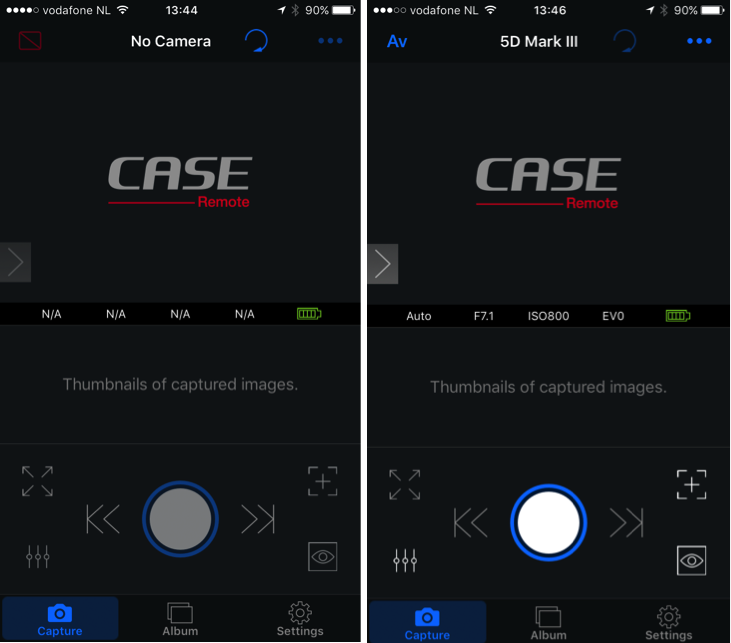
From the Capture screen (Properties), you again have control over a large number of the camera's settings. In (full screen) Live View mode, you can focus by tapping the iPhone screen. Manual focus and autofocus are also possible from the iPhone app.
The Advanced functions let you control a number of interesting extra options, such as HDR, bracketing, bulb or time lapse. You can also record a film.
In Album mode, you can see all photos as thumbnails on the iPhone or on the memory card in your camera, including the EXIF information.
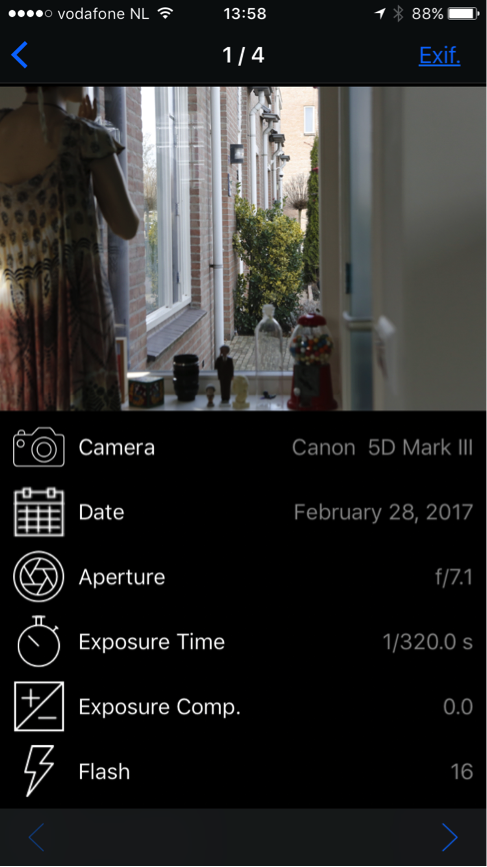
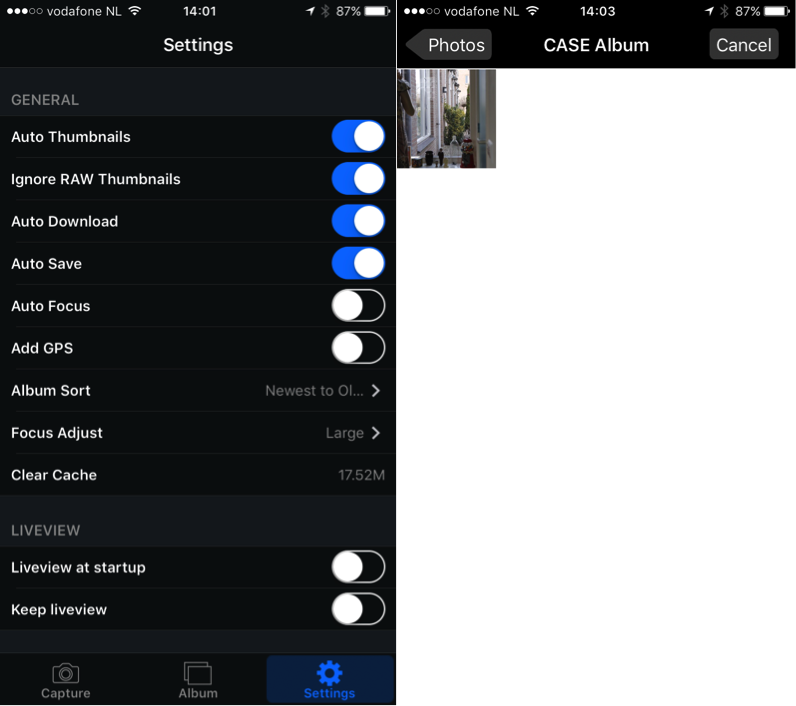
To save your photo locally on your iPhone, you can choose this in the Settings menu. Note: this only works with photos in JPG format. RAW files cannot be saved locally!
A new album called CASE Album is created on the iPhone, in which the photos are saved.
Personal conclusion:
Compared with, for example, an Eyefi SD card, I can wholeheartedly recommend this DSLR controller. It gives you very extensive remote control of your camera with many options.
Very useful when your camera is on a tripod somewhere and you no longer need to operate it directly.
A lot can also be automated, meaning you do not even have to press the shutter button.
As long as you do not shoot in Full Raw, the transfer speed to the iPhone and computer is acceptable.
I am happy to accept the minor errors and connection problems. I assume they will be fixed in future software releases.
I can see useful applications in star or star trail photography, for example, or photographing birds. Time-lapse photography is also supported, so you could, for example, capture the opening or turning of a flower automatically.
It is also very useful for taking a group photo with your camera on a tripod, for example. You can control the exposure and operate the shutter, all remotely with your smartphone. You no longer need to use the self-timer, which is much more relaxed!
It is also handy, of course, if you can show your model's photos on the computer straight away without first having to read CF or SD cards.
Price and where to buy?
The Case Air Wireless tethering system is available from, among others, CameraNu.nl, where it costs 189 euros.
Below is a video in which Frank Doorhof tests the Case Air Wireless:
About the author
Michelle Peeters is fotografe en oprichter van DeuxBleus Fotografie. Michelle herkent het bijzondere in het gewone en het gewone in het bijzondere. Ze heeft zich nooit willen specialiseren en is daardoor van alle markten thuis.
You might also like
-
 Review: Tether Tools Air Direct for wireless tethered photography
by Nando Harmsen
-
 Review: Sony A7R V mirrorless camera
by Nando Harmsen
-
 Review: Canon EOS R50 mirrorless camera
by Nando Harmsen
-
 Capture One Mobile can now tether wirelessly with Canon cameras
by Nando Harmsen
-
 Review: Book Sport Photography
by Michelle Peeters
-
 Review of the fantastic Canon EOS R6 Mark II
by Nando Harmsen
5 comments
-
 FrankT wrote on Saturday 18 March 2017 at 14:50 | reply
Very nice, I would love to try something like this sometime. But unfortunately.. My camera (Nikon D80) doesn't seem to be supported..
Translated from Dutch.
I've been looking for a way to connect my Nikon to my iPad for ages, so I can immediately view photos on a larger screen in a studio setting. It doesn't have to be wireless, preferably cheaper and with a cable. Eyefi cards are the only option I've come across, but that doesn't seem to be completely stable either. Does anyone have any suggestions? -
 Huub Sanders wrote on Saturday 18 March 2017 at 17:44 | reply
Hi FrankT, I have also worked with Eyefi and certainly didn't become entirely enthusiastic about it. To me, it always remains a bit of a hassle, one time it works and then for no apparent reason it doesn't. That's why I was glad I could play around with this Case Air for a bit. (Btw. I did a number of tests from the article above.). It's a shame that the D80 isn't supported. I'll have another look around to see if there's a solution for you.
Translated from Dutch. -
Huub Sanders wrote on Saturday 18 March 2017 at 17:54 | reply
There is also such a thing as DSLR remote. Software on a PC (Windows or Mac) as the server and the iPad then works as the client. Here's a video.
Translated from Dutch. -
FrankT wrote on Saturday 18 March 2017 at 19:03 | reply
Thanks for your ideas and tips! I have heard of DSLR remote, but I don't want to have to lug a PC around..
Translated from Dutch. -

 eerbeekh wrote on Tuesday 21 March 2017 at 11:40
| reply
With a wire I use an app for Android (smartphone/tablet) (DSLR controller - 8 Eur (?) and an OTG cable (also something like 5-6 Eur. ). Whether it is also available for Mac I don't know. Works fine, even remote control
Translated from Dutch. . Eyefi is not a success for me yet.... On a laptop use the camera's software (Canon). The wireless solution from this article sounds good.
Have your say
Please note: Articles older than a week can only be commented on by signed-in visitors.Would you still like to comment? sign in or create a free account.
Become a better photographer every week
A practical photography tip in your inbox every week.
38,768 photography enthusiasts already receive the tips! More about the weekly mail. Or keep up to date via  Facebook.

Elja Trum
Photofacts; everything to do with photography!
Would you like to take better photos and keep up with what is happening in photography? Photofacts publishes articles that teach you something about photography — from a product announcement to a practical shooting tip or a look at a website. Photofacts covers photography every day and is a hobby project of Elja Trum's that got out of hand. The articles are written by a team of volunteer authors. If you would enjoy writing one or more articles for Photofacts, do get in touch.More about PhotofactsPhotofacts is made possible in part by
