

Review: Luminar by Macphun
Monday 26 June 2017, 12:18 by Michelle Peeters | 12,303 views | 14 commentsThis article was translated from Dutch with the help of AI. Read the original.
I was asked to review the latest version of Luminar 'Pluto' (version 1.1.0). In this article, I share my findings and conclusion.
This article has been rewritten because I used too much material from Raymond Harper's thorough articles without asking. This attracted some justified criticism. My apologies for this. You can find Raymond's articles about Luminar Pluto here:
- Tip of the week: Luminar as a Photoshop/Lightroom alternative
- Tip of the week: Luminar under the microscope II
- Luminar Pluto: batch processing and vertical crops now available too
With Luminar, an image-editing programme by Macphun, you can improve your photos in a simple and impressive way. Unfortunately, the software is only suitable for Apple computers.
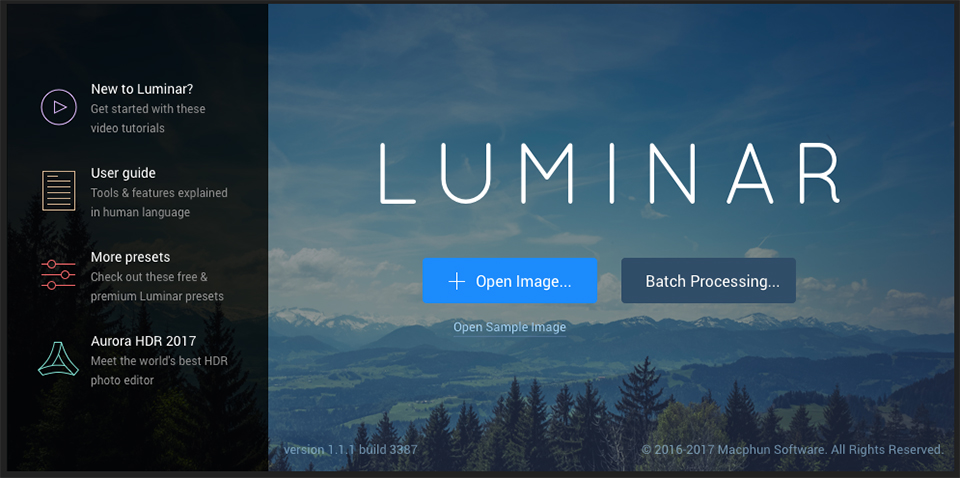
Luminar works as a standalone programme, but you can also install it as a plug-in for Photoshop, Lightroom, Photoshop Elements and Aperture.
You can open an image in Luminar by right-clicking the thumbnail in Adobe Bridge. But you can also open your photos in RAW or JPG format from the main screen. Once loaded, they are displayed large in the workspace.
The permanent licence, which costs 69 dollars, allows you to install the programme on up to five Macs. I installed Luminar 1.1.0 as a standalone programme, not as a plug-in for Photoshop and Lightroom. Apparently, its functionality as a plug-in is identical to that of the standalone application, but I have not tested this myself.
After installing the programme, I went through all the filters with various photos. Besides the standard filters, you can also add all kinds of 'loose' filters.
Ease of use
As with any new programme, it takes a little time to get used to the interface, but it is nothing like starting up and using a programme such as Photoshop or Lightroom for the first time. Once you have selected and opened an image, you can adjust the workspace exactly to your liking and get started quickly.
Users who already have experience with other Macphun products will feel familiar with it straight away. New users can quickly gain experience by clicking the various icons or hovering over them with the mouse to see a pop-up explanation of the relevant function.
And if you still need further instructions, you can consult the user manual or watch a wide range of excellent video tutorials through the Help menu.
Video Gallery
In these Video tutorials by Macphun, Jim Nix clearly explains the available actions and how to use all the filters and presets.
Interface
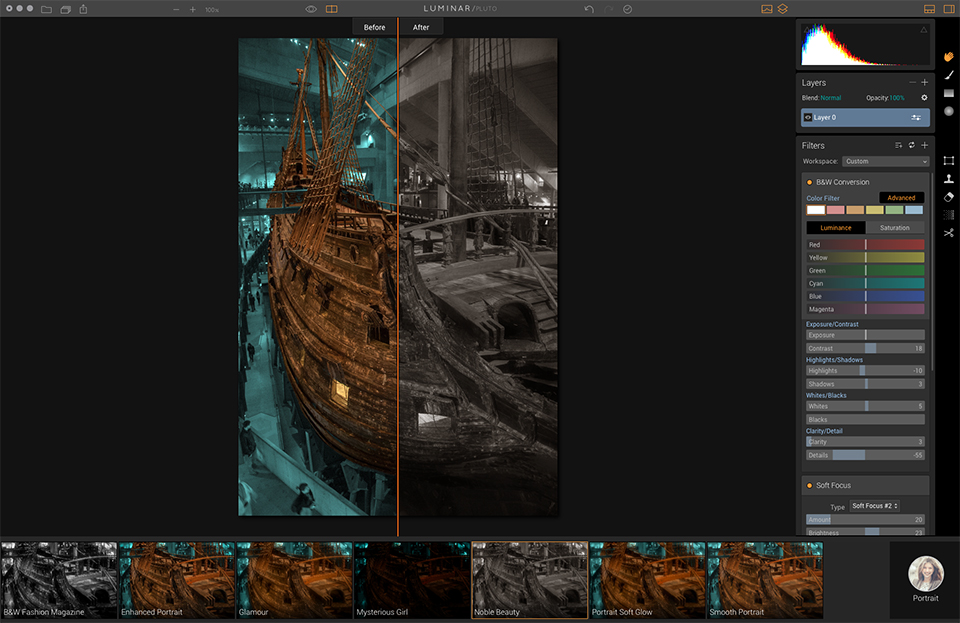
I think the interface itself is beautifully designed. Presets, with their associated filters, appear automatically below the preview window. When you click a preset, the associated filter appears in the right-hand panel. You can apply further edits and fine-tuning to your photos using sliders and tools.
If you click an icon in the top right-hand corner of the menu bar, you hide the presets and switch to advanced mode, where you can fill the filter window with the adjustments you want to apply to the active layer.
Layers
You can make as many adjustments or add as many new image layers as you like. You can combine layers in all kinds of ways and combine images with masks, which you can also create very easily. Working with layers was previously only possible in Photoshop!
Fine-tuning
You make any refinements in each filter by moving the sliders on the right, just as you would in other image editors. Very simple, intuitive and elegant.
Before and after
You can switch on the before-and-after function using a button at the top of your screen. It shows the photo before and after the edits you have applied. This lets you assess your edits or applied filters properly and compare them with the original.
What is supported:
- Adaptive user interface
- Non-destructive editing
- Workspaces
- Layers
- Photo filters
- Masks
- Object removal
- Colour toning
- Touch Bar support
- RAW support
- Black-and-white processing
- Plugin and extension
What was added or improved in the latest version:
Batch processing has been added as an option. This allows you to work with many photos in bulk quite easily. You select your photos in the batch processing module and then choose from a range of options, such as naming and selecting a preset to apply to all selected images.
The new Golden Hour filter lets you apply a warm sunset effect to your photos. You no longer have to wait for the 'golden hour'. It certainly makes dull photos more vibrant!
Vertical photos can now also be cropped because new aspect ratios have been added. Finally, a 'Dehaze' filter has been developed to make hazy photos clear again.
Functions that even Photoshop cannot perform!
Luminar makes extensive use of presets to correct your photo quickly. But Luminar also turns out to be able to perform functions that are not possible even in Lightroom or Photoshop.
Luminar even claims to be able to perform a number of actions that almost no photo editor includes as standard, such as:
• Colour balance filters
• Before-and-after interface in the photo
• Cross-processing filters
• Haze filter
• Polarisation filter
Polarisation filter
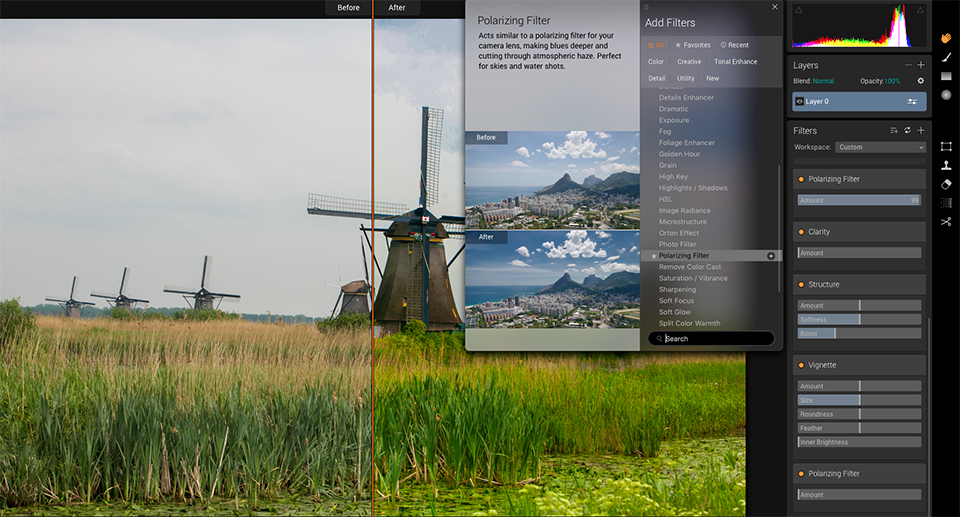
The polarisation filter is particularly interesting because it is one of the few filters that you cannot apply to a photo afterwards. What is special about it is that this virtual polarisation filter can not only make a white sky darker and bluer, but apparently also reduce unwanted reflections.
This photo of Kinderdijk was very suitable for trying out the polarisation filter. To use this filter, click "Add Filter" and then click Polarisation filter. The improvements are not very easy to see, but they are certainly effective. And since no other package offers this in such a simple way, this option is certainly interesting.
No catalogue and management tools yet
Unfortunately, Luminar does not yet have catalogue and management tools, so for now it is best used as a plug-in from Lightroom. Once these have been added, the programme will suddenly become very interesting as a standalone application too.
Mac only
Unfortunately, the software is still only available for Mac users. There are rumours, however, that a Windows version is also being developed for the future.
Autopilot
You can perform most edits, including batch edits, using autopilot. Some filters can introduce unwanted grain, noise and texture. However, you can also adjust most settings using the various sliders. You can even use a histogram here, visible in the top right-hand corner. And you can create your own presets too!
Layers, but they disappear when opening a PSD
Fortunately, Luminar does everything in layers. Just as in Photoshop, you can always go back a step by deleting layers. You can even open a History panel and remove recent steps. And you can always zoom in to the actual pixel size, 100%.
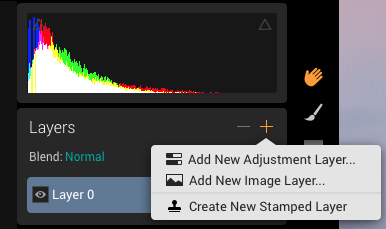
Luminar has its own file format for saving your edited images. It is also possible to save your edited photos in another file format, including Photoshop's PSD. However, if you open this PSD file again from another application such as Photoshop or Luminar itself, you get a flattened image without layers.
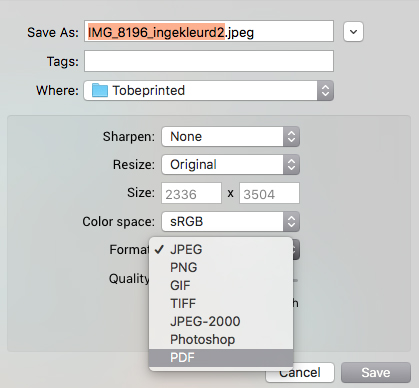
Crop tool does not quite work properly yet
The Crop tool behaves rather strangely when cropping photos. But at least you are no longer restricted to 'horizontal' crop ratios. You do need to make sure that the link which keeps the proportions intact is switched on.
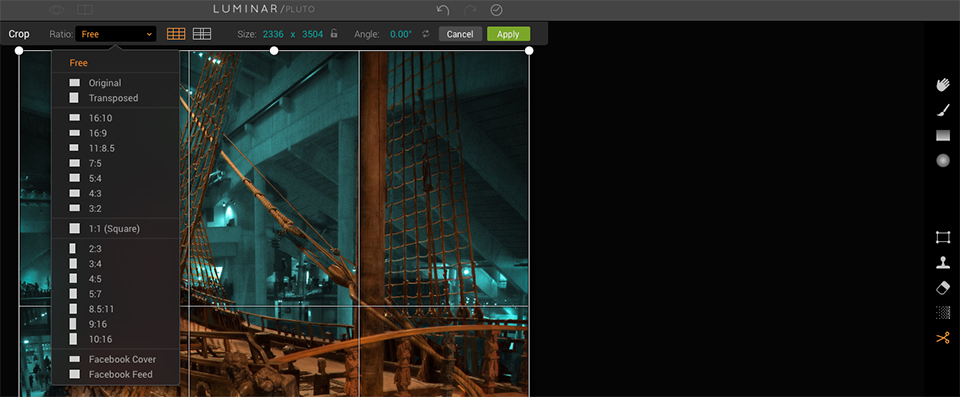
I still prefer unsharp mask
The three levels of sharpening are not ideal when exporting. I also prefer to keep the sharpening options in my own hands, as with the Unsharp Mask option in Photoshop. If you work with presets, it depends entirely on the selected preset whether you see such an option. If you do not, Filters > Add New Filter > Sharpening provides the solution.
Conclusion
Luminar is a very good photo editor with a very low barrier to entry. It is highly intuitive, with a wide range of easy-to-use presets. You get results straight away and your photos soon look spectacular. It takes many difficult-to-learn processes off your hands. This can save a lot of time, even if Photoshop holds few secrets for you anymore.
It can be a useful addition to packages such as Photoshop and Lightroom. In fact, it works best as a plug-in for Lightroom. Because Luminar still lacks essential catalogue and management tools, Lightroom remains indispensable to me for this.
For more complicated tasks such as making selections, creating composites and replacing backgrounds, and so on, I still fall back on Photoshop. I also prefer to use Lightroom or Photoshop for the fine control needed to recover detail in highlights.
In my view, the package is not yet really suitable if you want a technically perfect result that is fully under your control. But I am curious to see what future versions will bring!
With an Adobe subscription, you have access to Photoshop, Lightroom and Bridge. You pay a monthly fee that soon adds up to the amount you spend on Luminar.
But Luminar has much more power and potential than the first impressions suggest. The deeper you dig into Luminar's tools, the more you realise that behind that simple facade is a serious image-editing application.
Price
Macphun's Luminar Pluto is available for 69 dollars and can be ordered through the Macphun site.
Dit artikel is voor het laatst bijgewerkt op 26 juni 2017.
De eerste publicatiedatum is vrijdag 3 maart 2017, 22:44.
About the author
Michelle Peeters is fotografe en oprichter van DeuxBleus Fotografie. Michelle herkent het bijzondere in het gewone en het gewone in het bijzondere. Ze heeft zich nooit willen specialiseren en is daardoor van alle markten thuis.
You might also like
-
 Macphun Luminar Neptune now with AI filter
by Michelle Peeters
-
 Macphun Luminar for Windows announced
by Michelle Peeters
-
 Review: Macphun Noiseless 2016
by Michelle Peeters
-
 Skylum launches Luminar NEO
by Nando Harmsen
-
 Review: Macphun Snapheal CK
by Michelle Peeters
-
 What to consider when switching photo editing software
by Nando Harmsen
14 comments
-

 Tanja Thomas
wrote on Saturday 4 March 2017 at 03:39
| reply
Does it only run on Microsoft, or is there also a version for Linux?
Translated from Dutch. -
 100
wrote on Saturday 4 March 2017 at 11:35
| reply
First of all, compliments on the clear articles you write on Photofacts. Clear language, good structure and substantive, in short, an asset to this website.
Translated from Dutch.
I’m on a Windows machine and when I follow the link to Luminar I get: “Luminar for PC is coming soon”.
So they are working on a Windows version, although you never know how long that will take (for Aurora 2017 they say “spring 2017” regarding the Windows version, so that shouldn’t take too much longer). -
 Michelle Peeters wrote on Saturday 4 March 2017 at 11:45
| reply
@Tanja: as the name already suggests, it only runs on the Mac platform (unfortunately...)
Translated from Dutch. -
Michelle Peeters wrote on Saturday 4 March 2017 at 11:51
| reply
@100: Thanks for the compliment! There are indeed rumors that a Windows version is coming. That would be very beneficial! The latest updates (and they were really needed too) were released fairly quickly already, so it wouldn't surprise me if it happens this year. @Tanja: I don't think there will be a Linux version, I think the platform is too too small. With a Windows version they can really take on the competition with Adobe and that is of course of global importance!
Translated from Dutch. -
 DirkT wrote on Tuesday 7 March 2017 at 16:29 | reply
Great and smoothly written article!
Translated from Dutch.
Too bad it's only available for Mac.
Would it be possible to also write an article like this for Corel Aftershot 3 Pro?
This program is competitively priced and has an extensive manual. The only downside could be that it's entirely in English. -
 Koen van Venetie wrote on Tuesday 7 March 2017 at 17:17 | reply
I am very happy with ACDSee for Mac and I have been using it for almost 20 years.
Translated from Dutch. -
Michelle Peeters wrote on Tuesday 7 March 2017 at 17:25
| reply
@DirkT: Corel Aftershot is in itself a useful program for photographers. However, I have never paid any attention to it myself. I'll take a look at it!
Translated from Dutch.
@Koen: ACDSee is indeed a great package! -
 Tonny wrote on Wednesday 8 March 2017 at 21:58 | reply
Nice to read that another program is being looked at for once instead of just Photoshop. I know full well that it's the program for professional photographers. I've been using Corel PaintShop Pro (X9 by now) for a number of years, simply in Dutch. This program offers much more than I could ever use. Yet I can find little about it. If anyone knows the way there, I'd be grateful to hear about it
Translated from Dutch. -
 Peter Macphun wrote on Wednesday 24 May 2017 at 14:22
| reply
It is now official!
Translated from Dutch.
Luminar and Aurora HDR will soon be available on Windows.
Moreover, the public beta of Luminar for PC will be available in July - we’d love for you to give Luminar a test drive and help us make it as outstanding as it can possibly be.
Stay in the know: https://macphun.com/pc -
 Oleg Macphun wrote on Thursday 13 July 2017 at 14:48
| reply
Guys on Windows PCs, we have released an open beta of Luminar for you. Get a download link here: https://macphun.com/beta
Translated from Dutch.
Works with Windows 7, 8, 10, features a lot of our favorite Mac features as well as new Artificial Intelligence based enhancement filter.
You can send your feedback to support@macphun.com -
 Svartvatten wrote on Saturday 11 November 2017 at 12:51
| reply
@Michelle Peeters:
Translated from Dutch.
A question: in your text, do you mean the same thing by 'catalog' as what in Aperture 3 is the "Aperture Library.aplibrary"?
For me it is important that my RAW files remain unchanged in their archive folder and that the photo software saves the edits in a separate database as in Aperture 3.
From the descriptions of various photo programs such as Lightroom, Coral, Capture one etc. I find it difficult to determine that, and with this description too it is still not clear to me.
Working with Aperture is still going well, but at some point I will have to switch to something else. It is then important that I can import the Aperture Library into the library of the new program. -
Michelle Peeters wrote on Saturday 11 November 2017 at 17:36
| reply
@Svartvatten: the physical location of your RAW files obviously won't change, but whether you can import your Aperture library into a library in Luminar (Luminar doesn't even have that option yet) I doubt... If it's about cataloging and management tools, I'd rather choose a program like Lightroom.
Translated from Dutch. -
K.P. wrote on Saturday 11 November 2017 at 22:22
| reply
I only work with ACDSee Pro Mac (4.8 I think now).
Translated from Dutch.
What is important to me is the editing mode of a program. I like to keep control over where my files are located on my computer and how to access them myself. Just folders with jpgs. That is why I don't work with Photoshop either.
So simply: upload photos (jpg) from my card in my camera (Canon 5D Mark IV and 7DI) to my computer, put them in a folder and then edit them with ACDSee. Much faster than with Photoshop.
Have your say
Please note: Articles older than a week can only be commented on by signed-in visitors.Would you still like to comment? sign in or create a free account.
Become a better photographer every week
A practical photography tip in your inbox every week.
38,765 photography enthusiasts already receive the tips! More about the weekly mail. Or keep up to date via  Facebook.

Elja Trum
Photofacts; everything to do with photography!
Would you like to take better photos and keep up with what is happening in photography? Photofacts publishes articles that teach you something about photography — from a product announcement to a practical shooting tip or a look at a website. Photofacts covers photography every day and is a hobby project of Elja Trum's that got out of hand. The articles are written by a team of volunteer authors. If you would enjoy writing one or more articles for Photofacts, do get in touch.More about PhotofactsPhotofacts is made possible in part by
