

Review: Macphun Snapheal CK
Friday 12 January 2018, 16:32 by Michelle Peeters | 5,444 views | 0 commentsThis article was translated from Dutch with the help of AI. Read the original.
Snapheal CK from Macphun (soon to be Skylum) offers a quick and easy way to remove objects, fix skin imperfections and improve your images.
It often happens, at least to me, that you want to remove unwanted and distracting objects from your photos.
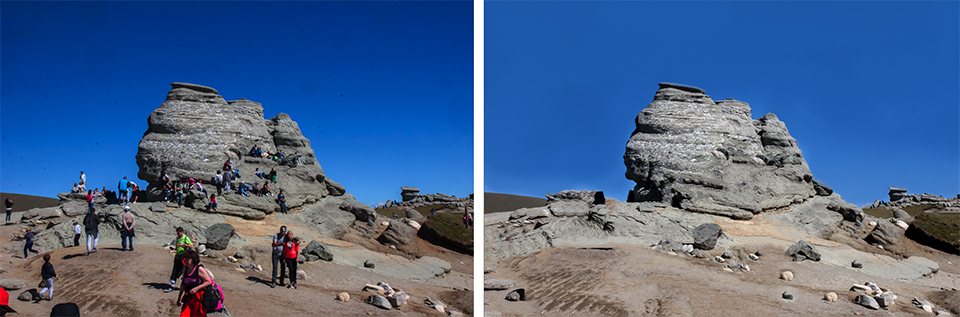
And if you are not a Photoshop expert or simply do not have the programme, Snapheal can be a fun alternative. Provided, of course, that you work on a Mac computer.
Macphun's (soon to be Skylum) Snapheal claims to do everything in a simple and easy way. In this article, I share my experiences with the package.
Features
- Three erasing modes for the best results
- Adjustable removal precision
- Powerful Clone & Stamp Tool
- Handy tool for editing images
- Selective enhancement with Smart Brush
- Standalone Software & Plug-in
- Built-in social sharing
- Dual screen
- Retouching
- Adjusting
Installation
Installing Snapheal CK is fairly straightforward. An interface guides you through the installation as a plug-in for other Mac software. The software finds where a plug-in is needed by itself.
You enter your name and serial number and the software is activated. It is also possible to use the package in demo mode for 60 days.
Using Snapheal CK
Macphun claims that this software is designed for users with different levels of experience. You can see this in the different tabs.
The screen is laid out quite simply and is very clear. At the top, you can see tools for importing the photo and viewing the image. You can choose from Fit to screen, Zoom In, Zoom Out or Actual Size.
The screen is divided in two by a toolbar. The top one is the function you will use most, namely Erase. This is also the main tool that Snapheal is so good at.
The sidebar shows the tools to use, such as selection, cloning, diameter and the three different approaches for removing objects. The Global, Local and Dynamic removal methods are based on different calculation methods.
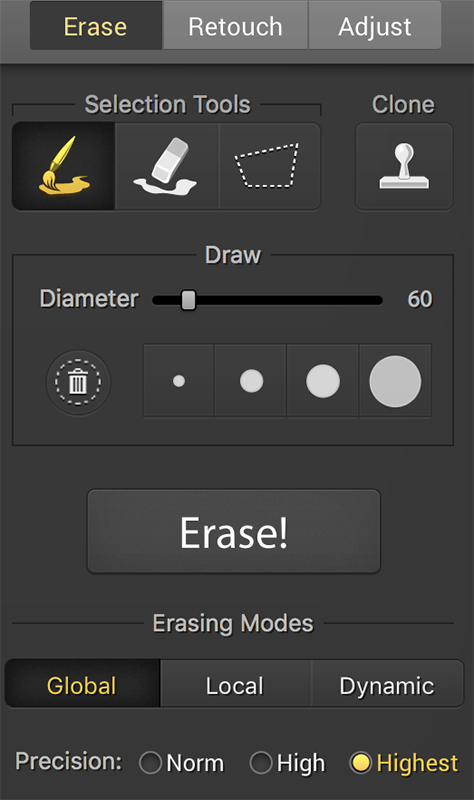
Global Erasing Mode
This is a mode for general use. The powerful CleanPics algorithm tries to find new patterns throughout the entire image. It takes the complete image into account.
Local Erasing Mode
This algorithm looks specifically around the marked area and tries to find similar patterns to fill the selected area.
Dynamic Erasing Mode
This algorithm tries to fill the selected area by dynamically generating new patterns from pixels at the edges of the marked area.
Precision
The precision of the removal mode determines how the algorithm is applied:
1. Norm (normal precision): fastest and most useful for simple erasing.
2. High (high precision): provides quality results with faster processing.
3. Highest (highest precision): provides the best quality, but takes a little longer to process.
Erase!
This is the button that starts the object removal process, applying the selections you have made, the desired accuracy of the algorithm and the erasing mode.
You can start this process by pressing Erase! or one of the three removal modes, after which the removal process starts immediately.
Testing
Testing Snapheal was fairly easy. The programme works simply and is very clear. Here, I mainly used the Erase function. It works well, but less so with messy and rather busy photos, such as the one below.

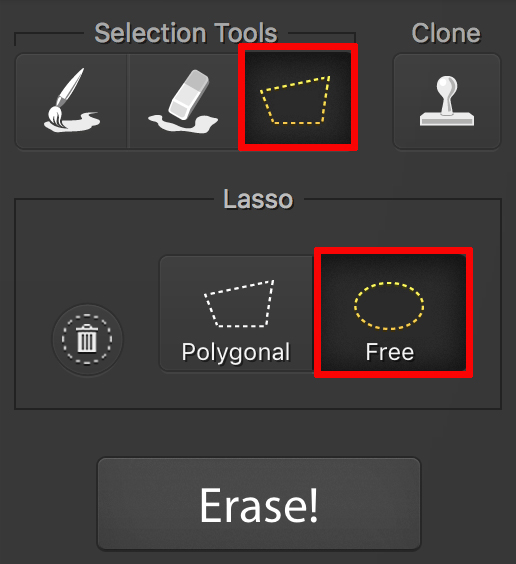
The process is very simple. You indicate what you want to remove with one of the selection tools and then click the Erase! button. You can also carry out more finely controlled edits. For example, you can adjust the diameter of the brush, select painted areas and remove them.
I started by removing the round spots in the sky, caused by a sensor that urgently needed cleaning. This was very easy. You select all the spots one by one with the round 'free selection tool', press the Erase! button once and the unwanted objects are gone!
Because this photo was rather messy and a lot of people had to be removed, I used the Clone Stamp tool afterwards, once I had removed everyone, to blend the pieces of rock together nicely again.
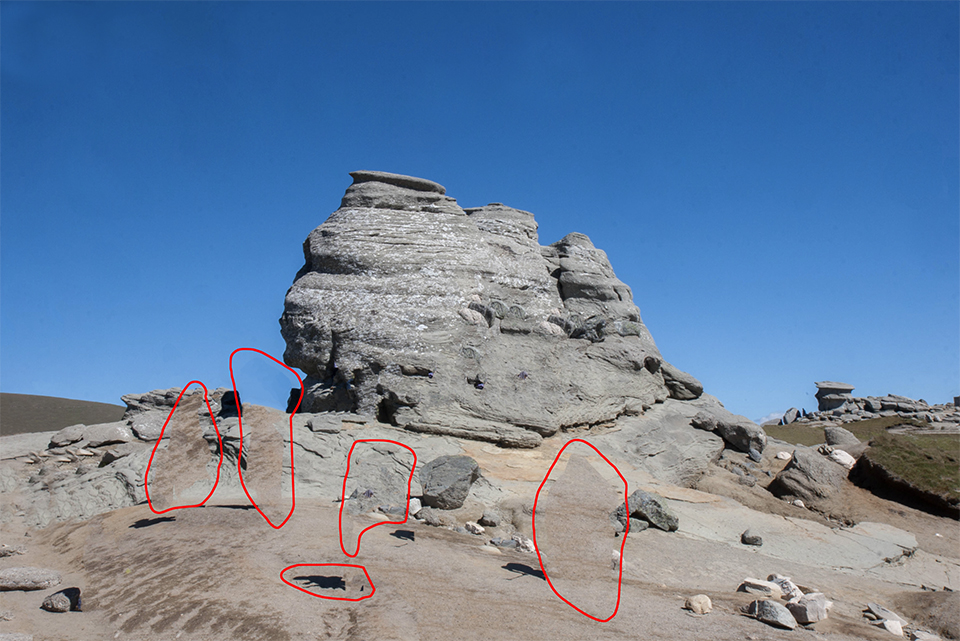
The Clone Stamp works in the same way as in Photoshop. You take a sample while holding down the Option key and copy this section over the area to be removed. This allows you to make repairs to fairly small areas.
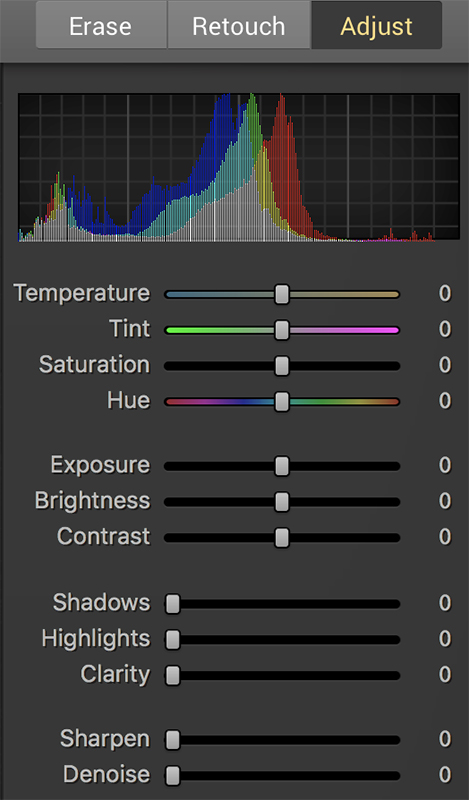
Once you have finished erasing the objects, you can make simple edits in the programme. With Snapheal's retouching tab, you can selectively edit parts of the image using contrast, saturation, sharpness, blur and brightness.
You can adjust the entire photo using the application's Adjust tool, which offers the same options for editing or retouching. You can also use sliders for colour temperature, tint, saturation, shadows, exposure, contrast, shadows, highlights, noise and sharpening.
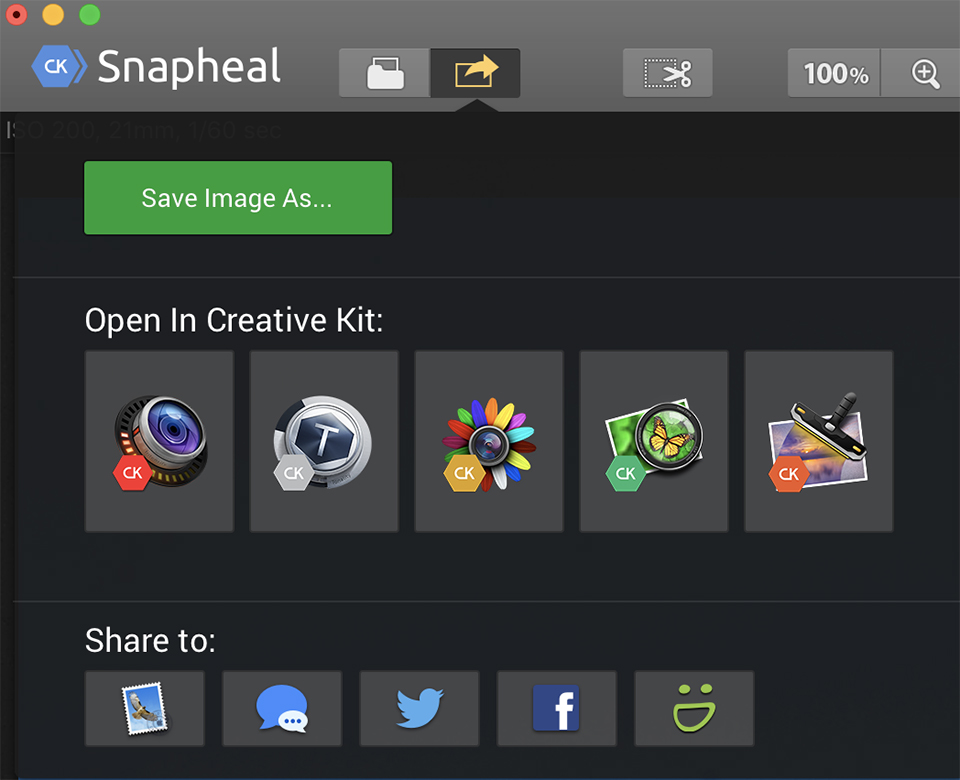
Once you are finished, you can save the image to your Mac or share it via email, Facebook, Tumblr, Flickr, Hyves or Twitter.
Conclusion
I am enthusiastic about the result. It saved me quite a bit of time compared with the number of actions required in Photoshop: 'Content-Aware Fill' and the 'Clone Stamp'.
I especially found the Clone Stamp to produce a very good and, above all, quick result in this case. You can adjust everything very precisely, allowing you to work accurately, especially when you zoom in quite far. It is also useful that you can clearly see and assess the before and after result side by side.
The programme is not expensive, especially when you compare it with a programme such as Photoshop. For 49.99 euros, you can download it from the Macphun website. Unfortunately, it is still only available for Mac.
About the author
Michelle Peeters is fotografe en oprichter van DeuxBleus Fotografie. Michelle herkent het bijzondere in het gewone en het gewone in het bijzondere. Ze heeft zich nooit willen specialiseren en is daardoor van alle markten thuis.
You might also like
-
 Review: Macphun Noiseless 2016
by Michelle Peeters
-
 Macphun Becomes Skylum
by Michelle Peeters
-
 Review: Canon EOS R5
by Nando Harmsen
-
 Review: Sony ZV-E10 vlog camera
by Nando Harmsen
-
 Macphun Luminar for Windows announced
by Michelle Peeters
-
 Review: Sony A1 mirrorless camera
by Nando Harmsen
0 comments
Be the first to share what you think!
Have your say
Please note: Articles older than a week can only be commented on by signed-in visitors.Would you still like to comment? sign in or create a free account.
Become a better photographer every week
A practical photography tip in your inbox every week.
38,836 photography enthusiasts already receive the tips! More about the weekly mail. Or keep up to date via  Facebook.

Elja Trum
Photofacts; everything to do with photography!
Would you like to take better photos and keep up with what is happening in photography? Photofacts publishes articles that teach you something about photography — from a product announcement to a practical shooting tip or a look at a website. Photofacts covers photography every day and is a hobby project of Elja Trum's that got out of hand. The articles are written by a team of volunteer authors. If you would enjoy writing one or more articles for Photofacts, do get in touch.More about PhotofactsPhotofacts is made possible in part by
