

How do you photograph the rare blue moon?
Friday 2 February 2018, 10:01 by Michelle Peeters | 7,760 views | 1 commentThis article was translated from Dutch with the help of AI. Read the original.
NASA reported an approaching triple natural phenomenon: a blue super blood moon. In the Netherlands, we could 'only' see a blue supermoon. We had to leave the 'blood' to other countries.
The name Blue Moon has nothing to do with a blue colour. The colour of a blue moon is no different from that of a regular full moon.
But because it was also a 'supermoon', it was brighter than usual, because at that moment it could be seen from Earth as 'maximally illuminated'. It was also 'perfectly round'.
A blue moon was visible on Wednesday 31 January. About once every 20 years, two blue moons occur in one year. This happens when there is no full moon in February. There are then two full moons in both January and March. This year, that is the case!
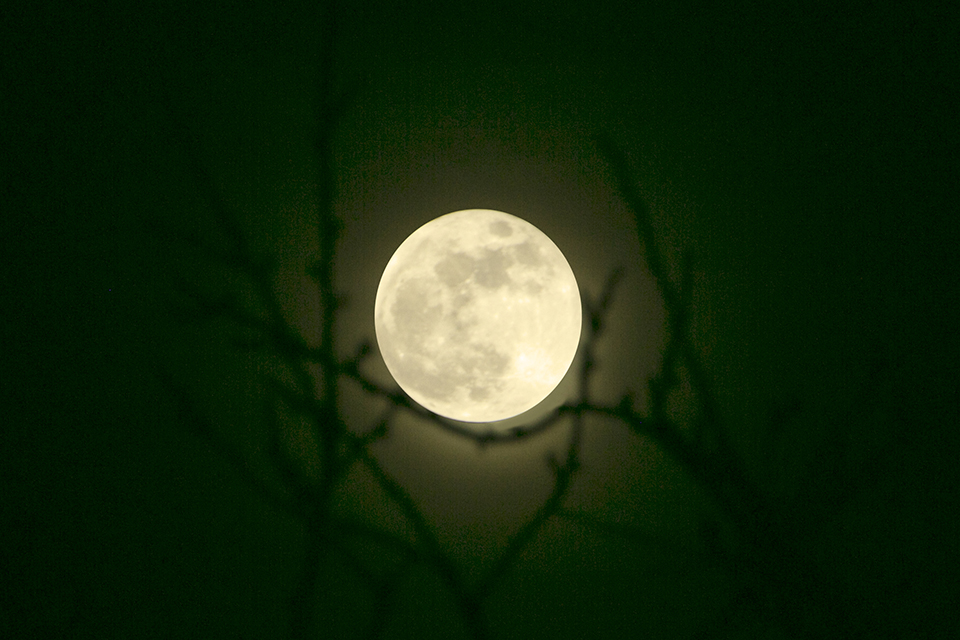
But how do you photograph such a beautiful full moon, preferably with attractive and well-exposed surroundings?
The Moon is a difficult subject to photograph. It is much brighter than you might expect, which makes it a challenge to get your shutter speed right.
The Moon is also much smaller than it appears. This can result in a tiny, disappointing spot in your photo instead of a massive white disc full of craters and detail.
1. Zoom in!
You take the best photos of the Moon by zooming in as far as possible. Use the longest focal length you have. 300mm is really the minimum.
I used my 70-200mm lens with a 2.0 converter, giving me 400mm on my full-frame camera. If I had used it on a crop camera, the distance, including a crop factor of 1.6, would be: 2 x 200mm = 400mm x 1.6 = 640mm. So with a crop sensor, you get even more reach from your lens!
2. Foreground
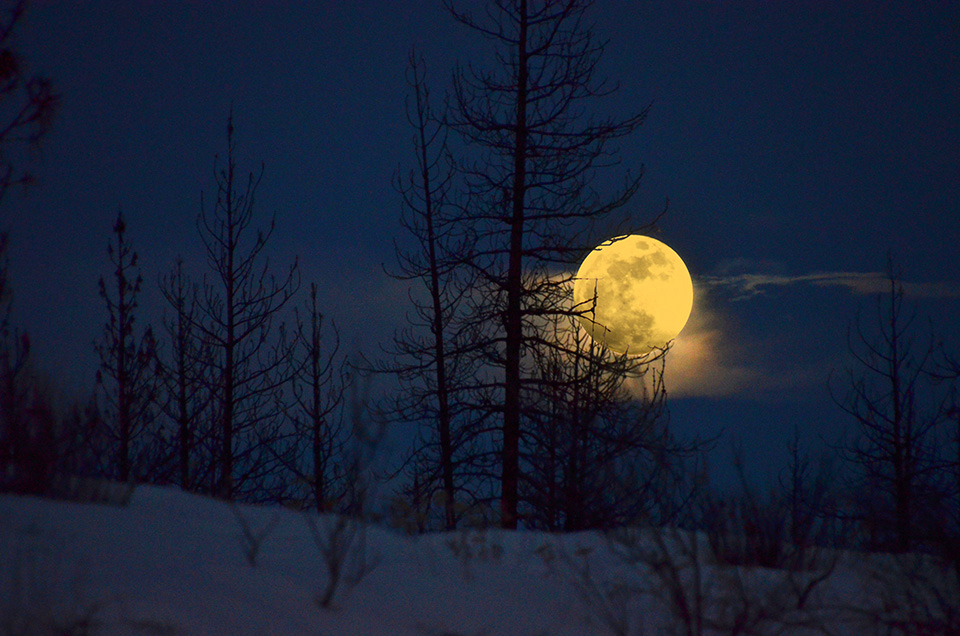
If you do not have a telephoto lens, you can still take beautiful photos of the Moon. You will need to pay a little more attention to your composition. You can do this by choosing an interesting foreground or placing the Moon as part of an interesting setting.
For example, choose a beautiful location, or position yourself where you can see the Moon shining through attractive foliage, branches or thin cloud.
3. Get the exposure right
The problem with including a lot of the surroundings in your moon photo is that it is almost impossible to expose both the foreground and the background with the Moon correctly.
You can now do two things: choose underexposure, so your Moon is not overexposed but your surroundings are.
A better option is to take two photos and combine them afterwards in post-processing. This allows you to make sure that each part is correctly exposed. You can also adjust your photos so that the final result is entirely to your liking, for example by changing the position and size of the Moon as desired.
4. Avoid camera shake
You will almost always take a good moon photo using a tripod. Because you have to zoom in so much, even minimal movement can cause visible motion blur.
Use a remote control or self-timer to reduce movement caused by touching the shutter button. If you want to play it completely safe, also lock up your mirror!
5. Camera settings
There is no single camera setting for photographing the Moon that always works. After a while, you get a feel for it and can start with basic settings, adjusting them after taking a few test shots. But there is a process you can follow every time:
- Set your camera to M (manual);
- If you cannot focus on the Moon using autofocus, which is often difficult because of the contrast between the bright Moon and the dark sky, take your camera off AF and focus manually. This is easier if you set your camera to LiveView;
- Start with an aperture of f/11 and a fairly low ISO value of, for example, 200 to 400. Start with a shutter speed of 1/100th and vary it to achieve a good exposure.
Try not to use a shutter speed slower than half a second to prevent blur. If you are photographing with a wide-angle lens, which allows you to include more of the surroundings in your photo, you will be less affected by this problem and can use longer shutter speeds; - Use the bracketing function so that you always have back-ups or can combine the photos later in post-processing.
More tips?
If you have more useful tips for photographing the full, blue Moon, let us know in the comments!
About the author
Michelle Peeters is fotografe en oprichter van DeuxBleus Fotografie. Michelle herkent het bijzondere in het gewone en het gewone in het bijzondere. Ze heeft zich nooit willen specialiseren en is daardoor van alle markten thuis.
You might also like
-
 Photographing the Full Moon creatively
by Nando Harmsen
-
 How to photograph the moon
by Michelle Peeters
-
 The Blood Moon on Auto?
by Tanja Thomas
-
 Total lunar eclipse on Blue Monday
by Michelle Peeters
-
 Jupiter, Venus and the moon form a smiley on 16 May
by Michelle Peeters
-
 Venus's date with the moon
by Tanja Thomas
1 comment
-
 Manuel wrote on Friday 2 February 2018 at 12:20 | reply
Use a mirrorless camera, that saves you a lot of hassle with exposure.
Translated from Dutch.
Have your say
Please note: Articles older than a week can only be commented on by signed-in visitors.Would you still like to comment? sign in or create a free account.
Become a better photographer every week
A practical photography tip in your inbox every week.
38,764 photography enthusiasts already receive the tips! More about the weekly mail. Or keep up to date via  Facebook.

Elja Trum
Photofacts; everything to do with photography!
Would you like to take better photos and keep up with what is happening in photography? Photofacts publishes articles that teach you something about photography — from a product announcement to a practical shooting tip or a look at a website. Photofacts covers photography every day and is a hobby project of Elja Trum's that got out of hand. The articles are written by a team of volunteer authors. If you would enjoy writing one or more articles for Photofacts, do get in touch.More about PhotofactsPhotofacts is made possible in part by
