

Keeping One Colour in a Black and White Photo
Sunday 14 December 2025, 14:28 by Nando Harmsen | 3,939 views | 0 commentsThis article was translated from Dutch with the help of AI. Read the original.
You can choose between colour and black and white for a photo. Or you can combine the two. Black and white with one colour. In this article, I show you the quick-and-dirty way to achieve this easily.
I use Lightroom Classic for this technique. But you can do this with any programme, Photoshop, Affinity, Luminar, Capture One, ON1, or whatever software you use. It is important that you can manipulate colours individually.
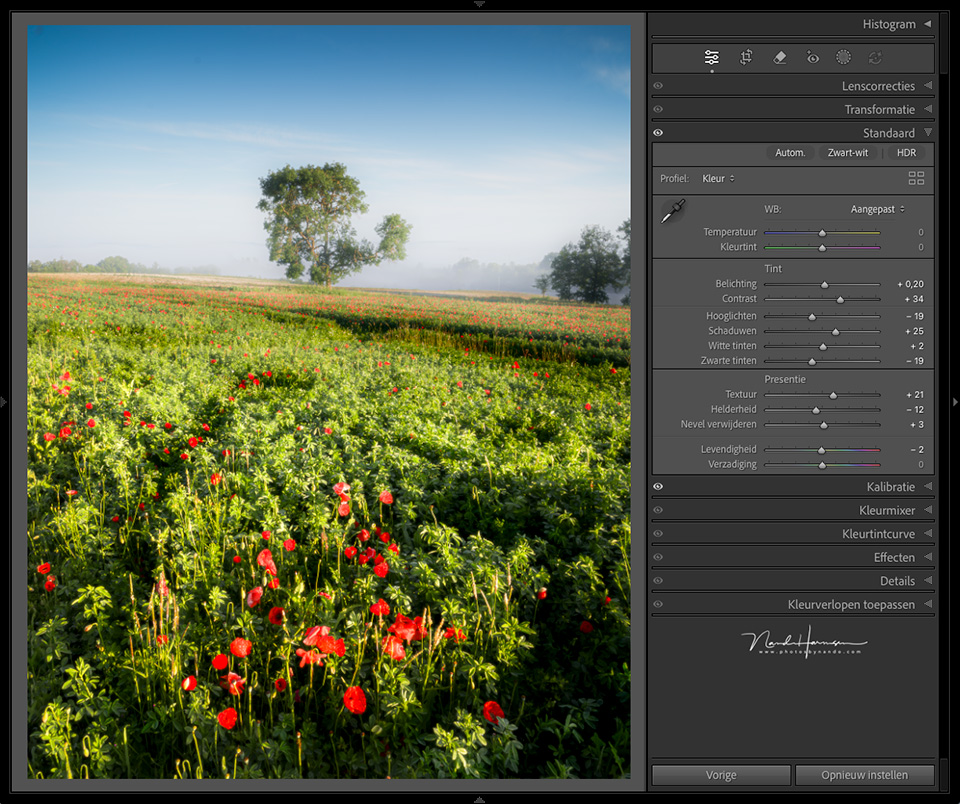
First of all, it is important that you edit the photo in colour. Make sure the colours are clearly present to get the best effect. You can make the colours a little more saturated if necessary. Keep it subtle.
Is your edit finished? Then you can switch to the colour panel. You will find the RGB and CMY colours there: red, green, blue, cyan, magenta, and yellow. Sometimes there are a few more.
Set the saturation of all colours, except the colour you want to keep, to a saturation of zero, or 100 in Lightroom. In other words, remove that colour from the photo. This leaves you with only the colour you want.
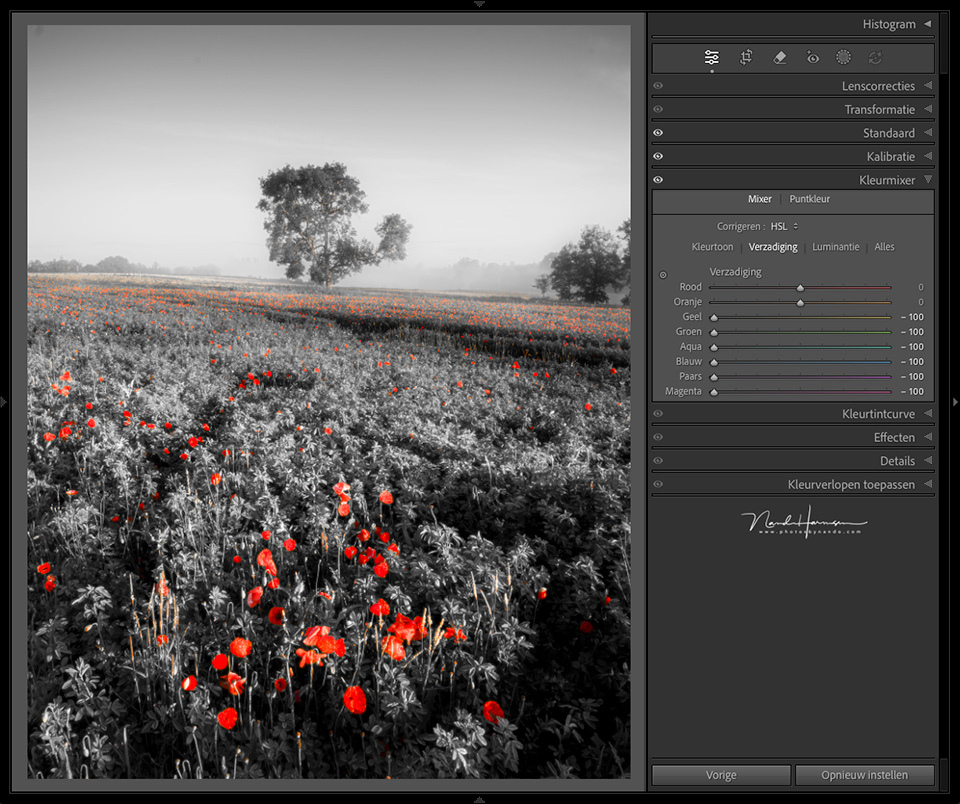
Red is an almost classic colour to keep in black and white photos. But it does not have to be red alone. You can choose just blue instead. Or a combination of colours such as green and blue.
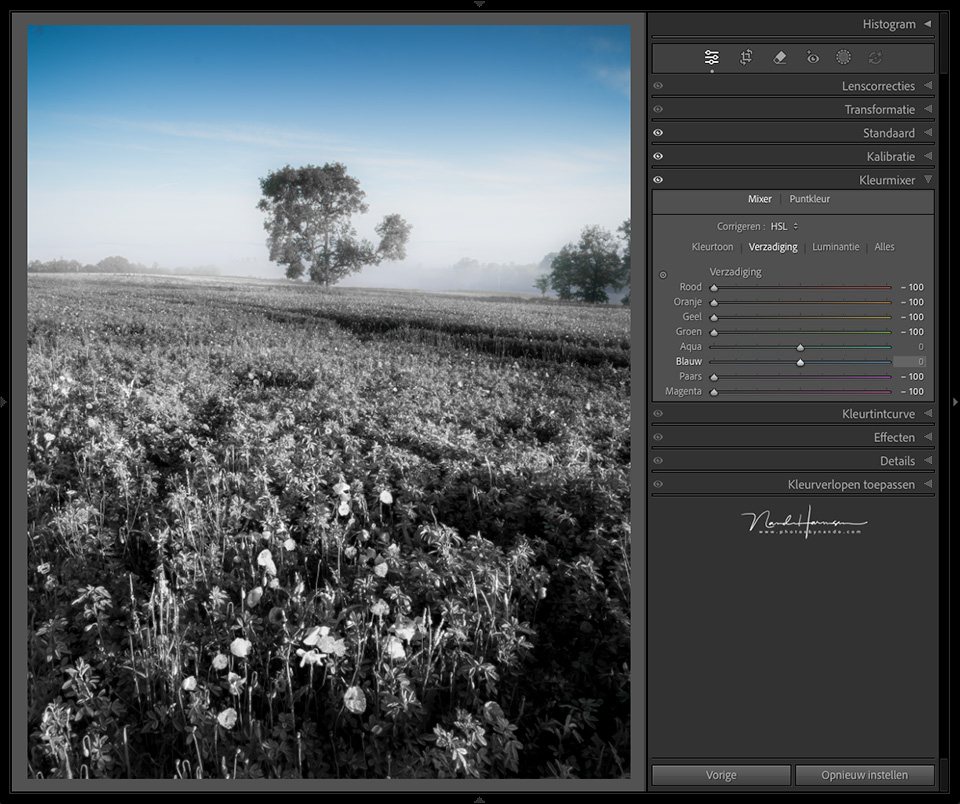
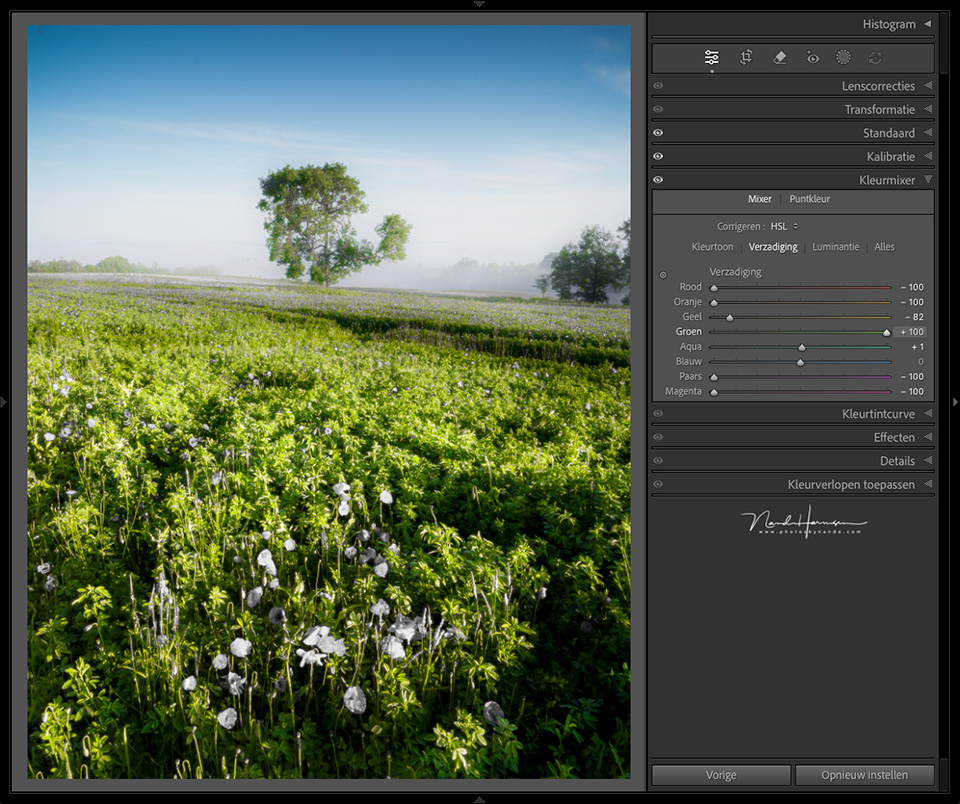
This method works best when there is a clear separation between the primary colours. Any 'colour contamination' can be removed with a mask if necessary. Set the saturation to zero in this mask.
If it is much more complex, or there is too much 'colour contamination', an edit in Photoshop or Affinity will be necessary. But in many cases, this quick-and-dirty method will work well.
About the author
Nando Harmsen has been photographing for more than 40 years. He specialises in wedding photography and landscape photography. Nando also gives talks, workshops, masterclasses and photo trips, and regularly reviews new and interesting equipment.
You might also like
-
 Create a washed-out look in a black-and-white photo
by Nando Harmsen
-
 Pressing the black and white conversion button is never enough
by Nando Harmsen
-
 5 Reasons to Use Black and White
by Nando Harmsen
-
 Black and white is not a solution for a failed colour photo
by Nando Harmsen
-
 Black and white photography tip: adding a colour tint
by Nando Harmsen
-
 Colour as a solution for a bad black-and-white photo
by Nando Harmsen
0 comments
Be the first to share what you think!
Have your say
Please note: Articles older than a week can only be commented on by signed-in visitors.Would you still like to comment? sign in or create a free account.
Become a better photographer every week
A practical photography tip in your inbox every week.
38,982 photography enthusiasts already receive the tips! More about the weekly mail. Or keep up to date via  Facebook.

Elja Trum
Photofacts; everything to do with photography!
Would you like to take better photos and keep up with what is happening in photography? Photofacts publishes articles that teach you something about photography — from a product announcement to a practical shooting tip or a look at a website. Photofacts covers photography every day and is a hobby project of Elja Trum's that got out of hand. The articles are written by a team of volunteer authors. If you would enjoy writing one or more articles for Photofacts, do get in touch.More about PhotofactsPhotofacts is made possible in part by
