

10 Tips for Applying the Orton Effect
Monday 25 August 2025, 15:15 by Nando Harmsen | 7,839 views | 0 commentsThis article was translated from Dutch with the help of AI. Read the original.
The Orton effect was devised by Mr Orton. Or at least, he made the effect popular and well known. You can achieve it in several ways. Here are 10 tips to get you started.
The Orton effect gives a photo a beautiful, dreamy glow. It works particularly well for landscape photos with lots of bright areas. It makes the light flow more across the photo.
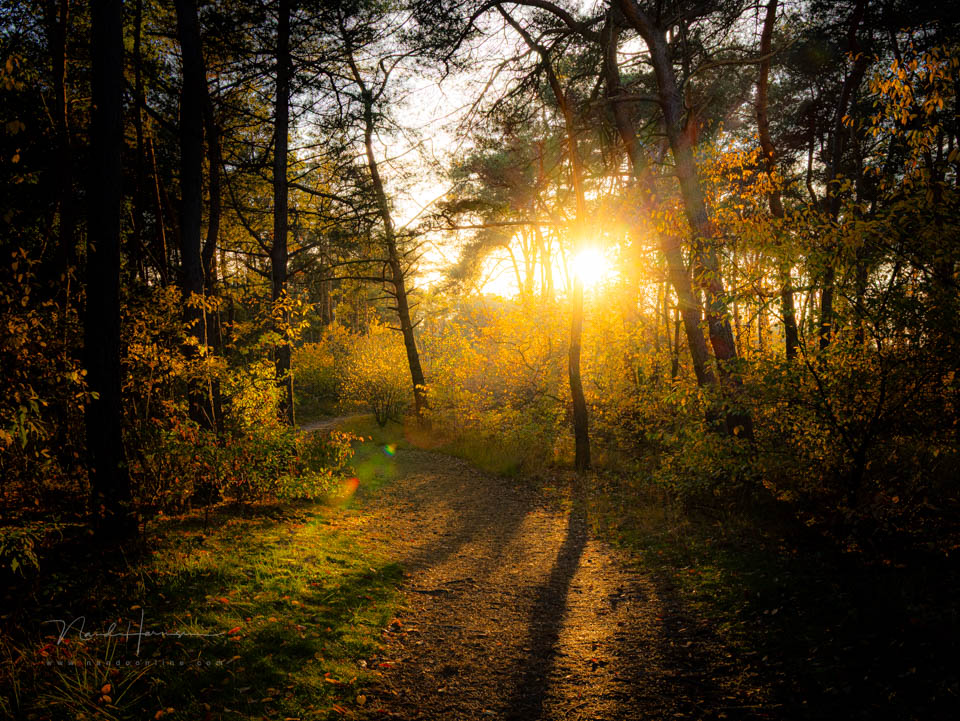
The traditional method creates a clear special effect. The newer methods allow you to apply it much more subtly. This makes the effect less noticeable.
There are several ways to apply the Orton effect to your photos. None of them is necessarily better than the others. Personal preference and the look you want to achieve determine how you use it.
Please bear in mind that I mention Lightroom and Photoshop as the software. This is just for convenience, as you can also use other software with similar options. If you use different software, simply replace the names in your mind.
1. Old-fashioned method: Take two separate photos
For this method, you need to take two photos. One sharp and in focus. The other out of focus. You choose the amount of blur yourself by shifting the focus manually.
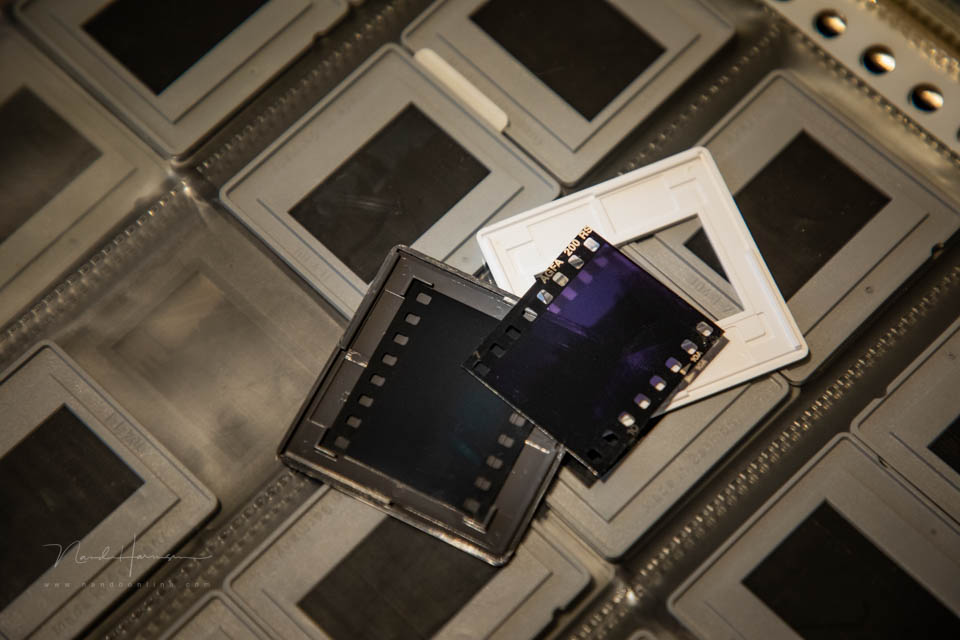
It is best to do this from a tripod, but it is not essential. Bear in mind that you need to use manual focus for the second photo.
2. Modern method: Create the effect from one photo
It is also possible to create the effect from a single photo by making a digital copy. You then need to add blur during the editing process.
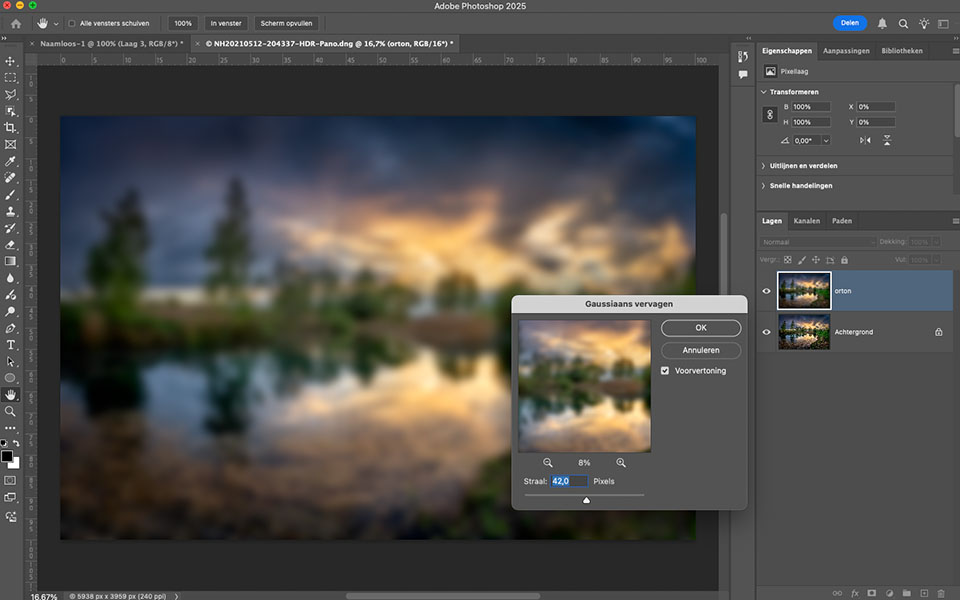
You can add blur very effectively and realistically with a Gaussian Blur filter, or a Lens Blur filter if it is available. You can set the amount of blur to suit your preference. You do this in a photo editing programme.
3. Precise method: Use layers in Photoshop
Whether you use two separate photos or a copy, you can place them on top of each other in Photoshop as layers. Preferably, put the blurred layer on top.
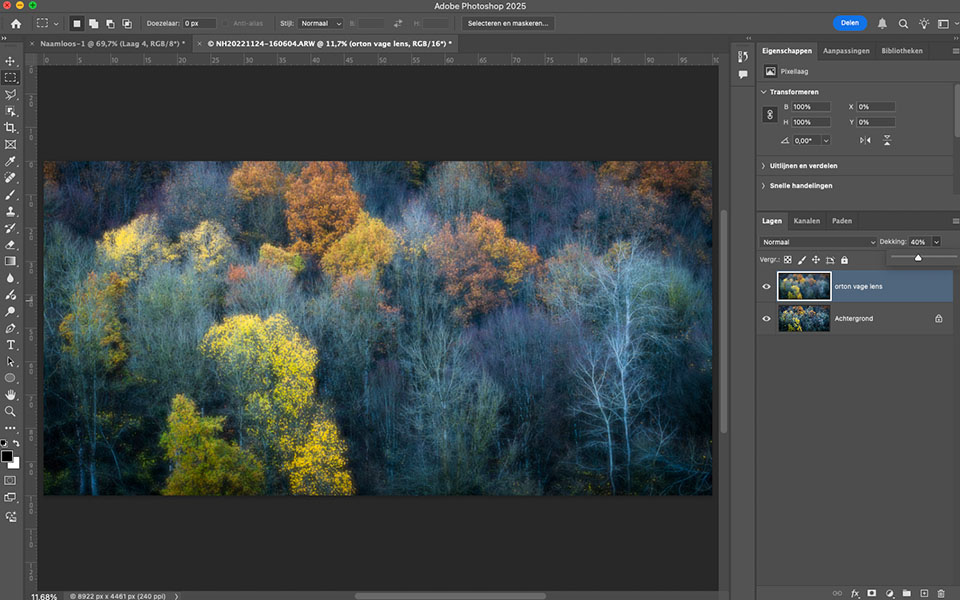
Change the opacity of the top layer, the blurred photo, until you reach the desired strength. Around 30% is a good starting point. Reduce it if the effect is still too strong, or increase the percentage if you want more blur.
4. Quick and dirty method: Use a mask in Lightroom
If you work with Lightroom, you can use a gradient mask. Place the gradient outside the photo so that the mask covers the entire photo.
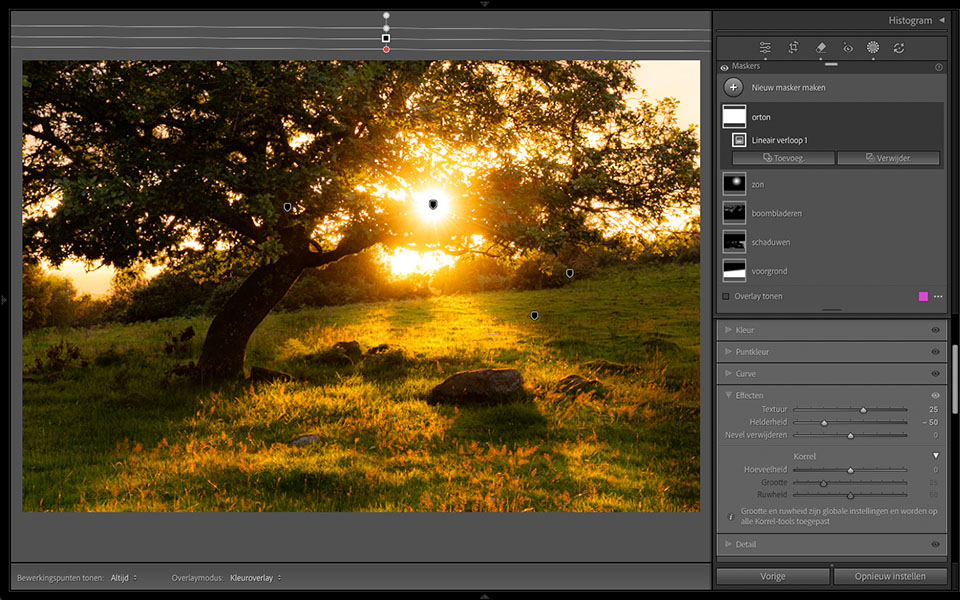
In this mask, you can lower the Clarity in the Effects panel, for example to -50. If desired, you can increase the Texture to compensate for the loss of detail. Experiment with the values until you achieve the desired result.
5. Creative method: Multiple exposures in the camera
Does your camera have a multiple exposure option? Then you can apply the Orton effect directly in the camera. You create the effect while taking the photos.
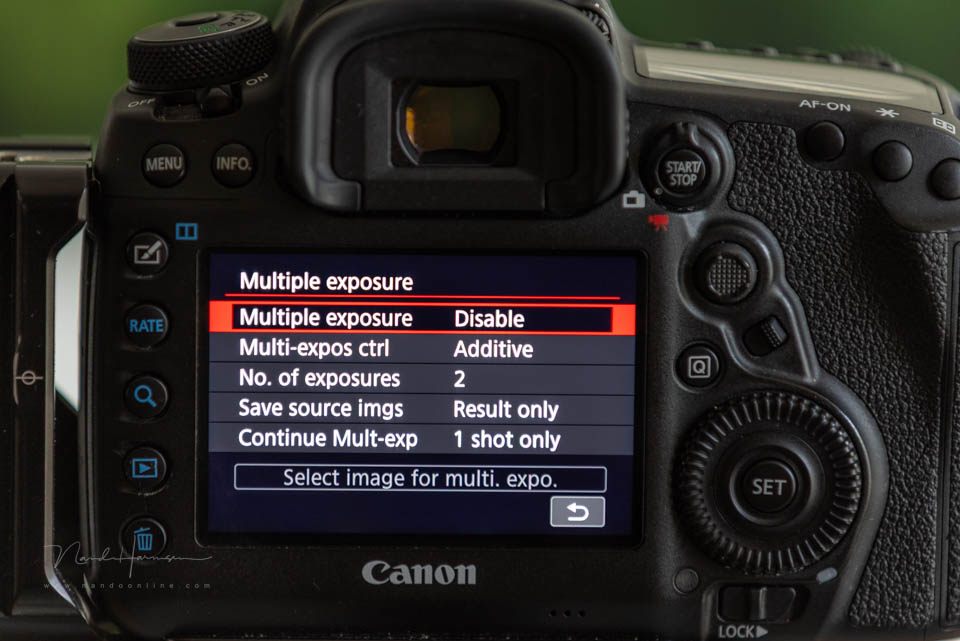
Set the camera to multiple exposures. Take a photo with the correct focus. The second photo should then be out of focus. To do this, set the focus to manual and choose the desired amount of blur.
You can often see the two photos overlaid on the screen. You can then experiment with the desired amount of blur on the spot. If you choose separate images in Raw, you can also do this afterwards.
6. Apply the Orton effect subtly
You do not need to apply the Orton effect at full strength. Every photo needs a different strength. That is why it is a good idea to assess how much 'glow' you add to each photo.
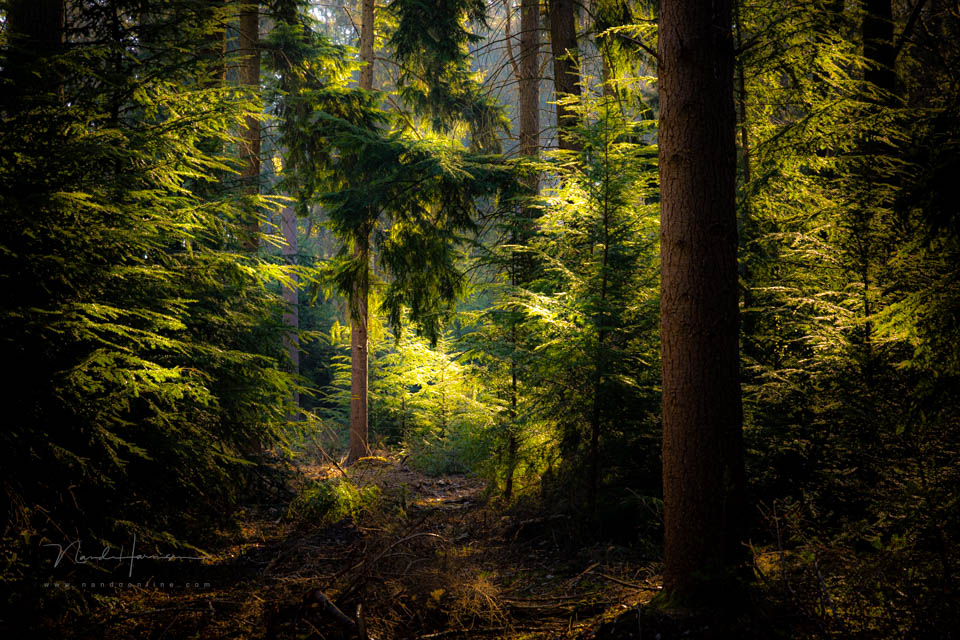
Choose the amount of blur that looks right. Or choose the opacity of the blurred layer to suit your photo. Make sure you can adjust these values until you reach the desired strength. If desired, use a mask to mask the effect locally.
7. Orton effect for bright areas only in Lightroom
You can apply the dreamy glow only to the bright areas and exclude the dark areas. To do this, choose the Luminance Range mask in Lightroom and select only the bright areas.
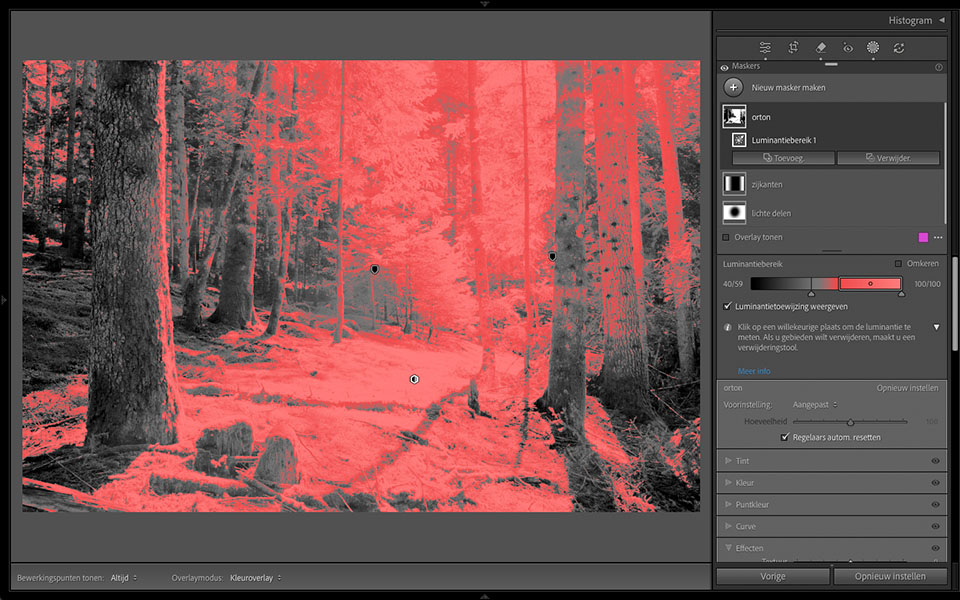
This allows you to easily exclude areas that should not receive the Orton effect. You can also apply the effect to the entire photo, then use the Mask Intersection option to select the areas that should receive the effect with a Brush or Luminance mask.
8. Orton effect for bright areas only in Photoshop
With layers in Photoshop, you can easily mask areas. That is what masks are for. Choose a brush and mask the areas where you do not want the effect.
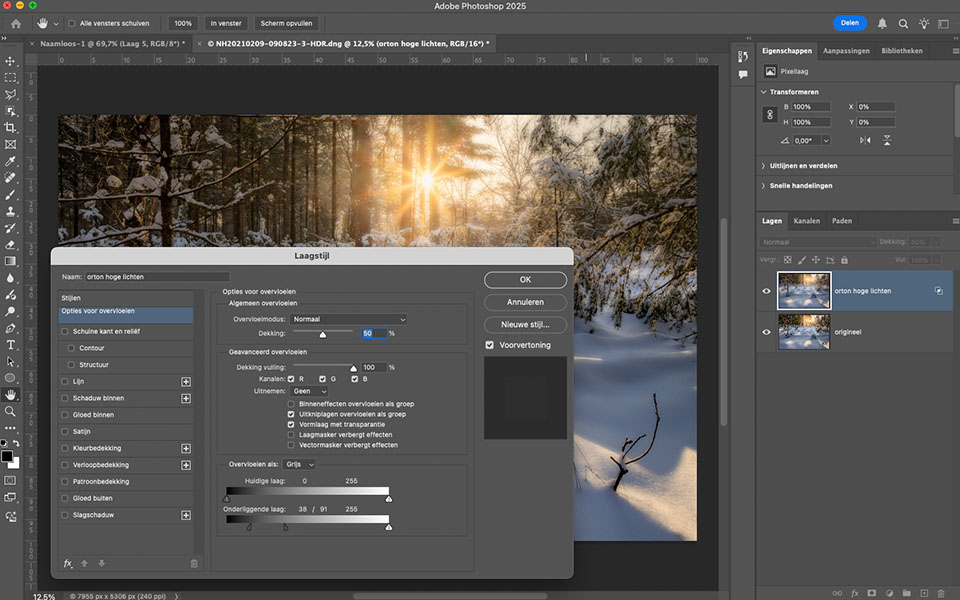
Do you want to mask the effect based on brightness? Go to the Layer Style and use the Underlying Layer slider to let the dark areas of the lower layer show through. You can soften an abrupt transition by holding down the ALT or OPTION key.
9. An Orton-like effect with two different shots
There is a variation on the creative method for creating the Orton effect. Instead of using a photo with the same composition and out of focus, you can choose a completely different composition.
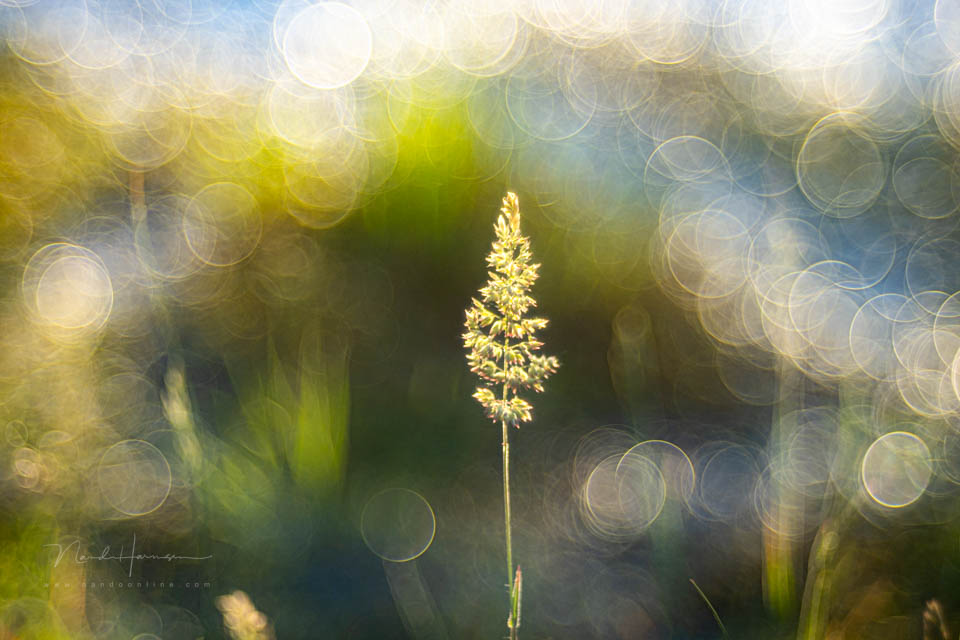
You then create a multiple exposure, either in the camera or otherwise, from two different photos. If you do this with multiple exposures in the camera, you can use the overlay on the LCD screen. You can see what the effect looks like.
10. Do not use the Orton effect
The Orton effect takes the raw edges off a landscape photo and creates a more dreamy effect. This can be subtle or very strong. Not every photo is suitable for it.

Although applying the effect very subtly works for almost any photo, there are situations in which it does not work. Only use it when it adds something.
About the author
Nando Harmsen has been photographing for more than 40 years. He specialises in wedding photography and landscape photography. Nando also gives talks, workshops, masterclasses and photo trips, and regularly reviews new and interesting equipment.
You might also like
-
 The Orton effect without Photoshop
by Nando Harmsen
-
 Orton effect directly in the camera
by Nando Harmsen
-
 5 tips to work faster in Lightroom Classic
by Thijs Schouten
-
 Does Lightroom make Photoshop redundant?
by Nando Harmsen
-
 Wanneer Lightroom en Photoshop niet meer samenwerken
by Nando Harmsen
-
How much do Lightroom and Photoshop subscriptions really cost?
by Nando Harmsen
0 comments
Be the first to share what you think!
Have your say
Please note: Articles older than a week can only be commented on by signed-in visitors.Would you still like to comment? sign in or create a free account.
Become a better photographer every week
A practical photography tip in your inbox every week.
39,077 photography enthusiasts already receive the tips! More about the weekly mail. Or keep up to date via  Facebook.

Elja Trum
Photofacts; everything to do with photography!
Would you like to take better photos and keep up with what is happening in photography? Photofacts publishes articles that teach you something about photography — from a product announcement to a practical shooting tip or a look at a website. Photofacts covers photography every day and is a hobby project of Elja Trum's that got out of hand. The articles are written by a team of volunteer authors. If you would enjoy writing one or more articles for Photofacts, do get in touch.More about PhotofactsPhotofacts is made possible in part by
