

Orton effect directly in the camera
Saturday 15 March 2025, 14:28 by Nando Harmsen | 3,520 views | 4 commentsThis article was translated from Dutch with the help of AI. Read the original.
The Orton effect gives your photo a dreamy look. This effect is easy to create in Lightroom or Photoshop. You can also create it directly in the camera. To do this, you need to be able to set multiple exposures.
Michael Orton was the photographer who became known for this technique. Hence the name Orton effect. By combining a sharp photo with a blurred photo of the same subject, you create a subtle or pronounced glow in the photo.
He used to do this with slide film by placing the two slides in a single slide mount. It was not an unfamiliar technique, but Orton became known for it.
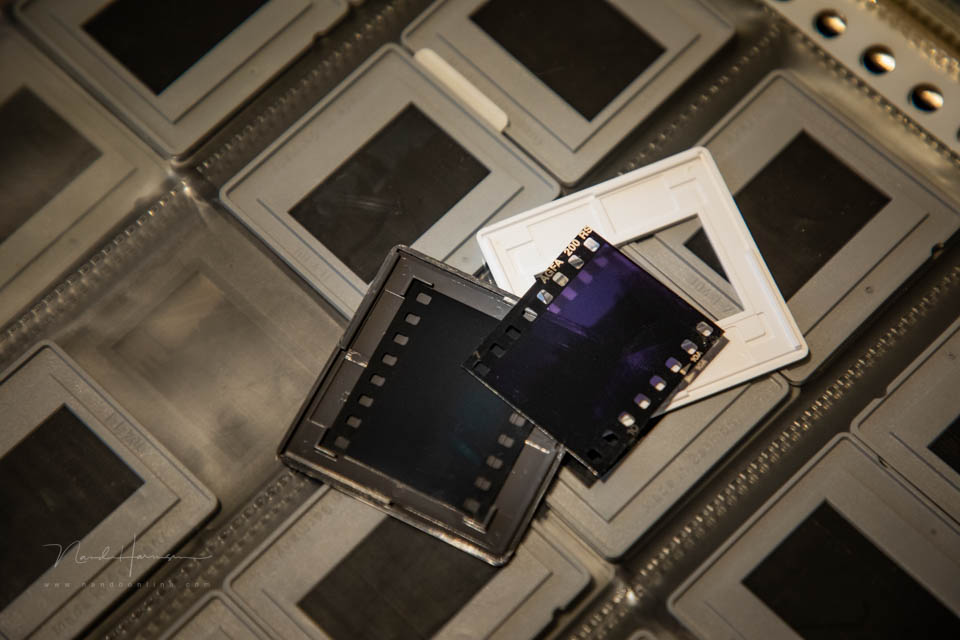
These days, this is done in Photoshop or similar photo-editing programmes. To some extent, you can also do it in Lightroom. With this modern technique, there is no longer any need to combine two different photos.
Instead of relying on digital manipulation of your photo, you can also use the old technique. Take one sharp photo, then take another one that is blurred. Combine them later.

You can take it one step further. Is your camera capable of making multiple exposures? Then use that technique to add the Orton effect.
Activate multiple exposures and set it to two shots with the overlay option set to 'average'.
Take a photo of your subject. For the second photo, switch to manual focus and turn the focus as far out as you like.
You can see the result directly on your screen, so you can use the amount of blur that you think is appropriate. You can also adjust the exposure for the desired effect if necessary.
This gives you an in-camera Orton effect straight away. You create it on the spot, without using software on your computer.
About the author
Nando Harmsen has been photographing for more than 40 years. He specialises in wedding photography and landscape photography. Nando also gives talks, workshops, masterclasses and photo trips, and regularly reviews new and interesting equipment.
You might also like
-
 10 Tips for Applying the Orton Effect
by Nando Harmsen
-
 The Orton effect without Photoshop
by Nando Harmsen
-
 Which is better to use? Lightroom or Photoshop?
by Nando Harmsen
-
 Wanneer Lightroom en Photoshop niet meer samenwerken
by Nando Harmsen
-
 Does Lightroom make Photoshop redundant?
by Nando Harmsen
-
 Using Lightroom Without a Catalogue
by Nando Harmsen
4 comments
-
 Donald Willemsen wrote on Saturday 15 March 2025 at 16:34 | reply
In my opinion, the technique of working with multiple exposures is better than adding it afterwards during post-processing. I do think you get the most beautiful effect if you also use backlighting.
Translated from Dutch. -
 Matt Houben wrote on Friday 21 March 2025 at 08:35 | reply
For Sony, there is another option: the Minolta 100mm F2.8 Soft Focus lens.
Translated from Dutch.
This is an A-mount lens that creates a similar effect. Sony E-mount cameras can use this lens with an adapter.
The strength of the effect can be adjusted on the lens. -

 Nando
wrote on Friday 21 March 2025 at 09:12
| reply
Nando
wrote on Friday 21 March 2025 at 09:12
| reply
I knew Canon has a soft-focus lens (135mm). I didn't know that about Minolta. There are also a lot of soft-focus filters available that you screw onto your lens.
Translated from Dutch.
And yet, in my opinion, soft focus doesn't quite give the same effect. It's precisely the combination of sharp and blurry. With soft focus, you miss the latter. -
Donald Willemsen wrote on Friday 21 March 2025 at 09:56 | reply
Nando, it was still during the time of analog photography that I used a number of creative filters from Cokin, including various types of soft focus filters and, for example, center spot filters. They were plastic filters and they really weren't all that great. I don't have them anymore either.
Translated from Dutch.
I personally find the method you suggested to be a better method with a nicer result. Lensbaby also has a number of options for achieving these kinds of results, by the way, but that aside.
Just to note that soft focus is not the same as the Orton effect.
Have your say
Please note: Articles older than a week can only be commented on by signed-in visitors.Would you still like to comment? sign in or create a free account.
Become a better photographer every week
A practical photography tip in your inbox every week.
39,077 photography enthusiasts already receive the tips! More about the weekly mail. Or keep up to date via  Facebook.

Elja Trum
Photofacts; everything to do with photography!
Would you like to take better photos and keep up with what is happening in photography? Photofacts publishes articles that teach you something about photography — from a product announcement to a practical shooting tip or a look at a website. Photofacts covers photography every day and is a hobby project of Elja Trum's that got out of hand. The articles are written by a team of volunteer authors. If you would enjoy writing one or more articles for Photofacts, do get in touch.More about PhotofactsPhotofacts is made possible in part by
