

Make a raw file 90% smaller with lossy DNG
Friday 12 July 2024, 16:32 by Nando Harmsen | 2,764 views | 0 commentsThis article was translated from Dutch with the help of AI. Read the original.
What if you could reduce a 50-megabyte raw file to just 5 megabytes? You could fit ten times as many photos on your hard drive. There are some disadvantages, though, because compressing to a lossy DNG causes quality loss. What should you look out for?
You can turn a raw file into a DNG file. This is a digital negative that many photographers believe is the only guarantee that you will still be able to edit your photos in the future.
.jpg "Unedited raw file(1)")
There is now also such a thing as a lossy DNG file, which means that your raw file is not only converted to DNG, but also made smaller. This can save you up to around 90% of hard drive space per photo.
Creating a lossy DNG file
There are several ways to convert a file to a lossy DNG. One of them is exporting to a DNG file in Lightroom Classic. You will then see the option 'use lossy compression'. This creates a lossy DNG file.
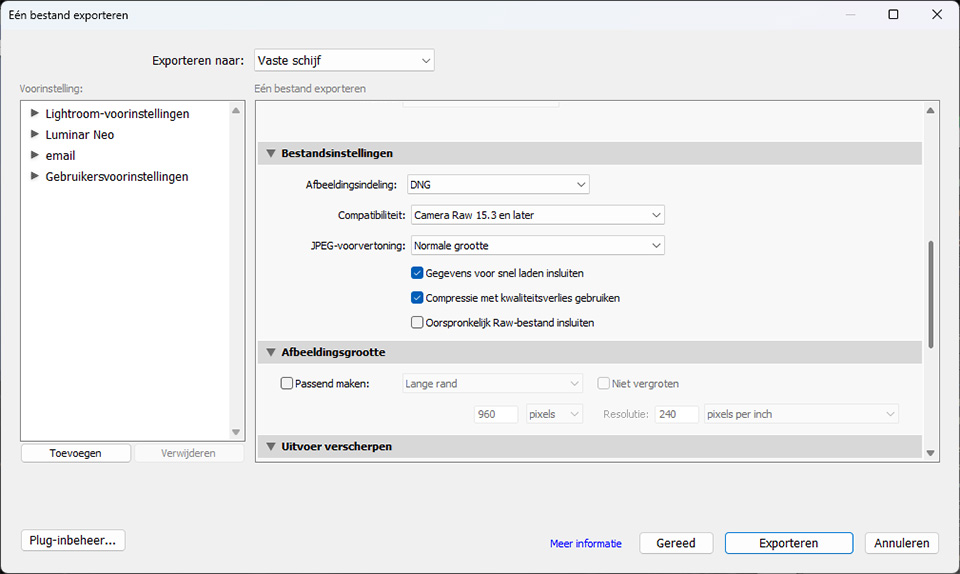
Converting a photo to a lossy DNG file does come at a price. Since a (relatively new) JPEG compression method is used, you lose image quality. The mosaic information, the unprocessed sensor data, is no longer in the file, for example, which means it is no longer a raw file.
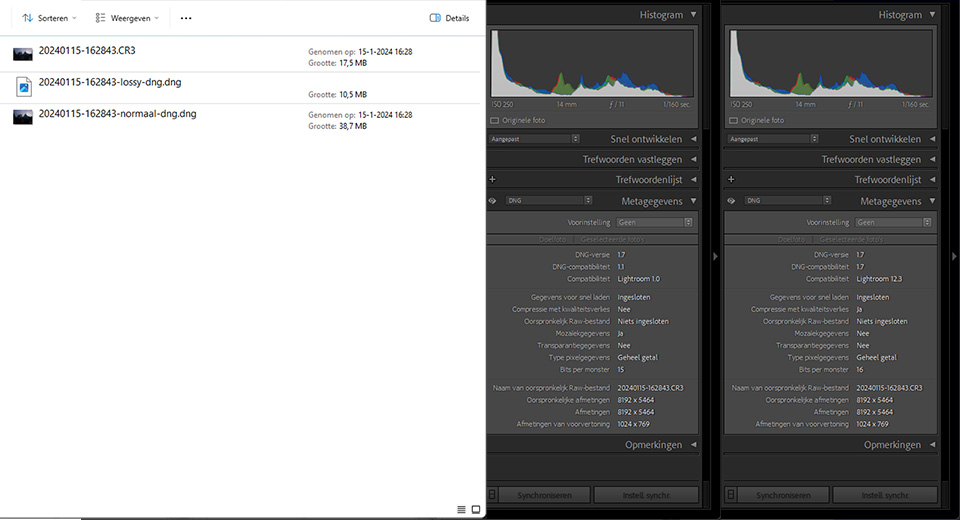
The quality of a lossy DNG file
At first glance, there is no difference at all between a normal DNG file and a lossy DNG file. Apart from the file size, of course. What does this mean when editing a photo?
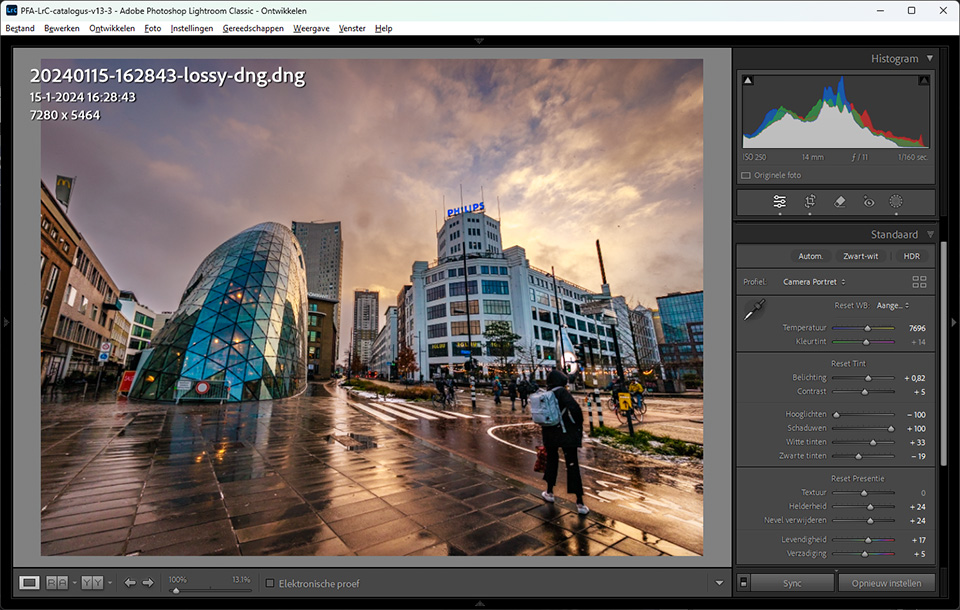
I edited the photo and lifted the shadows as much as possible. This is an edit that demands the maximum from the photo's dynamic range. I exported the edited DNG and lossy DNG files to a full-size JPEG file at a quality setting of 75%.
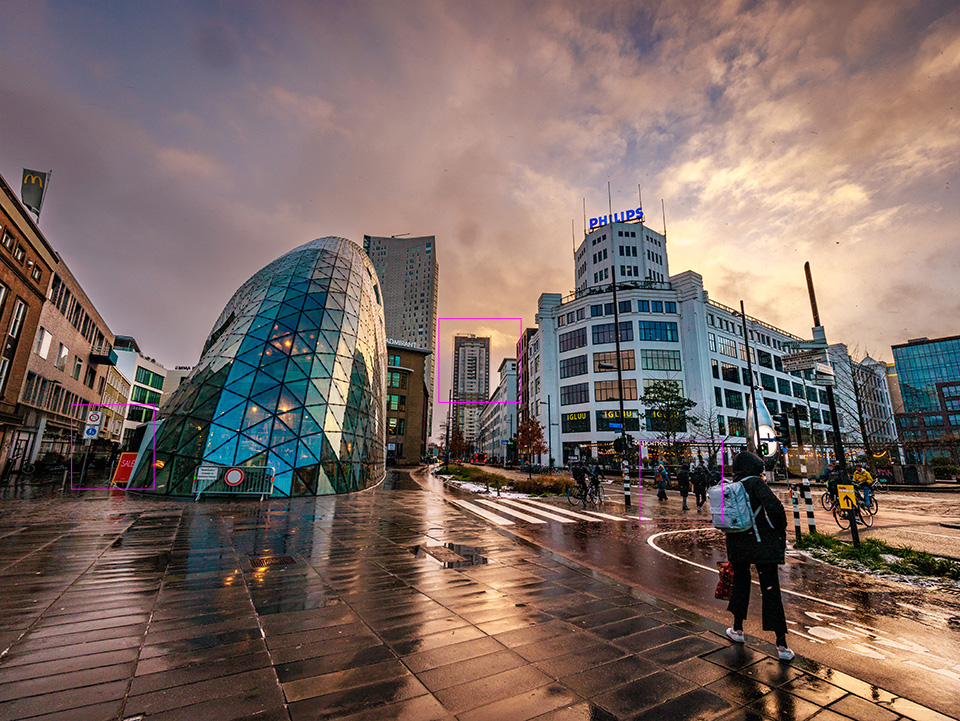
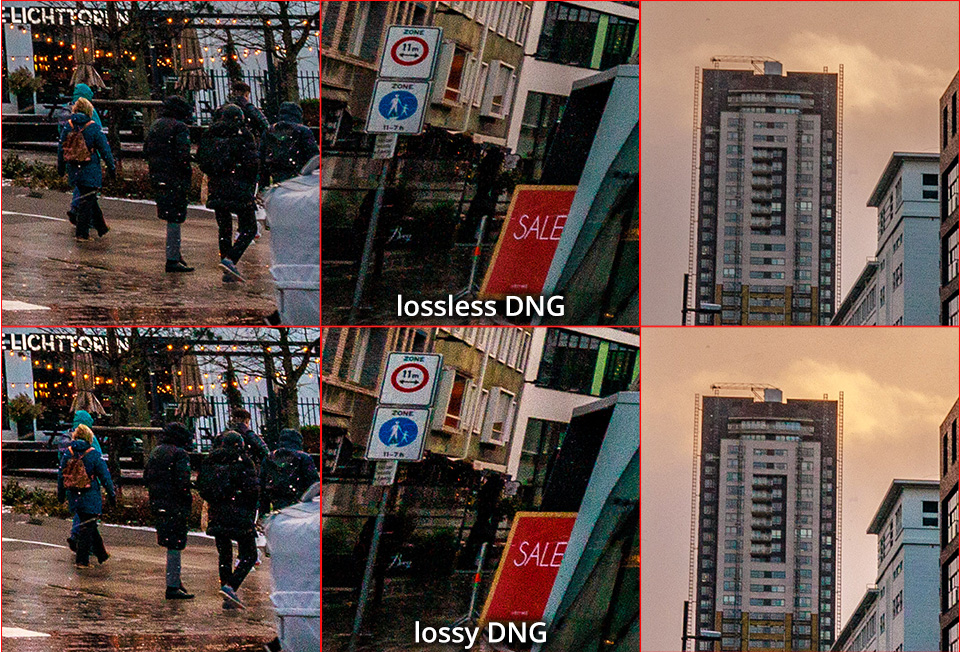
If you compare the normal DNG file with the lossy DNG file, you can see a clear decline in quality. The lossy DNG file is more heavily sharpened, shows loss of detail, colour noise and JPEG artefacts.
Applying AI noise reduction
There is something else you need to bear in mind. Since the mosaic information has been removed from the lossy DNG file, modern AI noise reduction can no longer be applied to it. If you still want to use this type of noise reduction, do it before creating a lossy DNG file.
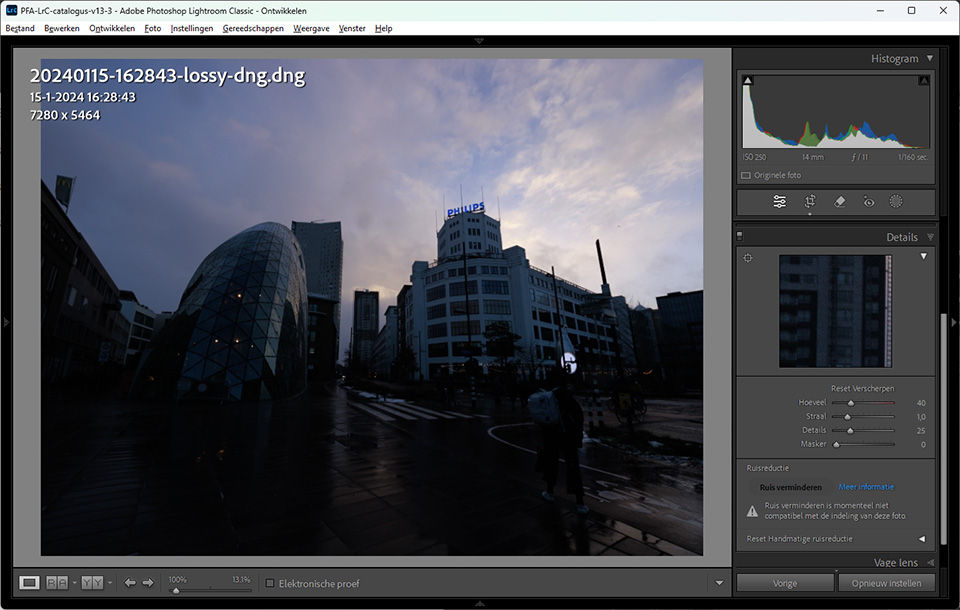
It is striking that when you apply AI noise reduction to a raw file first, the resulting DNG file becomes twice as large. If you then compress the DNG with noise reduction to a lossy DNG file, the file size becomes even smaller. At the same time, there is less colour noise and loss of detail.
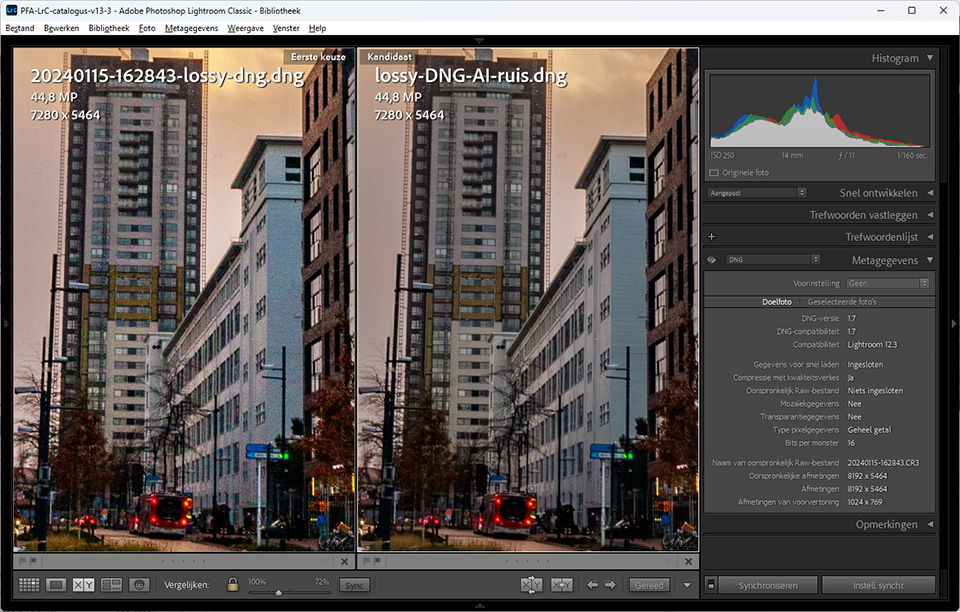
If you place the lossless DNG with AI noise reduction next to the lossy DNG with AI noise reduction, there is no noticeable difference at all. Even with the relatively extreme edit, both photos look exactly the same.
Future-proof, or not?
Just as you lose the option of using AI noise reduction after compressing to a lossy DNG file, possible future editing options may no longer be available either. This is something to bear in mind if you convert your photos to lossy DNG files.
The point, and lack of point, of saving hard drive space
Is it worthwhile to save 90% of your hard drive space for your photos? That is easy to work out. I am assuming that your raw file is 25 megabytes in size. How many raw files will fit on a hard drive?
On a 1-terabyte hard drive, that would be 40,000 photos. This means that a 4-terabyte hard drive can hold 200,000 photos. A 4-terabyte hard drive costs between 100 and 150 euros.
Suppose you take an average of 20,000 photos per year. You could then get around ten years out of a 4-terabyte hard drive. There is a good chance you will not keep, or need to keep, all those photos. You can delete failed photos, duplicates and photos that are not worth keeping.
Do you never delete photos, and do you also keep the failed and duplicate photos? Then you are simply filling up your hard drive. In that case, those unused photos could be compressed to a lossy DNG file. But if you never do anything with them again, that is still a waste of space.
Conclusion
For general use in a photobook or online, a lossy DNG file is reasonably usable. You cannot see the difference at those small sizes. Certainly not if the edit is minimal.
If the quality of your photo is important and you want to get the most out of it, after all, you do not shoot raw for nothing, a lossy DNG file causes a noticeable loss. This becomes particularly clear with more extreme edits.
Although lossy DNG files can indeed reduce a raw file by 90%, in my opinion it is not worth using them. To save hard drive space, it is not even financially worthwhile.
Do you still want to use lossy DNG files? Then I recommend applying AI noise reduction and editing the photo first. Then convert the result to a lossy DNG.
After that, do not forget to delete the original raw file and improved DNG file. Otherwise, you will still not save any storage space.
About the author
Nando Harmsen has been photographing for more than 40 years. He specialises in wedding photography and landscape photography. Nando also gives talks, workshops, masterclasses and photo trips, and regularly reviews new and interesting equipment.
You might also like
-
 Is there a quality difference between raw and compressed raw?
by Nando Harmsen
-
 The difference between file size and resolution
by Nando Harmsen
-
 Everyone photographs in raw, there are no exceptions
by Nando Harmsen
-
 Keep an overview: don't make JPEGs of your RAW files
by Nando Harmsen
-
 Is there a reason to save both raw and jpeg?
by Nando Harmsen
-
 Street photography tip: JPG or RAW: An old debate
by Michiel Heijmans
0 comments
Be the first to share what you think!
Have your say
Please note: Articles older than a week can only be commented on by signed-in visitors.Would you still like to comment? sign in or create a free account.
Become a better photographer every week
A practical photography tip in your inbox every week.
39,079 photography enthusiasts already receive the tips! More about the weekly mail. Or keep up to date via  Facebook.

Elja Trum
Photofacts; everything to do with photography!
Would you like to take better photos and keep up with what is happening in photography? Photofacts publishes articles that teach you something about photography — from a product announcement to a practical shooting tip or a look at a website. Photofacts covers photography every day and is a hobby project of Elja Trum's that got out of hand. The articles are written by a team of volunteer authors. If you would enjoy writing one or more articles for Photofacts, do get in touch.More about PhotofactsPhotofacts is made possible in part by
