

6 Tips for Importing Photos into Lightroom
Monday 1 December 2025, 20:02 by Nando Harmsen | 4,111 views | 19 commentsThis article was translated from Dutch with the help of AI. Read the original.
Importing into Lightroom is often taken for granted. You make sure your photos get into the programme so you can catalogue and edit them. But are you doing this in the most effective way?
It seems so simple, but appearances can be deceptive. There are several ways to import into Lightroom. From a manual job to an automated system. But you do need to invest a little time first.
Importing can seem like a tedious job. Set it up properly and it becomes simple. It also happens the same way every time, which is important for keeping an overview.
With a number of predefined settings, you create a workflow that ensures everything happens exactly as you want it to. I have collected a number of tips for this.
I should also point out that if you do not use Lightroom Classic, some of these things may also work in other catalogue/raw editing software. Try it out and see whether you can use any of it.
1. Use a (good) card reader
The photos on the memory card need to be transferred to the computer. You can do this by connecting the camera to the computer with the appropriate cable. I recommend using a good card reader rather than the camera.
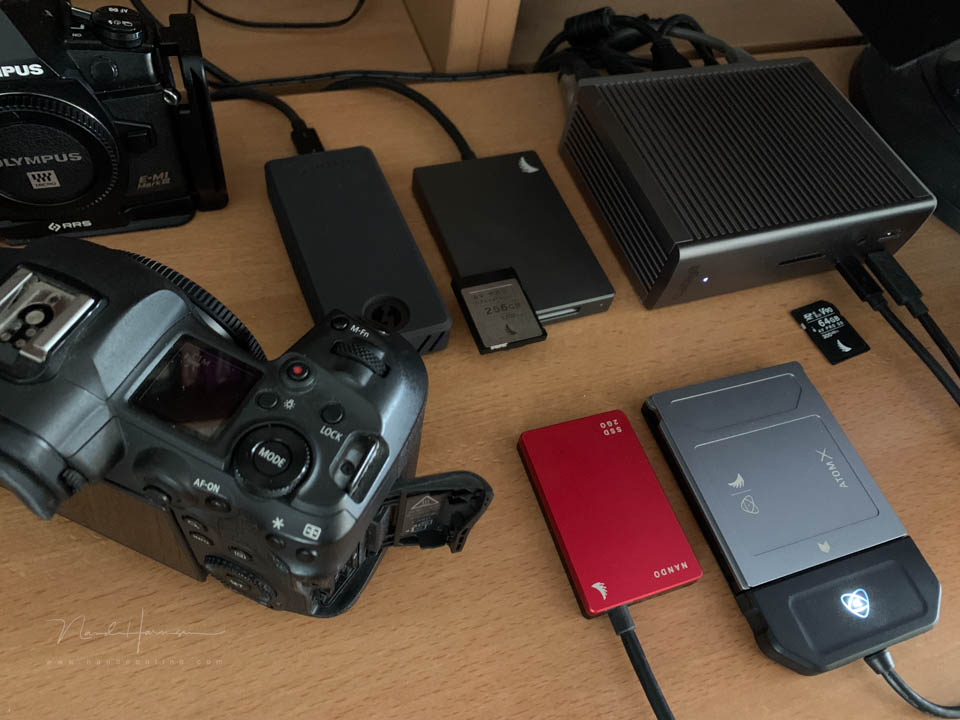
Connecting the camera means opening the (often) rubber flaps and attaching the cable. That is more work than simply taking the card out of the camera.
The connection between camera and computer is usually not the fastest connection. This means transferring photos takes longer than with a good (fast) card reader. It is simply easier.
2. Import directly into Lightroom Classic
You can first copy the photos from your memory card to your computer's hard drive and then import them. But why would you? Import directly into Lightroom Classic, as that saves a lot of work.
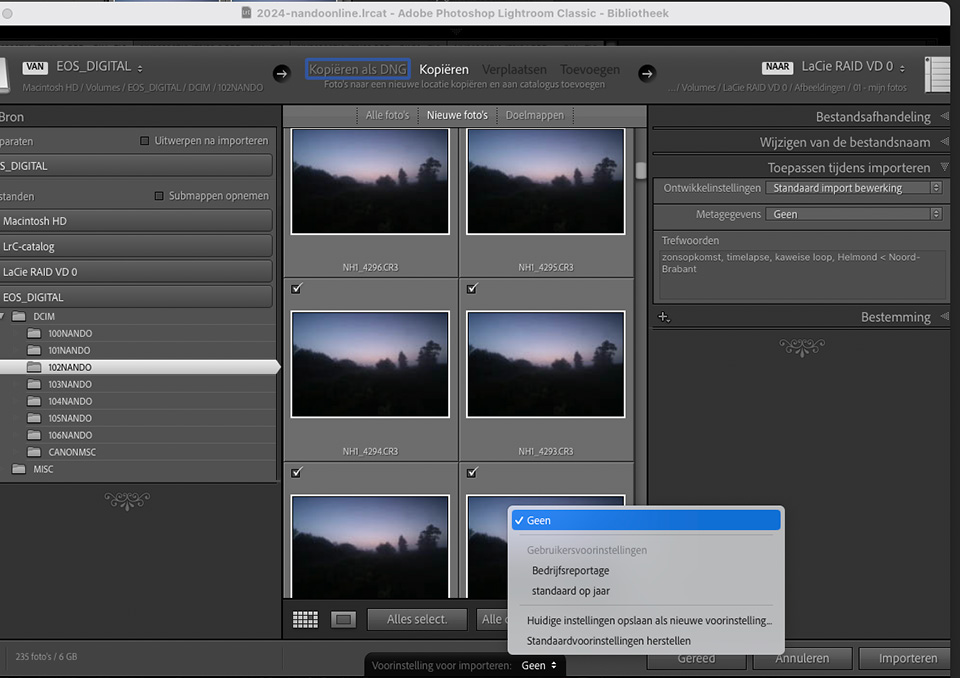
By copying directly from the memory card into Lightroom, you can automate things. For example, you can have the file name changed automatically. It is also faster because you only need to perform one action.
By importing directly into Lightroom Classic, you can automate many things, allowing you to work more efficiently. After all, you want to spend as little time and energy on this as possible.
3. Use presets for every step
When importing, you ideally want to provide as much information as possible straight away. That means you do not have to do it after the photos have been imported. You can do this with presets.
You can change the file name directly during import, but you can also have edits applied automatically, add metadata, or add keywords.
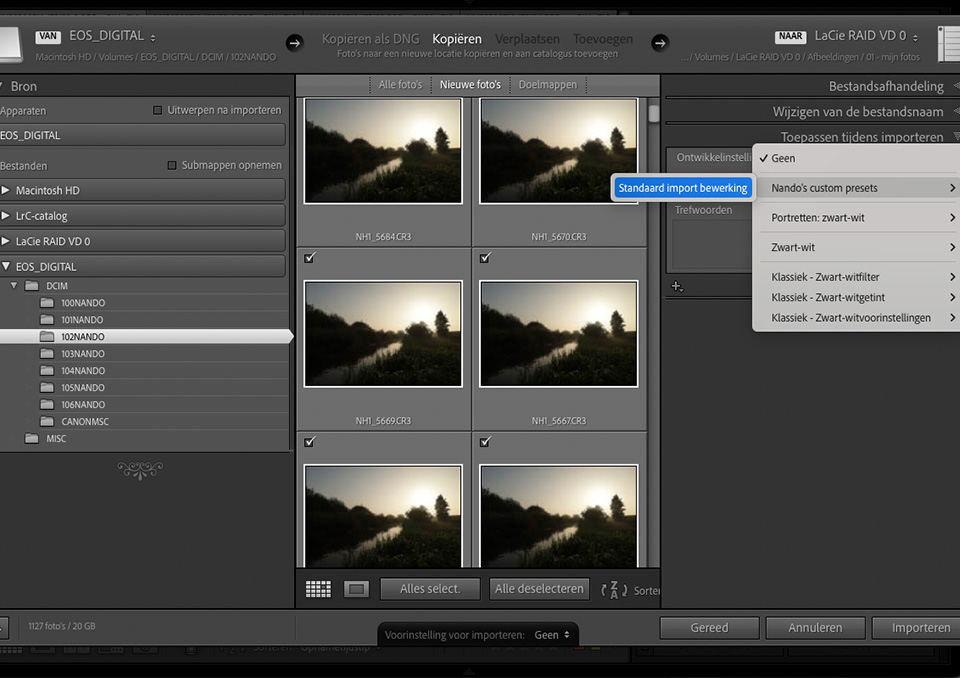
I describe all the steps you can take in the article about presets in Lightroom. I recommend that you study this article thoroughly and use whatever you can benefit from.
You can also create a separate preset for each type of import. That way, the right photos end up in the right place and in the desired collection. Read all about it in this article.
By automating this, you remain consistent and have as little work as possible. Everything happens behind the scenes, so you can focus all your attention on other things.
4. Start adding keywords
The most tedious and time-consuming job is adding keywords. Especially when you have many different subjects and objects during an import, it takes a lot of time and energy.
Still, it is sensible to start straight away, whether partly during the import or not. This not only ensures that the photos can be found as effectively as possible, it is also better to get the job done straight away.
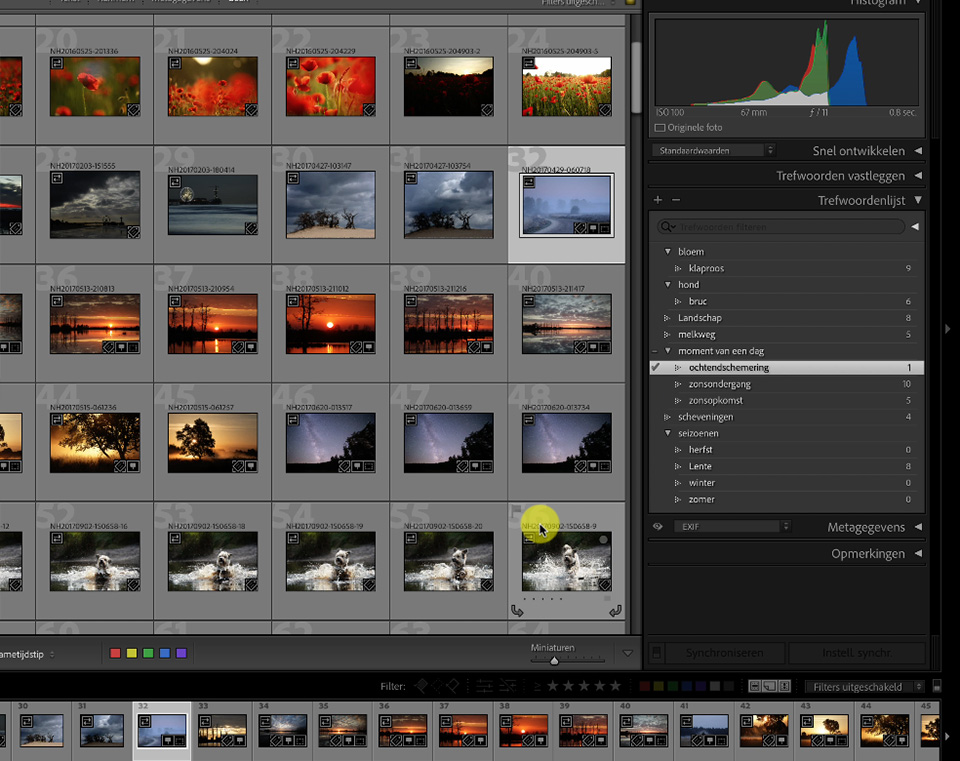
There are several ways to add keywords. Make it easy for yourself and use the methods that work best for you. In my article about keywords, you can see what is possible.
Do not put it off. If you have to catch up later, it will only be more work.
5. Use a system for selecting successful photos
To separate the wheat from the chaff, you need to use a consistent selection method. Work systematically and it becomes reasonably simple.
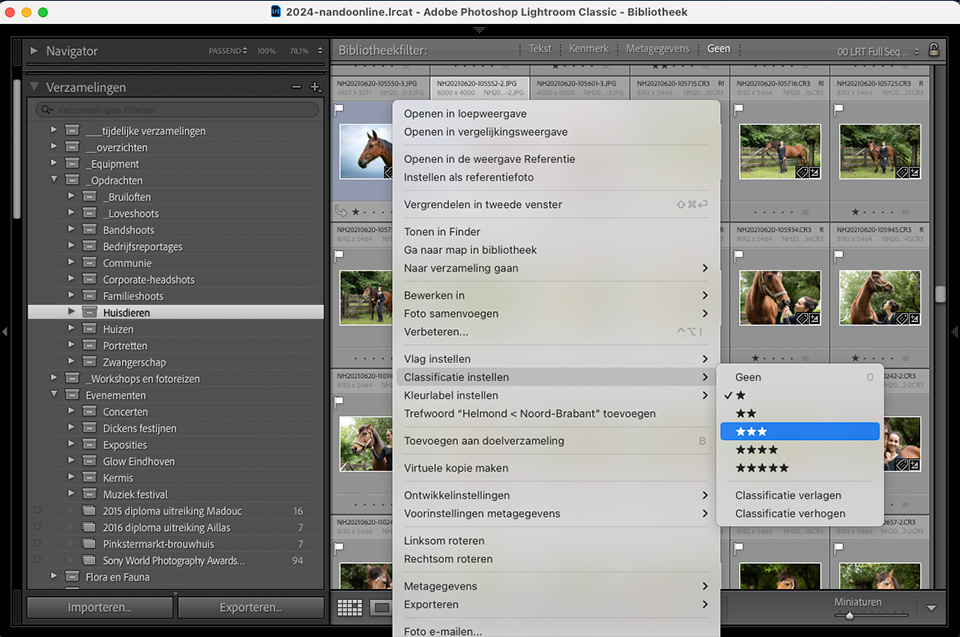
First choose successful or unsuccessful with a flag status. Then add stars to the photos that are worth editing. Use colours to mark edited or unedited.
Then start using further ratings. Two stars, three, or even four and five. Make this into a system that you follow every time. Write it down on a cheat sheet and keep it by your computer.
6. Make sure you have a backup
The photos you take are valuable. You do not want to lose them. So always make sure you have a good backup. This should be not only of the Lightroom Classic catalogue, but also of the photos themselves.
Make sure you have this properly arranged. Regularly backing up the Lightroom catalogue is something you are reminded about regularly when closing the programme. Do it regularly.
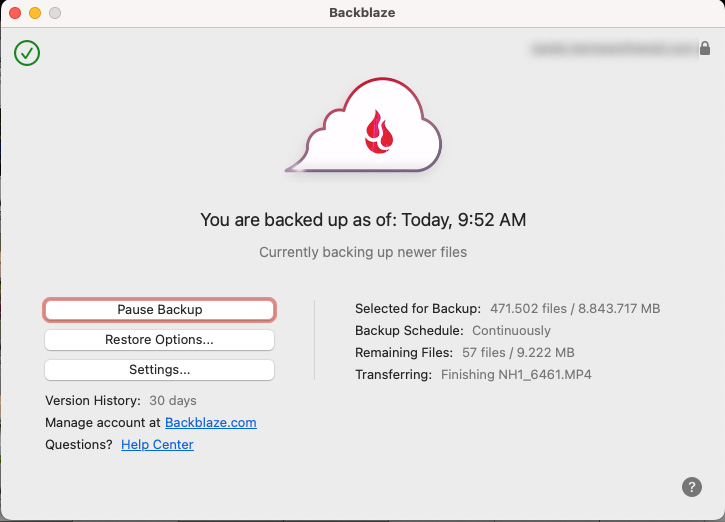
You have to arrange the photos yourself. Make sure you have a backup on an external hard drive, a NAS or in the cloud. This is the only way to minimise the chance of losing your photos. Read my article about this.
Tips are not obligations
Of course, you are never obliged to follow all the tips. Use whichever ones you find useful. But remember that you only know whether a tip is useful to you once you have tried it. Saying beforehand that it is not something you want does not work.
Try it out during the dark days before Christmas, and after Christmas if you need more time. Who knows, the tips may help make your Lightroom workflow more enjoyable.
About the author
Nando Harmsen has been photographing for more than 40 years. He specialises in wedding photography and landscape photography. Nando also gives talks, workshops, masterclasses and photo trips, and regularly reviews new and interesting equipment.
You might also like
-
 My 10-step Lightroom Classic workflow
by Nando Harmsen
-
 How do you get started with Lightroom Classic?
by Nando Harmsen
-
 Workflow tips for Lightroom Classic in 7 steps
by Nando Harmsen
-
 Improve your workflow with your own Lightroom scripts
by Dick Holtman
-
 Shoot raw? Throw away the exported JPEG
by Nando Harmsen
-
 Using Lightroom Without a Catalogue
by Nando Harmsen
19 comments
-
 Pierre Grim wrote on Tuesday 2 December 2025 at 11:14 | reply
I find your advice clear and very useful .
Translated from Dutch.
Regards Pierre Grim. -

-

-
-
 Evert wrote on Tuesday 2 December 2025 at 12:23 | reply
I often use two different cameras. I put these photos into one folder via File Explorer on the PC. I then sort them by date and time. Once this is done, I import everything into Lightroom. If there is a better and faster way, I would be happy to hear or read about it.
Translated from Dutch. -
-
-
-

 K.J.Schilstra
wrote on Tuesday 2 December 2025 at 16:48
| reply
K.J.Schilstra
wrote on Tuesday 2 December 2025 at 16:48
| reply
Removing your card is an unnecessary action which can also damage the contacts of the card and camera, repeatedly taking it in and out 2 times and the chance of acids from your hands getting on the contacts can be avoided by simply plugging a (often USB-C) cable into the port where it is intended for (behind the rubber flap) besides that opening the door's slot every time is less sensible.
Translated from Dutch.
Furthermore..the USB-C cable directly into the camera is faster than the actions mentioned by you and you also use that same cable in the card reader, so what is the advantage? I would say quite a lot of disadvantage.
I've been working with the cables directly in the Camera since 2009 and have never had a malfunction in any type of camera or card. -
Nando
wrote on Wednesday 3 December 2025 at 10:23
| reply
You can simply leave a card reader continuously connected to the computer; you don't need to disconnect it or put it away.
Translated from Dutch.
Of course, you should use your own preferred method. But that story about contacts is utter nonsense. You could say the same about repeatedly plugging a USB cable into the camera and unplugging it. -
 Corinne wrote on Tuesday 2 December 2025 at 20:23 | reply
Clear!
Translated from Dutch.
A question though; do you also have a good tip for easily importing photos taken with your IPhone into the LrC library?
I find the way I do it now very time-consuming, max 10 photos at a time and I notice that I’m increasingly using my IPhone alongside my camera. -
Nando
wrote on Wednesday 3 December 2025 at 10:25
| reply
I don't know how you do it, but I still sometimes want to export the photos in full resolution from the Photos app to a separate folder, and import them into LrC from that folder.
Translated from Dutch.
With a Windows machine, you have to do that via the webpage of your Apple account.
I'm also still looking (but not intensively) for a better or easier way. -
 Hein wrote on Tuesday 2 December 2025 at 21:54 | reply
One more tip make sure the date / time of both cameras is always exactly the same to the second so you get all the shots in chronological order in LR.
Translated from Dutch.
From experience I know that the clocks of my cameras do not run exactly the same which in practice means that over time a time difference of minutes develops between the cameras. -
-
guest wrote on Wednesday 3 December 2025 at 10:27 | reply
USB contact is many times stronger than fragile plates, pins of cards and the camera! So definitely not nonsense. And you really don't leave that USB-C cable permanently plugged into that reader.
Translated from Dutch.
Ergo, dare to admit that your tip is one that was correct 10 years ago but isn't anymore. -
-
 Christiane wrote on Saturday 6 December 2025 at 12:09 | reply
I recently imported the photos on my phone into LR mobile and to my surprise they also appeared in my file explorer and in LR Classic in the Lightroom sync folder.
Translated from Dutch. -
 MacBigfoot wrote on Sunday 7 December 2025 at 23:37
| reply
MacBigfoot wrote on Sunday 7 December 2025 at 23:37
| reply
You write in another article that you store your photos in RAID, is that a NAS? Because Backblaze doesn't support NAS by default.
Translated from Dutch.
The advantage of a NAS is that I can access the files anywhere at home with any device. -

Have your say
Please note: Articles older than a week can only be commented on by signed-in visitors.Would you still like to comment? sign in or create a free account.
Become a better photographer every week
A practical photography tip in your inbox every week.
39,079 photography enthusiasts already receive the tips! More about the weekly mail. Or keep up to date via  Facebook.

Elja Trum
Photofacts; everything to do with photography!
Would you like to take better photos and keep up with what is happening in photography? Photofacts publishes articles that teach you something about photography — from a product announcement to a practical shooting tip or a look at a website. Photofacts covers photography every day and is a hobby project of Elja Trum's that got out of hand. The articles are written by a team of volunteer authors. If you would enjoy writing one or more articles for Photofacts, do get in touch.More about PhotofactsPhotofacts is made possible in part by
